Week #17; A big good-bye
- On: September 11, 2019
 0
0
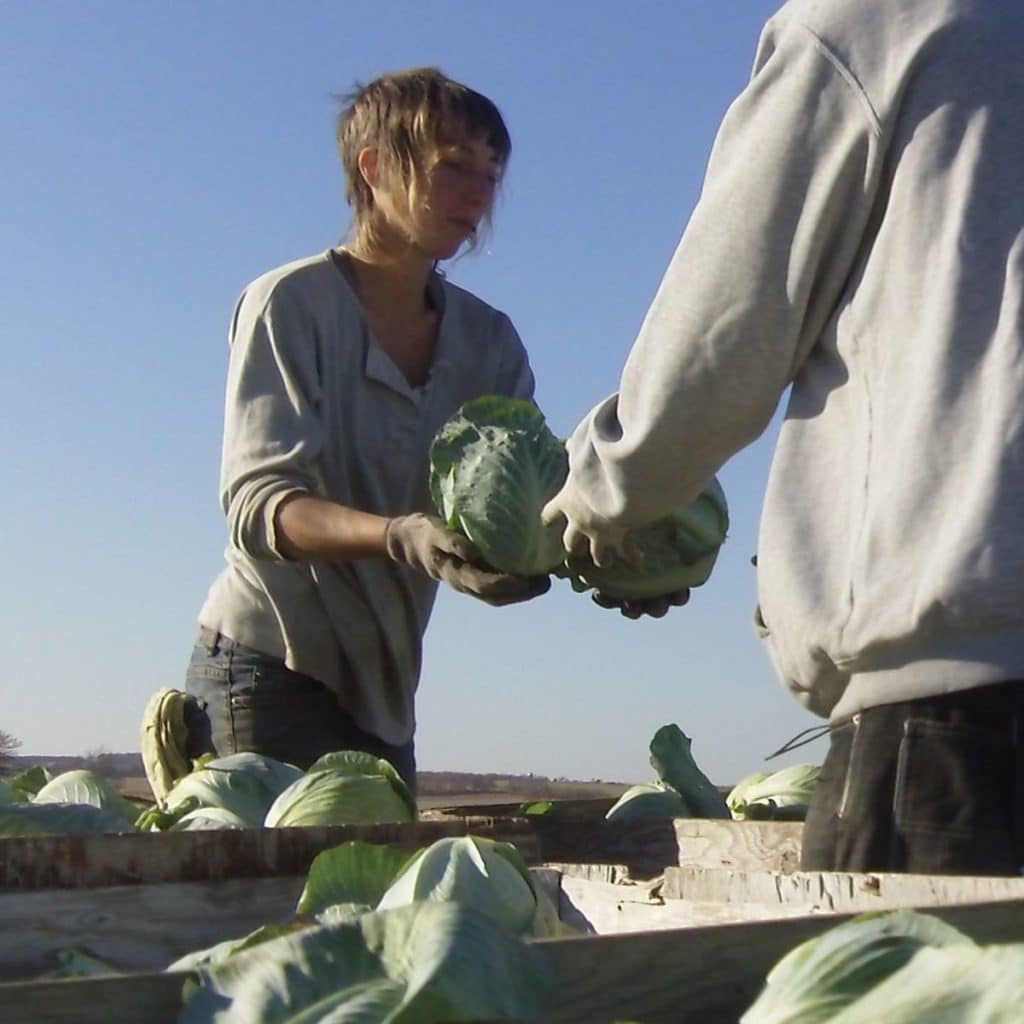
Kerry sorts cabbage at harvest. 2010.
Kerry
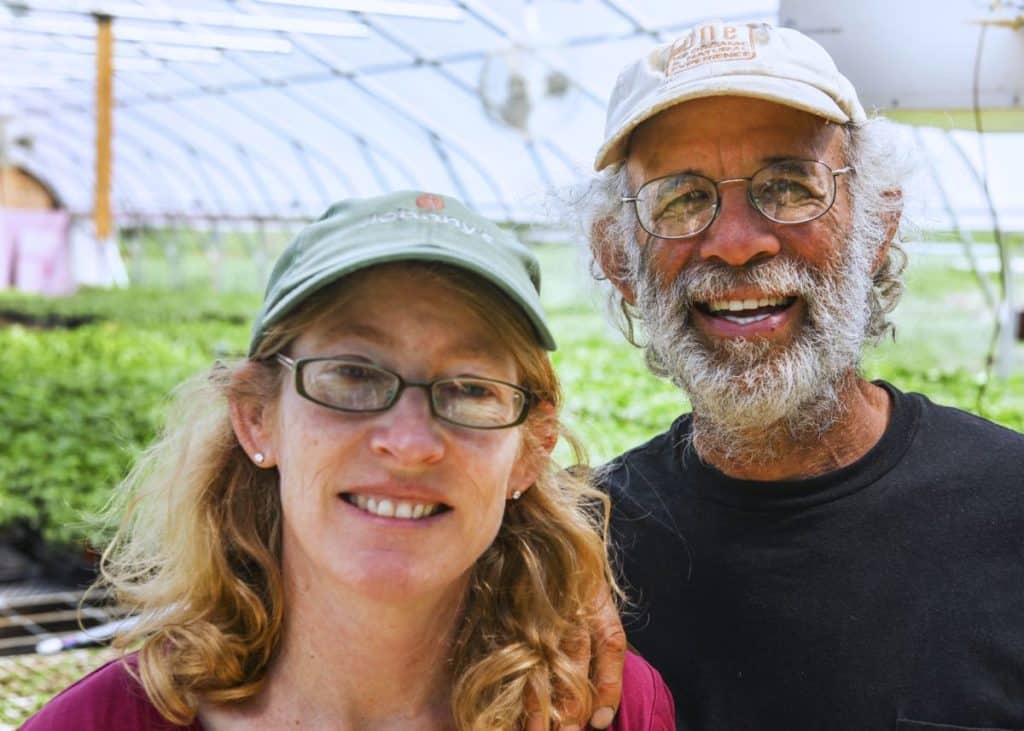
Longterm employee/ manager/ righthand woman Kerry Devlin has moved on to the next phase of her life. After working for us since 2006, she has returned to school to study Construction & Remodeling, leaving a big gap at our farm. In her 14 years with us, Kerry grew into being a manager, able to juggle employee crews, machinery and all the fine details of the 40 crops we grow. We call it the ‘split brain’ ability – the capacity to problem-solve and manage many, many details at once.
Kerry grew up while working for us. Hired at age 22, she developed along with the farm during her 20s and 30s. She was at my side as we grew the CSA from “Beth’s hobby” into over half of our farm’s sales. Her quiet steadiness drew her coworkers’ respect and allowed her to develop into an effective leader. She did not expect this. As a shy person, she was nervous about managing people. She grew into the job, gaining confidence as the years progressed.
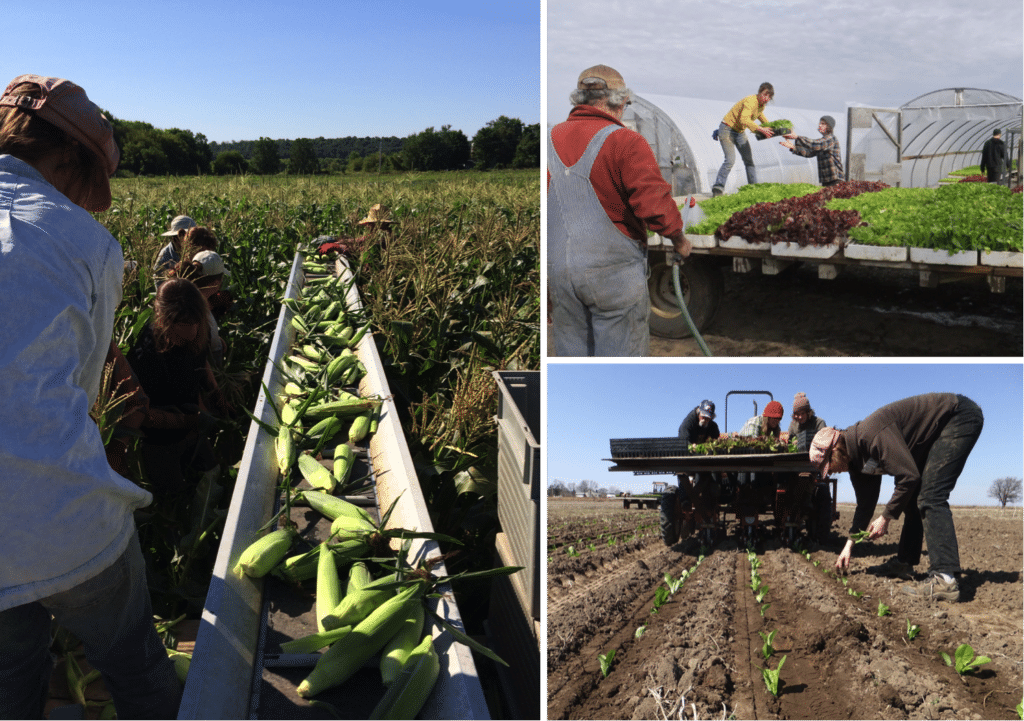
Left; Kerry (foreground, on wagon) sorts and counts sweet corn at harvest. The crew harvests the corn and places it on a conveyer belt for transport to the wagon. 2017.
Top right; Kerry (in yellow) arranges seedlings on the wagon in the correct order for transplanting. 2013.
Bottom right; Kerry (foreground) checks seedling depth and watering during transplanting. 2014.
What do you notice about Kerry in the photos above?
1. She is camera-shy.
2. In each job, she has positioned herself for maximum responsibility. During transplanting, everyone wants to ride the transplanter. It’s easier and more social. Kerry recognized that the person walking behind the transplanter is doing the most important job, even though the work is harder and grubbier, crawling or crouching to be sure the plants are properly set. Are the plants at the right depth? Is the water working? Are the rows at an even depth? Has the transplanter clogged with an old broccoli stem from last year? You can see these complications while walking, but not while riding.
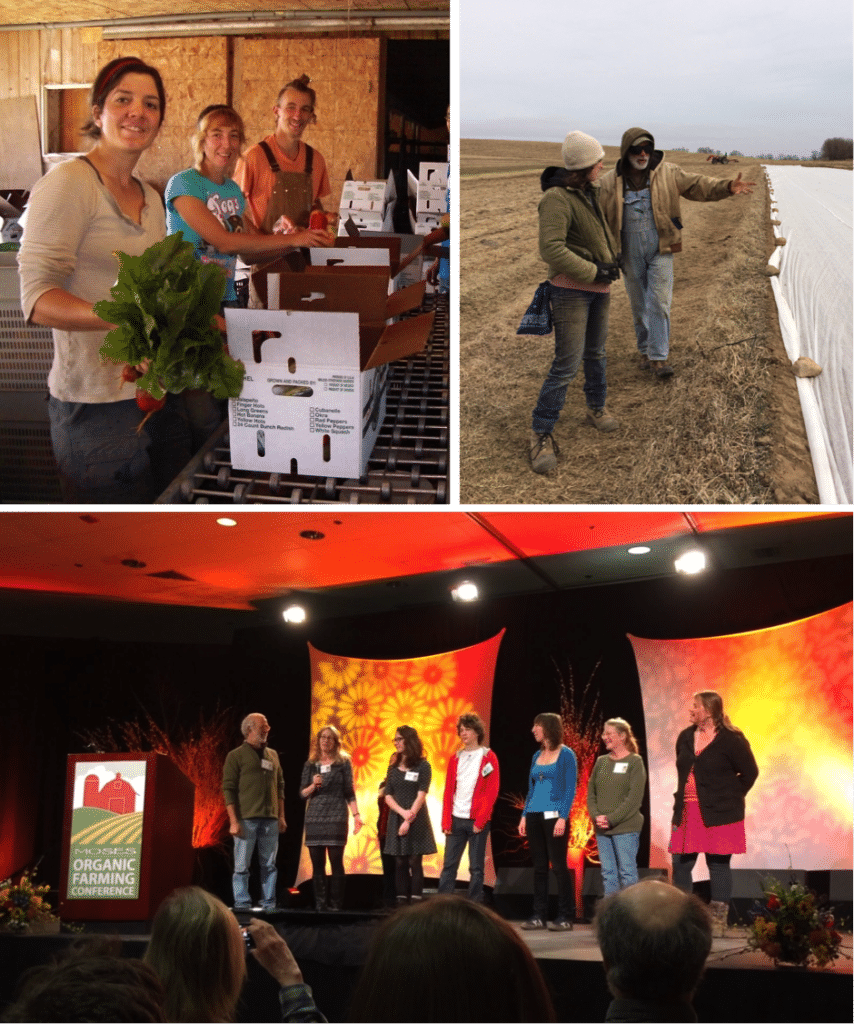
Top left; CSA packing crew (Georgia, Kerry, Noah, 2011.) Kerry has been my righthand woman in running the CSA. There are so many details and a lot of math and problem solving. Together, we got all the details right.
Top right; Steve relied on Kerry’s judgement too. In this photo, they strategize about laying row cover on spring lettuce, 2015.
Bottom; We were thrilled that all three of our Tipi managers could be with us when we were honored as the 2016 Organic Farmers of the Year, for the midwest. From left, Steve, Beth, daughter Sophie, son Ari, Kerry, Simone O’Donahue and Maggie Schley.
Now, what do we do? Panic? Of course not. There’s a lot of talent on the farm right now. We have many capable, longterm employees and managers. Let’s recognize the experience and knowledge of Maggie Schley (22 years), Simone O’Donahue (20 years), Smitty Bietila (9 years), Billy Frain (7 years), Karen Nicholson (7 years), Jory Carlin (5 years) and Kristin Knoener (5 years). They know so much. That’s not everyone, and doesn’t include the people who came and went over the years. Kerry gave us six months notice, plenty of time to train replacements for each of her specialized jobs. For example, we have a wonderful vacuum seeder for greenhouse flats that requires many fine adjustments. Maggie is taking over that important spring job, adding it to her other responsibilities. Our crew has stepped up. By the time Kerry left last week, all her work was covered. We hope!
During her final week on the farm, Kerry asked if she could take a crew to clean weeds out of our biggest greenhouse. I said ‘Sure.’ Weeds grow under the benches, creating a nuisance and sowing a new generation of weeds inside the greenhouse. I swung by later and found Kerry exiting the greenhouse hauling a huge pile of weeds. “This is great. Now the greenhouse is ready for spring,” she said. Even in her final days, she’s thinking about how to help the farm run better.
Kerry, thank you so much. We were lucky to have you as part of our farm for so many years. You are going to be a wonderful carpenter. Beth & Steve
#2 Grade Red Peppers
I write about pepper grading every year. Returning members can say “yeah, yeah” and skip ahead. New members, please read.
Many of the red bell peppers we send in the CSA boxes will be our #2 grade. We’ve sent a mix of #1 and #2 grade so far this year. We do this to avoid waste and to deliver good value to our CSA members. The #2 grade peppers are excellent eating quality, but are not quite pretty enough to sell to our coop store customers. As a result, we place a much lower value on these peppers. This allows us to provide generous amounts of peppers over the course of the season. We feel this is a good exchange, even if it means you occasionally open a pepper and find that it needs trimming. Here are the reasons that peppers are downgraded from #1 grade to #2 grade:
- They may have a minor blemish, or
- They may have minor insect damage, or
- They may be very ripe and beginning to wrinkle. (These are especially sweet and delicious as they are fully ripe. These cannot be sold to stores because their shelf life is short. You will find that the texture is less crisp than a #1 grade pepper, but the flavor more than makes up for it.)
- They might be partially red and partially green.
- Others are just too small.
.
Eating quality is fine (or excellent) for the #2 peppers. We throw away ALL peppers that we suspect have rot inside (although one may occasionally slip through in either #1 or #2 grade.)
Veggie List and Veggie Notes
Week #17, September 12/13, 2019
– Weekly shares
– EOW/ purple
– Sampler/ moon
Tomatoes, 5 lb total, plum (>4 lb) & slicing (<1 lb)
Red potatoes, 3.5 lb
Red frying peppers, ~3
Maybe 1 Jimmy Nardello frying pepper
Red or green bell pepper, 1
Red OR yellow watermelon, 1 small
Romano beans, 1 lb
Zucchini OR cucumber, 1 – 2
Edamame soybeans, 1 medium bundle
Walla Walla onion
Yellow onion
‘Roulette’ OR ‘Habanada’ not-hot habanero chiles, 2
Next week’s box will probably contain carrots, tomatoes, peppers, onions, winter squash and more.
Tomatoes – You will get mostly plum tomatoes this week. They are in good shape. Store at room temperature (e.g. your kitchen counter) but keep an eye on them. If you see signs of spoilage, use quickly. They are ripe.
Red potatoes – These beautiful red potatoes are from our friends at Driftless Organics.
Watermelon – This is the last melon of the season!
Romano beans – Take a look at last week’s newsletter for a description and cooking ideas. This week’s beans are more mature than last week, making them perfect for braising recipes.
Edamame soybeans – See last week’s newsletter for information. The edamame are more mature than last week, and will need longer cooking. Don’t be concerned about yellow leaves. It’s normal at this stage, as the plants divert resources from the leaves into the pods.
‘Habanada’ OR ‘Roulette’ chiles – You will receive one type. Both are new varieties bred to have the aromatic taste of habanero chiles, with almost no heat. Lo and behold, habaneros have a wonderful fruity flavor. No one knew because the blazing heat of a traditional habanero sears your taste buds and you cannot taste the chile itself. Snack on them to enjoy the flavor, or add them to any dish. To reduce all chances of spiciness, remove the seeds and midveins. ‘Habanada’ was developed through a collaboration between chefs and plant breeders. Read more about its background story.
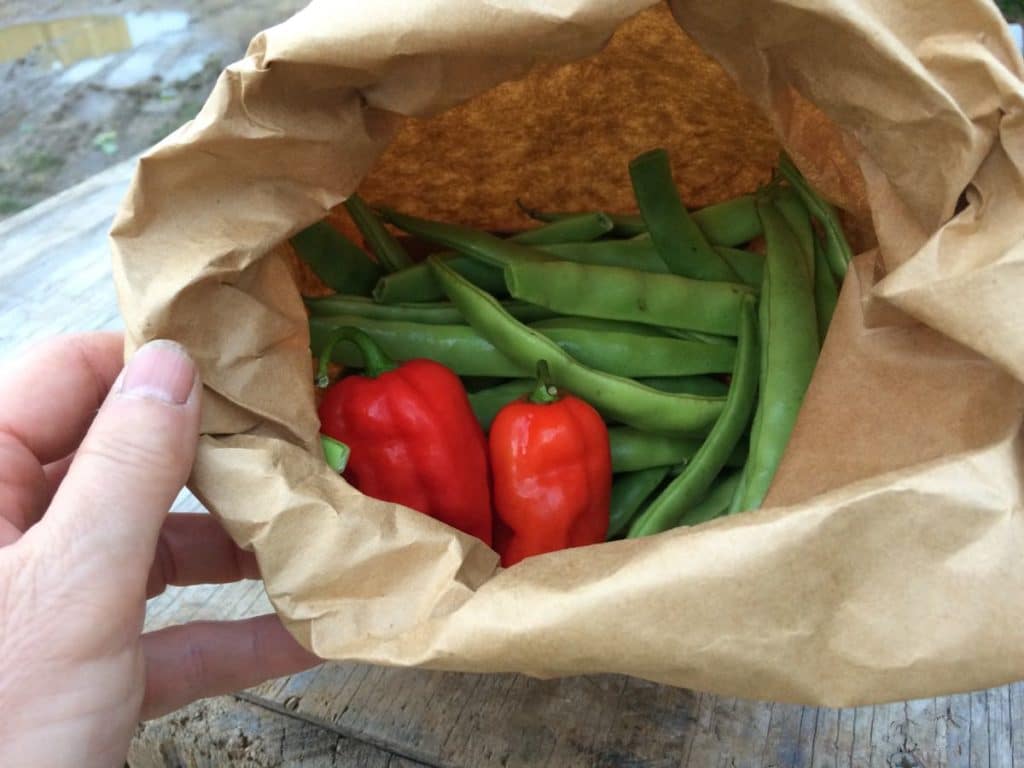
Your ‘Roulette’ or ‘Habanada’ chiles are packed in your bag of beans, to help you identify them.
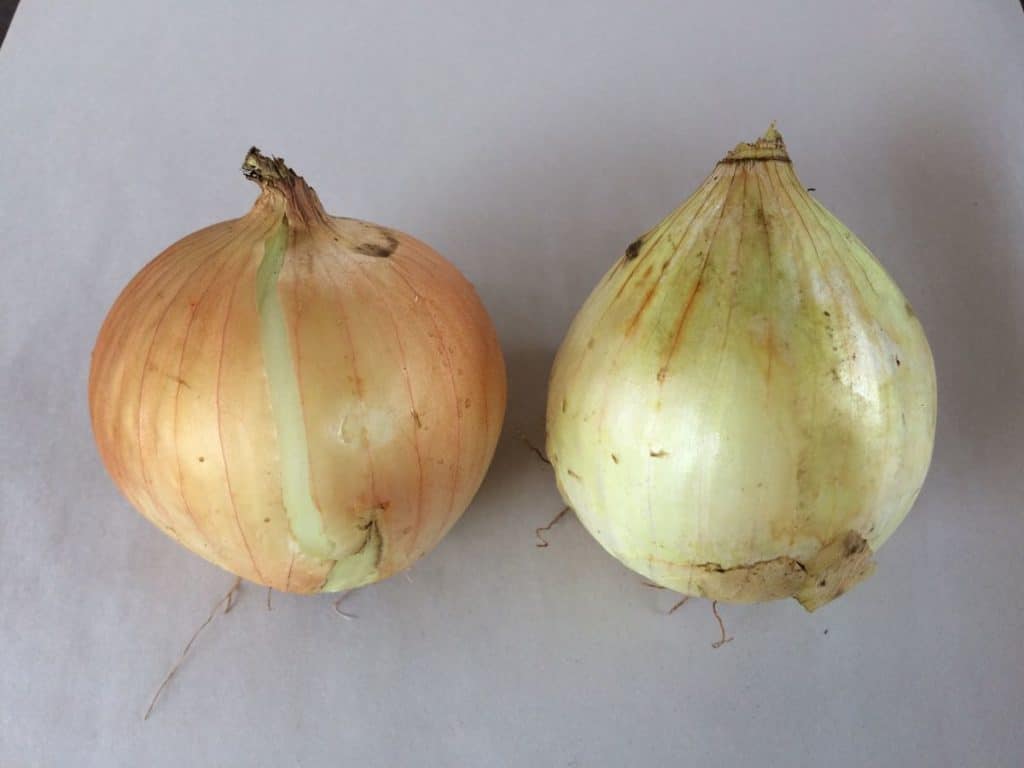
Yellow storage onion (left) versus sweet Walla Walla onion (right)
You will receive two onions from us this week, with different purposes. Here are their uses and how to tell them apart.
Yellow storage onions are pungent, and (unlike Wallas) will fry and sauté nicely. Their skins are tighter and darker yellow.
Walla Walla onions are sweet, wonderful in salad or for grilling. Because of their high moisture content, they do not fry well. Walla Wallas are a lighter shade of yellow, with sparse outer skins. They tend to look ‘messy’ because they have few outer layers to shed when we clean them up for you. In contrast, the outer skins of yellow onions flake off easily, taking all the soil with them, leaving clean, shiny skins.
RECIPES
Visit our 2019 Recipe Log or our 2018 Recipe Log or join our Facebook discussion group.
LOCAL THYME/ Comforting Classics aka Cooking 101
Tomato and Pepper Braised Romano Beans with Herb and Garlic Goat Cheese
Sweet Red Pepper Sauce with Capellini
Wholegrain Mustard Roasted New Potatoes with Salmon and Tomatoes
Tomato Bruschetta with Thyme
LOCAL THYME/ Outside the Box Recipes
Romano Bean, Potato and Meatball Stew
North African Roasted Vegetable Salad
Curried Chana Dal with Potato, Peppers and Romano Beans
Spanish Roasted Tomatoes and Peppers with Jamon
LOCAL THYME/ Quick & Easy Meal
Shrimp Edamame and Pepper Stir Fry
????
RECIPES FROM LAUREN
SKILLET SAUSAGES WITH ROMANO BEANS & TOMATO CREAM
Takes 45 minutes.
Serves 4-6 (or more if served over rice).
3 tablespoons vegetable oil
1 pound favorite sausage, preferably a pre-cooked variety (I used Klement’s smoked sausage)
1 Walla Walla onion, diced
2 habanada or roulette chiles, diced
1 teaspoon Kosher salt, divided
1/4 teaspoon freshly ground black pepper
3 cups chopped tomatoes
1 cup chicken or vegetarian broth
1 pound romano beans, cut into 1-inch pieces on the diagonal
1/4 cup heavy cream
Cooked white rice, optional
- In a large heavy skillet or Dutch oven, heat oil over medium high heat. Add sausages and cook for 5-7 minutes until charred on both sides. Remove to a cutting board and slice into 1-inch pieces.
- Turn skillet or Dutch oven heat down to low. Add onions and peppers along with 1/2 teaspoon Kosher salt and pepper. Saute for 10 minutes until softened. Add tomatoes and broth. Bring to a boil, reduce to a simmer and cook for 5 minutes. Add romano beans along with remaining salt. Partially cover and continue simmering for 10 minutes. Remove from heat and stir in cream. Add sausages back in. Taste and adjust seasonings as deserved. Serve in bowls or over rice!
.
????
.
FALL FAJITAS WITH AVOCADO EDAMAME MASH
Takes 30 minutes.
Serves 4-6.
1/4 cup olive oil, divided
1-2 green bell peppers, seeded and cut into thin strips
2 colored peppers, seeded and cut into thin strips
1 yellow onion, cut in half and thinly sliced
3 garlic cloves, minced
1 teaspoon Kosher salt, divided
1/2 teaspoon freshly ground black pepper
1 pound flank steak, cut into thin strips
2 teaspoons cumin
2 teaspoon chili powder
1 pinch cayenne powder
2 avocados
1 cup shelled edamame (pods boiled for 4 minutes and then removed from shells)
1 lime, juiced
Tortillas
Sour cream or Greek yogurt, optional
Hot sauce, optional
- In a large heavy skillet, heat 2 tablespoons olive oil over medium heat. Add peppers, onions, and garlic with 1/2 teaspoon each salt and pepper. Cook for 15 minutes, stirring occasionally. You want the veggies to be softened and just beginning to char in places. Add steak along with cumin, chili powder, and cayenne. Saute 5 minutes longer, just until steak is cooked through.
- Combine avocado and edamame in a small bowl. Smash with a potato masher, pastry cutter or two forms until the two come together. Add lime juice from half a lime and remaining 1/2 teaspoon salt. Taste and adjust flavors as desired. I used the juice from a whole lime but you may not want to.
- Warm tortillas on a skillet or in microwave and serve with a generous portion of both avocado edamame mash and fajita mixture. Top with sour cream or Greek yogurt and hot sauce if desired. Enjoy!
.
????
.
EASY OVEN FREEZER TOMATOES
Takes 1 hour, 15 minutes (almost all inactive)
1/4 cup olive oil
5 pounds tomatoes, cored and cut into quarters or eighths depending on size
1 Walla Walla, cut into quarters
1 colored bell pepper, cut into large chunks
4 garlic cloves, peeled
1/2 teaspoon Kosher salt
1/4 teaspoon freshly ground black pepper
- Preheat oven to 450 degrees.
- Pour olive oil into a 9 x 13-inch pan. Add tomatoes, skin side down if possible. Nestle onion (it’s good if the layers fall apart a bit), pepper chunks, and garlic into between the tomatoes so they are even distributed throughout the pan. Sprinkle with salt and pepper.
- Roast for 45-60 minutes until their is less juice remaining and the tomatoes even have a little browning on their edges. Let cool and then pack into freezer-proof mason jars or freezer bags for chunky tomatoes to use in winter soups, stews, or chilis. Or puree in your food processor or blender before freezing for a quick pizza or pasta sauce.
.


