
Blog
Week #10; A Good Week
- On: July 22, 2020
 0
0

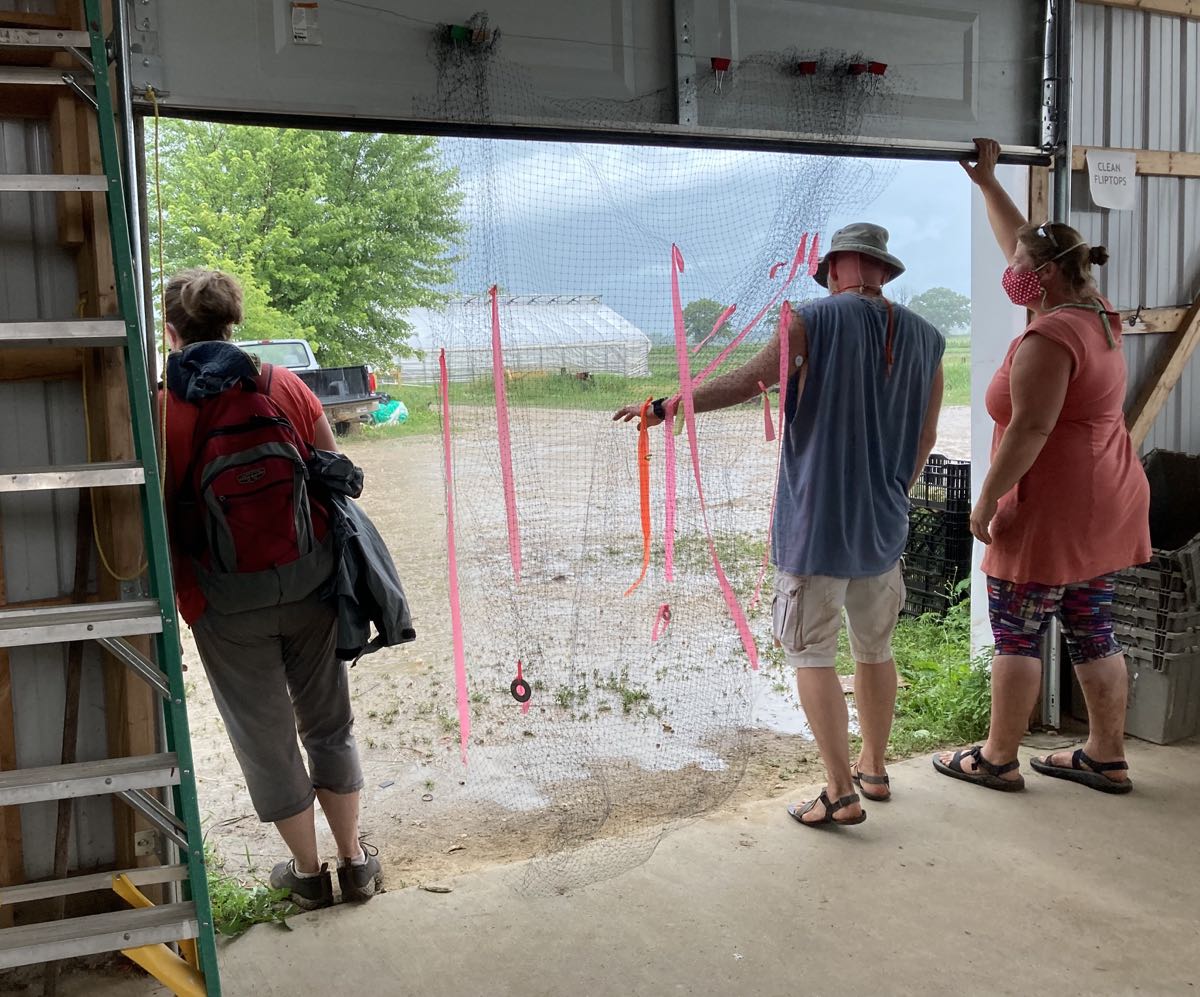
This was a good week, following difficult times after a lightning strike two weeks ago. We’ve gotten almost everything repaired, including the expensive controller for our irrigation well. We held our breath on that one. Once the controller was fixed, we could test the pump and fortunately it was not damaged. We still need to get electronics for our solar array fixed but have not yet been able to line up someone to do the repairs. (photo credit Ari P-K)
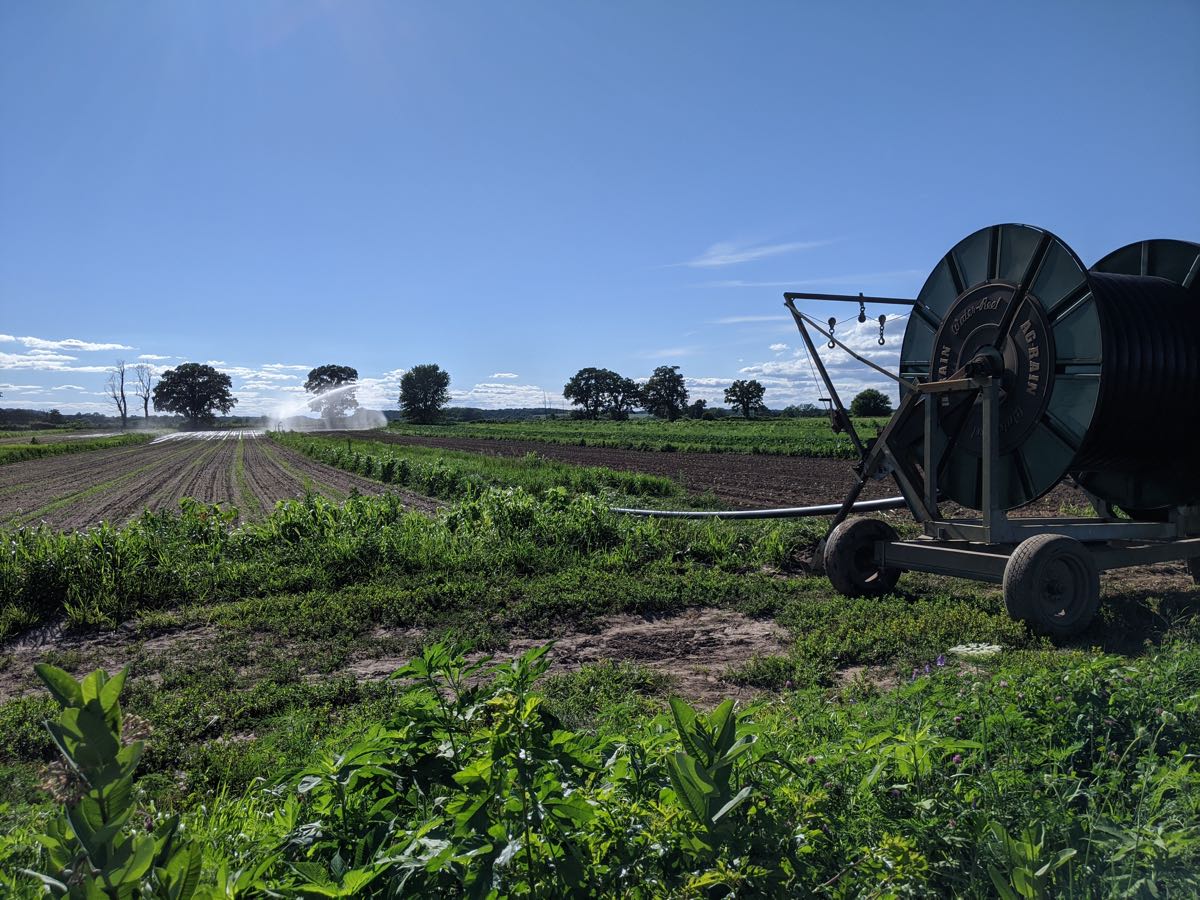
There’s been plenty of rain for most crops, except our young carrot plantings. We seeded a sequence of carrot fields right before the lightning strike. The carrots need steady moisture to emerge. Usually we irrigate lightly for 12 days. This year we had to rely on rain as it took over a week to get the irrigation well running again. So far the fields look fine because there was enough rain to keep the tiny seeds moist as they germinated. (photo credit Ari P-K)
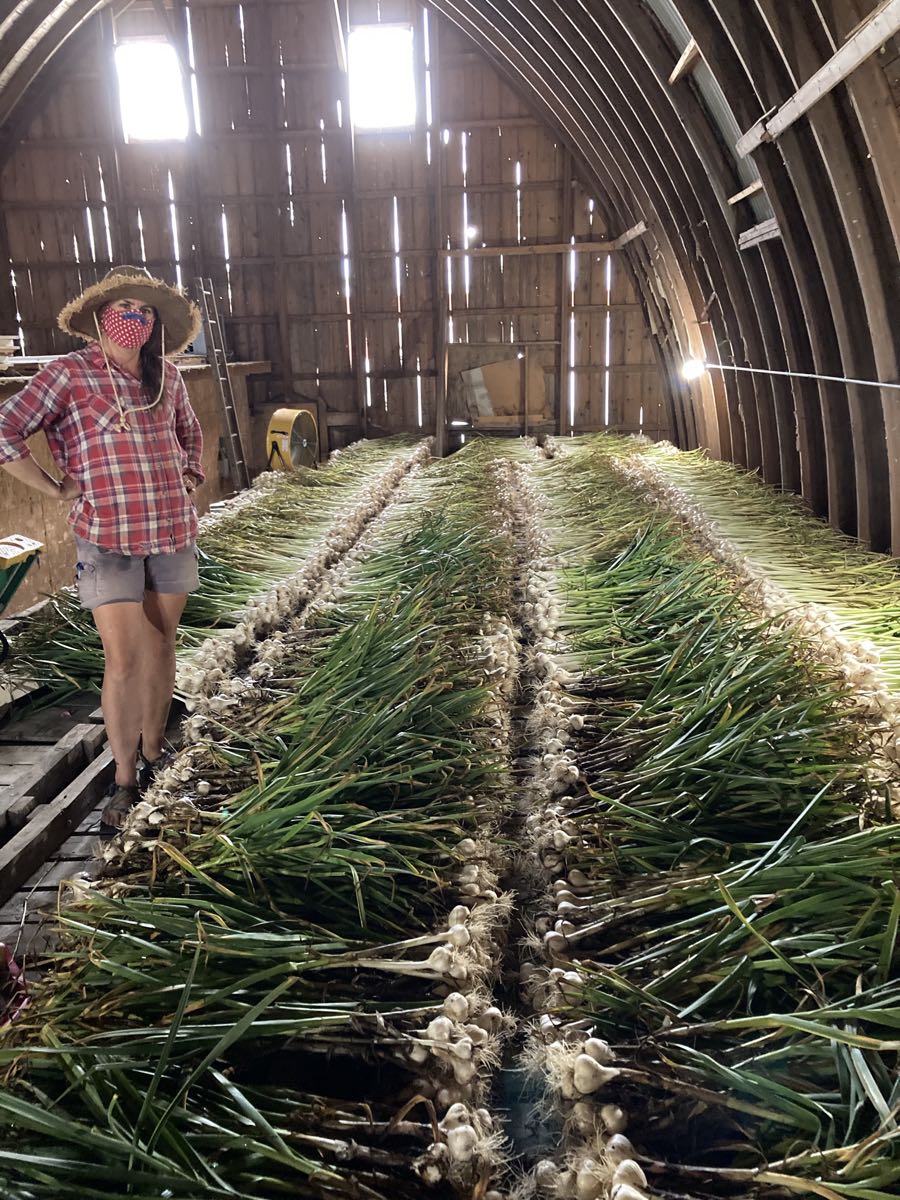
We harvested almost our entire garlic crop over the past week. There’s still a few hundred bulbs to pull. We dry the garlic upstairs in our well-ventilated barn, laying the stalks on overturned wooden bins. The masked bandoleer is neighbor/employee/friend Karen who helps with garlic every year. She grows seed garlic on her farm, so I rely on her expertise as we harvest our garlic crop.
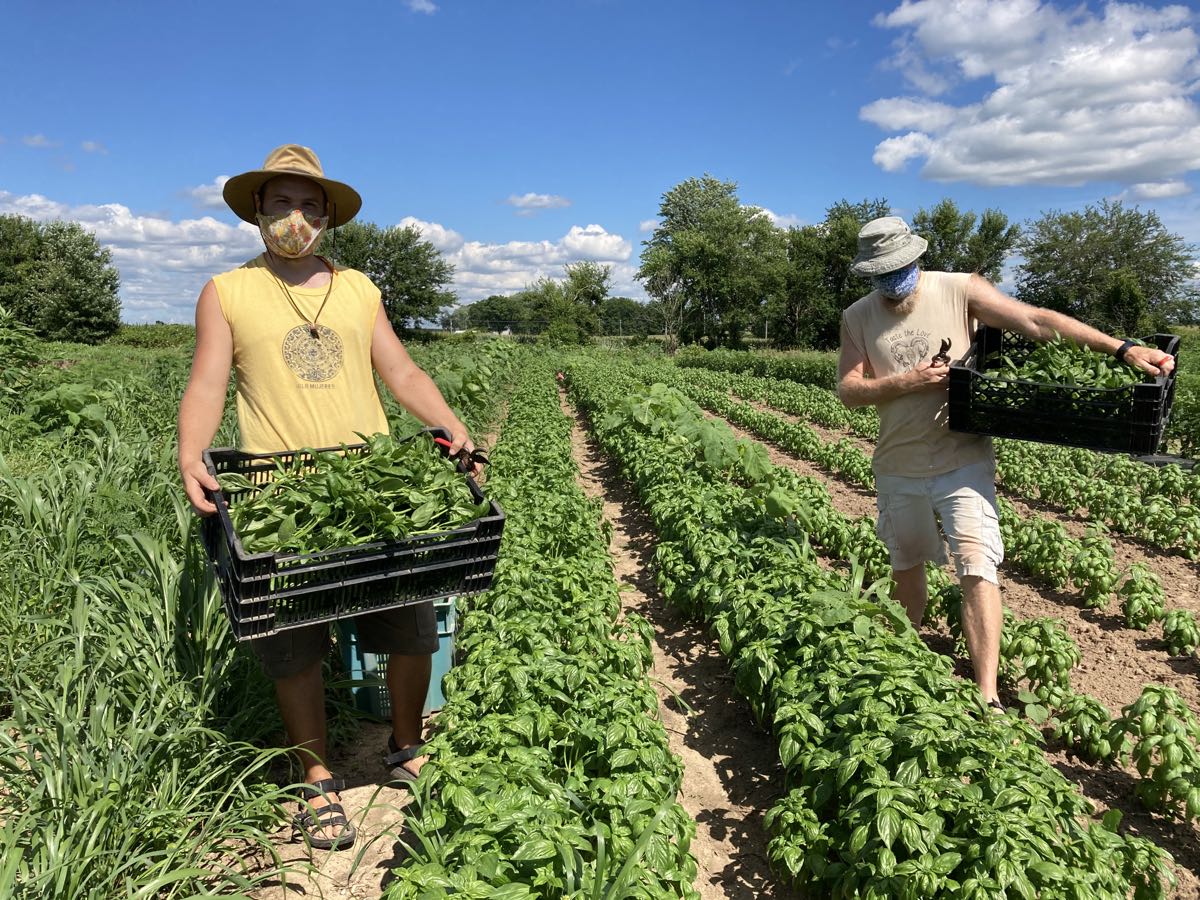
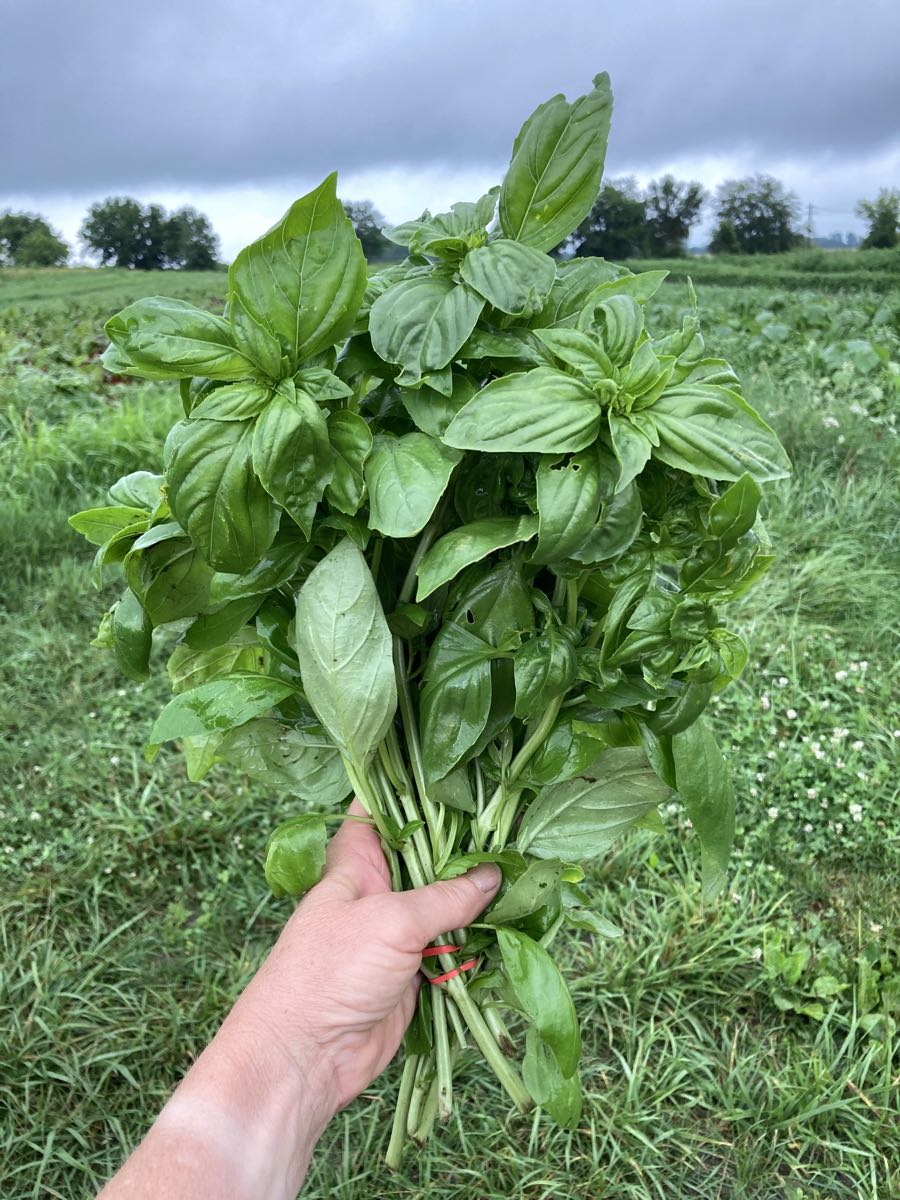
We have to say goodbye to employee David (left, harvesting your basil with Ben). David returned to work for us during the pandemic, but now is leaving for a job in his field (wine making). We were glad to have him back – he’s worked for us several times over the past ten years, when he’s been available between other adventures.
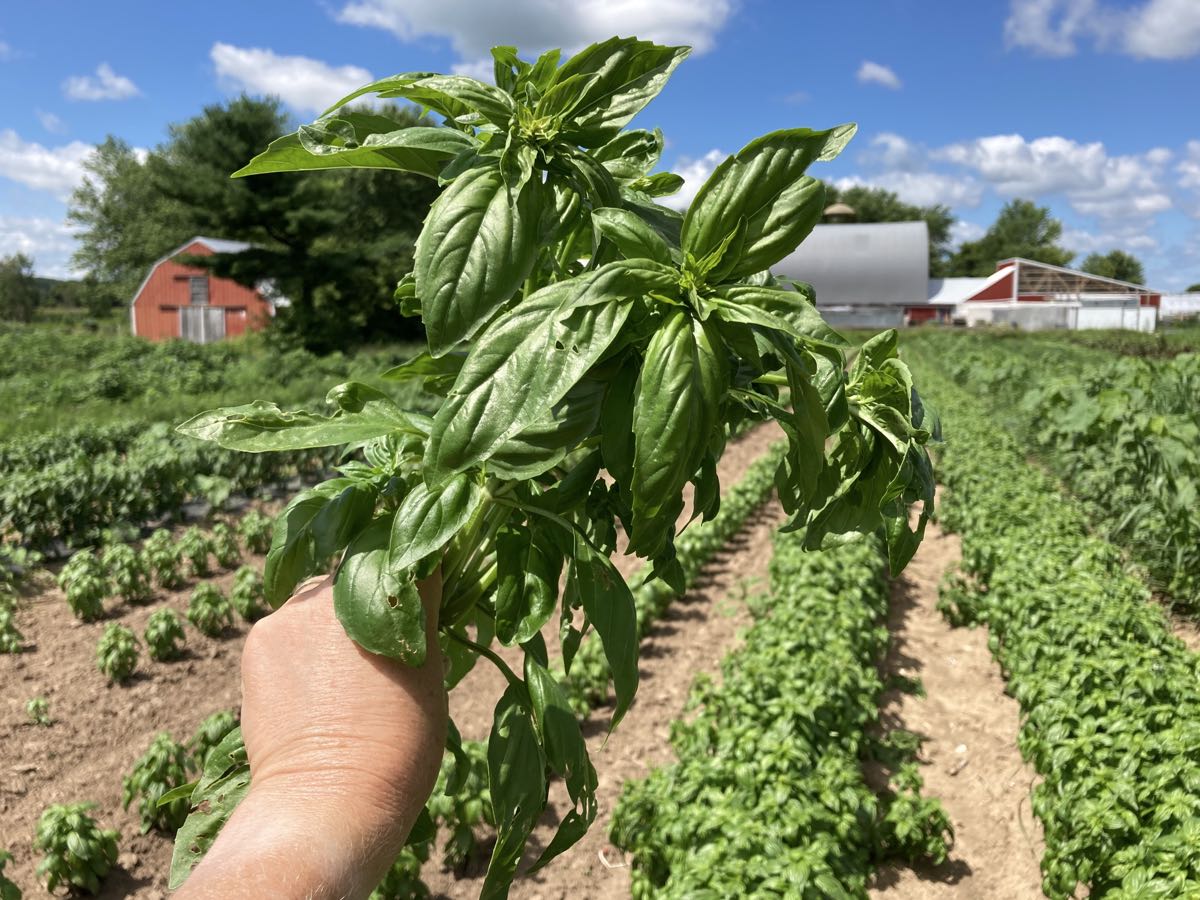
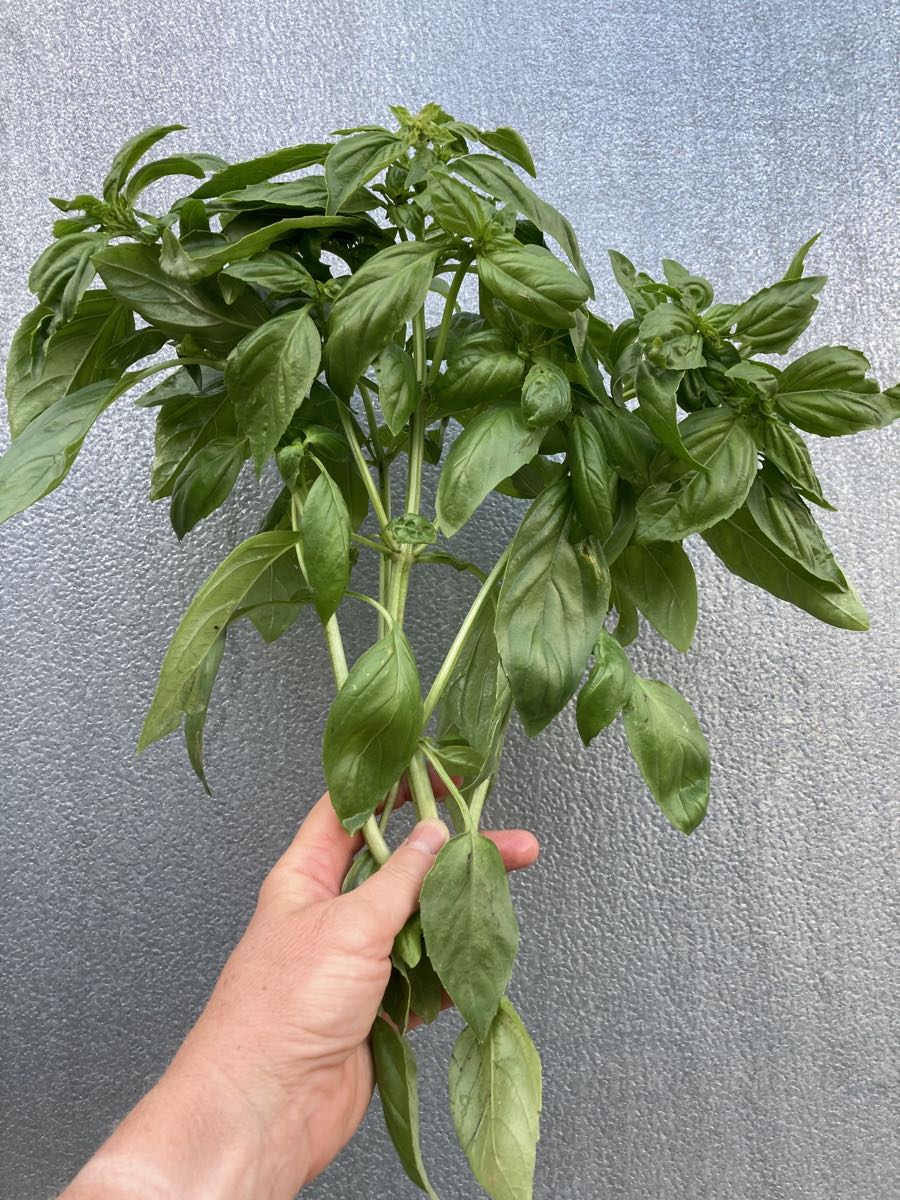
The basil is growing extraordinarily well this year so we’re sending another nice bunch. We usually overplant in anticipation of losing some to to disease. Instead, it is unexpectedly lush. We’ll continue to send it frequently. If it’s too much, freeze some for winter. You’ll be glad you did.
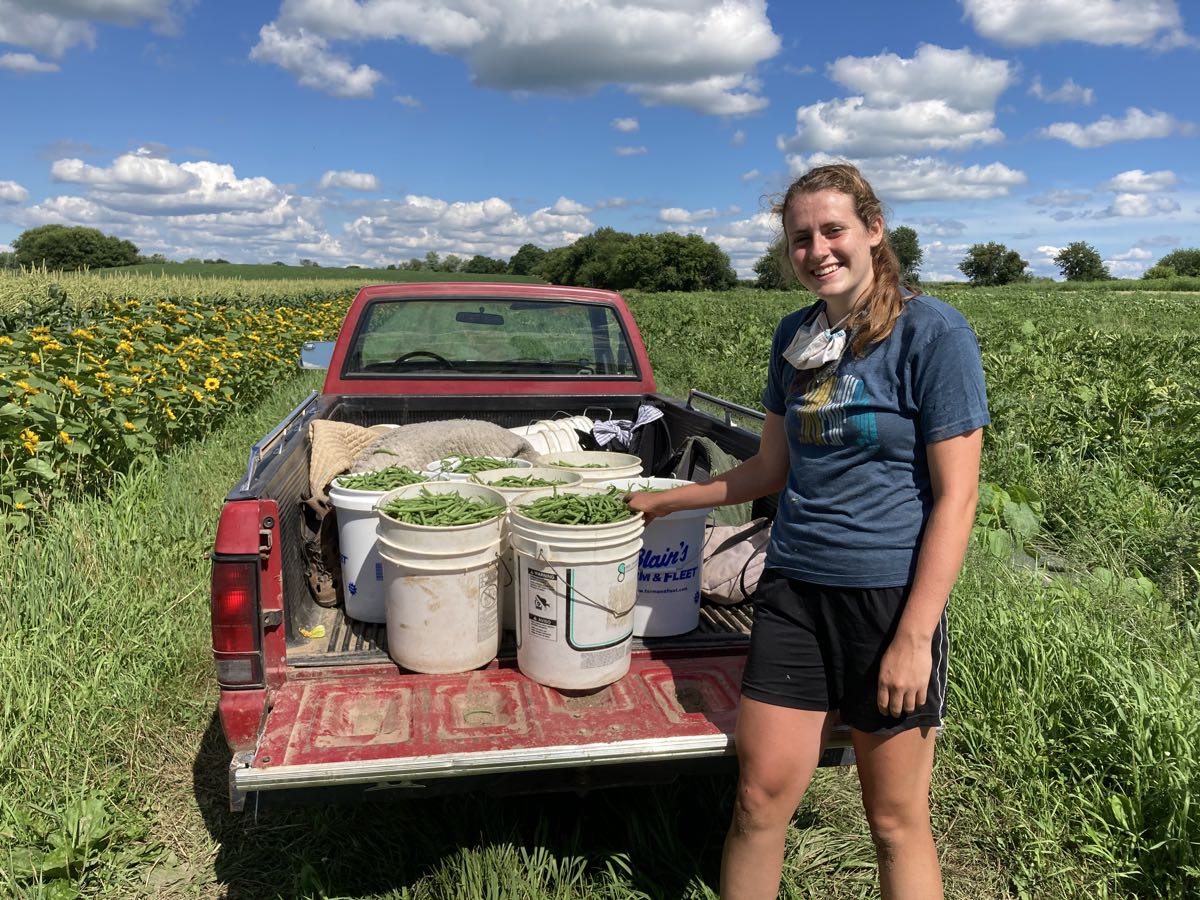
All our farm work is so much easier in the cooler weather! Zoe brings in the bean harvest.
Veggie List & Veggie Notes
Week #10, July 23/24, 2020
– Weekly shares
– EOW/ purple
– Sampler/ sun
Sweet corn, ~8 ears
‘Caraflex’ cabbage
Green beans, 3/4 lb
Cherry tomatoes, 1 pint
Tomatoes, a few slicing or plum tomatoes
Cucumbers, 3
Green bell pepper, 1 small
Walla Walla onion, 1 large
Basil, 1 bunch
Each site gets globe eggplant OR broccoli OR zucchini OR extra corn.
Next week’s box will probably contain sweet corn, green beans, tomatoes and other summer crops!
Sweet corn – Now it’s summer! Some ears have bugs at the tip. I suggest cutting off the tips before shucking the corn.
Storage. Sweet corn is best when fresh, so we encourage you to eat it asap. Store in the refrigerator, in the husks if you have the room, or husked in a plastic bag.
Cooking. It is quicker to steam sweet corn than to boil it.
1.) Stand ears of corn upright in a tall pot. Put one inch of water in the pot.
2.) Bring the water to a boil. If the corn is cold when you begin cooking, steam for 5 – 6 minutes. If the corn starts at room temperature, steam for 4 – 5 minutes. The cooking time will vary somewhat depending on how many ears are in the pot. Pay attention to how the corn smells. The scent changes once the corn is ready. Another clue: water will bead on the corn until it is cooked. Don’t overcook it.
‘Caraflex’ cabbage – This is the same type of cabbage we sent three weeks ago. This ‘salad’ type is great for slaws and raw salads but handles light cooking too.
Green beans – Store in the warmer part of your fridge.
Tomatoes (plum or slicing) – Store your tomatoes at room temperature to preserve flavor and texture.
RECIPES
Visit our 2020 Recipe Log or our 2019 Recipe Log or join our Facebook discussion group.
LOCAL THYME/ Cooking 101
Corn Pudding
Roasted Chicken and Cabbage Dinner
Green Bean Salad with Basil and Pine Nuts
LOCAL THYME/ Cooking 202
Caramelized Corn with Basil
Roasted Caraflex Cabbage with Gruyere
Pesto Pasta Salad with Green Beans and Corn
LOCAL THYME/ Quick & Easy Meal
Composed Chicken Salad with Buttermilk Dressing
RECIPES FROM LAUREN
RUNZA
What the heck is runza you ask? Well, officially, it is the state dish of Nebraska. But closer to home, it is a dish I grew up with when my mom had extra cabbage in her garden. It’s essentially a German-style calzone packed full of ground meat (traditionally beef, but here I used pork because it’s what I had on hand), cabbage, and onions. I know making your own dough can seem intimidating but give it a try. It’s easier than you think.
Makes 8 runzas
Takes 2 hours
Dough:
3/4 cup lukewarm water
2-1/4 teaspoons active yeast
Pinch sugar + 3 tablespoons sugar, divided
4 eggs; 3 for dough, 1 for egg wash
4 cups all-purpose flour, divided + more for dusting counter
12 tablespoons butter, softened
2 teaspoons Kosher salt
Filling:
1 tablespoon olive oil
1 pound ground pork
1 teaspoon Kosher salt, divided
1/2 teaspoon black pepper
1/2 Walla Walla, diced
1 green pepper, seeded and diced
2 tablespoons butter
1 head cabbage, shredded
1 teaspoon dried thyme
1/2 teaspoon dried sage
- In a large bowl, combine water (it should be warm but not hot), yeast and sugar. Whisk gently to combine. Let sit for 10 minutes until it bubbles, rises and smells yeasty. Add 3 eggs and whisk to combine. Add half the flour and beat with a spoon until totally incorporated. Add butter, remaining flour, sugar and salt. Stir until just combined and then let rest for 15 minutes.
- Once rested, dust counter with flour and knead dough for 5 minutes until tight and smooth. Transfer the dough to a clean, greased bowl. Cover with plastic wrap and let rise in a warm space for an hour (until doubled in size).
- When the dough is about 20 minutes from finished, preheat the oven to 375 degrees and start on the filling. In a large heavy skillet (or Dutch oven), heat olive oil over medium heat. Add ground pork, 1/2 teaspoon salt and the pepper. Break up meat with two forks, cooking for 5 minutes until browned. Add onion and pepper. Cook 5 minutes more. Add butter and remaining salt to skillet. Get it a stir so the butter coats all the meat and veggies. Add cabbage along with dried herbs and let wilt gently over medium low heat for 15 minutes.
- At this point, your dough should be risen. Grease two baking sheets. Divide into 8 pieces.
- Re-dust counter with flour and roll out dough into a rough 8×4-inch rectangle. Scoop 3/4 cup of cabbage mixture into the center. Fold in the two long sides of dough so they touch then pull the other edges into the center until you form a sealed dough pocket with the meat in the middle. Place, seal side down, on the greased baking sheet. Repeat with remaining dough and cabbage mixture.
- Beat last egg in a small bowl until smooth and brush runzas with egg mixture.
- Bake for 15 minutes. Rotate pans and bake 15 minutes longer until golden brown. They may crack, but you shouldn’t worry too much if they do. It just means you over-kneaded the dough and they will still taste amazing.
- Serve with ketchup or some variation of a spicy special sauce.
**Pro tip: My mom often cuts a slit in the side of the fully baked runzas when she is reheating them and adds a slice or two of cheese.
.
????
.
SWEET CORN RISOTTO WITH CORN COB BROTH & CHERRY TOMATOES
Adapted barely from a genius recipe from Susige at Food52
Oh my, oh my this dish! This is hands down one of the most tasty things I’ve ever consumed (and I live a pretty decadent and delicious life). I love really any combination of corn, peppers, onion and garlic but something about this risotto just sings on another level. I think the corn cob broth is the real game changer. Don’t skip this step if you can help it. It adds a little time (but also can be left alone while you get things done around the house). Also don’t omit the quartered cherry tomatoes on top. It’s a simple thing but it adds the acidity and brightness that the rich creamy risotto needs.
Takes 90 minutes (1 hour active cooking time)
Serves 4-6
5-6 ears sweet corn
6 cups water
1 tablespoon Kosher salt, divided plus more for seasoning
5-6 garlic, divided
1/4 cup butter, divided
1 tablespoon olive oil
1/4 teaspoon freshly ground black pepper
1 cup arborio rice
1/2 cup dry white wine
1/2 cup parmesan
1/4 cup minced basil leaves
1 pint cherry tomatoes (or diced tomatoes), quartered
- Husk ears of corn. With a knife, remove kernels from corn and set aside in a small bowl (hopefully there is 1-2 cups). In a large stock pot or Dutch oven, combine water and corn cobs (sans kernels) and 2 teaspoons Kosher salt. Smash 3-4 garlic cloves with the blade of your knife and remove the skin. Toss into pot.
- Bring corn cob broth to a boil and then immediately reduce to a gentle simmer. Simmer slowly for an hour. Then keep warm on very low heat to add into the risotto.
- After the corn cob broth has been simmering for about 30 minutes, begin your risotto. Melt 1 tablespoon butter with olive oil in a large saute pan (with tall sides) over medium heat. Mince remaining 2 garlic cloves and add to pot along with black pepper and remaining teaspoon Kosher salt. Cook until garlic is very fragrant and just beginning to brown, about 10 minutes. Reduce heat to low. Cook over very low heat for 15 minutes, stirring occasionally.
- Turn heat up to medium low. Add rice and cook for 2-3 minutes until it has absorbed any fat from the pan. It should look slightly puffed.
- Add the wine to deglaze the pan. Cook, stirring occasionally until the rice has absorbed all the wine.
- By now your broth should be nicely reduced to 4 cups of liquid. Remove the corn cobs with tongs. If you feel ambitious, run the back of a knife against the corn cob to get every yummy morsel of corn off the cob and into the broth. Toss the garlic gloves into the pan with the rice.
- Add three ladles of broth to the rice and stir. Let simmer gently, stirring occasionally until broth is absorbed by rice. Then add a couple more ladles of broth. Continue this process of adding broth, stirring occasionally and letting the rice absorb the broth until you’ve used all the broth and the rice is tender but not mushy. It should take about 20 minutes. (If you use up the broth before the rice is cooked enough to your likely just add a little more warm water).
- Remove pan from heat. Add reserved kernels, remaining three tablespoons butter, Parmesan cheese and basil. Stir to combine then cover and let sit for five minutes.
- Serve warm with quartered cherry tomatoes and a sprinkle of salt.
.
????
.

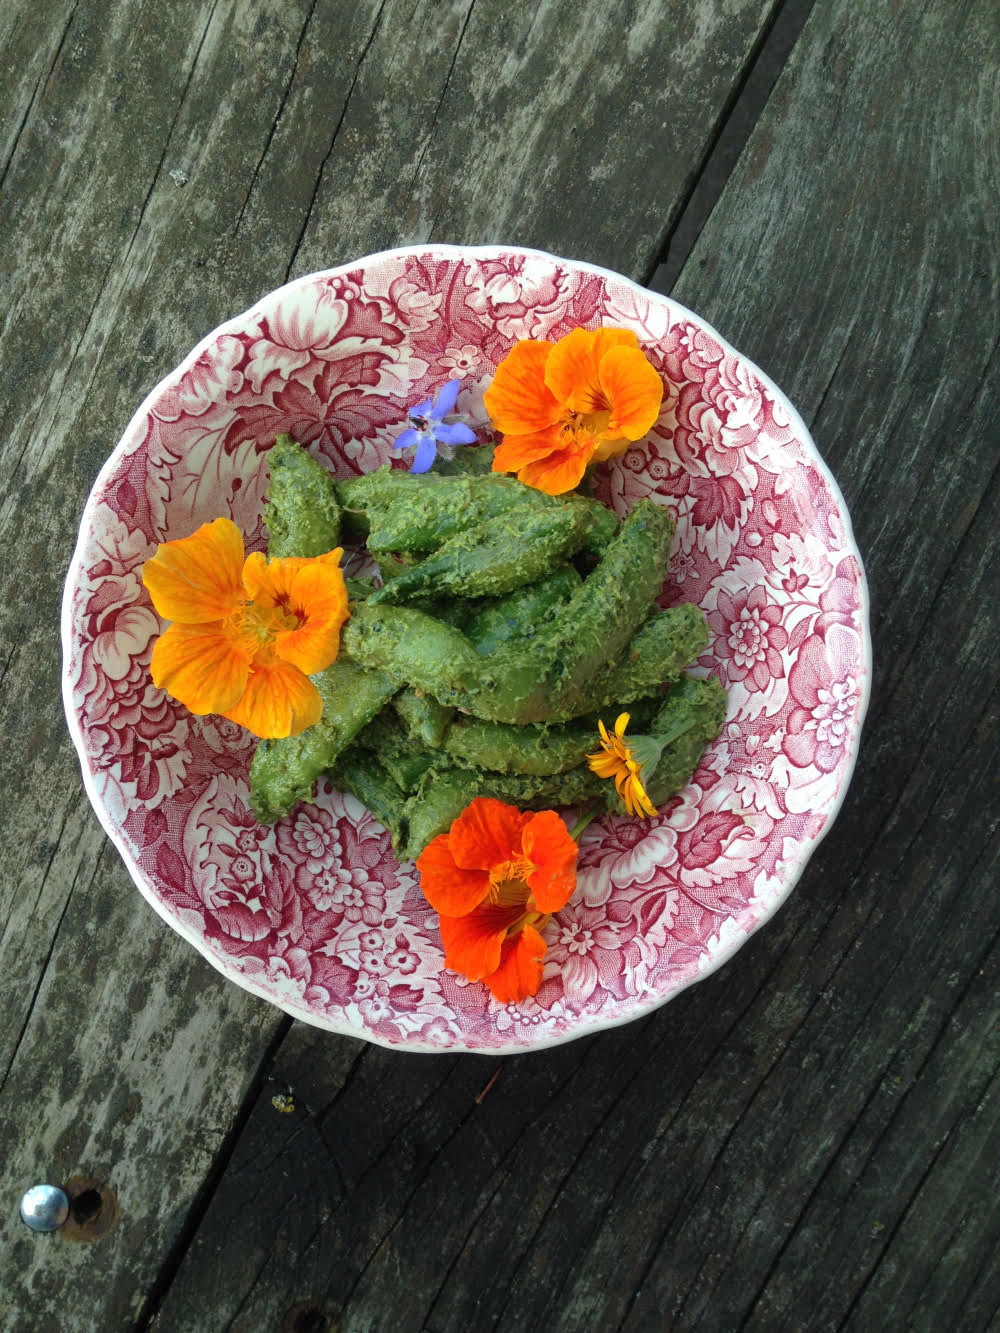
CREAMY CUCUMBERS
Serves 2-4 as a side (though I am known to eat the whole bowl for dinner)
Takes 15 minutes (but gets better the longer you let it sit)
3 cucumbers, cut into 1/8-inch slices
1/2 Walla Walla onion, halved and sliced
1/4 cup Greek yogurt
1/4 cup mayonnaise
2 tablespoons sugar
2 tablespoon white vinegar
Salt and pepper to taste
Dill, optional
- In a large bowl, combine cucumbers and onions.
- In a small bowl, whisk together yogurt, mayo, sugar, vinegar, salt and pepper until smooth. Pour over cucumbers and onions and toss gently to combine. Garnish or season with dill (if you like).
- Serve immediately or chill for an hour to let the flavors really meld together.
.

Lightning strike
- On: July 15, 2020
- 0
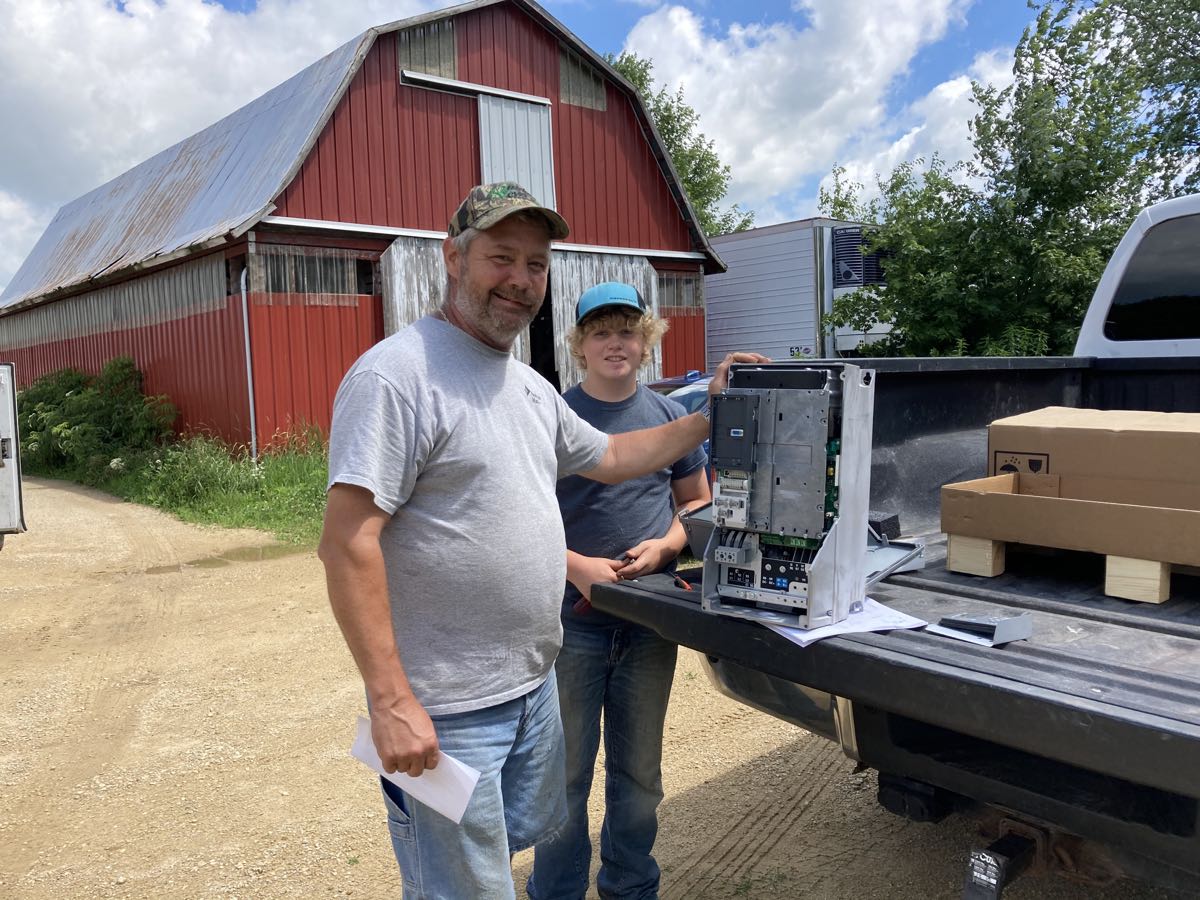
Charlie Davis and his son Caleb came to repair our farmyard well.

This is the inside of the well controller. It is not supposed to have the rainbow/galvanized look. That’s the result of the lightning surge.
There was a lightning strike nearby on Thursday night. No one was hurt but many electronics were damaged. Here’s the list so far:
– farmyard well controller
– irrigation well controller
– solar array controller
– a thermostatic control for one cooler
– pump for our diesel fuel tank
– controls for a mixer we use to prepare greenhouse potting mix.
That’s a lot. If we hear Steve cursing, then we know he has found more damage. We are crawling our way through repairs. Water was off in the house and farm buildings for less than a day because our well repair guy is terrific. Charlie Davis (Southcentral Well & Pump) returned our call on Thursday night, tracked down a replacement controller early Friday, and was at the farm by 11:00 am.
Steve fixed the cooler compressor and the diesel pump (more cursing) but the irrigation well and solar array remain unresolved. An electrician has declared both controllers as ‘dead.’ These are specialized and expensive parts but we have insurance.
Honestly, I kind of lost it on Thursday night. This is a complicated year and suddenly we had no water and so many essential farm systems were damaged. We filled buckets at the neighbors (thank you K & J!) and took bucket baths. Charlie’s quick reply helped. We opened a few beers and went to bed early. Beth
Basil
We are sending a substantial bunch, as the basil grew well this week. If you don’t expect to use it all within one week, you should freeze some. Chop finely by hand or in a food processor. Mix with a little olive oil, and press firmly into a shallow freezer container. Once frozen, you can break off pieces when you need them. No need to thaw; just throw a frozen chunk into your tomato sauce or salad dressing. Full disclosure, basil blackens when frozen so keep that in mind when using it.
Storage: Basil deteriorates if stored in the refrigerator. It is best stored at room temperature with the cut ends in water, for example in a jar or vase. Treat it like a flower. Give the stem a fresh trim and change the water every day or two.
Basil forecast: We think this will be a good basil year. Keep your fingers crossed. We’ve settled on a favorite disease-resistant variety, to avoid the disease that has ended our basil crops early the past few years. I think we’ll have a steady supply during tomato season.
Veggie List & Veggie Notes
Week #9, July 16/17, 2020
– Weekly shares
– EOW/ green
Carrots, 1.25 lb
Green kale, 1 bunch
Zucchini &/or summer squash, 1 or 2
Cucumbers, 3
Walla Walla onion, 1 or 2
Green bell pepper, 1
Broccoli, 1 or 2 small heads
Basil, a generous bunch
Fresh garlic, 1 bulb
– We have 1 pt cherry tomatoes for a few sites. We’ll distribute cherry tomatoes to all the sites as they ripen in the coming weeks.
– Each site gets something from this list: globe eggplant OR a few plum tomatoes OR a small bag of snap peas.
– Remember, all boxes at a site are identical. Do not touch or open other members’ boxes.
Next week’s box will probably contain cucumbers, zucchini, Caraflex cabbage, basil and more.
Carrots – These were smaller than expected at harvest. We’ll let the field grow for a few more weeks before harvesting again.
Walla Walla onions – These fat onions are sweet, crisp and very mild. Wonderful raw or lightly cooked. Try cutting into wedges, threading on a skewer and grilling. Do not try to fry these onions – it doesn’t work because of their high water content.
Storage: It’s OK to store at room temperature for up to one week. Otherwise, refrigerate.
Fresh garlic – The garlic you receive this week is freshly dug and uncured. The cloves are very crisp and pungent. You will find that the wrapper papers on each clove are still crisp but peel off readily. You should refrigerate this head of garlic. It won’t spoil at room temperature but the clove wrappers become difficult to peel as they dry. We expect to dig our garlic crop over the next week, then will cure the bulbs for a few weeks. We’ll send more garlic once the curing is finished.
Storage: Refrigerate fresh garlic.
Eggplant – For best flavor, store eggplants at room temperature for 2 – 3 days. If holding for longer than three days, store in the warmest part of your refrigerator. Eggplants do not store well for long periods of time. Many recipes instruct you to salt and drain eggplant “to remove bitter flavors.” Eggplant this fresh is not bitter so you can skip the salting step.
There are many ways to use versatile eggplants. Here are a few ideas:
– Roast in the oven or over coals to cook and smoke your eggplant, then transform into baba ganouj with lemon, tahini, and garlic.
– Cut in 1/2 to 3/4 inch slices, peel, and rub with a little salad dressing (I use Newman’s balsamic dressing), then grill slowly until soft and smoky. At this point, you can cut into cubes to make eggplant caponata with chopped tomatoes, onion, garlic, olives, capers, olive oil and red wine vinegar.
– Use the grilled cubes in casseroles or to top pizza.
– Add thin, grilled eggplant slices in grilled cheese sandwiches. Use hearty bread – this doesn’t work well with soft sandwich bread.
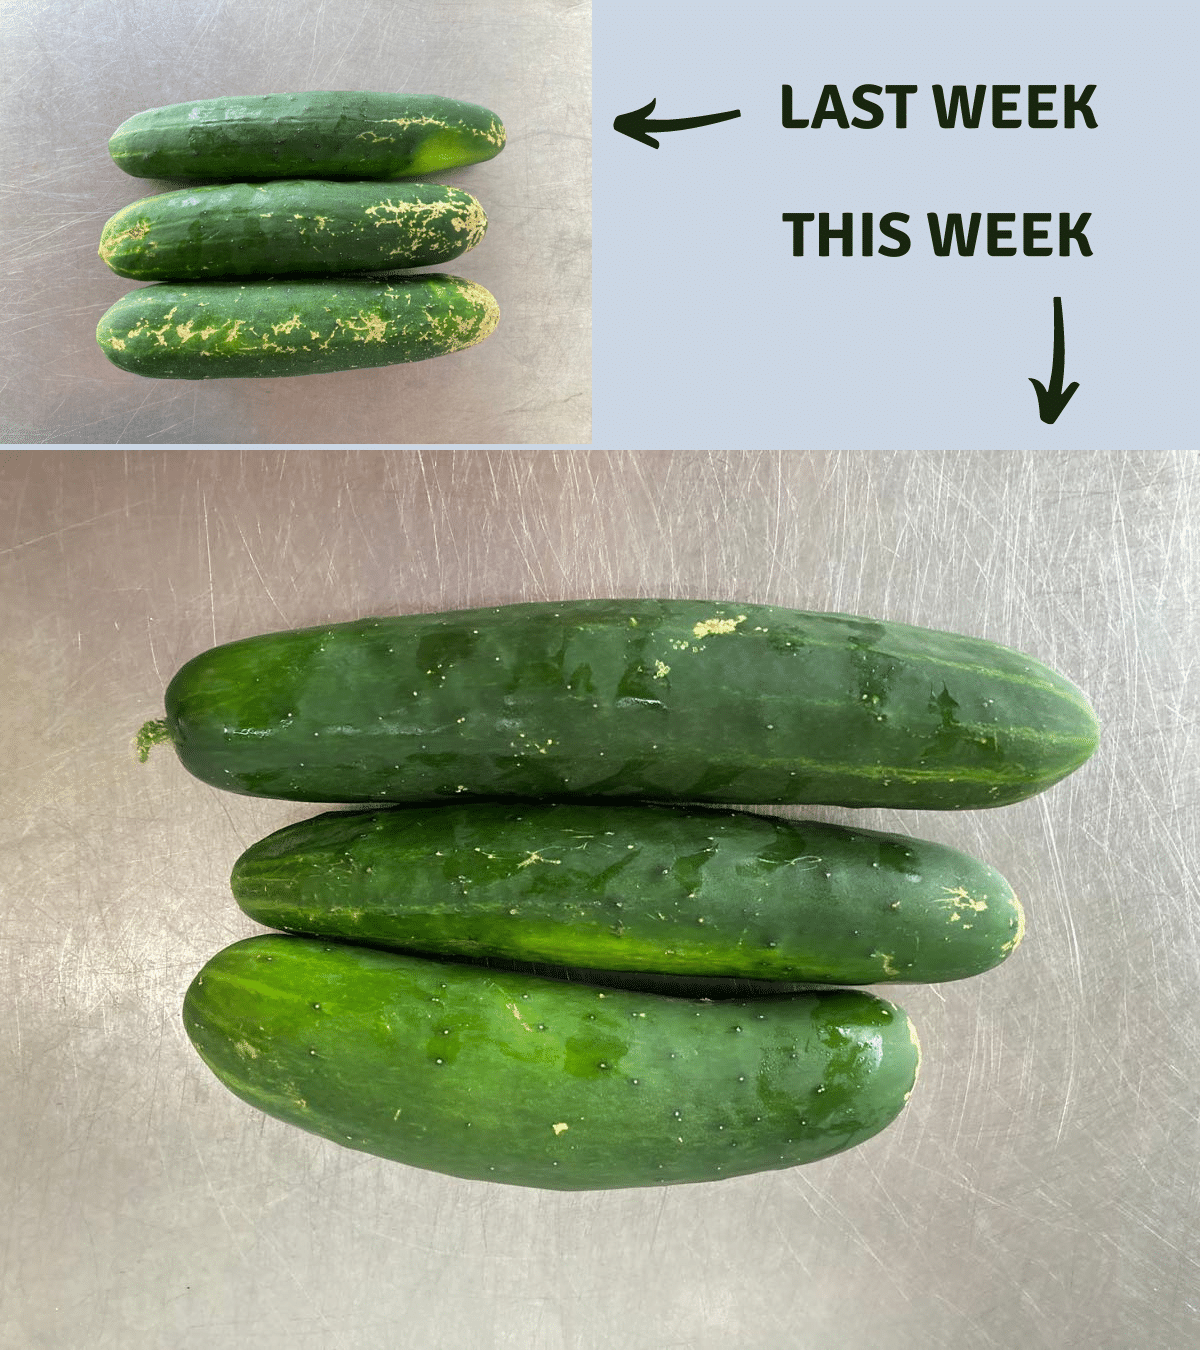
See? The cucumbers already look better, with less beetle damage.
RECIPES
Visit our 2020 Recipe Log or our 2019 Recipe Log or join our Facebook discussion group.
LOCAL THYME/ Cooking 101
Baked Eggplant Fries
Pasta Sorta Gricia
Basil Oil Grilled Crostini with Goat Cheese
LOCAL THYME/ Cooking 202
Creamy Polenta with Eggplant and Zucchini
Chicken Noodle Soup with Cannellini Beans and Kale Pistou
Basil Cucumber Buttermilk Dressing
LOCAL THYME/ Quick & Easy Meal
Olive Hummus, Basil, Cucumber, Zucchini, Carrot Wraps
RECIPES FROM LAUREN
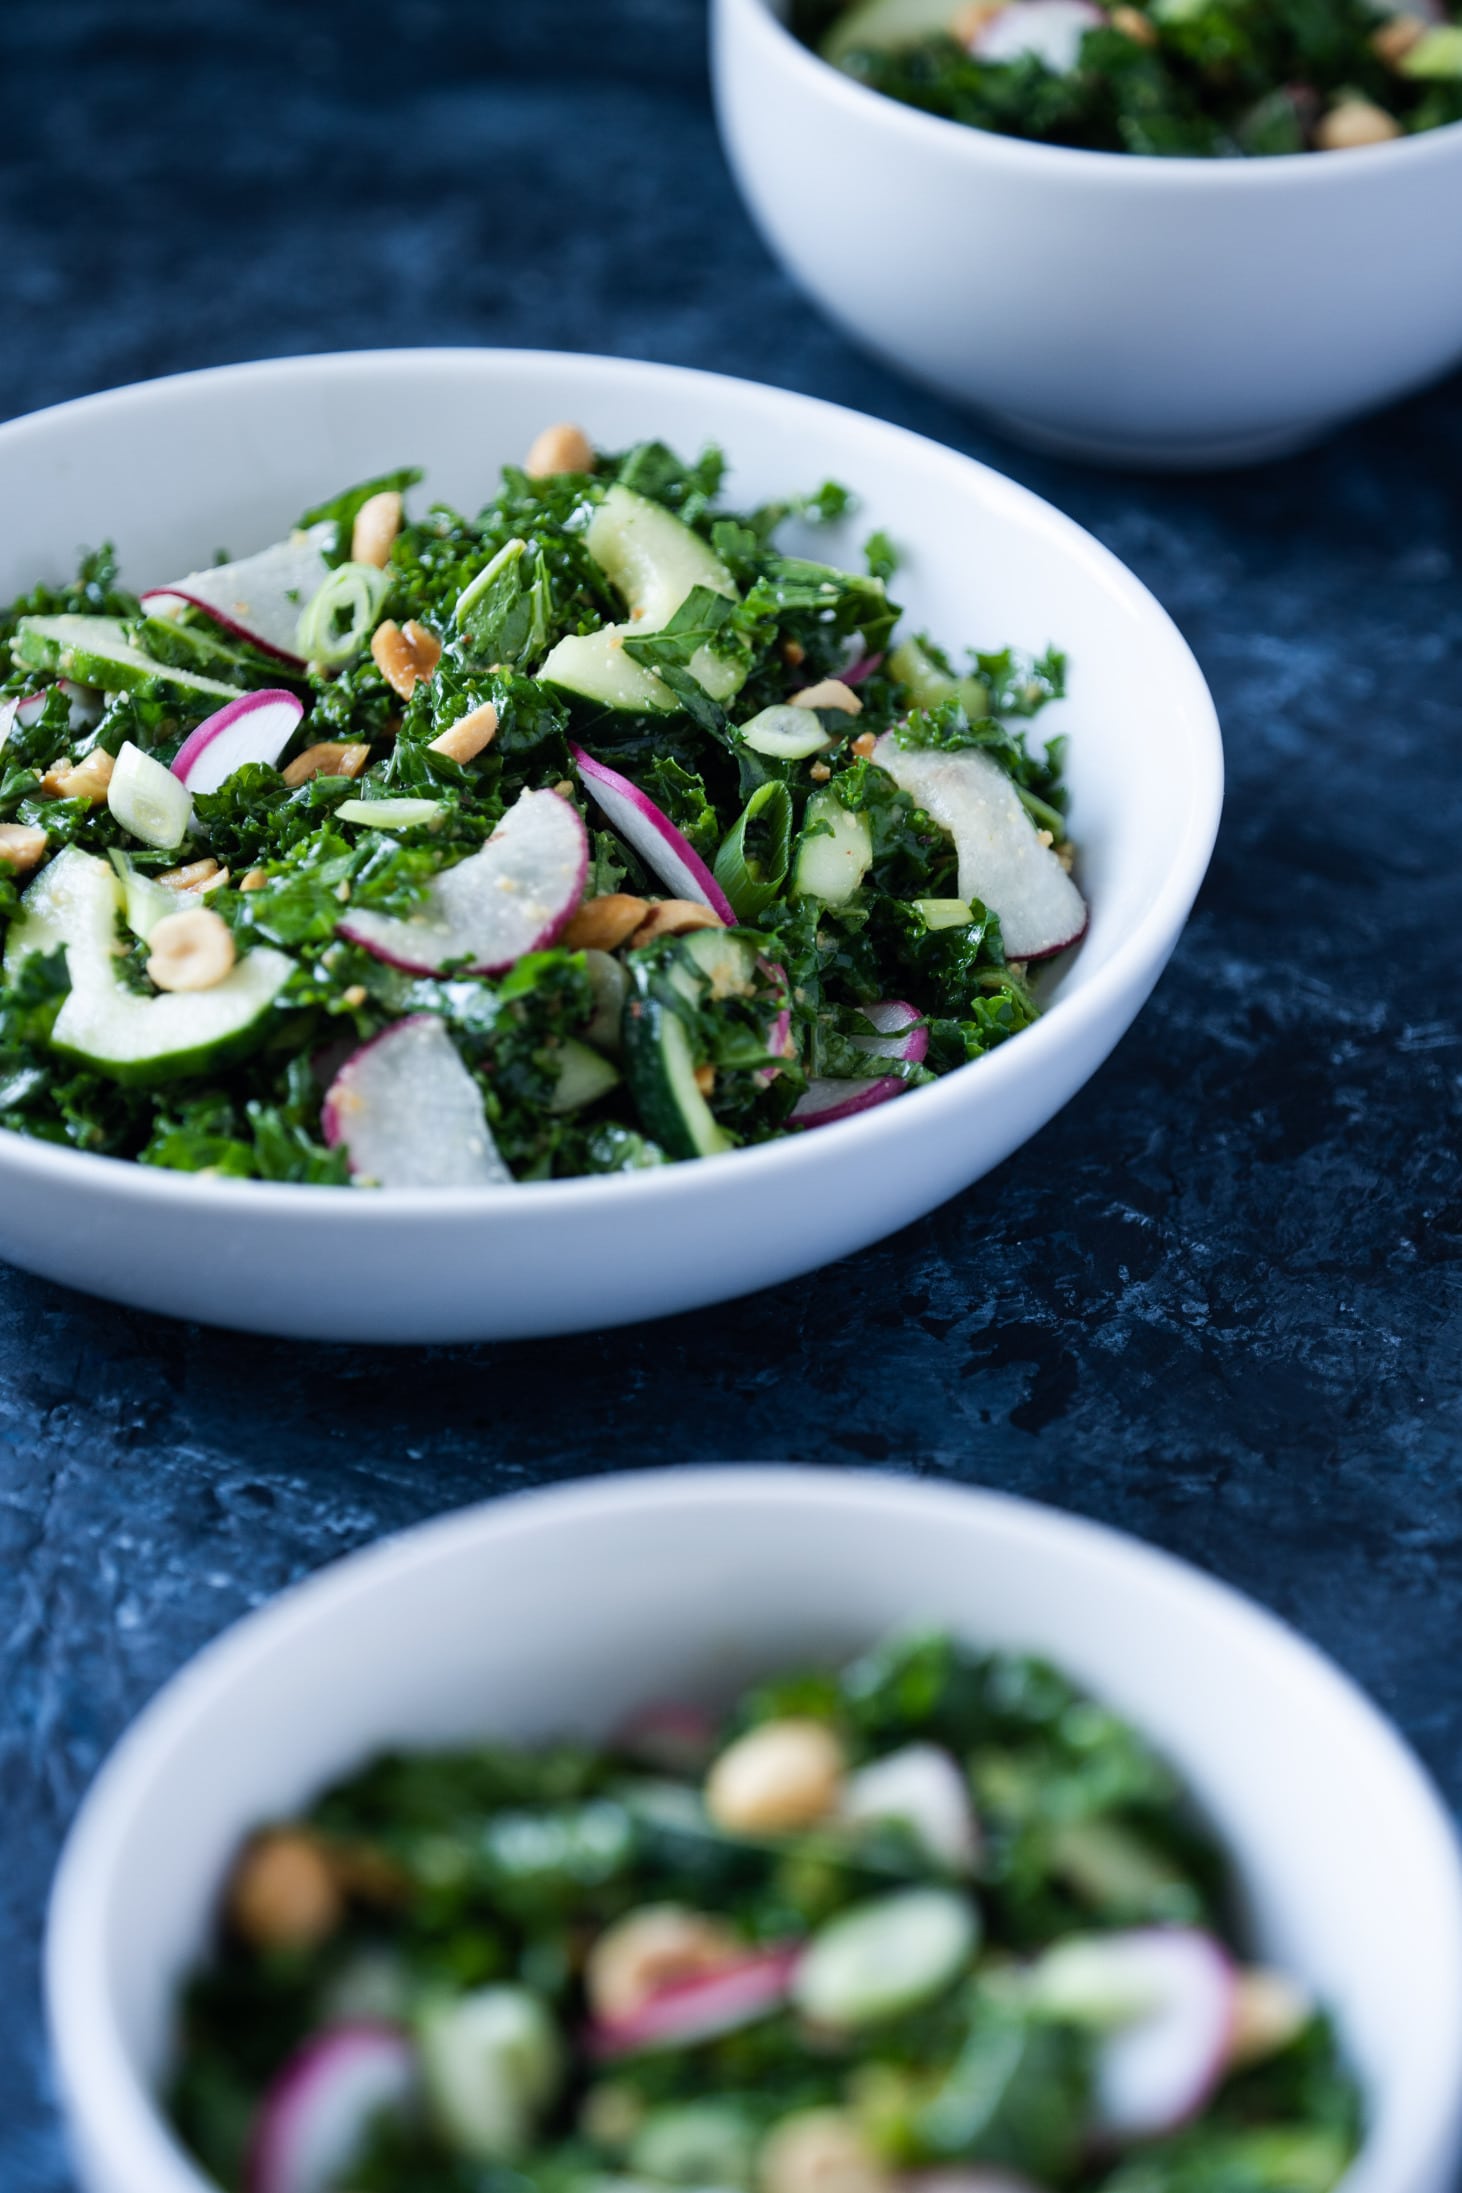
KALE PEANUT SALAD
Adapted from Martha Stewart
Depending on the season, I change up the veggies I use for this salad. The kale and the dressing are the powerhouse part of this meal and the rest is easily substituted so don’t worry if you don’t have any scallions or radishes on hand at the moment. I always use an onion of some kind– sometimes scallions as listed here, but at other times it’s thinly sliced yellow onion, leek or shallot. I usually use a root vegetable as well– sometimes radish, sometimes carrot, occasionally beets. Then I’ll add another veggie or two, again whatever I have on hand, cucumbers and bell peppers of any color are great. Really anything you like raw on a salad will work just fine.
1-1/4 cup roasted salted peanuts, divided
6 tablespoons vegetable oil
5 tablespoons apple cider vinegar
3 tablespoons brown sugar
1 teaspoon Kosher salt
1/2 teaspoon red pepper flakes
1 pound kale (or collards), ribs removed and very thinly sliced
1-2 cucumbers, seeded and sliced
1 Walla Walla onion, thinly sliced
- In a food processor, combine 3/4 cup peanuts, oil, vinegar, brown sugar, salt and red pepper flakes. Process until smooth. Taste and adjust seasoning as desired.
- In a large bowl, combine kale with the dressing, using half at first, tasting and adding more as you like. I often use the full amount for a pound of kale but you may not want to.
- Top with cucumber, onion and remaining 1/2 cup nuts. Serve right away or store for 2-3 days in your fridge. The kale can stand up to being dressed in advance.
.
????
.
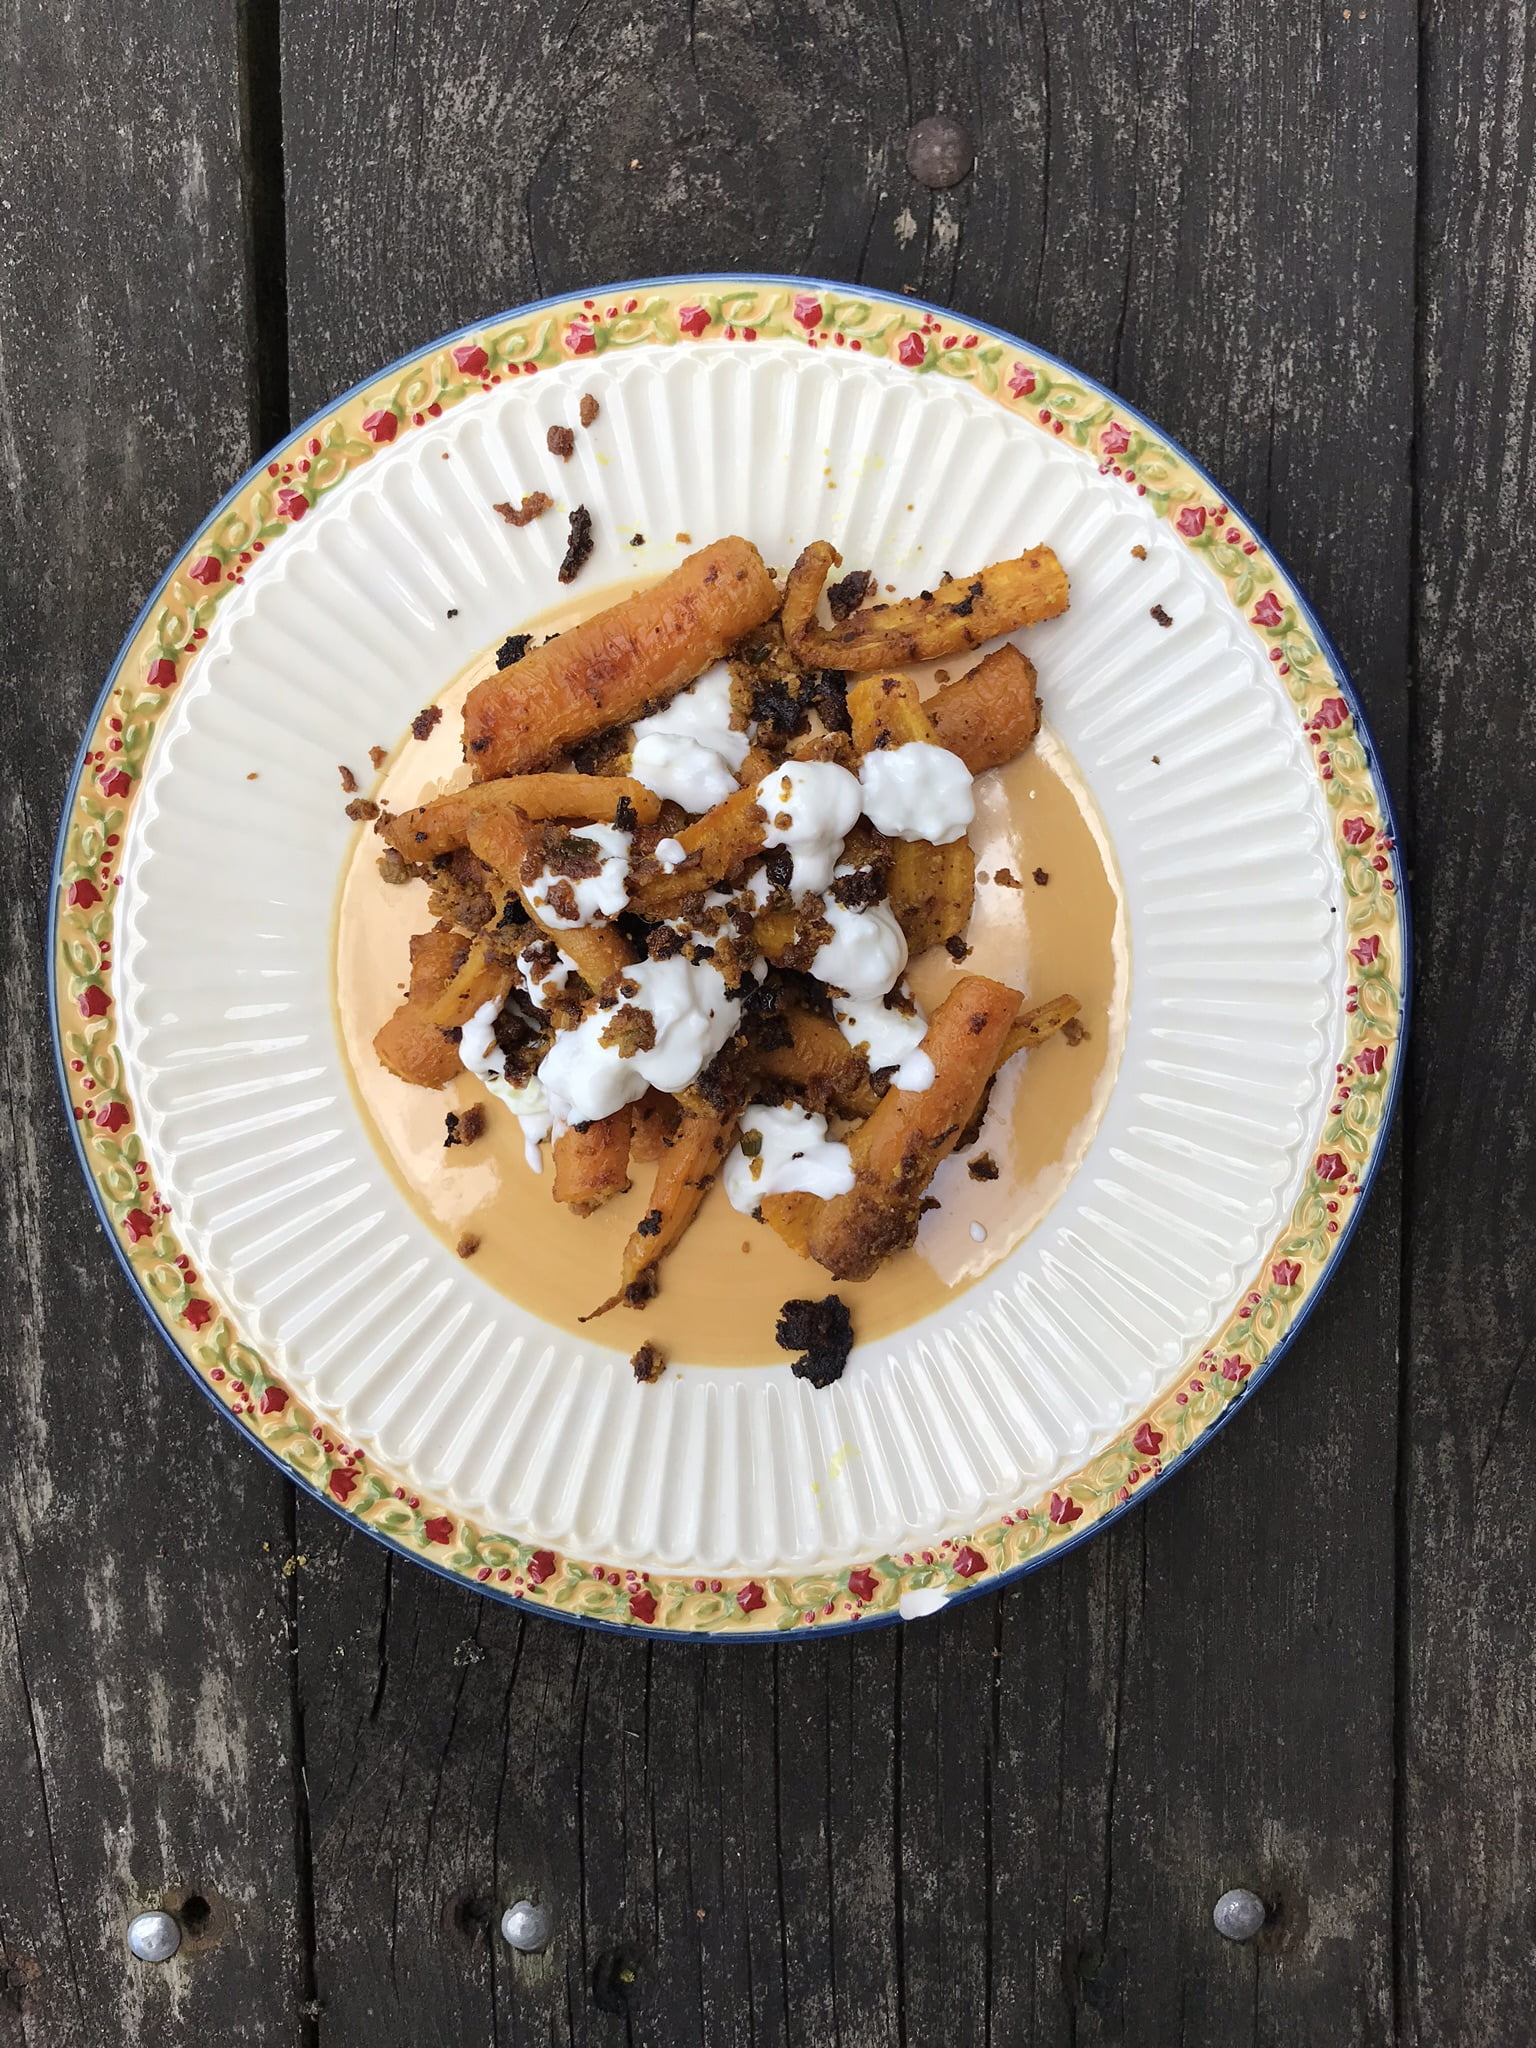
INDIAN-SPICED CARROTS WITH YOGURT
Adapted from Bon Appetit
Serves 2-4 (as a side)
Takes: 45 minutes
½ cup Greek yogurt, divided
1 tablespoon curry powder (preferably hot curry powder)
1-1/2 teaspoons onion powder
1-1/2 teaspoons garlic powder
2 garlic cloves, minced, divided
3 tablespoons olive oil
1 pound carrots, unpeeled, tops trimmed, cut in half if large
2 tablespoons lemon juice
Kosher salt and freshly ground black pepper, to taste
- Preheat oven to 450 degrees. Mix together ¼ cup yogurt, curry powder, onion powder, garlic powder, 1 minced garlic clove, and olive oil in a large bowl until smooth. Season well with salt and pepper. Add carrots and toss to coat. Roast on a baking sheet in a single layer, turning occasionally, for 30 minutes. You’ll want them to be lightly charred in spots and very tender.
- Meanwhile, whisk together lemon juice, remaining garlic clove and remaining ¼ cup yogurt in a small bowl. Season well with salt and pepper.
- Place cooked carrots on a platter (along with any crunchy bits left on the baking sheet). Drizzle with yogurt mixture. Serve warm.
- Or skip the platter and put all the carrots and yogurt on one plate and dive in (without sharing!).
.
????
.

BROCCOLI PESTO QUICHE
Makes 6 servings
Takes 1 hour
1 pie pan lined with pie dough (from scratch or store-bought)
1 cup finely diced broccoli
1 Walla Walla onion, thinly sliced
1 green pepper, diced
1 cup shredded cheddar or Gruyere cheese
1 tablespoon flour
3 eggs, lightly beaten
1 cup half-and-half, whipping cream or milk
1/4 cup prepared pesto (recipe below) or 1/2 cup finely chopped basil if you’re feeling less ambitious
1/4 teaspoon salt
1/8 teaspoon pepper
- Preheat oven to 425 degrees.
- Prick bottom and sides of crust and line with foil. Bake in preheated oven 8 minutes, remove foil, and bake another 8 minutes. Reduce oven to 325 degrees.
- Toss broccoli, onion, peppers, cheese and flour in a bowl. Spread mixture over bottom of crust. Whisk remaining ingredients in the bowl. Pour filling into crust. Bake until knife inserted near center comes out clean, about 35 to 40 minutes.
.
Basil Pesto:
3 tablespoons pine nuts (or walnuts or almonds)
1/4 cup shredded Parmesan
1 garlic clove
2 cups basil leaves
1/4 cup olive oil
Salt
Pepper
- Combine pine nuts, Parmesan and garlic in a food processor, blender or mortar and pestle. Process until finely ground. Add basil and process 20-30 seconds longer until combined. Remove to a small bowl and fold in olive oil. Season to taste with salt and pepper. Makes 1/2 cup.
.
Week #8, Other farmer friends made the same decision.
- On: July 08, 2020
- 2

Almost every cucumber has some level of insect feeding damage. Consider peeling your cukes, at least the sides with scarring.
A grower on our farmer listserv wrote that he missed the window to protect his zucchini seedlings with row cover, and that the cucumber beetles became unrelenting. That happened for us too, as well as other local farms. Steve replied with this explanation of why we didn’t get our usual row cover protection in place. Row cover is lightweight fabric that we use to cover fields in spring to capture warmth and exclude insects.
“We also are seeing very large numbers of cuke beetles this late spring. For many years we have transplanted zucchini, summer squash, cucumbers and melons into green plastic mulch and applied row covers within one to two days. This year we missed that window for covering, and were inundated with beetles. Why didn’t we cover right away? We didn’t have our drip irrigation set up; the main line got torn up last fall and we had yet to rebuild it. The hot sunny weather after transplanting made covering very risky – we’ve lost too many cucurbit plants by covering during hot spells without concurrent drip irrigation. Also, we finished transplanting on a Friday evening– 2 hours after our usual quitting time. By Monday morning, when our crew returned, it was too late.”
Sometimes a tweak of the weather has unplanned consequences. We worked late that Friday night to get the zucchini planted before a rain storm and this was the outcome. It’s interesting to learn that other farmers’ decision-making converged in this way.
We’ve begun harvesting both zucchini and summer squash so clearly the crops survived. Green zucchini harvests are low for now; a few varieties were particularly hard-hit by the beetles. The cucumbers have a lot of insect scarring; they are the beetles’ favorite host. Let’s wait and see if the scarring abates once there are more cucumbers in the field to spread the beetle damage.
Our crops (and weeds!) grow 50% faster in weather this hot.
Can we work 50% faster?
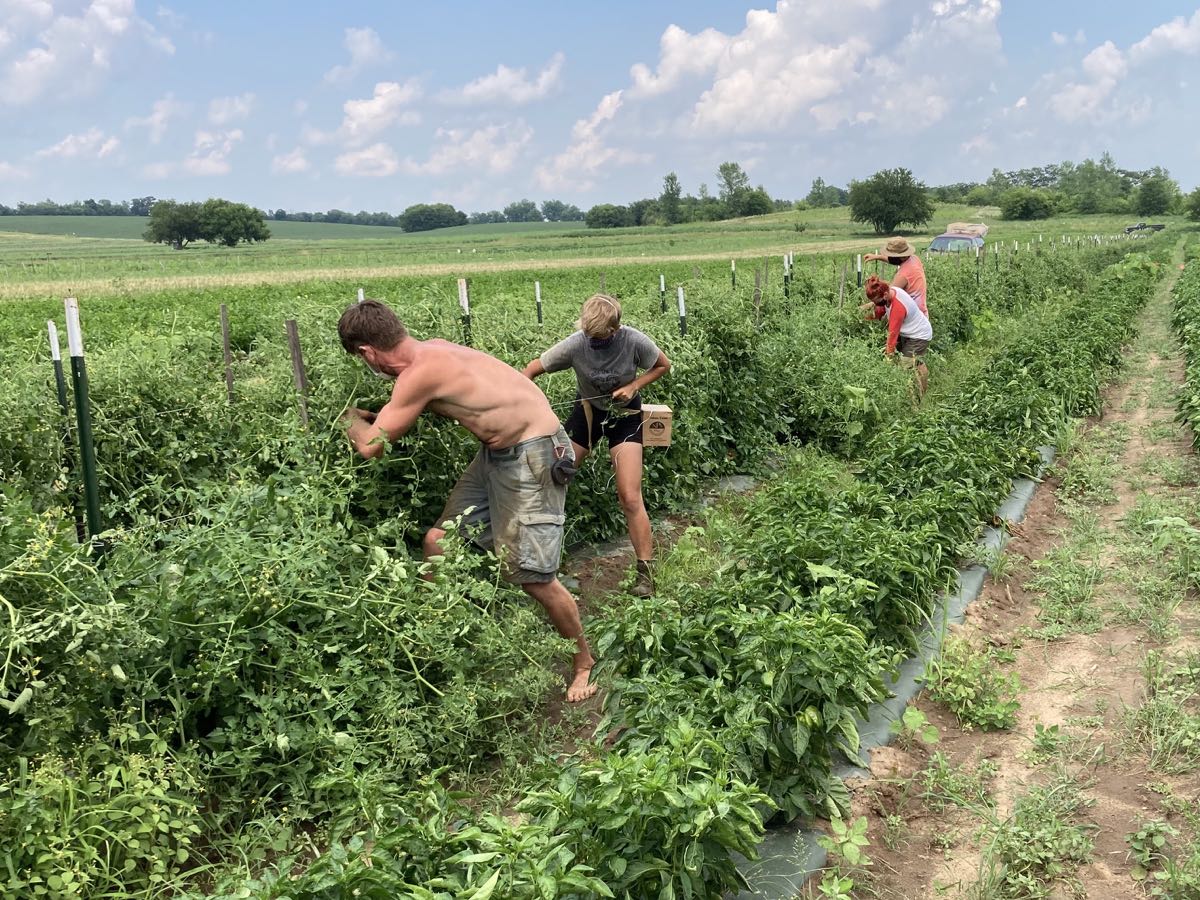
Obviously not. Our work is very difficult in the ridiculous heat. We need lots of water and Gatorade and more breaks in the shade than usual. In the photo, Billy, Demi, Courtney and David trellis tomato plants. The tomato growth rate has been astonishing and the plants got tossed over during recent storms. One person gathers the plants while the other person weaves string around them in a supporting figure-eight pattern, tied to the stakes. With this dastardly job, we can’t even take off our masks because we’re working so close together. Otherwise, masks are off whenever we can work far apart outside.

Our heavy barn fans save the day. We bought several to dry garlic in our barn loft. Now we use them for ventilation and to cool our work spaces. They are so, so great.
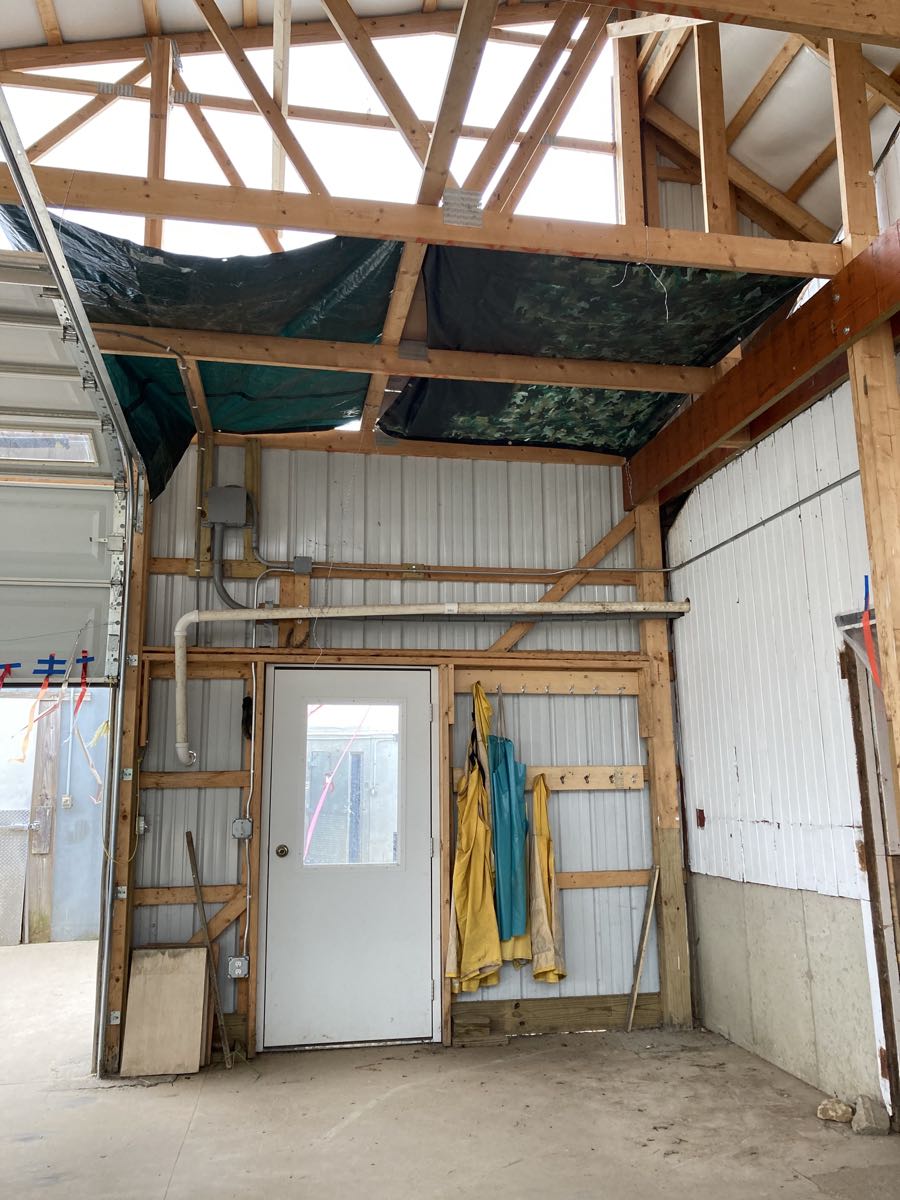
We suspended tarps over a corner of the pack shed. We appreciate the light from our tall peaked roof but the sun is too much for us right now.
Veggie List & Veggie Notes
Week #8, July 9/10, 2020
– Weekly shares
– EOW/ purple
– Sampler/ moon
Sugar snap peas, 2 1/4 lb
Cucumbers, 4
Zucchini or summer squash, 2 to 2.5 lb
Red bibb lettuce
Green bell pepper, 2
Broccoli, a few heads
Basil, 1 – 2 large sprigs
Garlic scapes, 1 small handful
Some sites get 1 sunflower, for beauty.
Next week’s box will probably contain cucumbers, zucchini &/or summer squash, Walla Walla onion, basil and more.
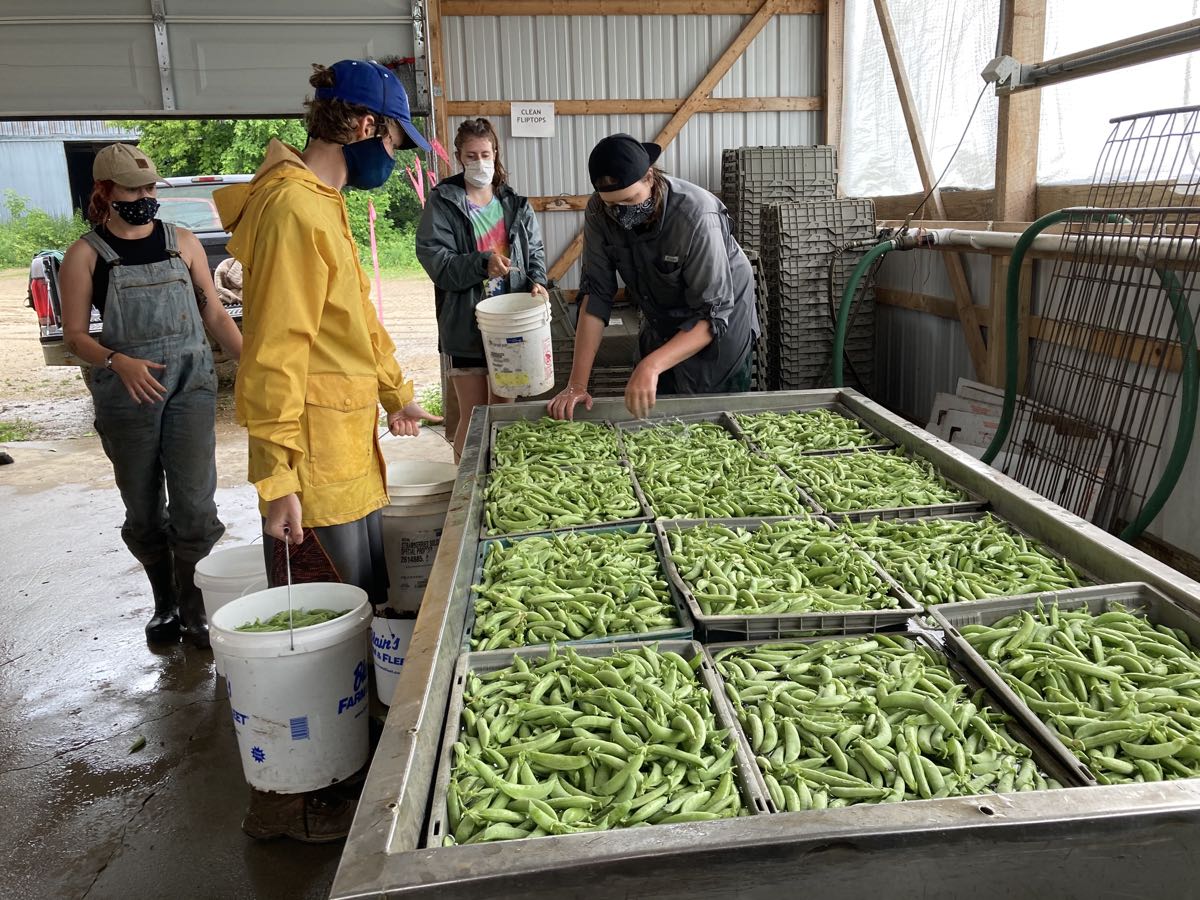
Sugar snap peas – This has been an amazing pea season, despite the heat. Enjoy this huge bag.
Cucumbers – I bet you all know what to do with cucumbers.
Storage: Cucumbers need refrigeration but do best at about 48 F. Store in a warmer part of your fridge – that’s the best compromise.
Green bell pepper – The first of the season!
Basil – Yum, the first tender basil, perfect to combine with garlic scapes, zucchini, snap peas, etc.
Storage: Basil will blacken if stored in the refrigerator. It is best stored at room temperature with the cut ends in water, for example in a jar or vase. Treat it like a flower. Give the stem a fresh trim and change the water every day or two.
Garlic scapes (curly green things) – Use scapes as a substitute for garlic cloves. They can be minced, mixed with olive oil, and added to stir fries or simple pasta dishes. The scapes can be sautéed, but will not brown like garlic cloves. Expect them to retain their crunch even when cooked, and to be milder than garlic cloves, closer in pungency to the green garlic we’ve sent.
Sunflower (for some sites) – We continue experimenting with sunflowers. They are one of the few flowers that we can send in the CSA boxes. This cheerful variety ‘Vincent’s Choice’ does not produce pollen, making it a good choice to pack with vegetables. The sunflowers are for beauty and joy, not to eat!
Storage: Trim the stem and place in water. If you re-trim the stem and change the water a few times, the flower should last about one week.
Everyone gets one or two branched sprigs of basil.
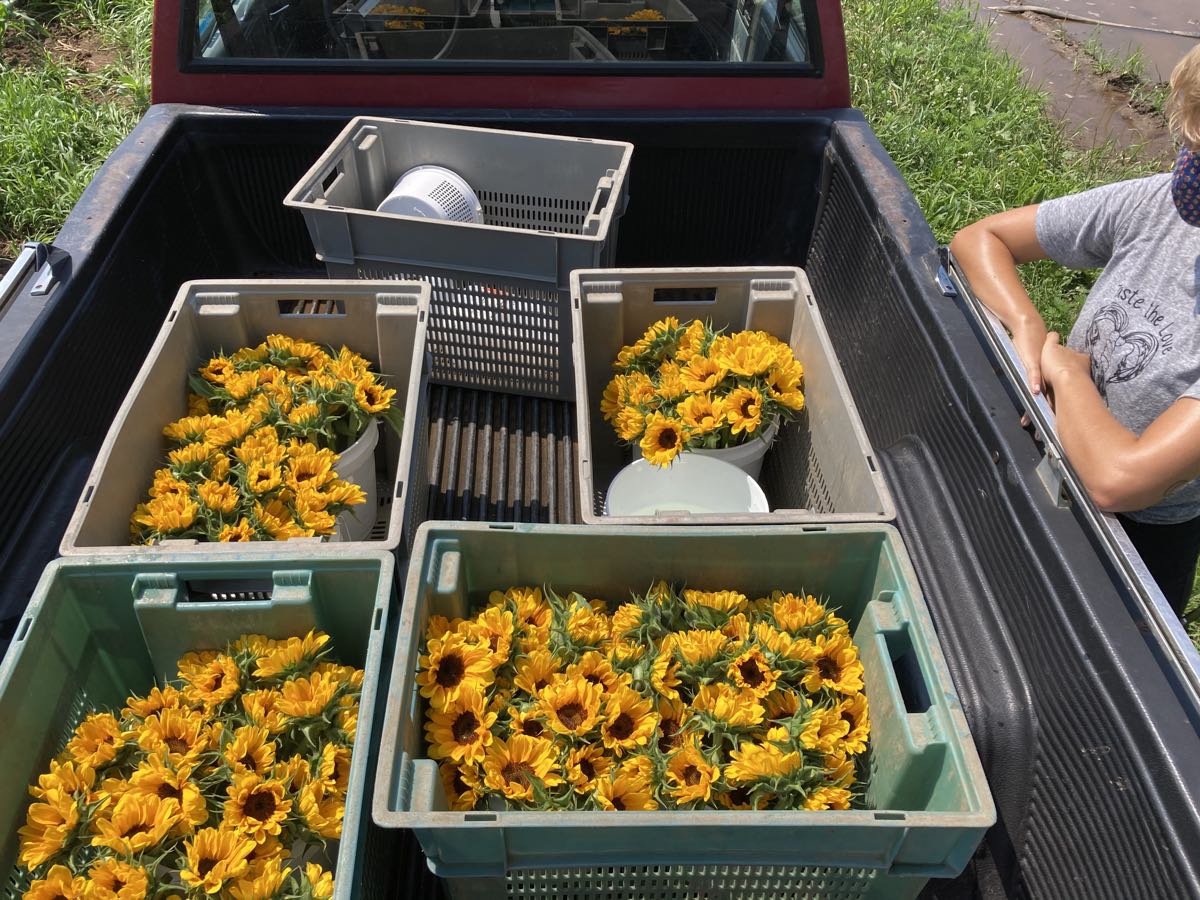
A load of sunflowers, with Demi.
RECIPES
Visit our 2020 Recipe Log or our 2019 Recipe Log or join our Facebook discussion group.
LOCAL THYME/ Cooking 101
Broccoli Pesto
Broccoli, Cucumber and Pepper Salad with Sesame
LOCAL THYME/ Cooking 202
Broccoli Sausage Strata
Thai Pickled Cucumber
Quinoa Salad with Snap Peas, Garlic Scapes, and Zucchini
LOCAL THYME/ Quick & Easy Meal
Broccoli Pesto Flatbreads with Grilled Zucchini
RECIPES FROM LAUREN
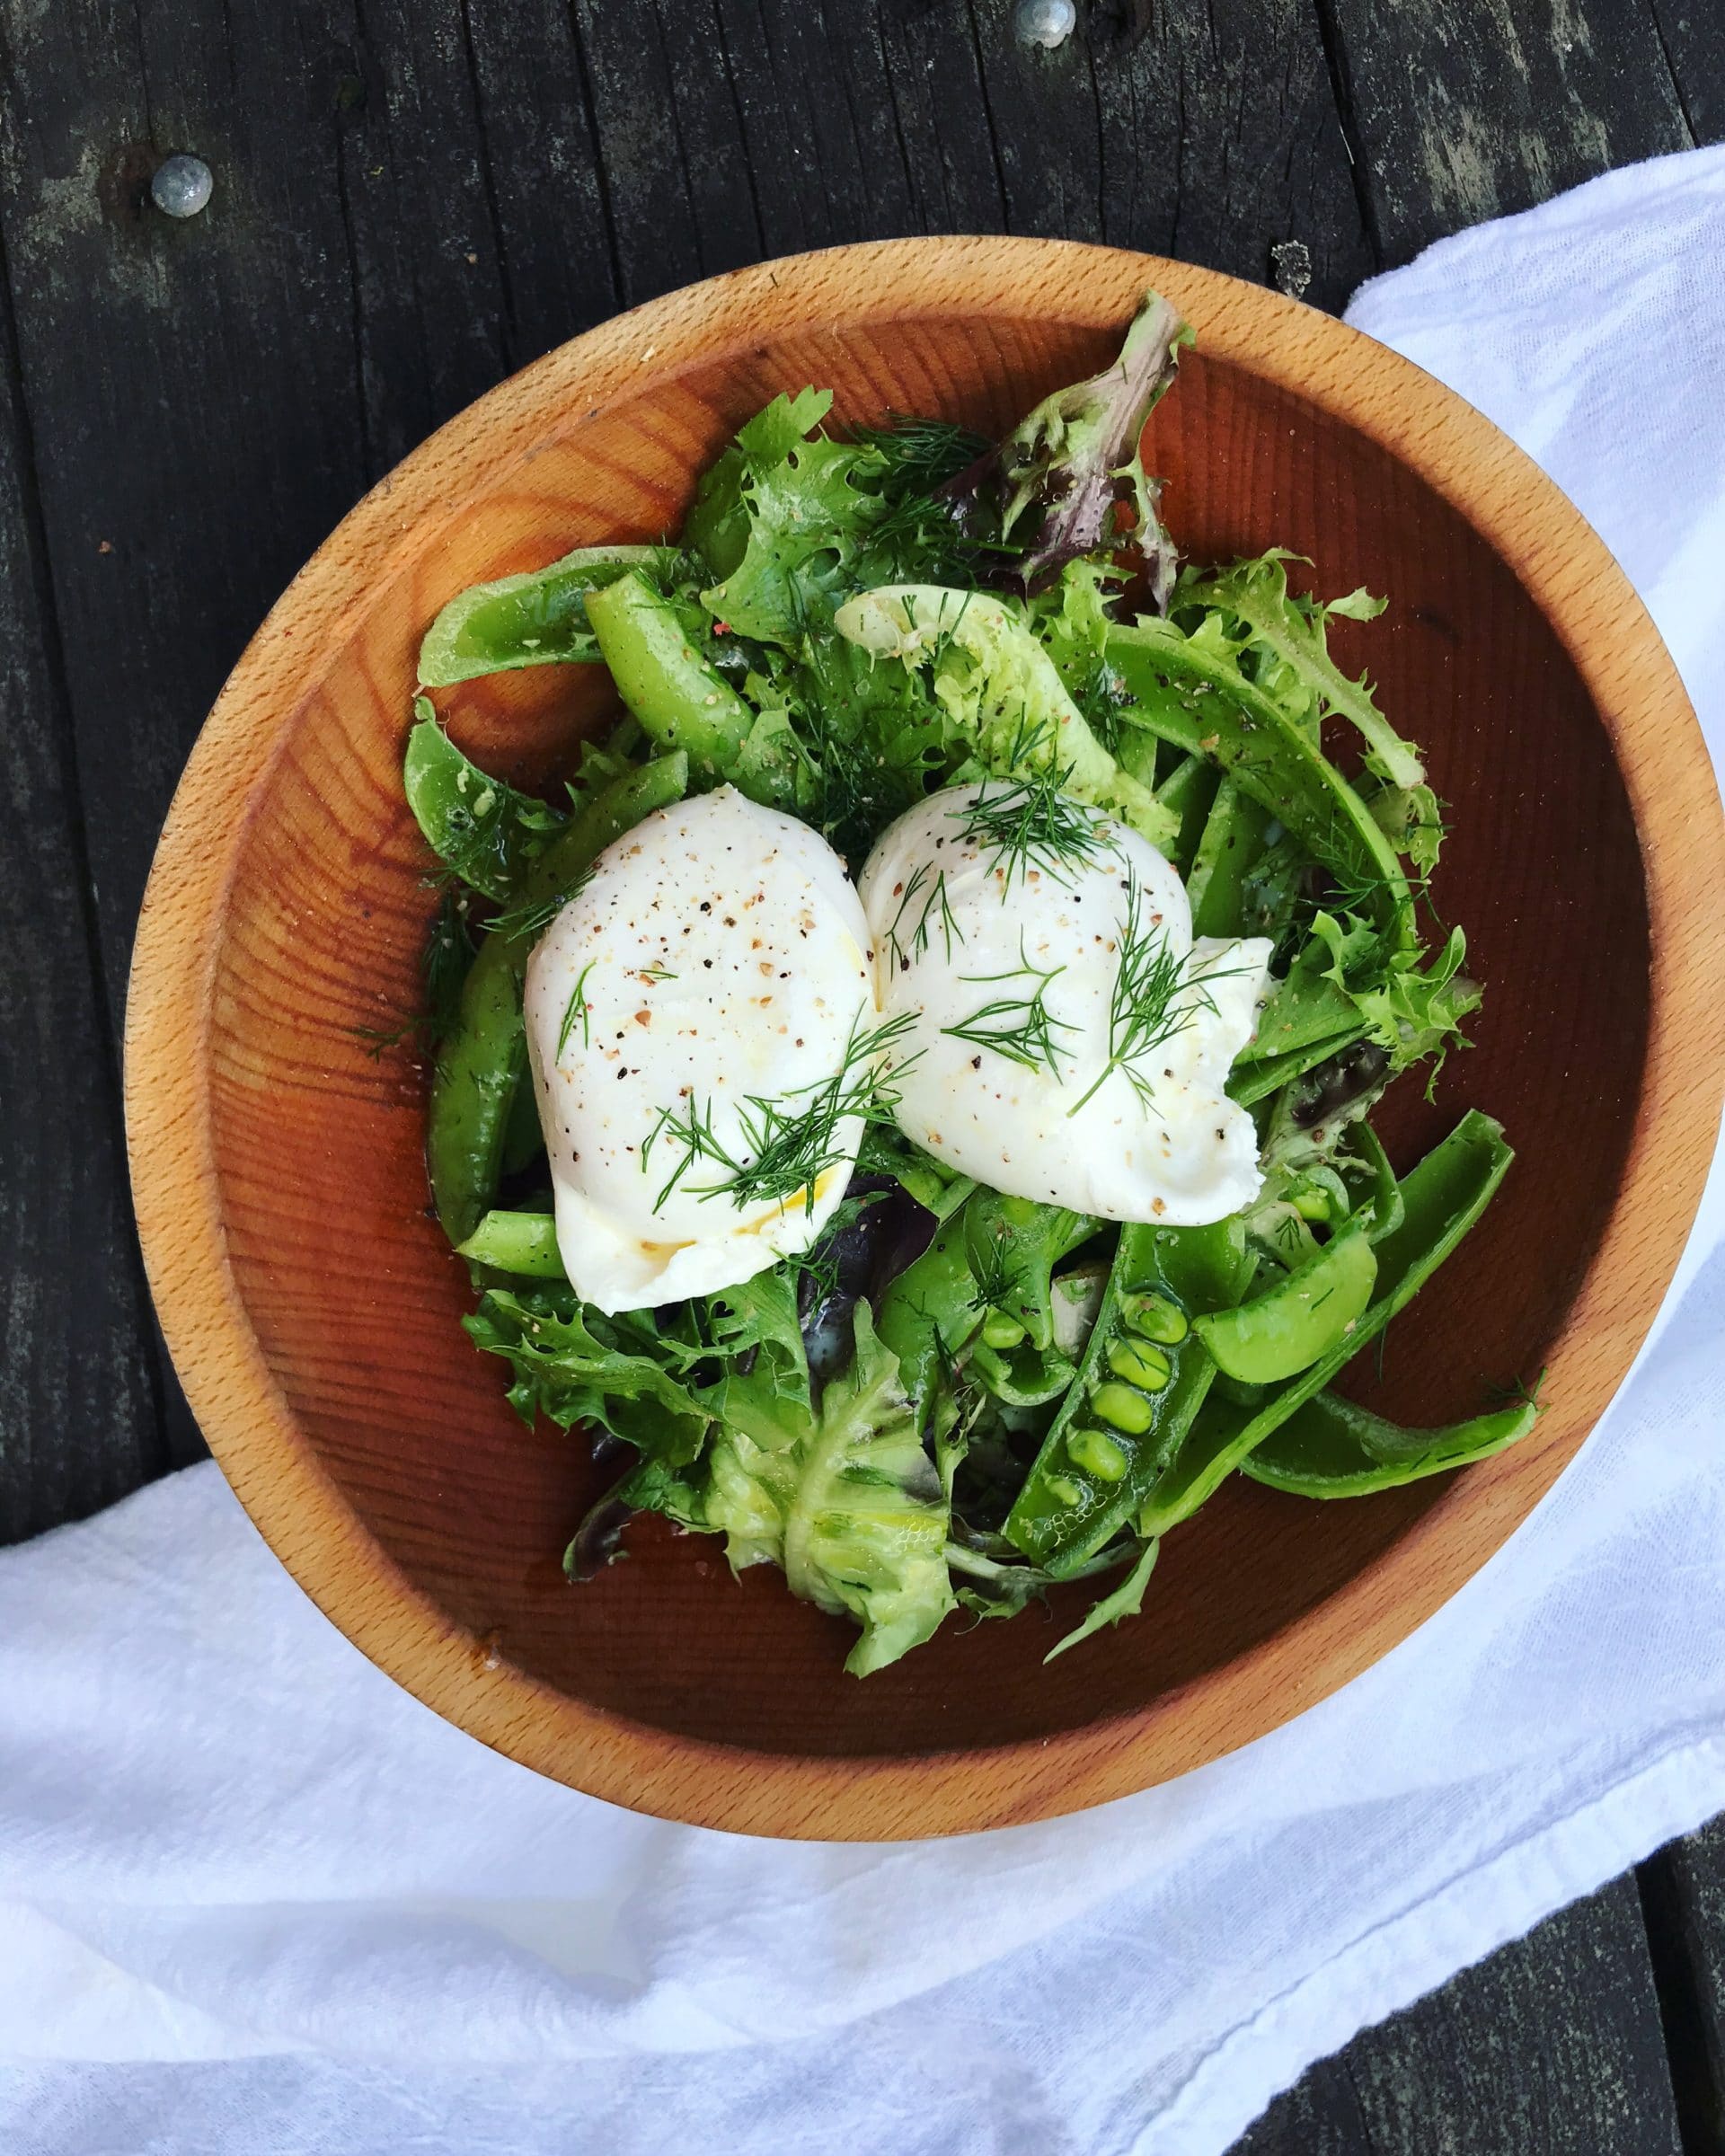
SNAP PEA SALAD WITH BURRATA
Takes 15 minutes
Serves 2-4
1-2 pounds snap peas (as many as you are willing to spare), cut in half lengthwise
1 head lettuce, leaves torn
3 tablespoons olive oil
2 tablespoons lemon juice
Kosher salt
Black pepper
1 (8 ounce) ball or 2 (4 ounce) balls fresh burrata
1. In a large bowl, toss snap peas (cut in half lengthwise) and any peas that fall onto your cutting board with lettuce.
2. Drizzle with olive oil, lemon juice, a good pinch of Kosher salt and several grinds of freshly ground black pepper. Toss to combine. Taste and adjust seasonings as desired.
3. Serve with burrata and a few more grinds of pepper.
.
????
.
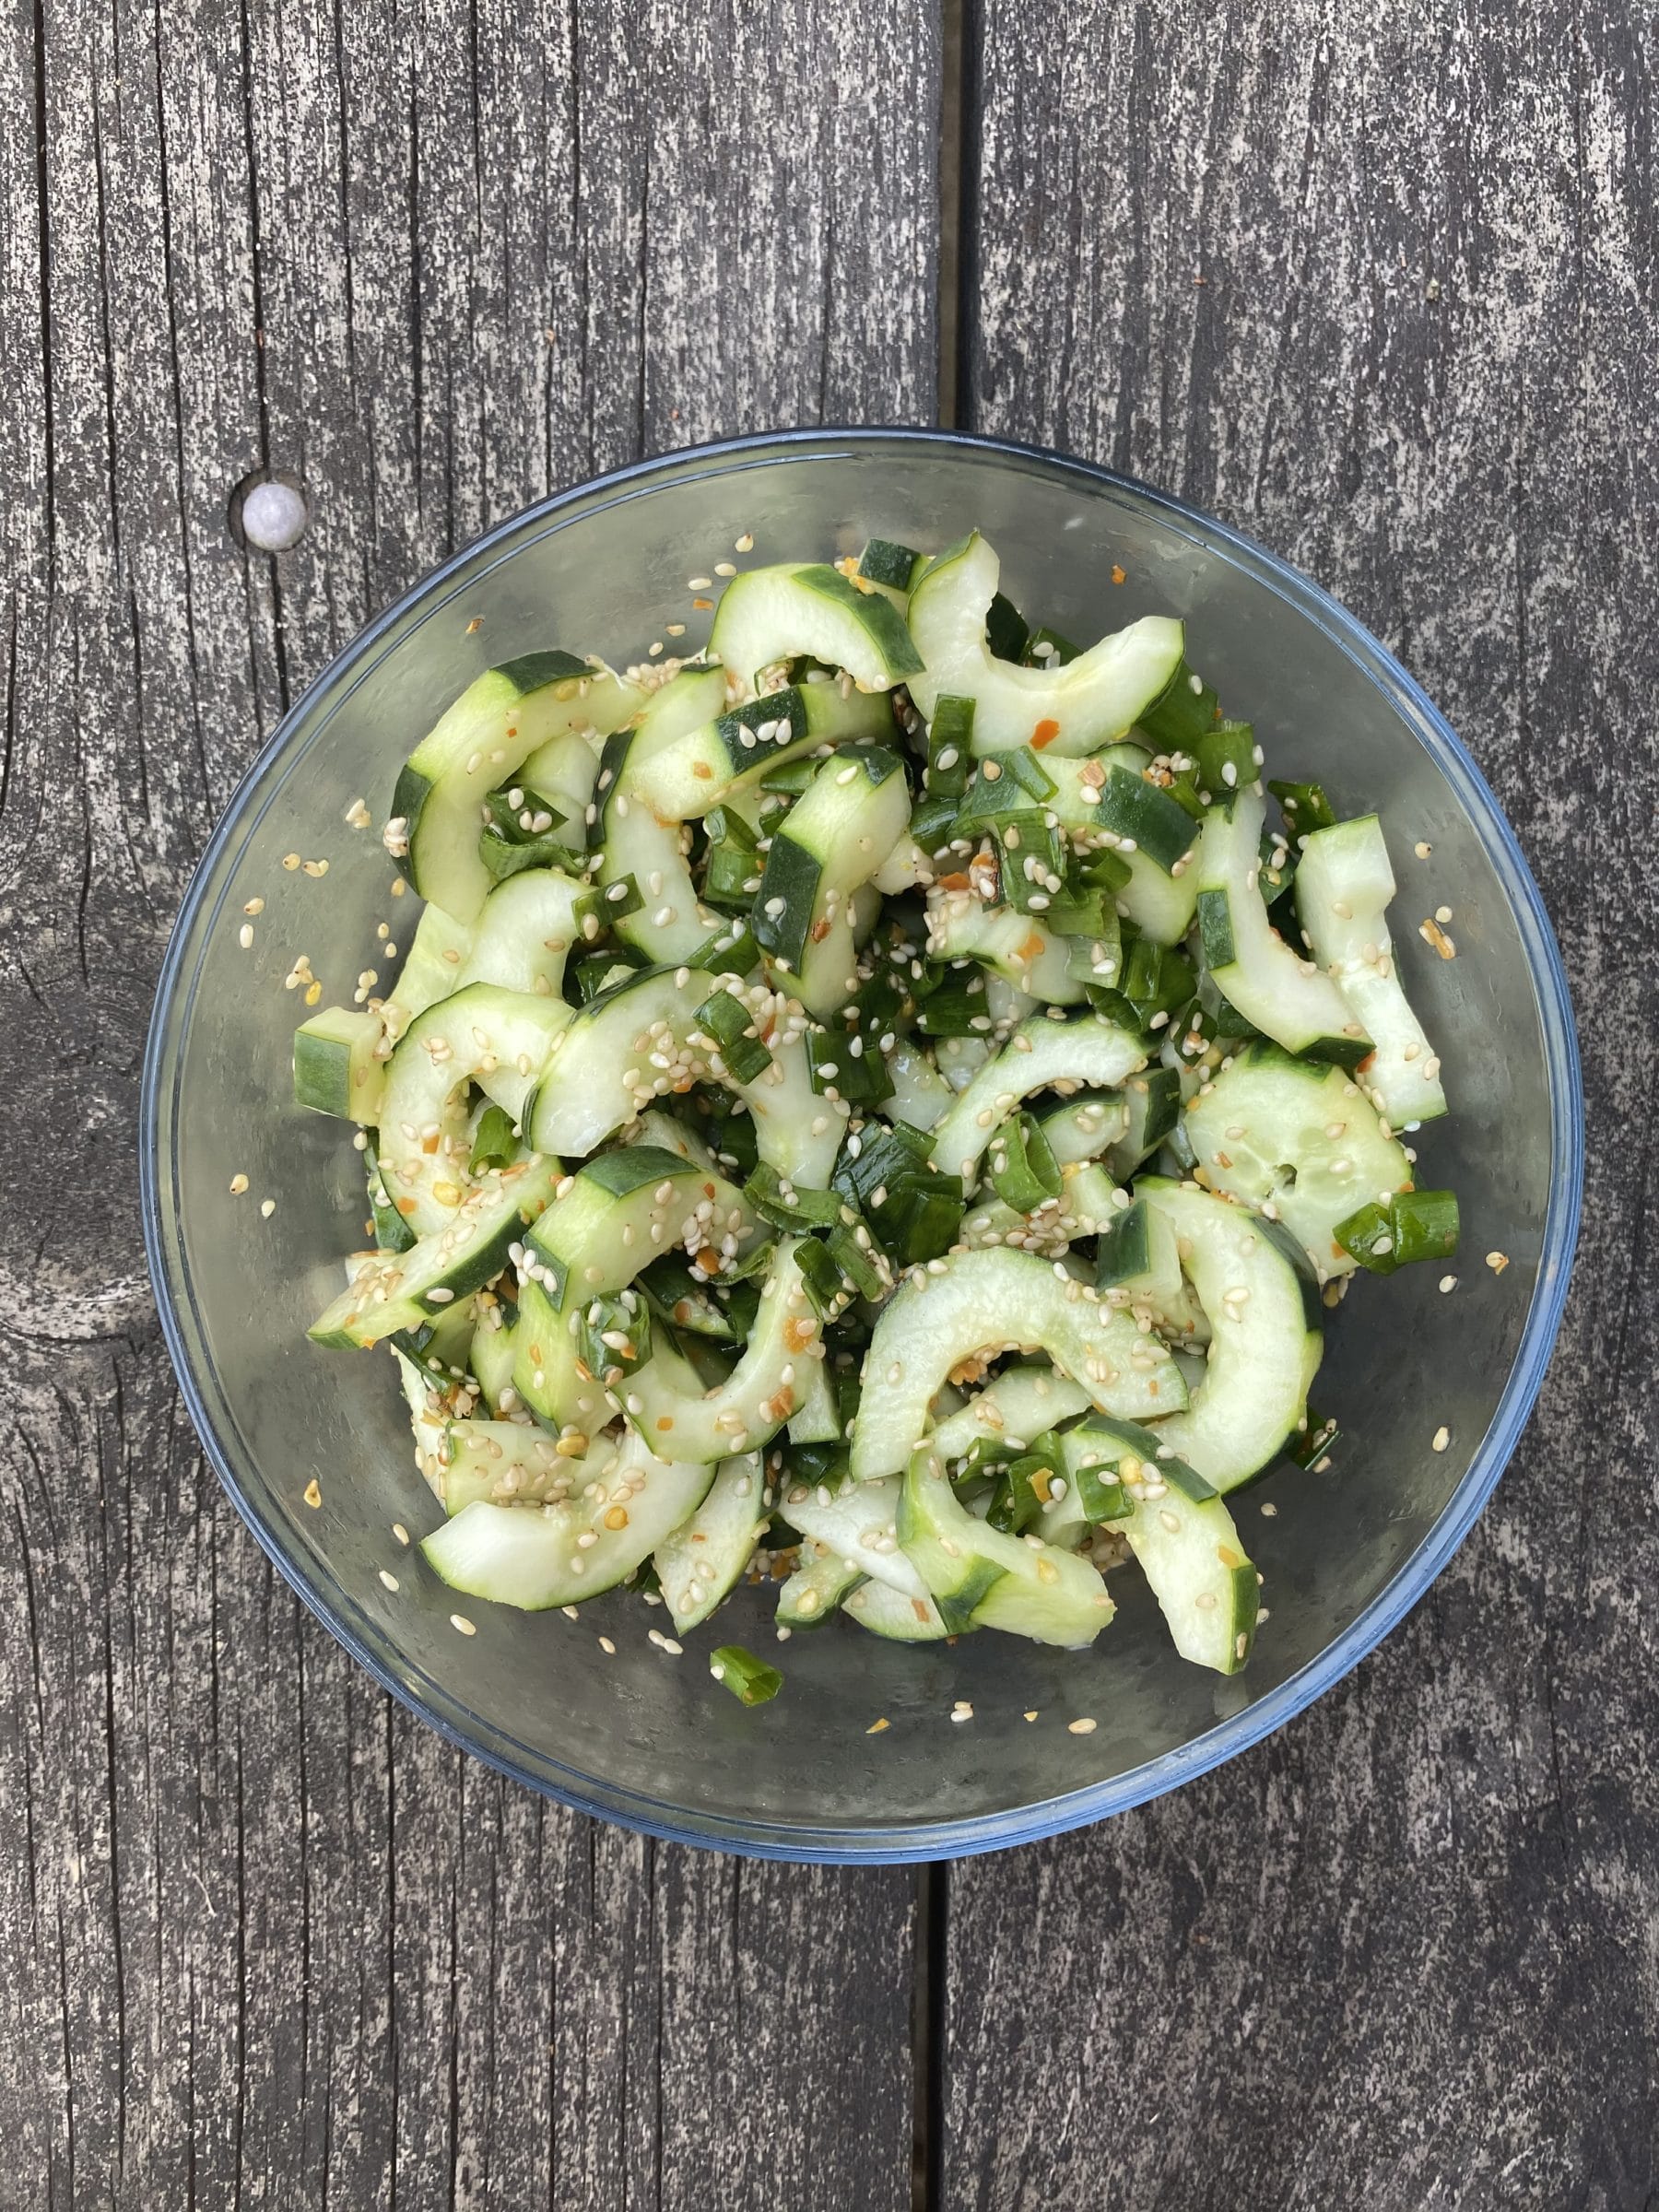
CRUNCHY CUCUMBER SALAD
Takes 10 minutes
Serves 2-4
3 cucumbers, halved lengthwise and seeded
1 tablespoon rice wine vinegar
1 tablespoon olive oil
2 tablespoons sesame seeds
1 teaspoon sugar
1/2 teaspoon red pepper flakes
1/4 teaspoon Kosher salt
1. Combine all ingredients in a medium bowl. Toss to combine. Eat at room temperature or chill before serving. It will get a bit soggier than longer you wait to eat it, but still taste delicious.
.
????
.
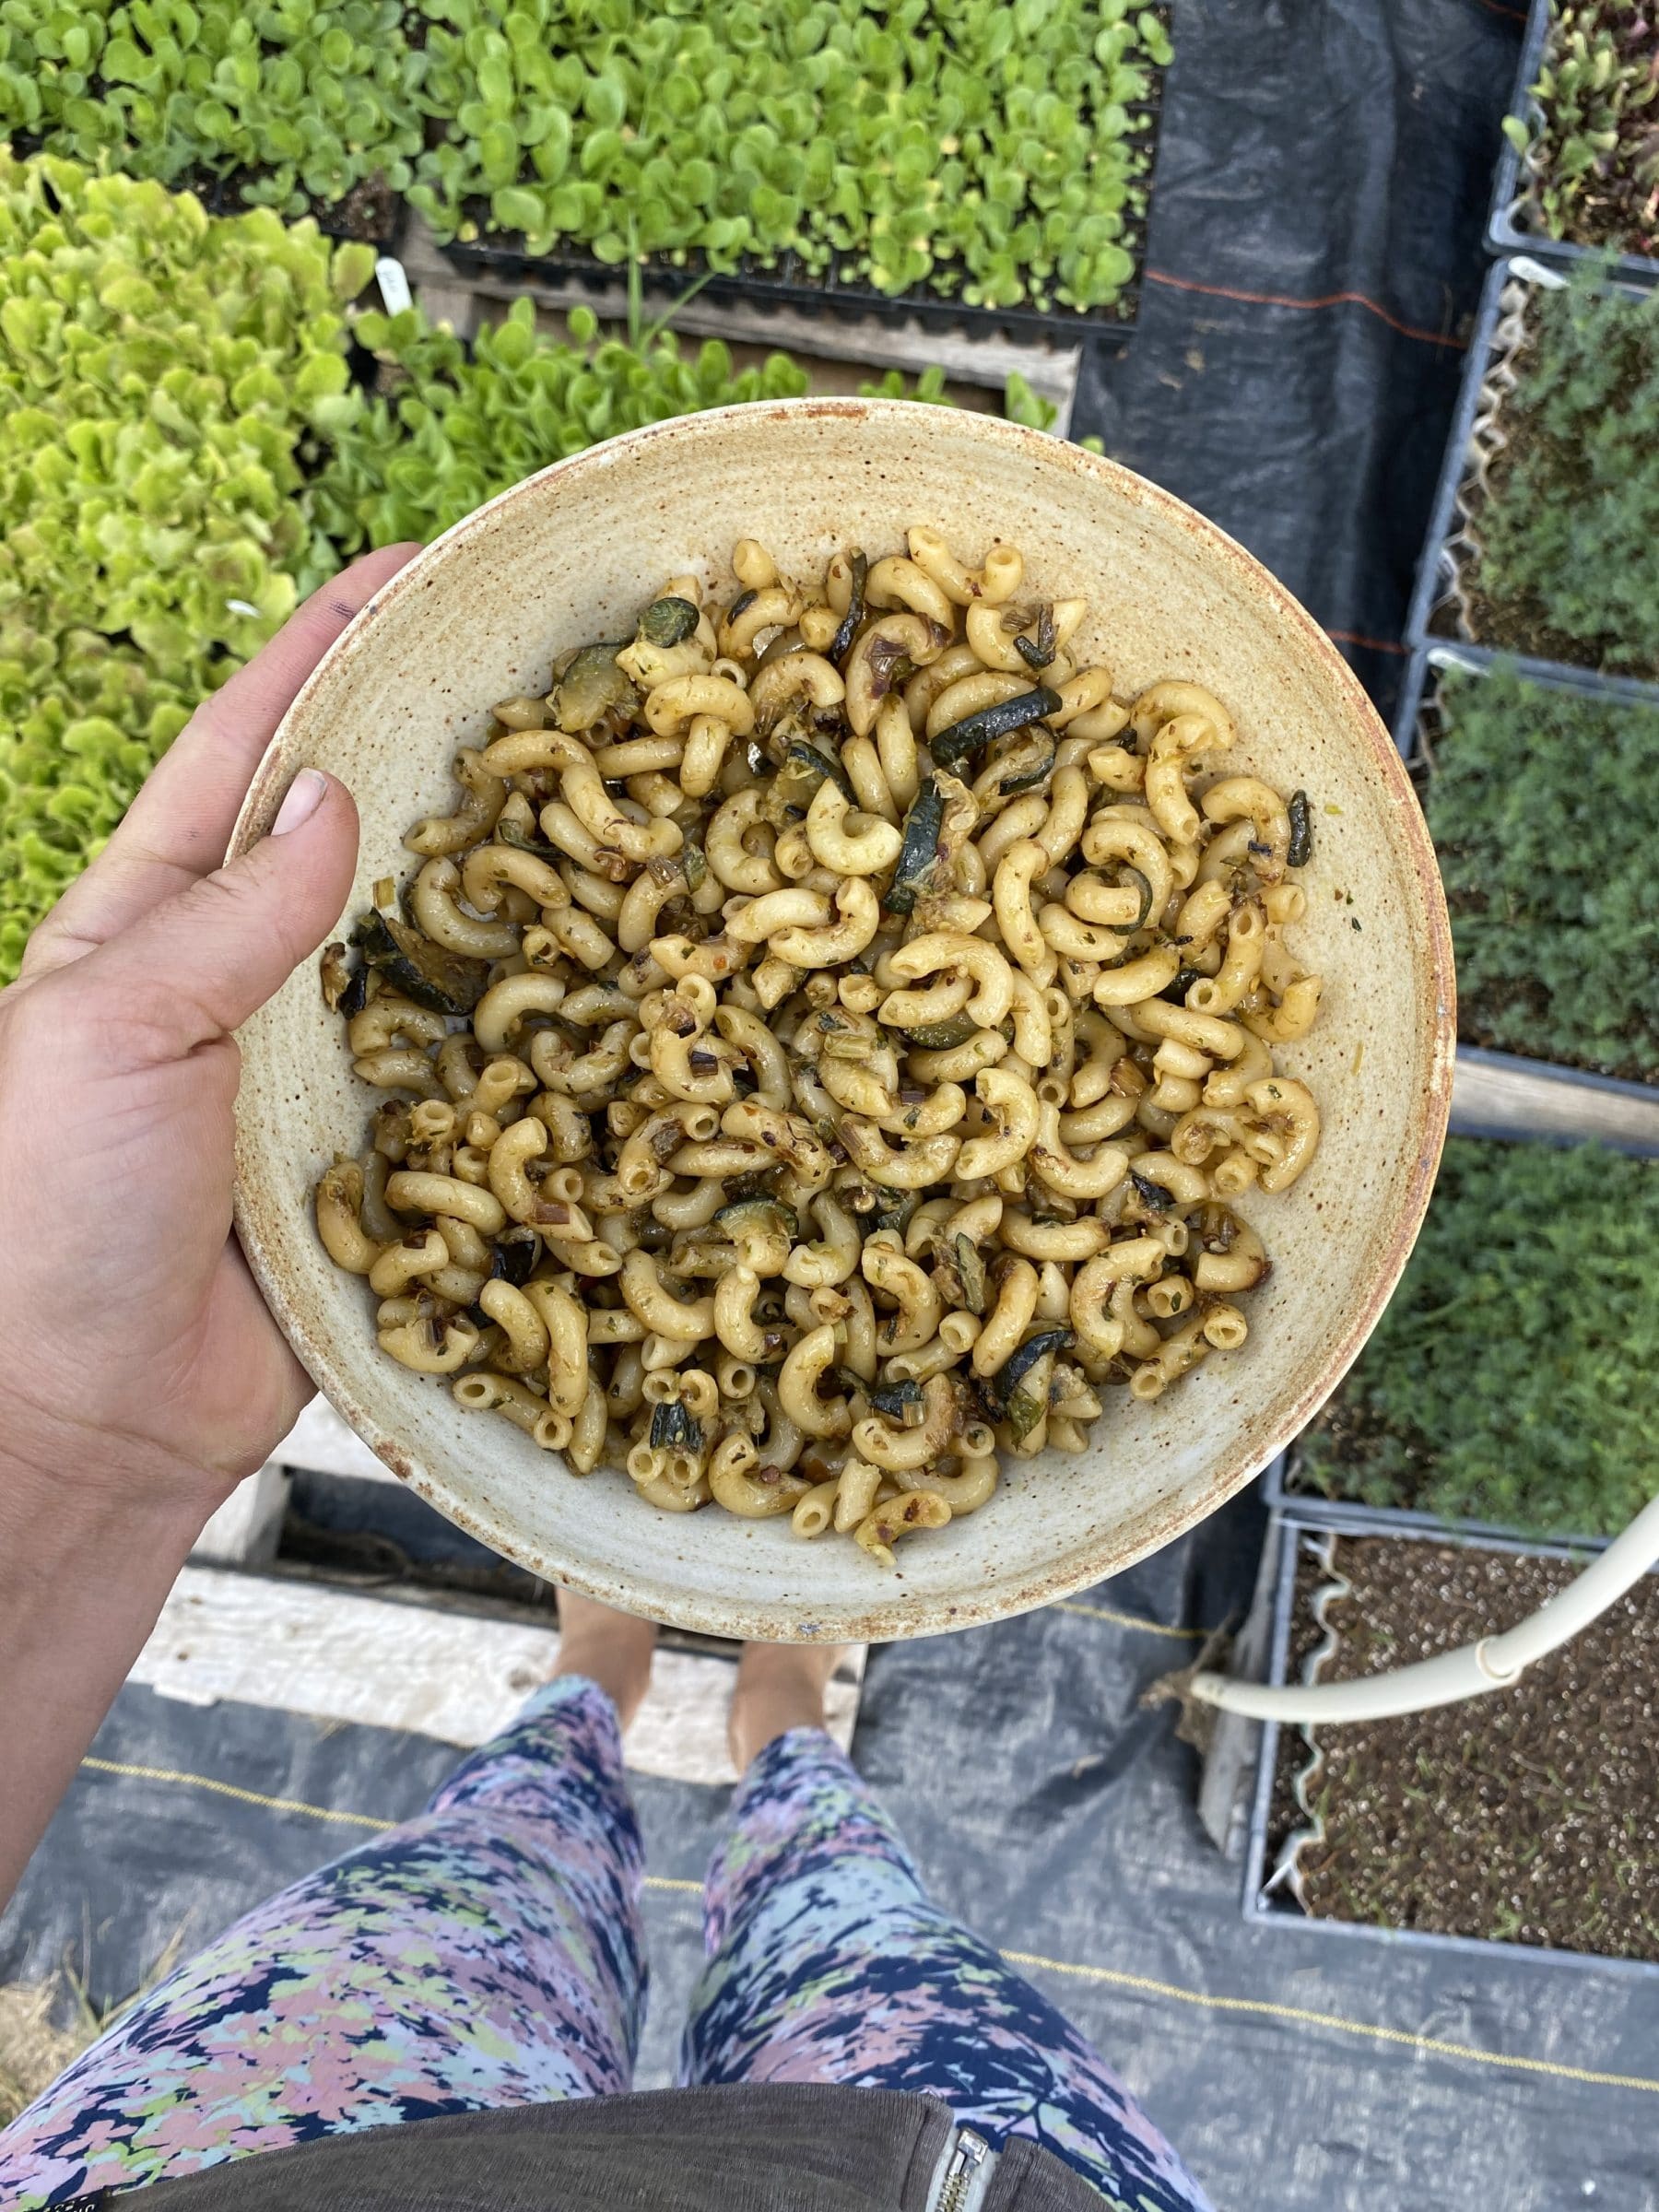
JAMMY ZUCCHINI PASTA
Takes 40 minutes
Serves 4-6
1/4 cup olive oil
1 bunch garlic scapes, thinly sliced
2 green peppers, diced
2 pounds zucchini, quartered lengthwise and sliced
1/2 teaspoon red pepper flakes
12 ounces pasta of your choice (ziti or elbows work great)
2 ounces Parmesan, finely grated
1/4 cup basil leaves
- Heat oil in a large skillet over medium heat. Cook garlic scapes until lightly browned, about 5 minutes. Add peppers and zucchini. Increase heat to medium high and sprinkle mixture with salt (about 1/2 teaspoon). Let it cook until the zucchini begins to break down then turn heat to low. Continue cooking and stirring until squash is jammy and soft, about 15 minutes. It will stick a little bit. Don’t worry about that. Add pepper flakes.
- Meanwhile, bring a large pot of salted water to a boil on the stovetop. Cook pasta according to package direction. When done, drain, reserving 2 cups of pasta water.
- Transfer pasta to zucchini mixture and add half the reserved pasta water. Stir with a wooden spoon to combine and scrape any of the jammy zucchini from the bottom of the pan. Add cheese and stir until sauce coats pasta. Add more pasta water if the mixture is too thick or the cheese is clumping/not mixing well. Remove from heat and add in the basil.
- Enjoy warm!
.
Week #7; Our thoughts on the u-picks
- On: July 01, 2020
- 0
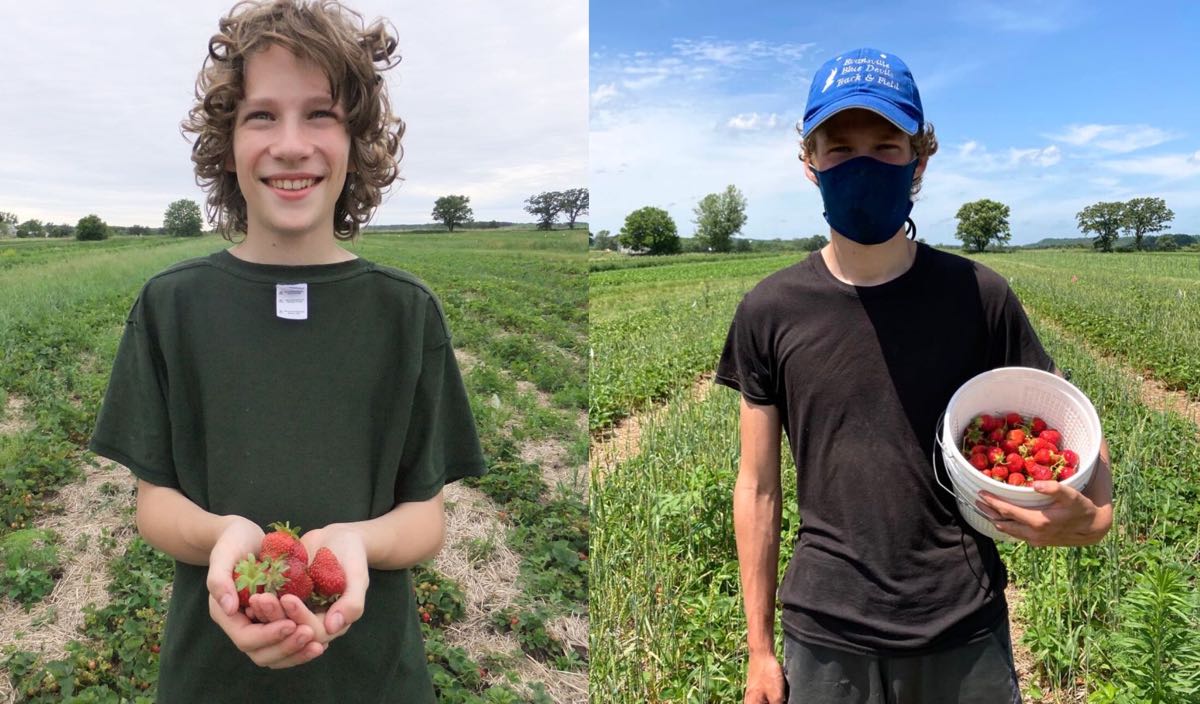
From left, your strawberry guide Ari in 2014, and this year at age 17.
We hosted a second strawberry u-pick last weekend, by reservation only. This one was much calmer than the u-pick held on Fathers’ Day. We scheduled up to 10 groups per 20-minute arrival window and that worked smoothly.
Scheduled reservations seems an obvious u-pick strategy whether there’s a pandemic or not. Let me explain why we have avoided them until now. It is very difficult to predict how many strawberries are in a field. That’s why most u-pick farms simply offer berries “until sold out.” If we offer a reservation, it is an implicit promise there will be berries when you arrive, even for later reservations. Imagine if we ran out of berries for the later groups and someone had travelled all the way from Milwaukee? What a mess. By this past weekend, we had a better idea of how many berries were in the field. However, we also ‘under-sold’ our reservations, knowing that some berries would go unpicked. That’s exactly what happened. While a waste, it was necessary to make the u-pick run smoothly.
I am explaining our thoughts and experiences because it’s clear that we will need to consider reservations for other u-picks this year. We will do our best to make the events ‘fair’ for everyone (eg by offering Milwaukee-area members the first chance at early arrival times) but no system will be perfect. At the same time, we cannot overtax our own limited time and energy. The farm consumes all of our energy right now. All!
We consider this past weekend a success. Feedback from attending members was excellent. A few people had attended both u-picks, so they got to experience how calm the second weekend was. Other members confided that they had driven to the farm on June 21, were uncomfortable with the number of people, and simply drove away. This weekend was a better system.
Finally, I would like to acknowledge our son Ari, your strawberry guide both weekends. He was a whirling dervish the first weekend! Let’s give him a round of applause!
Beth
Experiences of the week
The weather forecast on Monday predicted 1/10 inch rain, with a brief, midday thunderstorm. We gathered after lunch and decided to wait while the lightning passed. Then another cell popped up, then another. The deluge went on for over an hour, totaling 2.5 inches. Steve went out and turned off the irrigation. In the meantime, we did a few chores but mostly socialized in our spacious pack shed. Crew members told me afterwards how much they enjoyed this hour together. We work in teams, which are social, but this rainy day break was oddly enjoyable.
From left, Courtney, Ari, Zoe and Chance bring in the snap pea harvest. It was a very productive week for peas!
Veggie List & Veggie Notes
Week #7, July 2/3, 2020
– Weekly shares
– EOW/ green
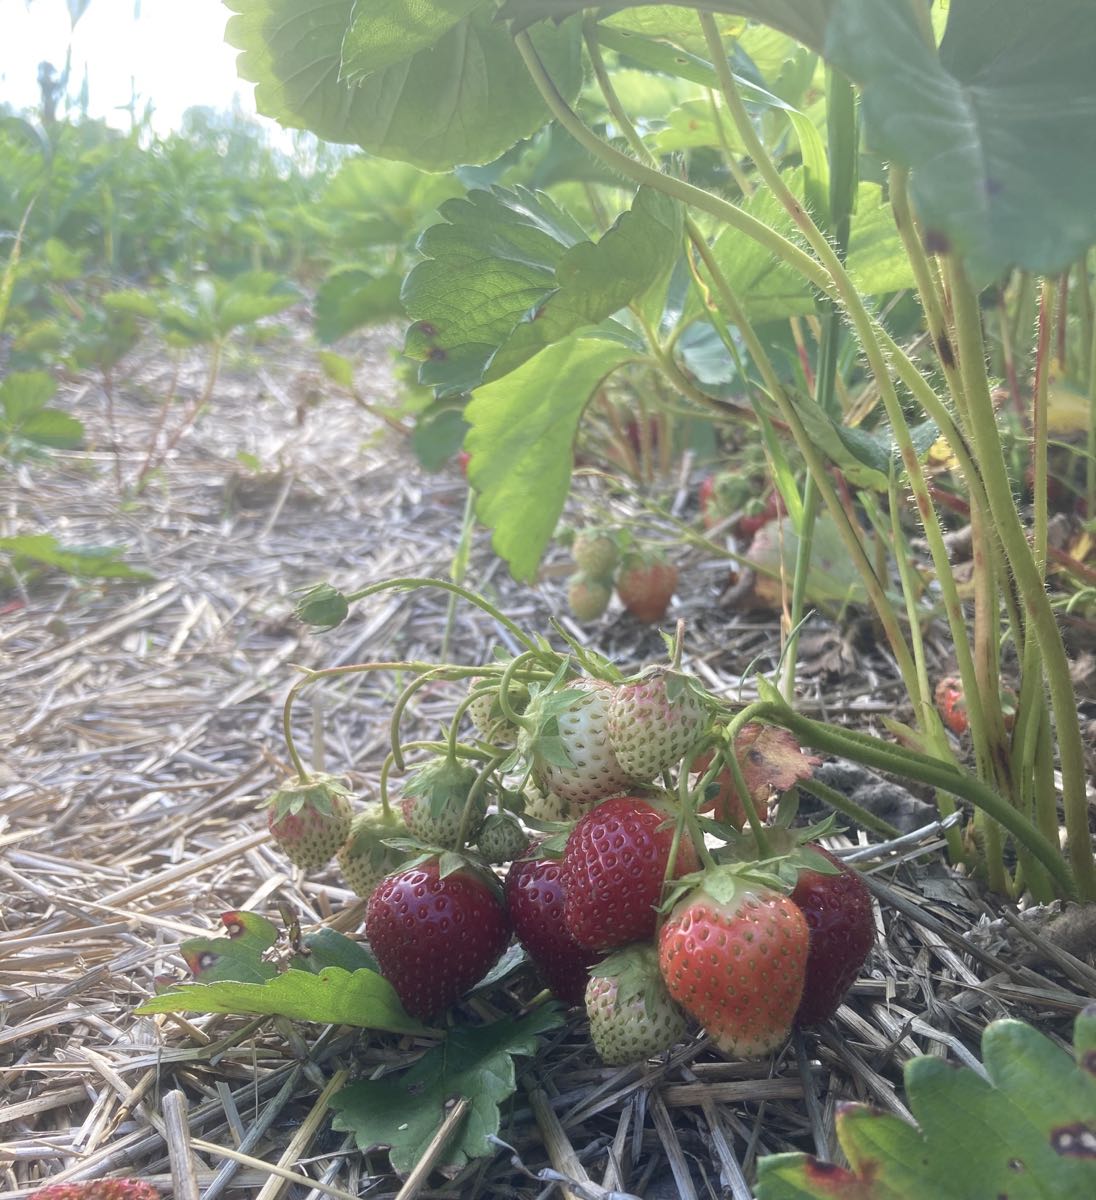
Strawberries, 1 scant pint
‘Caraflex’ cabbage, 2 medium
Sugar snap peas, 1.2 lb
Zucchini or summer squash, 1 – 1.75 lb
Romaine lettuce
Broccoli, 1 small head
Scallions, 1 bunch
Parsley, 1 bunch
Garlic scapes, a handful
– Some sites get Swiss chard.
– Some sites get Red Russian kale.
Next week’s box will probably contain cucumber (we hope!), zucchini, sugar snap peas, lettuce, basil, garlic scapes and more.
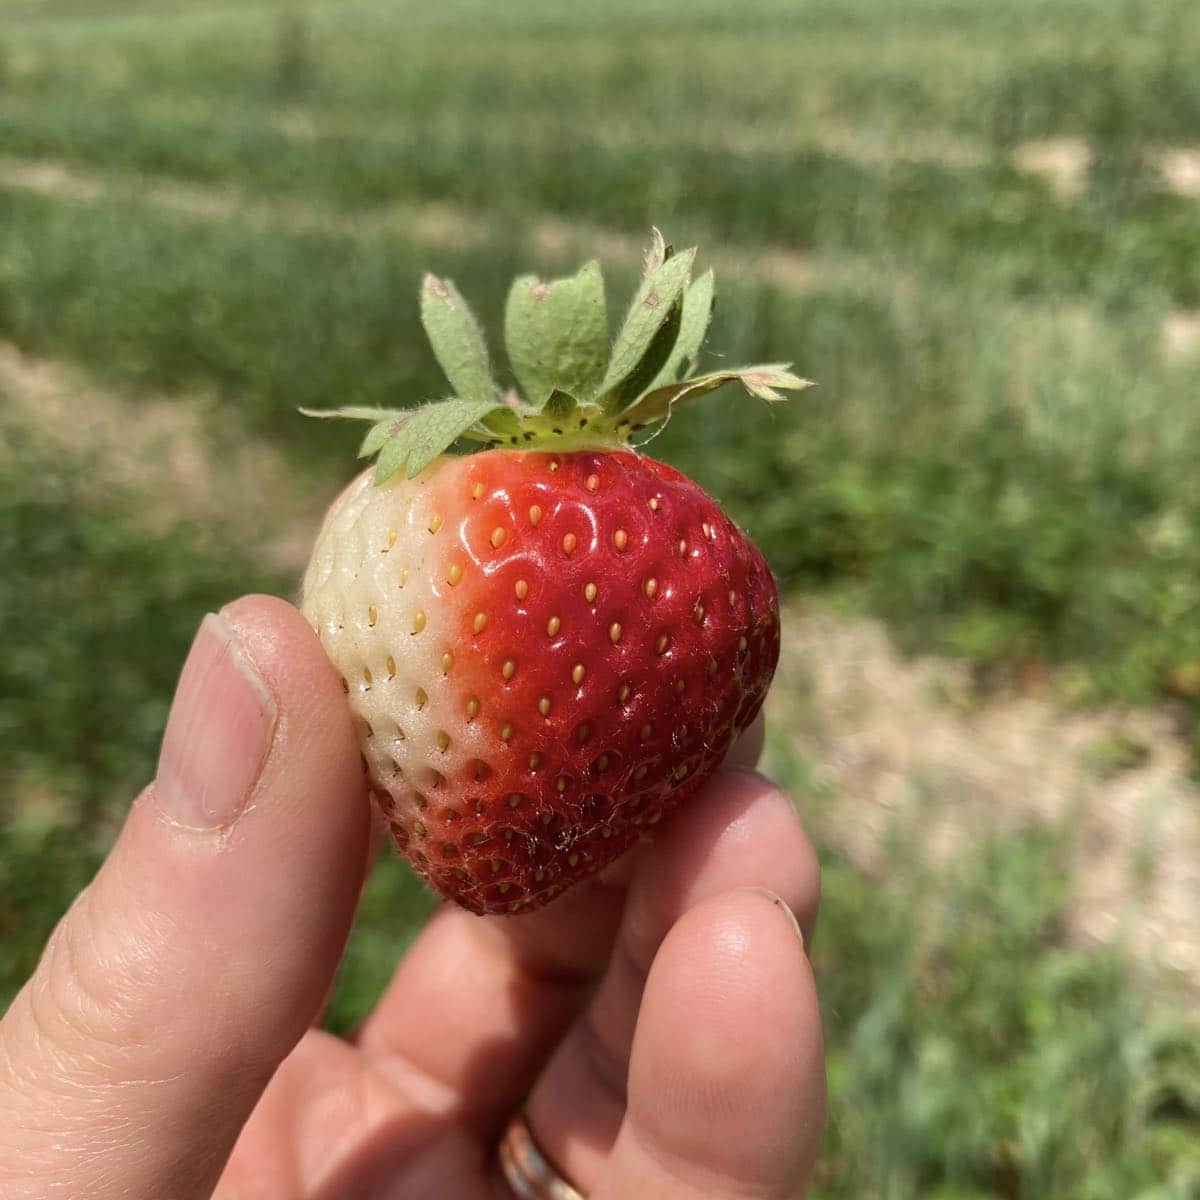
Strawberries – Folks, these berries survived 2.5 inches of rain on Monday. They are ripe and perishable and need to be eaten immediately. We’ll have either a pint or a half pint for everyone, and will find out when finish our berry harvests in the morning.
‘Caraflex’ cabbage – This is a nice salad-type that we grow in summer. Don’t you love the pointy shape? It has thinner, more tender leaves than the usual green cabbage. Great in salads and slaws but can also be cooked. Here’s the description from the seed catalogue: “Inner leaves are tender, crunchy, and have an excellent, sweet and mild cabbage flavor. Perfect for summer salads, slaws, or cooked dishes.” We’re sending it this week so you can make slaw for your holiday picnics.
Scallions – This is the last batch of scallions until fall. We hope you enjoyed them.
FOR SOME SITES, Swiss chard (pretty bundle of green leaves) – Our crew did a nice job mixing colors for pretty bunches. Swiss chard is a close relative of spinach, but requires a bit more cooking. Use as a substitute in any recipe that calls for spinach, just cook the chard a little longer. Both stems and leaves are delicious. The stems requite longer cooking, so cut them free from the leaves when preparing. That allows you to cook the stems longer.
Garlic scapes (curly green things) – Garlic scapes grow at the top of garlic plants. They look like flower buds but are actually clusters of tiny bulblets. We snap off the young scapes to direct the plants’ energy into forming garlic bulbs underground. Use scapes as a substitute for garlic cloves. They can be minced, mixed with olive oil, and added to stir fries or simple pasta dishes. The scapes can be sautéed, but will not brown like garlic cloves. Expect them to retain their crunch even when cooked, and to be milder than garlic cloves, closer in pungency to the green garlic we’ve sent.
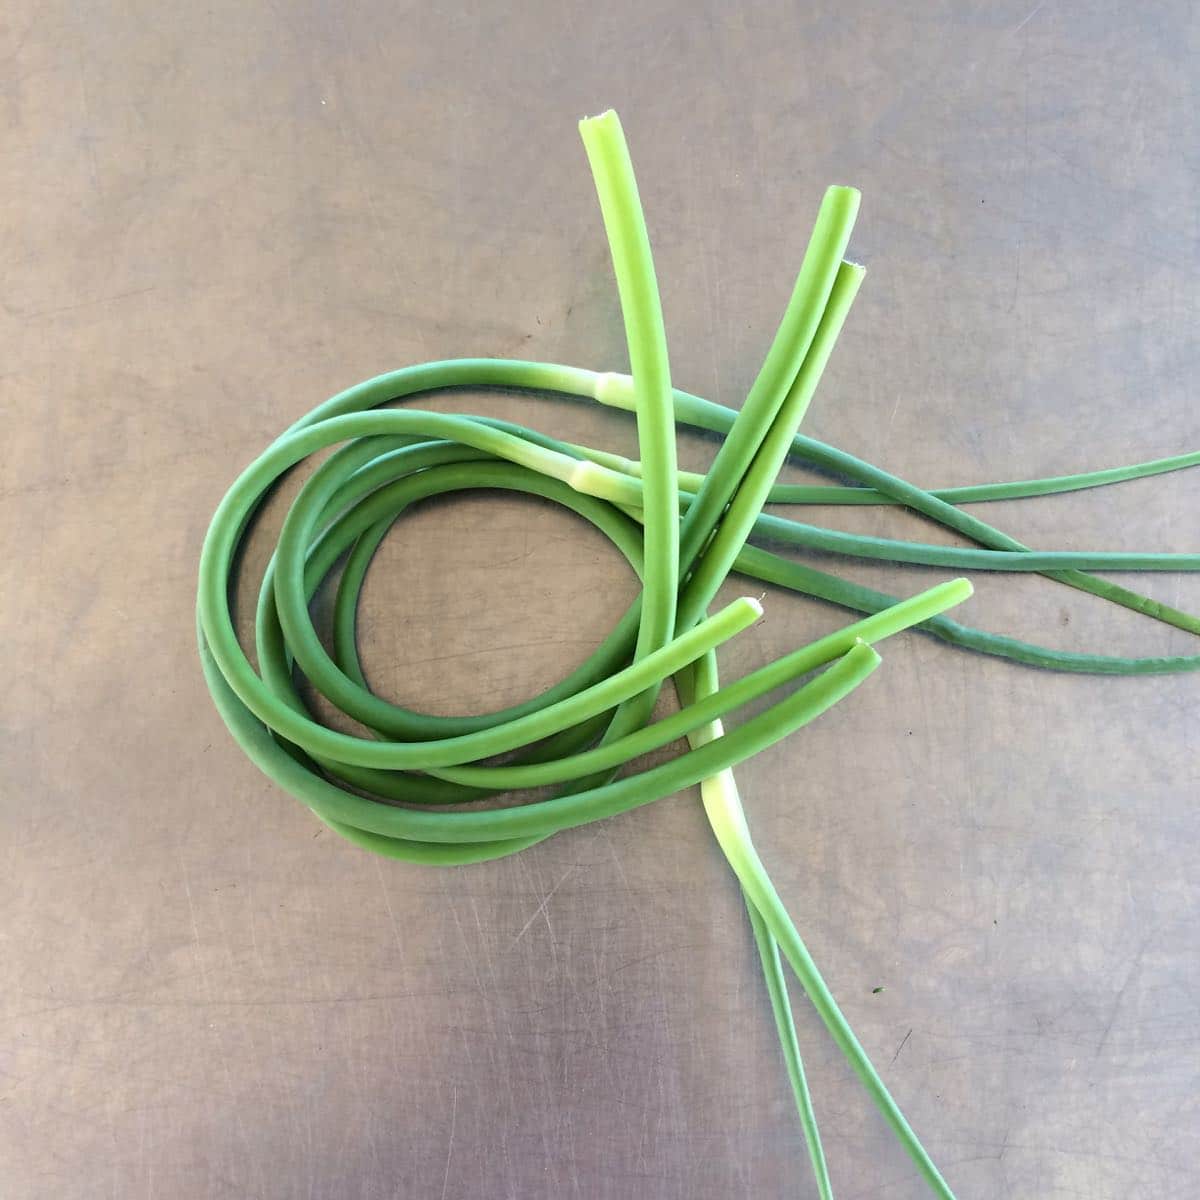
Garlic scapes
RECIPES
Visit our 2020 Recipe Log or our 2019 Recipe Log or join our Facebook discussion group.
LOCAL THYME/ Cooking 101
Smoked Trout, Snap Pea and Cabbage Pasta Salad
Snap Pea and Strawberry Salad
Greek Swiss Chard or Kale Fritters
LOCAL THYME/ Cooking 202
Warm Japanese Cabbage Salad
Precious Snap Pea Sauté
Provençal Omelet
RECIPES FROM LAUREN
SNAP PEA SALAD WITH CHARD & PISTACHIO PESTO
Takes 15 minutes
Serves 2-4 as a side + lots of leftover pesto for your fridge
4 cups snap peas or snow peas, ends trimmed
2-4 tablespoons Chard & Pistachio Pesto (see below)
1/2 teaspoon Kosher salt
1/2 teaspoon red pepper flakes
1/4 teaspoon freshly ground black pepper
Nasturtium, borage or other pretty edible flowers, optional
- Bring a large pot of water to a boil over high heat. Blanche peas for two minutes, drain and rinse with cold water.
- Add peas to a small bowl with remaining ingredients and toss to coat evenly. Enjoy warm or cold (I like it best some hours later once it’s been chilled.
.
Chard & Pistachio Pesto
1 bunch rainbow chard (5-6 leaves), well dried
1/2 cup shelled and toasted pistachios
2 garlic cloves (or 2-3 garlic scapes)
1 teaspoon Kosher salt
1/2 cup olive oil
1-3 teaspoons lemon juice
- Prepare rainbow chard. Remove stems and roughly chop. Set aside. Tear leaves into small pieces.
- In a food processor, chop pistachios until finely ground. Add garlic, salt and chard stems. Process until consistent in size and then add leaves. Continue to puree until leaves are all finely chopped, you may have to scrape down the sides occassionally.
- Turn the food processor on and run it while you drizzle in the olive oil. Process until smooth. Add lemon juice to taste.
.
????

BBQ BRISKET PIZZA WITH COLESLAW
Takes 8 hours, if using slow cooker to make brisket, though only about 45 minutes of active time are involved
Makes two 14-inch pizzas
Serves 6-8
1 batch favorite pizza dough
2/3 cup favorite BBQ sauce
1/2 bunch scallions, thinly sliced
2 cups smoked cheddar cheese
Brisket:
3 tablespoons smoked paprika
2 tablespoons ground black pepper
2 tablespoons Kosher salt
1 tablespoon brown sugar
1 tablespoon chili powder
1 teaspoon ground cumin
2-3 pounds beef brisket
3/4 cup BBQ sauce
1/4 cup water
1 tablespoon Worcestershire sauce
1 yellow onion, thinly sliced
Coleslaw:
1/3 cup Greek yogurt
Juice of 1/2 lime
1-1/2 tablespoons olive oil
1/2 teaspoon Kosher salt
1/8 teaspoon freshly ground black pepper
1/2 medium head cabbage, shredded
- As advised above, the real work for this delicious pizza should start a couple days before you want to make it. You can store the dough until your fridge until you’re ready to use it. If you prefer to make it in the morning for the evening, just leave it in a cool place in your kitchen to slowly rise all day. You can absolutely also buy a store-bought dough if you like.
- The next step is making that tasty brisket. I like to start this in the morning before I head to work. Combine paprika, pepper, salt, brown sugar, chili powder, and cumin in a small bowl. Pat all over brisket.
- Place brisket in slow cooker (You could also do this night of in a Dutch oven in the oven or likely very quickly in an Instant pot) and surround with BBQ sauce, water, Worcestershire sauce and onions. Bake on low setting for 6-8 hours or high setting for 3-4 hours.
- When you’re ready to bake your pizza, preheat oven to 450 degrees.
- Divide pizza dough into two 12-inch round pizzas (you can also fit the dough to two baking sheets). Cover each round with 1/3 cup BBQ sauce.
- Shred approximately 2 cups of brisket and divide between the two pizzas. Sprinkle with scallions and cheddar cheese. Bake for 20 minutes.
- While the pizza bakes, throw a quick coleslaw together. In a small bowl, whisk together the yogurt, lime, olive oil, salt and pepper. Pour over the cabbage and toss gently. Use a spatula to scrape the sides of the bowl until dressing evenly coats cabbage.
- Serve pizza warm with coleslaw on top.
.
????
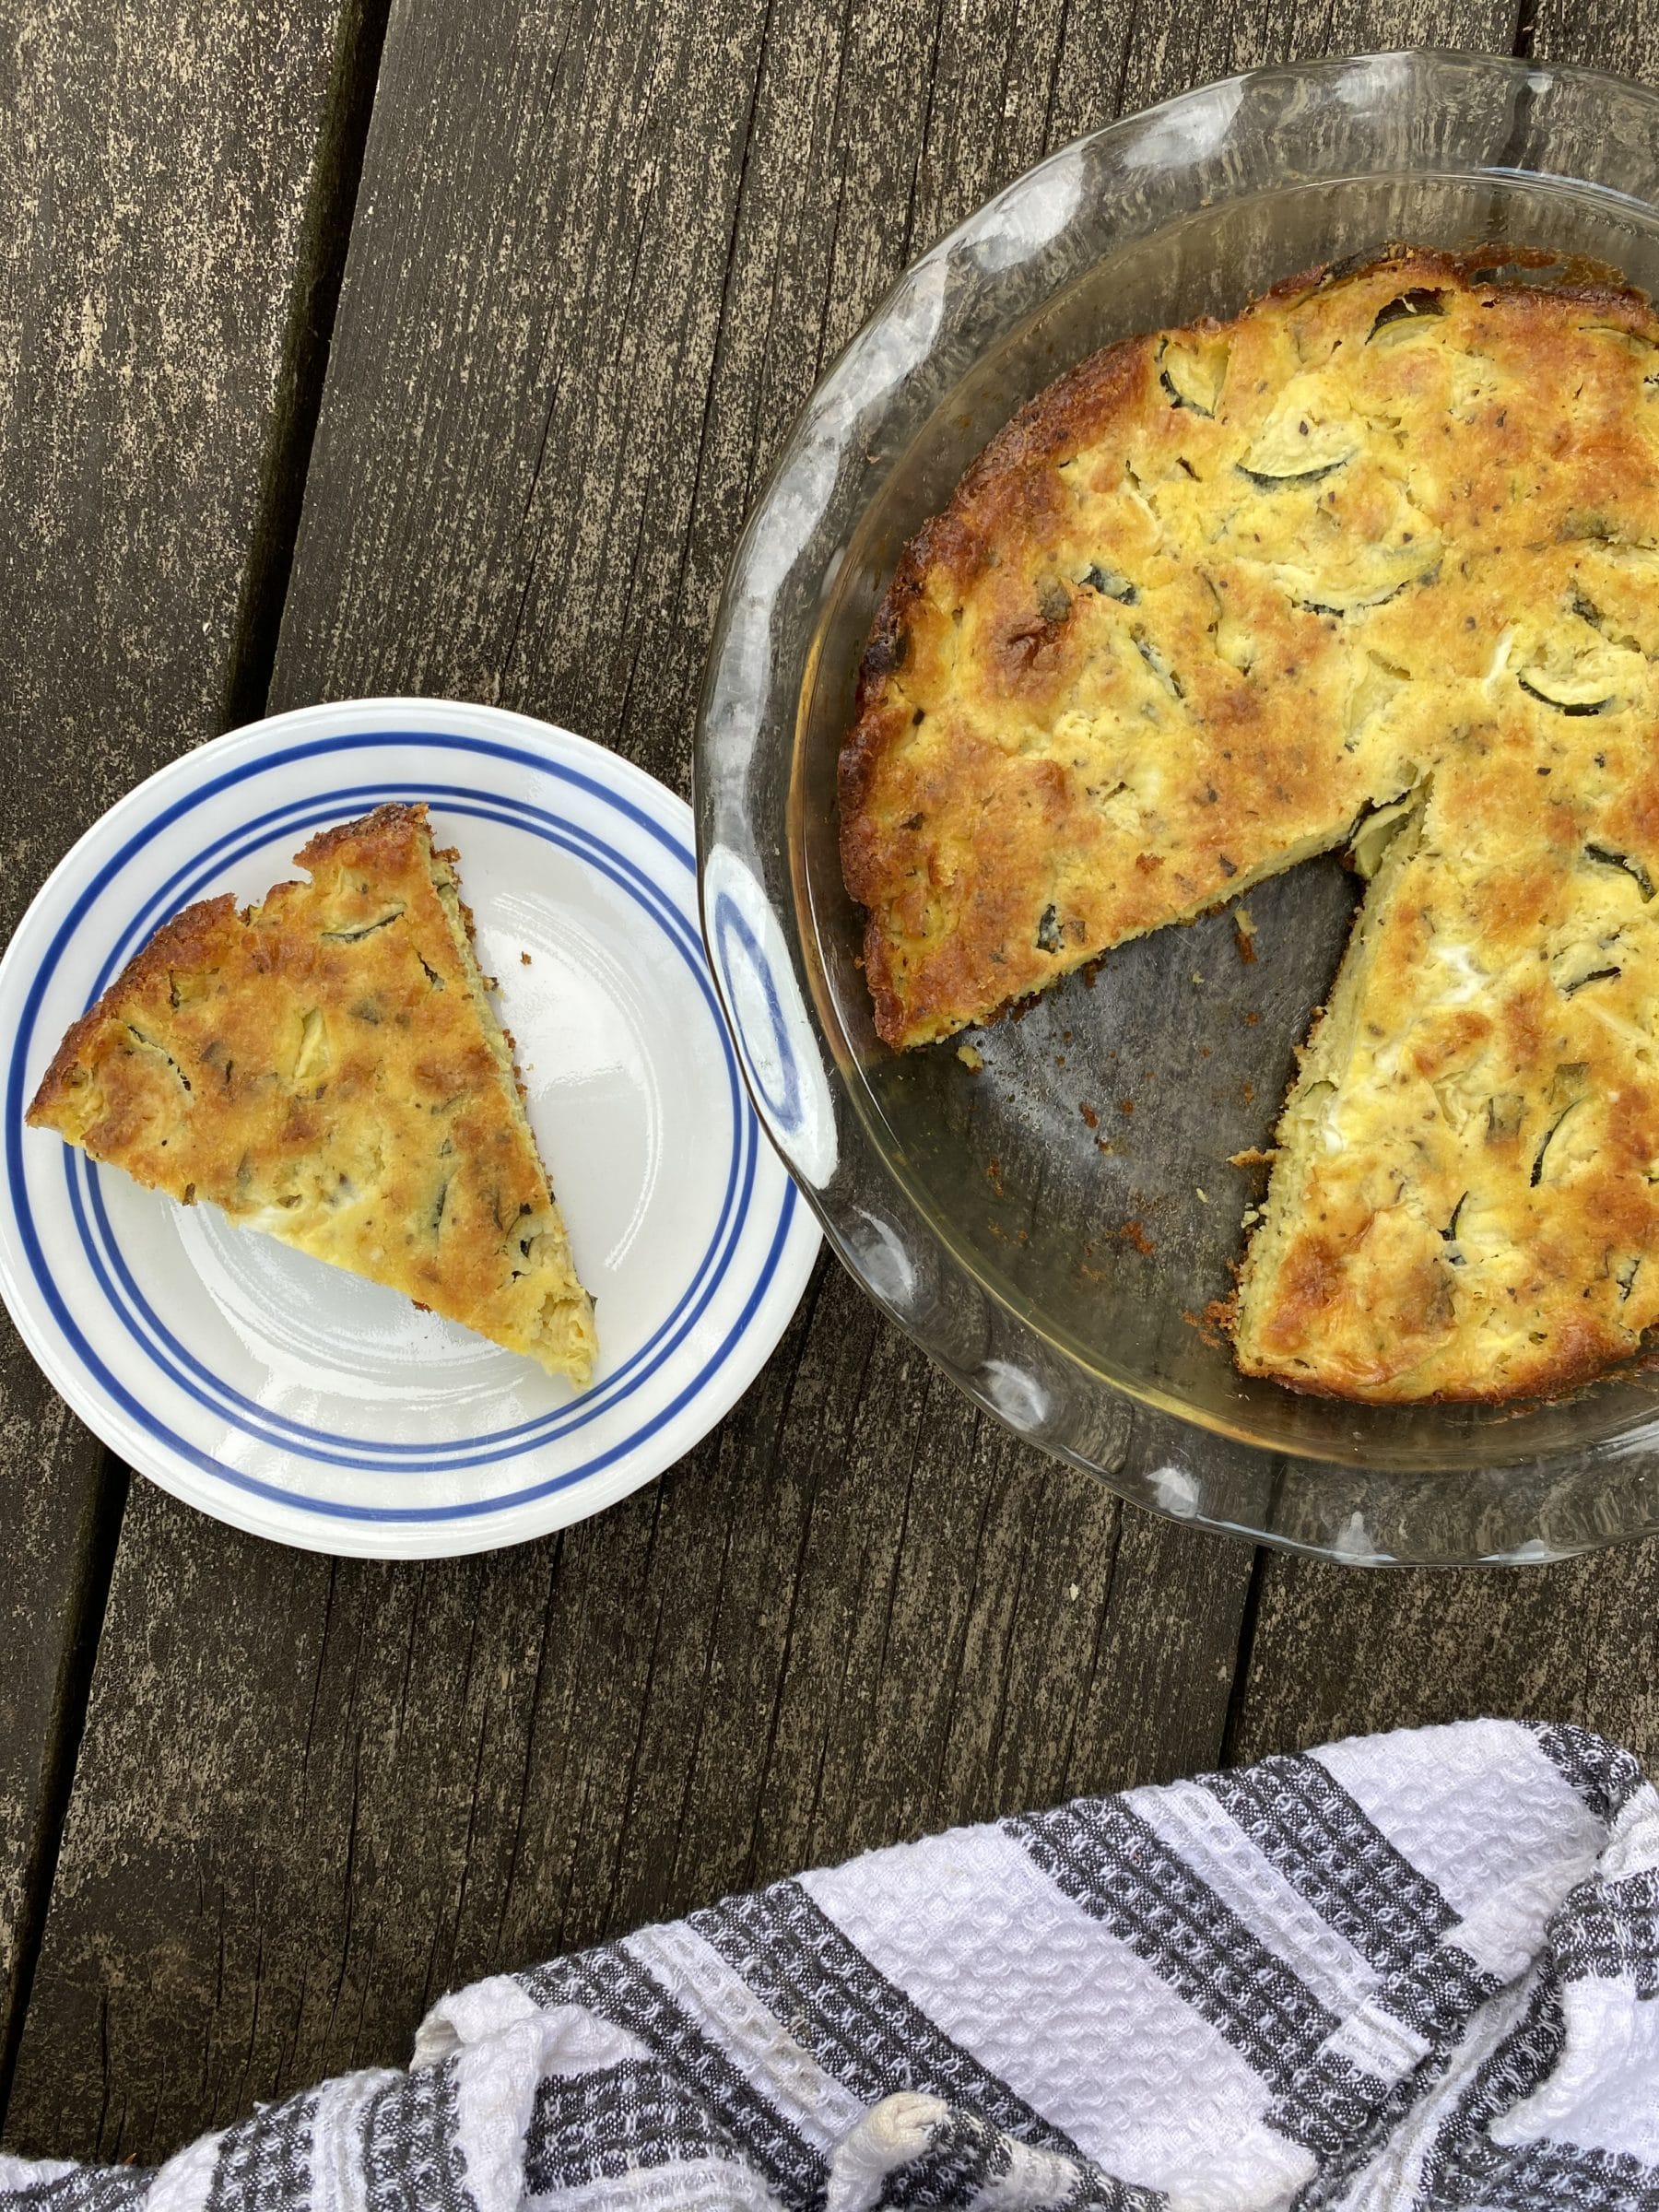
Zucchini Pie
This recipe comes straight from my momma—an excellent Midwest home cook. It calls for Bisquick because my mom loves things like that but if you don’t have any on hand, just use this great homemade substitute.
Takes 45 minutes
Serves 3-4
3 eggs
1 cup grated parmesan
½ cup canola oil
¼ cup diced fresh parsley
6 minced garlic scapes
¼ teaspoon salt
Pinch pepper
3 cups thinly sliced small zucchini
1 cup Bisquick
½ bunch scallions, thinly sliced
- Preaheat oven to 350 degrees.
- In a large bowl (or the mixing bowl of your stand mixer), combine eggs, parmesan, oil, parsley, garlic scapes, salt and pepper. Stir until well combined.
- Add zucchini, Bisquick, and scallions. Stir until all ingredients are combined but the mixture is not overmixed.
- Pour into a greased 9-inch pie pan (or 9×9 baking dish). Bake for 25-35 minutes until golden brown on top. If it’s not golden brown on top, the middle will likely not be cooked through. Wait for the pie to take on a golden hue before removing it to the oven. Serve warm on its own or alongside any roast meat.
.
Week #6, U-Pick Analysis
- On: June 24, 2020
- 0
I did not have time to take photos during the u-pick!
We were not sure what to expect for the farm u-pick this past Sunday. We rescheduled from Saturday to Sunday at the last minute to avoid thunderstorms. On the one hand, we thought you might already have Father’s Day plans and be unable to come to the u-pick. On the other hand, we suspected interest would be strong, based on the experiences of other farms in the area, plus emails from some of you.
Turns out you all wanted to get out of the house, come to the farm and enjoy the day outside. Many people said they were eager to do anything new and outdoors. This was the highest participation we’ve ever had at a berry u-pick. Our field was full of ripe berries that needed to be picked, so it was a good match.
However, we were swamped. Almost everyone arrived during the first hour. This has never happened before. We’ve run u-picks for many years, learning and tweaking the format. For example, member u-picks used to be three hours long. When we switched to four hours, people naturally spread themselves out over the longer time period, making the whole day more manageable for us. That did not happen this time.
We were short-staffed. Our crew did not want to help at the u-pick. They work hard all week and find that they are more tired than usual because of wearing masks. Plus it was Father’s Day. That left just me, Steve, Ari and our young employee Chance. With normal pacing, that would be fine. I apologize for the lines to enter the field and to pay for your berries. Fortunately, everyone was in a great mood and I did not hear a single complaint about the wait. I wish I’d been able to visit with some of you! I look forward to the u-picks for that but needed to focus and get everyone’s berries weighed and tallied.
We want to thank all of you who complied with our COVID-19-related requests. Almost everyone wore masks and the few people who did not really stood out. As far as we could tell, everyone practiced social distancing while in line. Steve flagged the field in a new system to maintain greater distance between groups but we’re not sure if that played out as expected with so many people arriving at once.
Overall, we thought it was a good day. We loved everyone’s enthusiasm and appreciation and relief at being outdoors. If/when we offer another u-pick we’ll incorporate what we learned on Sunday.
Thank you,
Beth & Steve
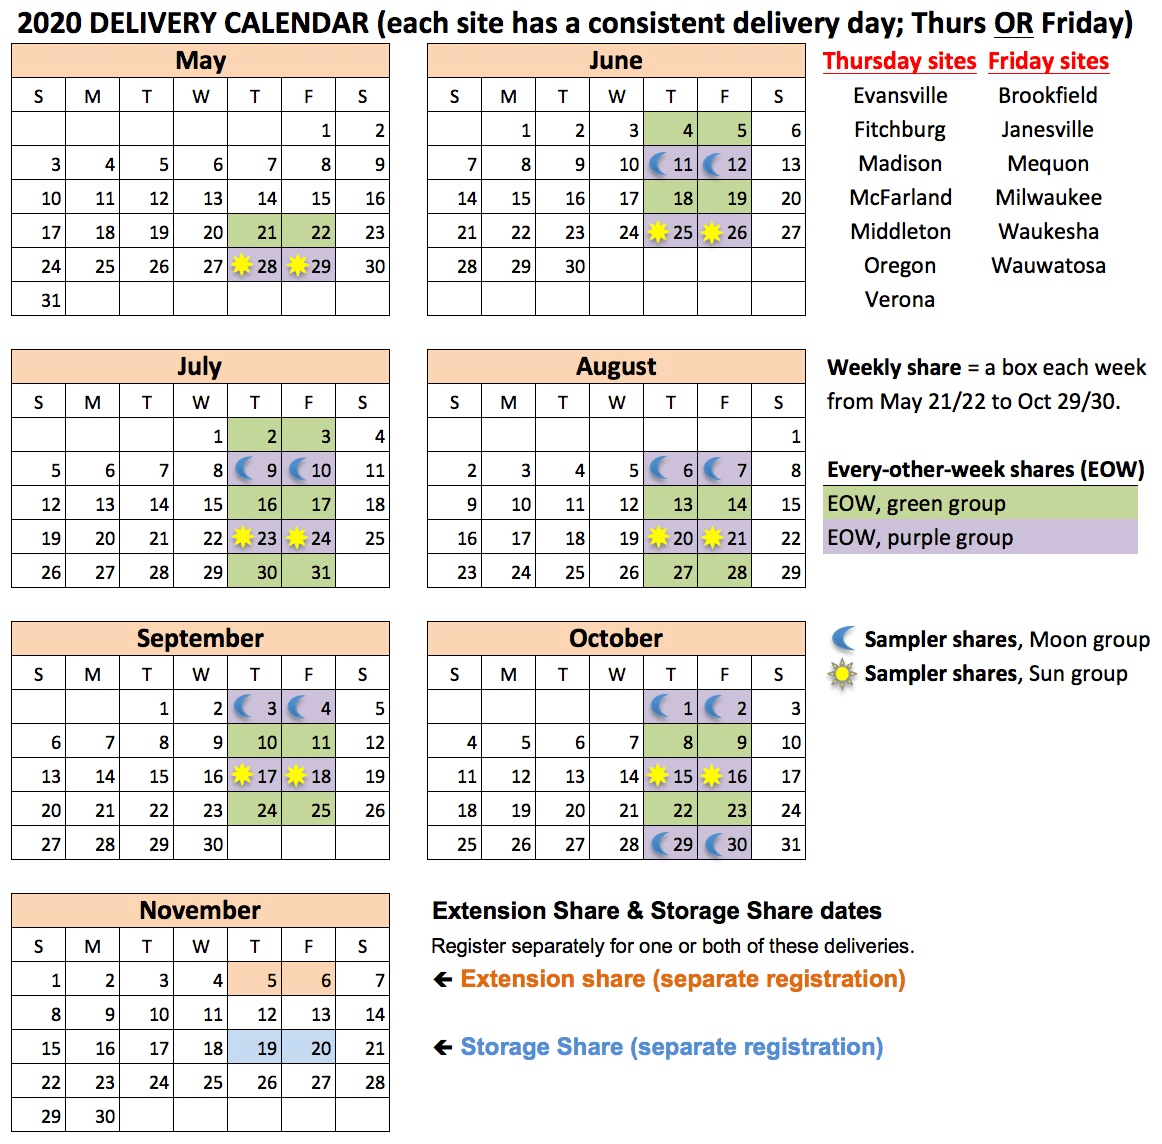
Deliveries will be scheduled as usual the week of July 2/3.
See calendar below. If you need to change your schedule because of the holiday weekend, please use our vacation rescheduling tool at http://tipiproduce.csasignup.com/members/scheduleactions.
Veggie List & Veggie Notes
Week #6, June 25/26, 2020
– Weekly shares
– EOW/ purple
– Sampler/ sun
Strawberries, 1 pint
Snow peas, ~2/3 lb
Snap peas, ~2/3 lb
(Both types of peas will be in one bag.)
Green zucchini
Yellow summer squash or patty pan squash
(Combined, squash is 3 – 3.5 lb total)
Fennel, 2 – 4 bulbs with fronds, depending on size
Broccoli, 1 small head
Scallions, 1 bunch
By site: Swiss chard OR lacinato kale
Next week’s box will probably contain sugar snap peas, zucchini &/or summer squash, kale or Swiss chard, scallions, garlic scapes and more.
Peas – It’s a pea-palooza week. Peas are slow to pick but the patch was ready so we swarmed the field and picked lots for you.
Zucchini & summer squash – Zucchini and summer squash need refrigeration but do not do well at very cold temperatures, as they will soften and form pits in their surface. Refrigerate these squash but in the warmest part of your fridge.
Fennel (bulbs and lacy fronds) – Fennel is a ‘swing vegetable’; it can be used raw or cooked. Clean well and slice as thinly as possible for use in raw salads. It is good simply prepared with olive oil, lime or lemon juice, salt and shaved parmesan cheese. Cooking softens and sweetens fennel, and mellows its anise flavor. Both the bulb and leaves are edible. Here are ideas from Alice Water of Chez Panisse about how to use fennel: ‘It’s strong anise characteristic seems to suit fish particularly well. … We use fennel all the time. We add the feathery leaves to marinades for fish and to numerous salads, sauces and soups and we use them as a garnish, too. … The bulbs are sliced and served raw in salads in various combinations with other vegetables, parboiled for pastas; caramelized and served as a side dish; braised whole; or cooked in vegetable broths & fish stocks.”
A few sites will get this Cavendish variety, that often ripens with one side still white. The berry in the photo is fully ripe.
Scallion Pancakes
I love scallion pancakes and have tried many recipes over the years. I notice that several of you shared scallion pancake recipes in our Facebook discussion group this past week. Here are some of the recipe links. I am not sharing posters names here (I haven’t asked) but you can view the full discussion and photos in our Facebook group page.
Korean Pancakes with Scallions (Pa Jun) – “So many scallions, so little time. Make Pa Jun, Korean scallion pancakes. There were a few different recipes in the newsletter but I like this one! Simple, fast, and delicious!”
Extra Flaky Scallion Pancake Recipe – This recipe makes layered pancakes.
Kimchi, Pork + Scallion Pancakes – Beth’s comment: This is our household’s favorite, but we add bay scallops instead of pork and skip the relish. These are hefty and filling.
Avoid this recipe! Easy Shortcut Scallion Pancakes – Beth’s comment: I thought this was going to be a good kitchen hack but they just taste like crackers.
Scallion Ideas
We have sent scallions for many weeks in a row. They are the best seasonal allium (onion family plant) this time of year and have been unusually productive this year. Let’s share a few of our favorite ways to prepare them. This is the same list as last week’s newsletter but I’m repeating it because some of you read my post before I added the list.
– Scallion biscuits (slice and add to your usual biscuit recipe)
– We have a favorite scallion dressing for adaptable pasta salads. We use it with spinach and asparagus in spring, then switch to grilled vegetables and sweet Walla Walla onions once those are available.
– Egg drop soup with spring greens, topped with sliced scallions
– Grilled scallion, asparagus and turnip salad
– Sliced scallions are good on sandwiches and salads
– Grilled beef bulgogi wrapped in lettuce leaves. Easily adapted to tofu.
– Salmon patties with minced scallions mixed into the batter.
RECIPES
Visit our 2020 Recipe Log or our 2019 Recipe Log or join our Facebook discussion group.
LOCAL THYME/ Cooking 101
Greek Snow Pea and Zucchini Soup
Sweet and Sour Pork and Vegetable Stir Fry
Fennel Summer Squash Slaw
LOCAL THYME/ Cooking 202
Lemon Chicken Velvet Soup
Orzo Salad with Grilled Summer Squash
Fennel and Sausage Risotto
LOCAL THYME/ Quick & Easy Meal
Chicken Breasts and Zucchini with Herbs
RECIPES FROM LAUREN
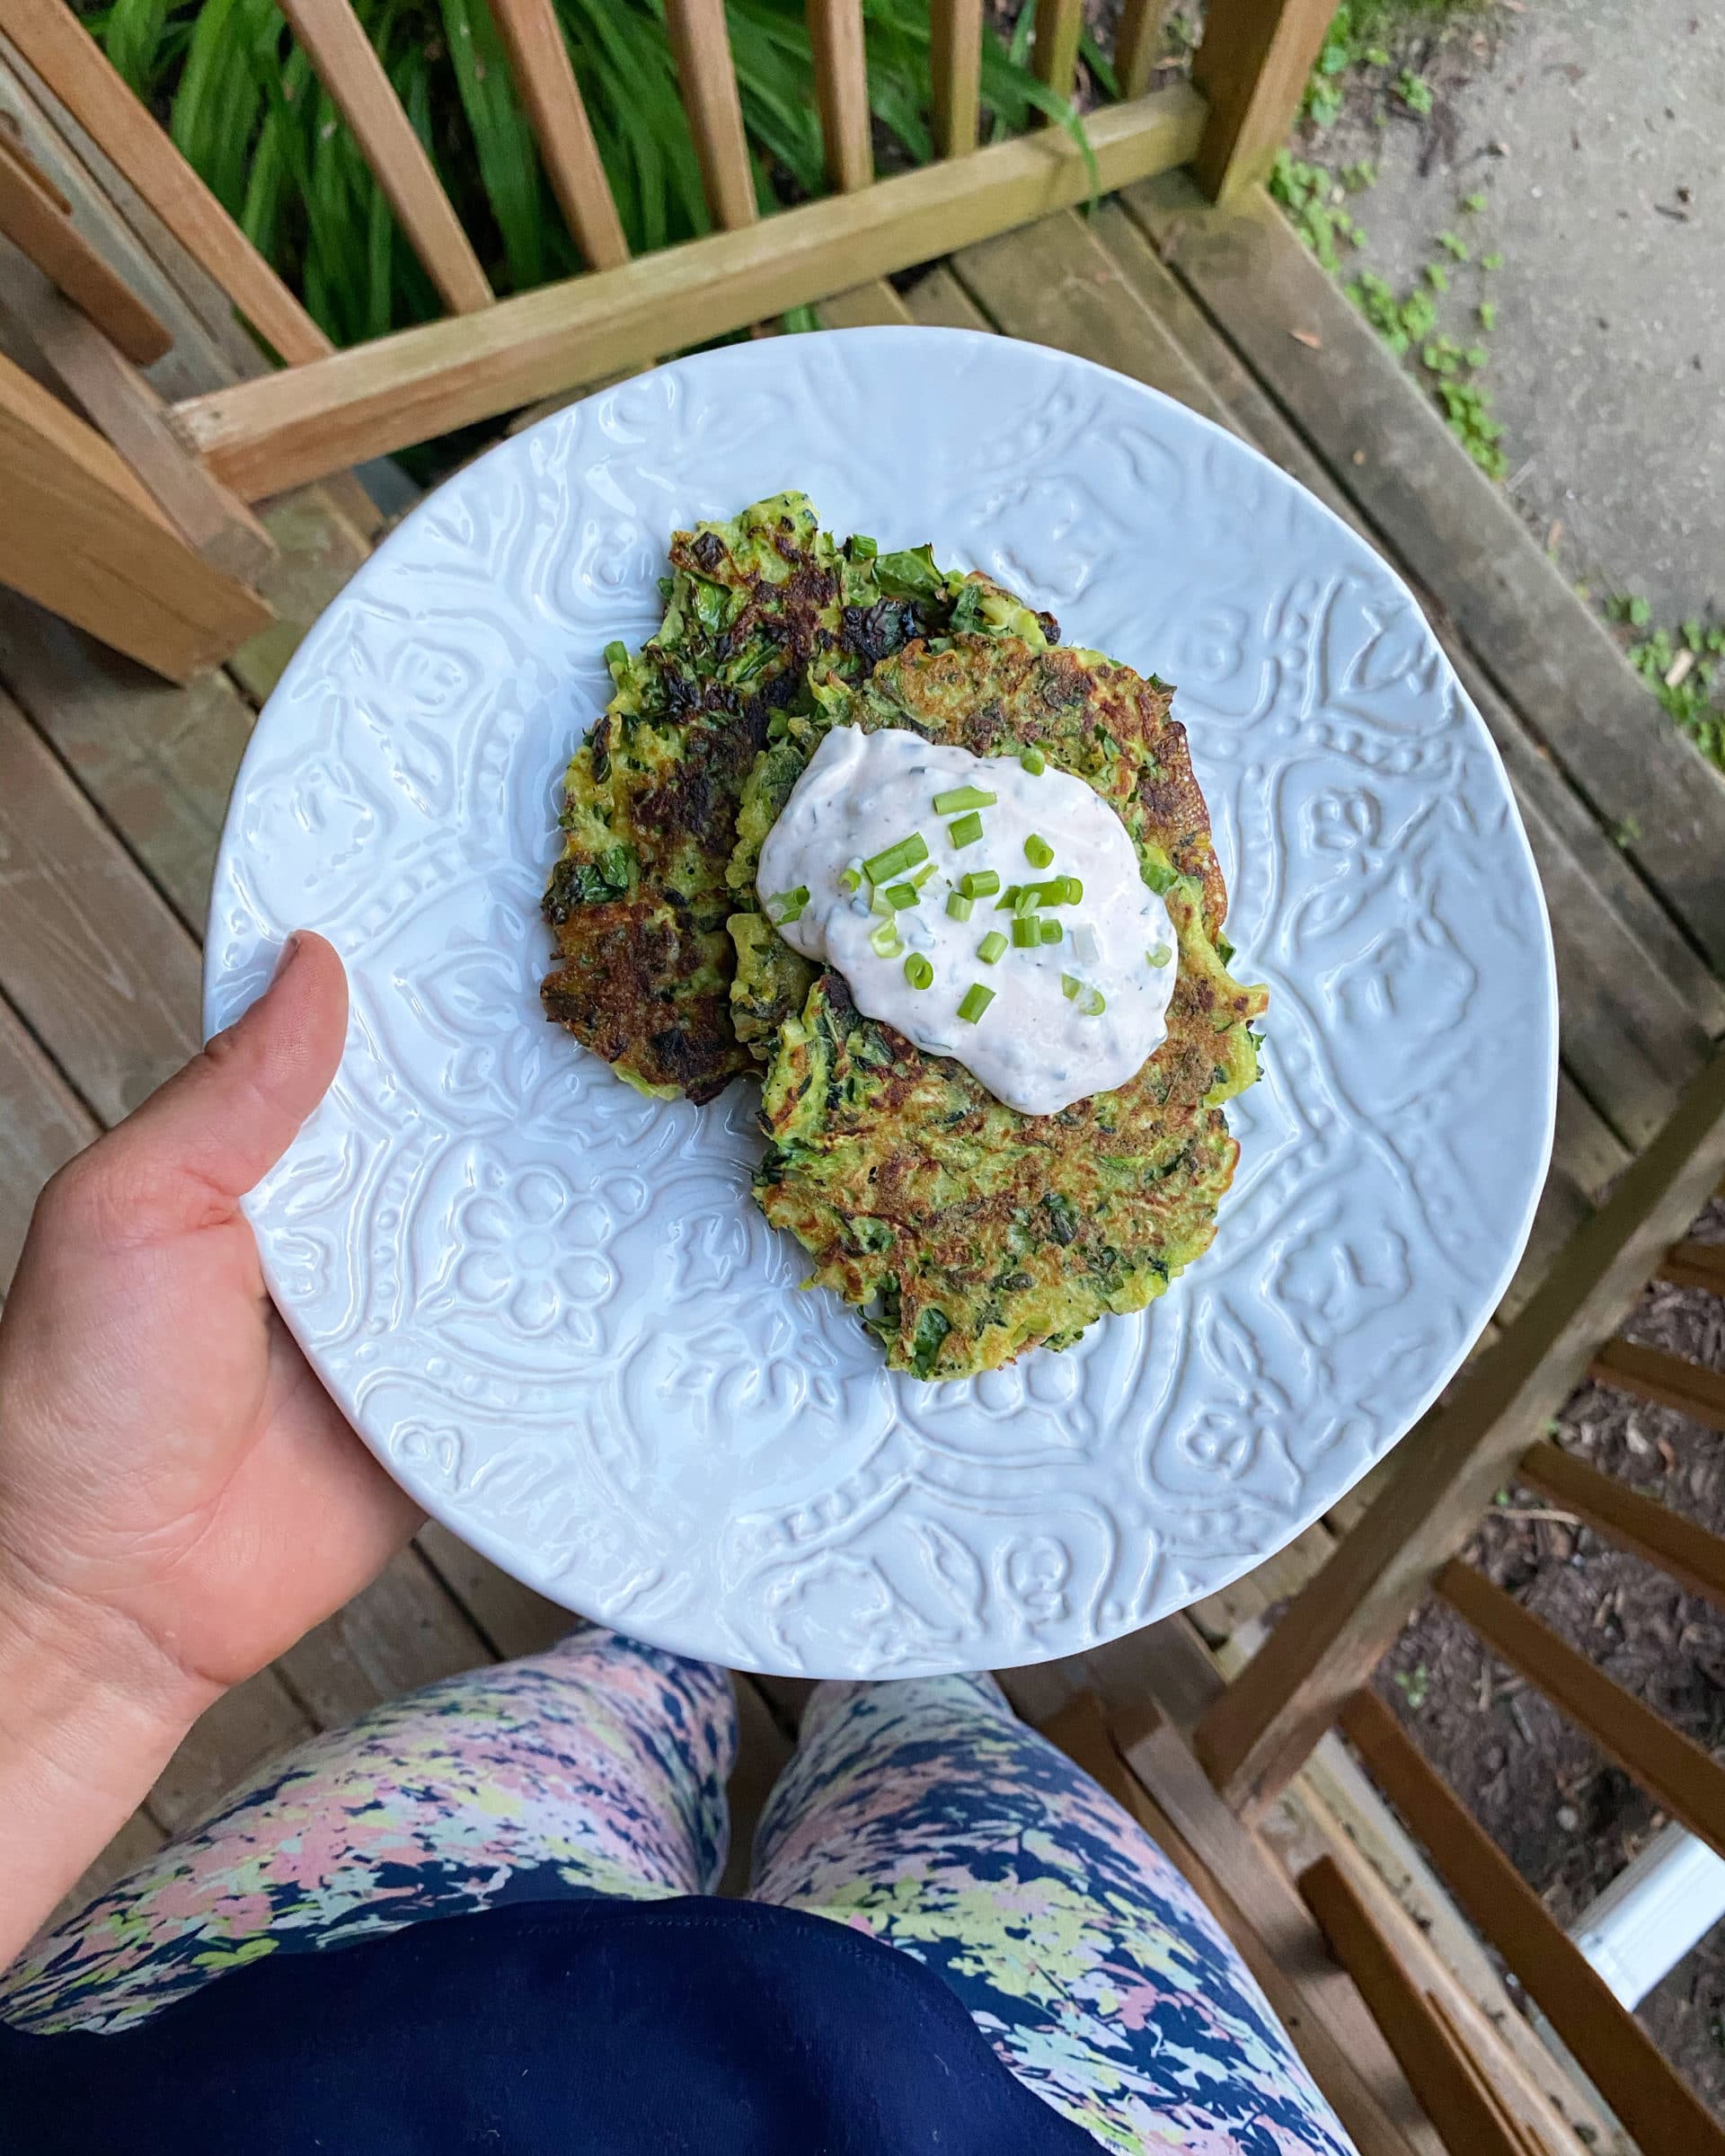
ZUCCHINI & GREENS PANCAKES
Eight cups of shredded zucchini is a LOT of zucchini. It will use a significant portion of what you received this week. I recommend using a food processor for shredding (if you have one). I’m slow to use my food processor unless it’s a big batch. This is a big batch. It’s worth it.
Makes 20 (ish) pancakes
Serves 4-6
Takes 45 minutes
8 cups grated zucchini
1 bunch scallions
1-2 garlic cloves, minced
1 bunch kale (or chard), stems removed, finely chopped
5 eggs
1 cup flour
1 teaspoon baking powder
2 teaspoons Kosher salt
1 teaspoon freshly ground black pepper
3 tablespoons butter
HERB SAUCE:
1/2 cup Greek yogurt (or sour cream)
1/4 cup mayonnaise
1 small lime, juiced
1/2 teaspoon hot suace
1/2 teaspoon Kosher salt
1/4 teaspoon freshly ground black pepper
1/4 cup minced fresh herbs (dill, chives, basil, mint, cilantro all work great), optional
- Lay out your shredded zucchini in a kitchen towel and squeeze to drain out some of the liquid. You can also do this by
- Combine zucchini, scallions, garlic, kale (or chard) in a (very) large bowl. The bowl of a stand mixer works great if you have one. Add eggs and stir until the veggies are well-coated with the eggs. Add flour, baking powder, salt, and pepper. Again, stir until everything is well-coated. Finally, add the butter and stir to combine.
- Heat a large heavy skillet over medium heat. Add a tablespoon or two of vegetable oil (or another neutral cooking oil). Add 1/4 cupfuls of zucchini pancake batter to the pan (as many as fit without crowding– for me that was three). Cook on each side until a dark brown, about 2 minutes per side. Repeat with remaining batter until you make all 20 (ish) of your pancakes, adding oil as needed.
- In a small bowl, combine yogurt, mayo, lime juice, hot sauce, salt and pepper. Stir to combine and then add in fresh herbs (if you’ve got them).
- Serve warm fritters with several dollops of herbed yogurt sauce.
.
????
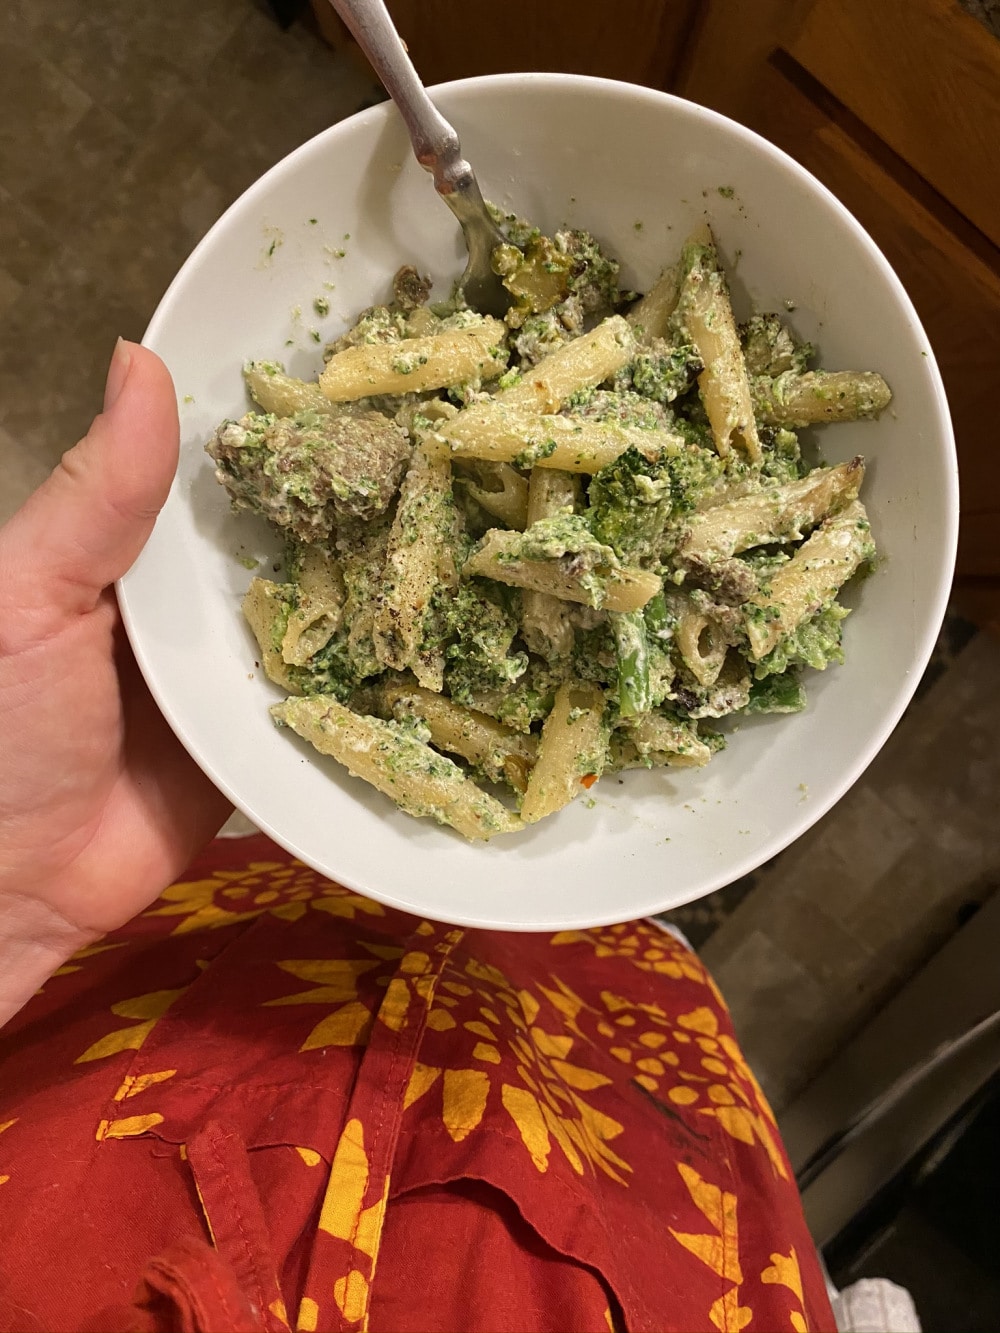
PASTA WITH BROCCOLI, SNOW PEAS, SAUSAGE & WHIPPED RICOTTA
Adapted ever so slightly from the incredible Six Seasons cookbook
Serves 4
Takes 45 minutes
5 garlic cloves, thinly sliced
8 tablespoons olive oil, divided
1 tablespoon + 1 teaspoon Kosher salt, divided
1 pound broccoli
1/2 pound snow peas, trimmed
8 ounces pasta of your choice (we used penne)
1 pound bulk pork sausage
1/2 teaspoon dried red pepper flakes
1 cup whole-milk ricotta
Freshly ground black pepper (or 1/2 teaspoon ground black pepper, divided)
1 cup freshly grated Parmesan
- Put the sliced garlic in a small bowl and cover with 4 tablespoons olive oil.
- Bring a large pot of water to a boil over high heat. Add 1 tablespoon of salt to the water.
- While waiting for the pasta water to boil, prepare you broccoli. Cut the top into bite-size florets. Push to the side. Peel the stem with a vegetable peeler and then cut the stem into 1/4-inch thick coins. Keep the stems separate from the florets (you are going to cook them differently).
- Your pasta water is likely boiling now. Add the pasta and cook according to package directions. When there are just 3 minutes left in the cook time for the pasta, remove 3 or 4 ladle-fuls of pasta water to a small bowl or measuring cup for later use. Then, add the broccoli florets and snow peas to the pasta kettle. Drain the pasta, broccoli and snow peas.
- Shape the sausage into four patties (like you are going to make hamburgers). Heat a cast-iron or other large skillet over medium heat and add 2 tablespoons olive oil. Once oil is hot and just beginning to glisten, add the sausage patties. Cook, without moving, for 4 minutes so they patties can get nicely browned on one side.
- Flip the patties and pour the garlic (with all of that yummy infused olive oil) over top of them. Add the broccoli stems as well. Cover and cook for 5 minutes more without moving. Then uncover, and break up the sausage into bite-size pieces. Add red pepper flakes and a ladle-ful of that reserved pasta water. Stir gently to get all those crispy brown pieces from the bottle of the pan into the sauce. Reduce the heat to low and add the pasta and veggies. Pour another ladle-ful of reserved pasta water and stir everything to combine.
- In a medium bowl, whisk together ricotta, remaining 2 tablespoons olive oil, 1/2 teaspoon salt and 10 twists of freshly ground black pepper (or 1/4 teaspoon of the pre-ground stuff) until fluffy. Add to pasta along with the Parmesan.
- Stir once or twice to incorporate and then shake the pan to further combine ingredients. Add remaining 1/2 teaspoon salt and a generous amount of freshly ground black pepper (or the remaining 1/4 teaspoon). Add more pasta water if you want a looser (thinner) sauce.
- Serve warm and enjoy!
.
????

SHAVED APPLE & FENNEL SALAD:
This recipe is simplest with a mandoline. If you don’t have one, just practice your knife skills making the thinnest slices you can.
Takes 15 minutes
Serves 2-4
1 tart apple (Granny Smiths work great)
1 large fennel bulb
Apple maple vinaigrette (below)
Pinch red pepper flakes
1/2 cup halved walnuts, toasted
- Cut unpeeled apple into 1/8-inch thick slices (with a mandoline or fancy knife skills). I sliced one side until I reached the core and then continued on another side and continued all the way around the apple until only core remained. This yielded slightly different size pieces, but it didn’t seem to matter much.
- Cut the stems and base off your fennel so that you are only left with the bulb. Cut it in half lengthwise and remove the core (it will be in the middle and kind of triangular; it will be much harder than the rest of the fennel and pretty obviously inedible). Cut each half into 1/8-inch thick slices (again mandoline is preferred but fancy knife skills will work too).
- Throw apple and fennel into a medium bowl. Toss with half of the vinaigrette and red pepper flakes. Taste and add more vinaigrette according to your preference (I used it all). Add toasted walnuts and serve at room temperature or cold.
.
Apple Maple Vinaigrette:
2 tablespoons olive oil
2 tablespoons apple cider vinegar
2 tablespoons maple syrup
1/2 tablespoon lemon juice
1/2 teaspoon stone-ground mustard
1/2 teaspoon Kosher salt
Few grinds freshly ground black pepper
- Combine all ingredients in a small bowl. Whisk vigorously until well-combined and slightly opaque in color (this means it’s emulsified!).
- Taste and adjust seasonings to your preference. Don’t forget that the apple will add quite a bit of tartness and sweetness to the overall salad.
.
Week #5; June 18/19, 2020
- On: June 17, 2020
- 0
Tipi members, please read your email this week.
It’s got useful updates and information.

Tipi tomato juice
Folks, we have enough tomato juice that we can deliver it two times this season. This has never happened before. EOW/green members, you get a bottle this week. EOW/purple members, we’ll pack it again some other week, on your schedule. Last year was a very good tomato year, so we had enough tomatoes to bottle a double batch.
At peak season each year, we take our tomatoes to a small batch processor in East Troy, to process into this tomato juice. It’s a great way to capture ripe tomatoes when abundant. Drink the juice or try making an easy soup with vegetables from your CSA box. Feel free to hold on to your bottle for a week or two until we have zucchini, scallions, Walla Walla onions and herbs. Those make great soup with the juice. Or make cocktails and enjoy it now!
Storage: Store the juice out of sunlight at room temperature when unopened. Refrigerate after opening. The juice is already seasoned so do not add salt if you cook with it.
Ingredients: organic tomatoes from Tipi Produce, salt, organic garlic, organic onion, organic black pepper. Nutritional information is posted here.
Veggie List & Veggie Notes
Week #5, June 18/19, 2020
– Weekly shares
– EOW/ green
Strawberries, 1 quart
Tipi tomato juice, 1 quart
Napa cabbage
Sugar snap peas, ~1/4 lb
Snow peas, ~1/2 lb
(Both types of peas will be in one bag.)
Lettuce, iceberg
Lettuce, red or green leaf
Scallions, 1 bunch
Each site gets something from this list:
– kohlrabi OR
– white salad turnips (roots not greens) OR
– broccoli
Remember, all boxes at a site are identical every week. Please do not open boxes to ‘shop’ for kohlrabi vs turnips, etc.
Next week’s box will probably contain strawberries, sugar snap peas, zucchini, greens, scallions and more.
Strawberries – Wow, this is a great batch of berries. Storage: Refrigerate and eat soon.
– Most berries are quite clean. If you want to clean your berries, rinse gently. Don’t soak them, just rinse.
– Please recycle your strawberry containers. We no longer collect them for re-use. Please do not return them to your pick-up site.
Snap peas and snow peas. Both types have strings to remove. Snap off the stem end and pull the string down the concave side of the pod (the inward-curing side). Throw away the string and eat the pod. The thicker pea pods will usually have a string along both edges. Remove them when you snap off the stem.
– Snap peas (plump pea pods) – These peas should be eaten pod and all. They are delicious raw, or very lightly cooked or stir-fried. Preparation: They will need a quick rinse to remove faded gray blossoms. Storage: Refrigerate.
– Snow peas (larger, flatter pea pods) – These are excellent stir fried or in raw salads.
Napa cabbage (large, pale green cabbage with crinkled leaves) – This week’s napa might have an internal flower stalk, also the result of fluctuating temperatures this spring. Cut it lengthwise and you’ll find out. The stalks are still tender (and surprisingly sweet) so there’s no harm including them in your dishes.
Napa cabbage is an interesting vegetable, useful for both fresh, raw salads and for cooking. Its most famous use is fermented kimchi. I like to prepare a fresh, unfermented kimchi. Same seasonings, but it’s ready to eat right away. You will be amazed at how much shredded napa cabbage shrinks when prepared this way. See here for an example, but cut the salt in half (or less): Grilled Flank Steak with Kimchi-style Coleslaw.
Storage: Napa stores very well. When refrigerated, it will keep for several weeks. Peel off the outer layer and it will be ready to use. Here are a few preparation ideas from the ‘Asparagus to Zucchini’ cookbook.
– Chop raw napa into green salads.
– Substitute napa in traditional coleslaw.
– Chinese cabbage cooks quickly. Steam 3-5 minutes, or until leaves are wilted down but remain slightly crisp.
– Substitute napa cabbage for common cabbage in recipes, but reduce the cooking time by 2 minutes.
– Napa cabbage is the main ingredient in egg rolls. Try making an egg roll mixture to eat as a cooked side dish instead of preparing time-consuming egg rolls.
Scallion Ideas
We are very enthusiastic about scallions at our house. Here are our favorite uses:
– Scallion biscuits (slice and add to your usual biscuit recipe)
– Scallion pancakes (There are many approaches. Our favorite is here, but we add bay scallops instead of pork and we skip the relish.)
– We have a favorite scallion dressing for adaptable pasta salads. We use it with chard or spinach in spring, then switch to grilled vegetables and sweet Walla Walla onions once available.
– Egg drop soup with spring greens, topped with sliced scallions
– Grilled scallion, asparagus and turnip salad
– Sliced scallions are good on sandwiches and salads
– Grilled beef bulgogi wrapped in lettuce leaves. Easily adapted to tofu.
– Salmon patties with minced scallions mixed into the batter.
RECIPES
Visit our 2020 Recipe Log or our 2019 Recipe Log or join our Facebook discussion group.
LOCAL THYME/ Cooking 101
Wedge Salad
Cabbage Salad with Smoked Trout
Cannellini Bean and Provolone Salad with Scallion Vinaigrette
LOCAL THYME/ Cooking 202
Red Leaf Lettuce and Strawberry Salad
Pan Fried Tofu on Cabbage and Snap Pea Salad
Scallion Pancakes
LOCAL THYME/ Quick & Easy Meal
Shrimp, Cabbage, Pea Fried Rice
.
????
.
RECIPES FROM LAUREN

NAPA CABBAGE & SNOW PEA RICE BOWL WITH WARM COCONUT PEANUT SAUCE
Adapted from Bon Appetit magazine
Takes 1 hour
Serves 6-8
4-1/2 cups water
2 cups brown rice
1 teaspoon Kosher salt
1 head Napa cabbage, cleaned and thinly sliced (I slice the white stem and green leafy portion together)
1/4 pound snow peas, ends removed and sliced
1 bunch scallions, sliced (you can use all of the scallion, whites, pale green and dark green portions)
Warm Peanut Sauce:
1/2 cup creamy peanut butter
3/4 cup coconut milk
2 tablespoons brown sugar
2 tablespoon soy sauce or tamari
Juice from 1 lime (or 2 tablespoons lime juice)
1 tablespoon fish sauce
1/2 teaspoon red pepper flakes
Kosher salt
- Bring water to a boil in a large saucepan on the stove top over high heat. Once boiling, add rice and salt and reduce heat to low. Cover and cook for 50 minutes (or less, depending on your type of rice; read the package directions).
- While the rice cooks, prepare your veggies. In a large bowl, toss napa cabbage, snow peas, and scallions together.
- When the rice has about 10 minutes left to cook, begin the sauce. Combine peanut butter, coconut milk, brown sugar, soy sauce or tamari, lime juice, fish sauce and red pepper flakes in a large saucepan. Whisk together until smooth. Place on stove and turn heat to medium. Whisk until smooth and hot. If it seems too thick, add a bit of water and whisk it in. You will want the dressing to be warm to wilt the greens.
- Serve in a bowl with the ratio of about a 1/2 cup of rice to 2 cups of veggies. Pour about 1/4 cup of peanut sauce over the greens and toss gently to coat.
.
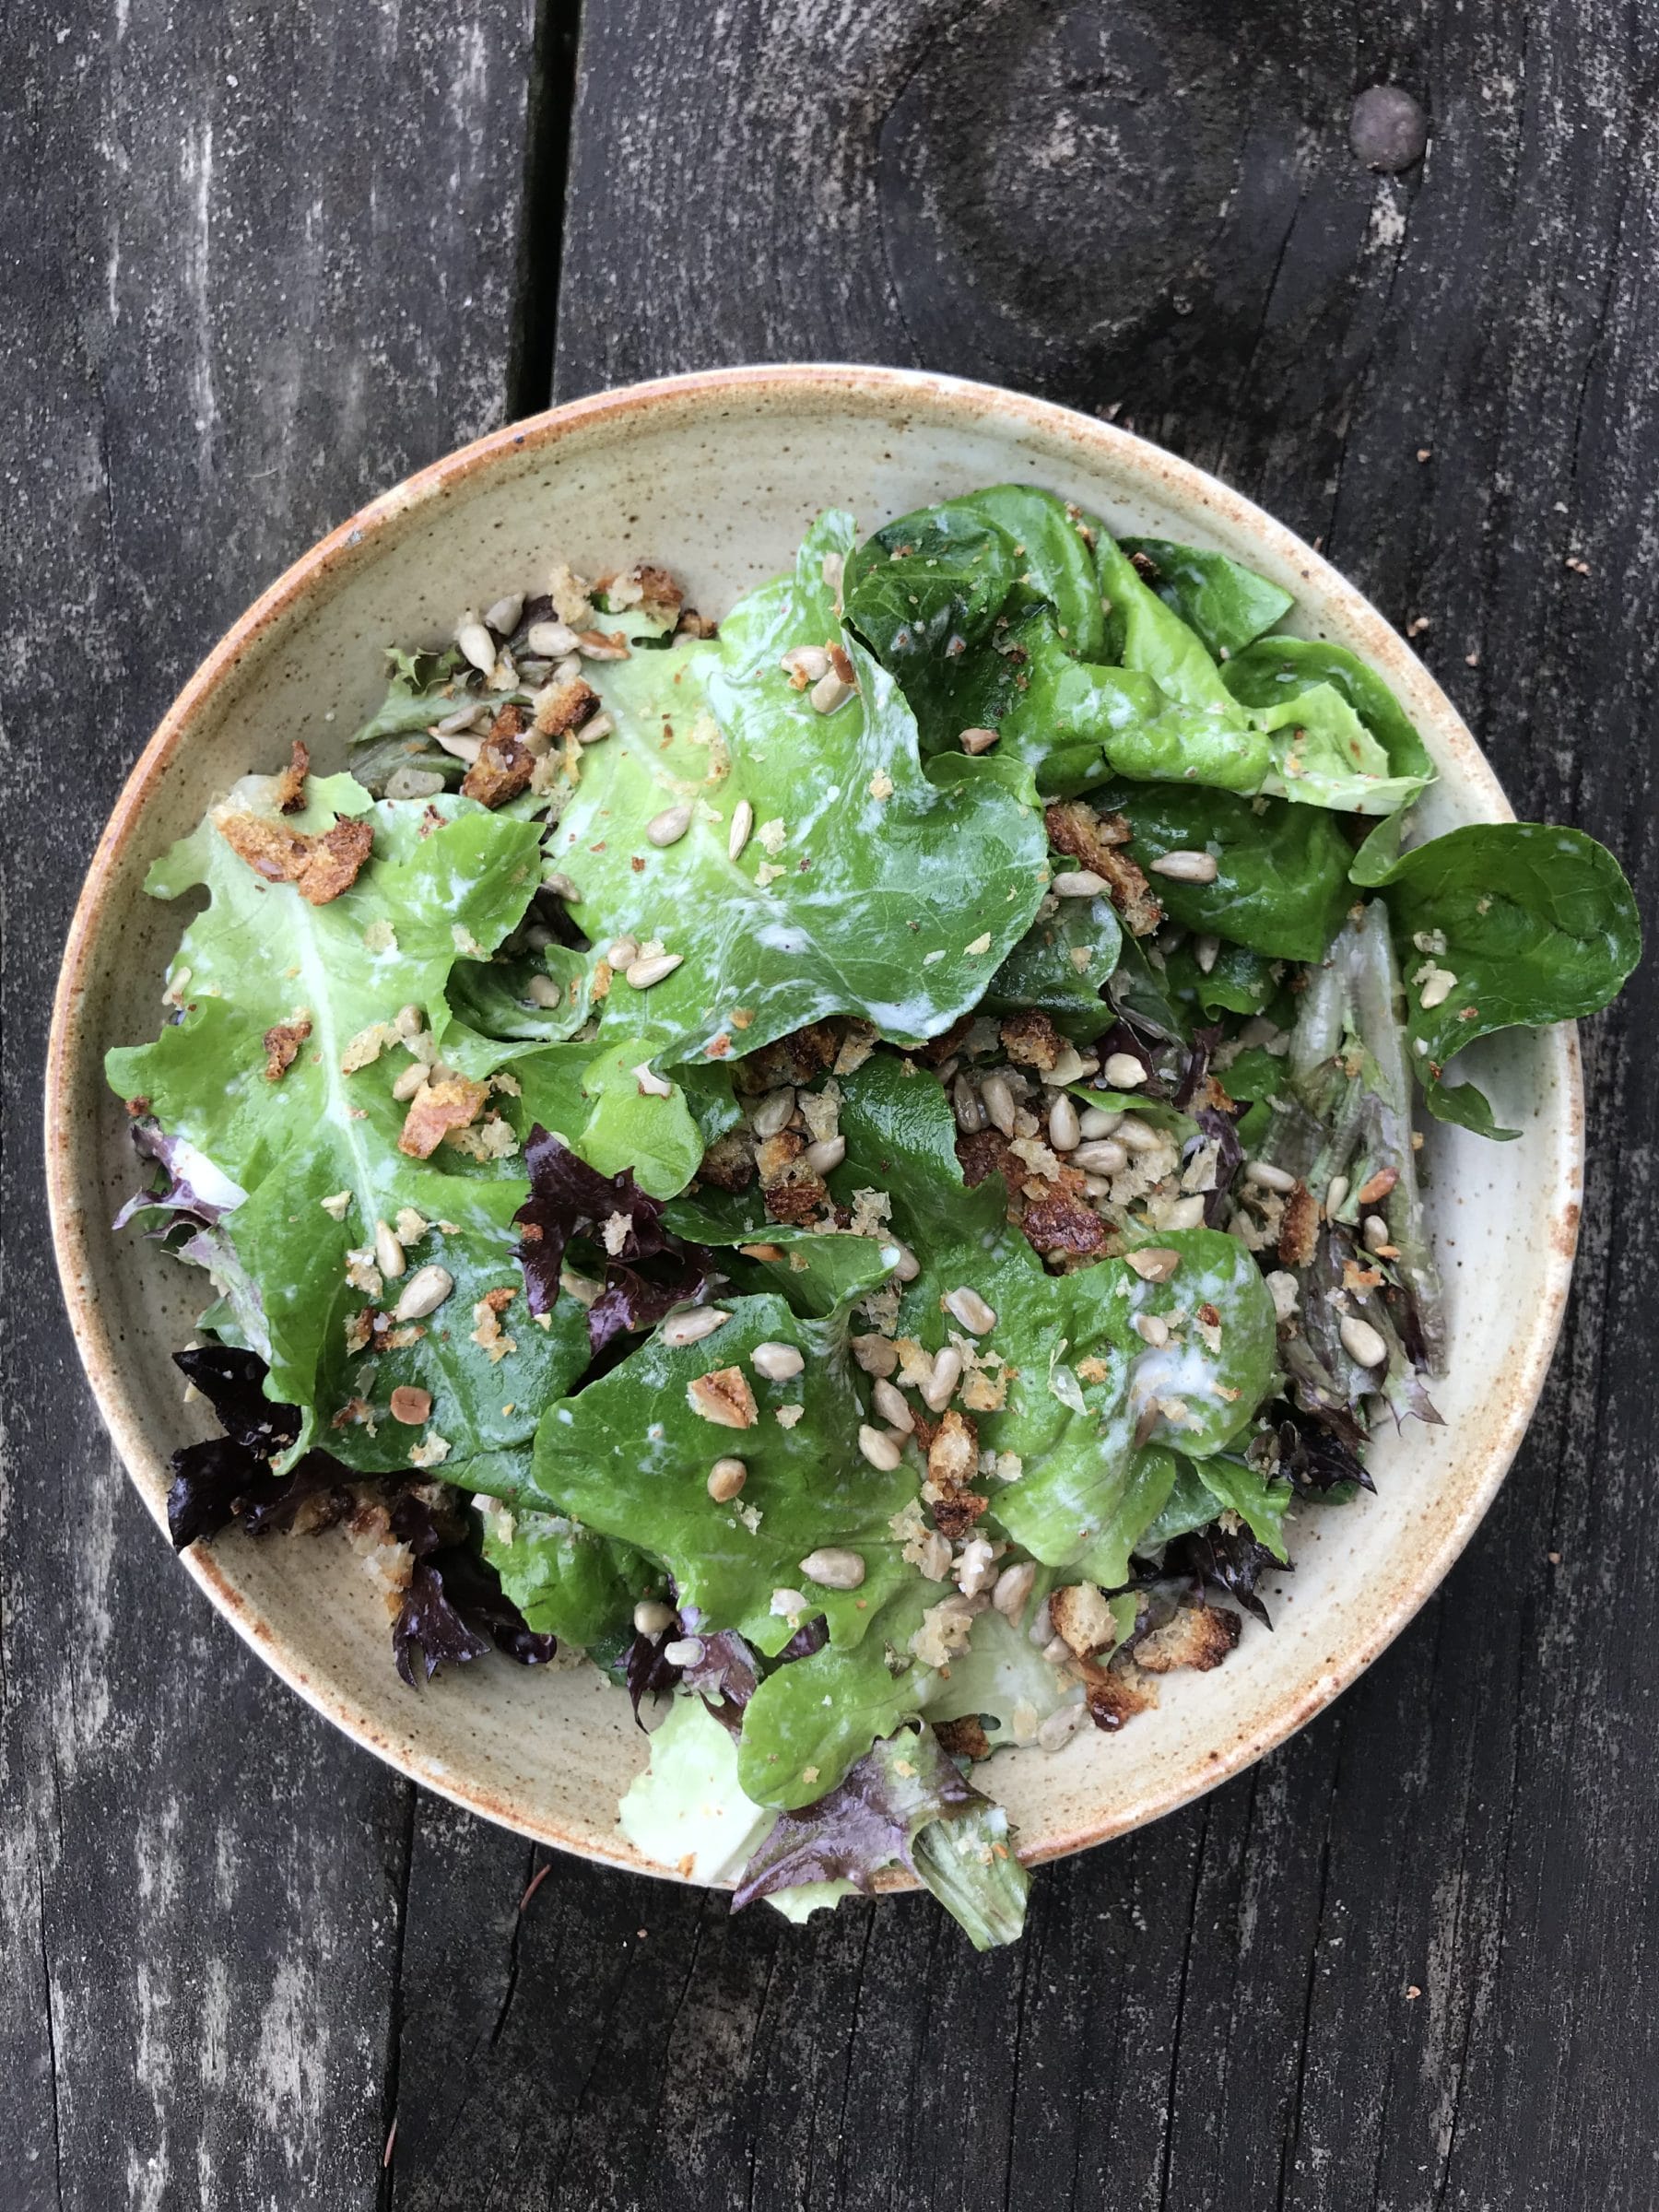
SPRING SALAD WITH LEMON CREAM
Adapted from Joshua McFadden’s Six Seasons
3 garlic cloves, smashed
½ cup heavy cream
½ teaspoon Kosher salt, plus more for seasoning
¼ teaspoon freshly ground black pepper, plus more for seasoning
½ teaspoon fresh lemon zest
2 tablespoons fresh lemon juice
2 tablespoons olive oil
1 head lettuce (preferably the red or green leaf)
½ cup toasted freshly toasted breadcrumbs
¼ cup toasted salted sunflower seeds
- In the morning, combine garlic and heavy cream in a smash mason jar. Leave in the fridge until you get home and are ready to cook dinner.
- When ready to prepare your salad, strain cream into a small bowl. Discard garlic. Add salt, pepper and lemon zest to cream. Whisk until it begins to thicken then add lemon juice and olive oil. Keep whisking until it is light and airy.
- Roughly cut up your lettuce, and place it in a large bowl. Add the lemon cream dressing you just made and toss well to evenly coat. You may not use all of it. I suggest starting with 1/3 to a ½. Taste and then season with additional salt and freshly ground black pepper as desired.
- Add breadcrumbs and sunflower seeds (you can toast them together in a pan for 5 minutes right before you serve) and eat right away.
.

SPRING WEDGE
Serves 4-6 as a side (or 2 as a meal)
Takes 30-40 minutes
6 pieces bacon
1 head iceberg lettuce
1/4 pound snap peas, slivered
2 scallions, finely chopped
3/4 cup sour cream or Greek yogurt
1/2 cup buttermilk
1 tablespoons white wine vinegar
1 teaspoon Kosher salt
1/4 teaspoon freshly ground black pepper
1/2 cup crumbled blue cheese
1/2 cup chopped toasted almonds
- Place bacon on a baking sheet and place in a cold oven. Set temperature to 400 degrees and timer for 15 minutes. Bacon should be cooked by the time the timer beeps, but if not, set it for a few minutes longer. Drain grease by placing on paper towels then roughly chop.
- Cut your salad into 4 to 6 wedges. Place each wedge in a large broad bowl or a plate (place 2-3 wedges in bowl or on a plate if eating as a meal). Sprinkle with snap peas and the reserved bacon. (Feel free to also sprinkle with radish or fresh herbs if you have any on hand).
- Then in a small bowl, combine scallions, sour cream, buttermilk, vinegar, salt and pepper until smooth. Fold in blue cheese. Taste and adjust seasonings as desired. You will likely want more pepper. Spoon dressing over each wedge. You will want at least three spoonfuls per wedge. Sprinkle with almonds just before serving.
- Serve with more salt and freshly ground black pepper. Eat with a knife and fork and keep that delicious dressing nearby.
.
Our daughter’s bout with COVID-19 … maybe
- On: June 10, 2020
- 2
In March, our daughter Sophie rushed home from studying abroad in Spain, trying to beat border closings as Spain entered military lockdown. She was healthy when she arrived but fell sick within days, presumably with COVID-19. She could not get tested for the virus but had many typical COVID-19 symptoms: fever, uncontrollable cough, racing heartbeat, exhaustion. Her fever persisted for 14 days straight. She did not need to be hospitalized but our bags were packed for two nights as she struggled to breathe. She is completely recovered now but it was a scary and tense three weeks, with many worries at once. We were worried about Sophie’s health of course, but also the unfolding growing season and how to protect our employees as they returned to work.
Farmwork continued during Sophie’s illness. She was in isolation upstairs in our house. Steve, Ari and I were in quarantine, in separation from both Sophie and the rest of the farm. Our winter crew kept things going. We met outside in the driveway at great distance, communicated via phone, sanitized everything, and created ‘zones’ on the farm. The crew got the barn, Steve and I got the greenhouse, etc. No one else got sick and, by mid-April, we were all out of quarantine.
This experience sharpened our farm response to COVID-19 risks. Figuring out how to avoid spread within a household is directly applicable to avoiding spread on a farm. We’ve made many changes, which I’ll write about another time. Knowing how sick Sophie was lit a fire under our crew. Only five employees were working in March and April and they all took this very seriously. Everyone was on board and actively problem-solving with us.
Eventually, we will know via antibody test if Sophie was exposed to COVID-19. As I tell people about her experience, she is often the only person they know who may have contracted the disease. Believe me, this is one hell of a disease. Beth
Veggie List & Veggie Notes
Week #4, June 11/12, 2020
– Weekly shares
– EOW/ purple
– Sampler/ moon
Asparagus, ~1/4 lb
Spinach, 1 medium bunch
Romaine lettuce
White salad turnips, 1 bunch
Radishes, 1 bunch
Kohlrabi, 1 or 2
Scallions, 1 bunch
Mint, 2 stalks
– Some sites get 1 medium bok choy.
– Some sites get 1 small bok choy plus 1 small bunch green kale.
Next week’s box will probably contain napa cabbage, lettuce, kohlrabi, scallions and more.
Asparagus – This has been an unusually short asparagus season. We lost production to frost and to Japanese beetle damage last season that weakened the plants. We have finished our asparagus harvests. Now it’s time to tend the plants and let them replenish their root reserves for next season.
Mint – You’ll get about two sprigs. Refrigerate in a small container. Avoid bruising until you are ready to use it.
Kohlrabi (pale green, round vegetable with thick skin) – Crunchy and sweet, kohlrabi is a great addition to salads.
Storage: Kohlrabi bulbs will store for a month in the refrigerator.
Uses: Kohlrabi are good peeled and eaten out of hand, or added to sandwiches, or added to salads. It makes a nice salad on it’s own. You can grate it, slice it, or cut it into matchsticks. It’s also good cooked. If you have it, the Asparagus to Zucchini cookbook has a long list of kohlrabi suggestions.
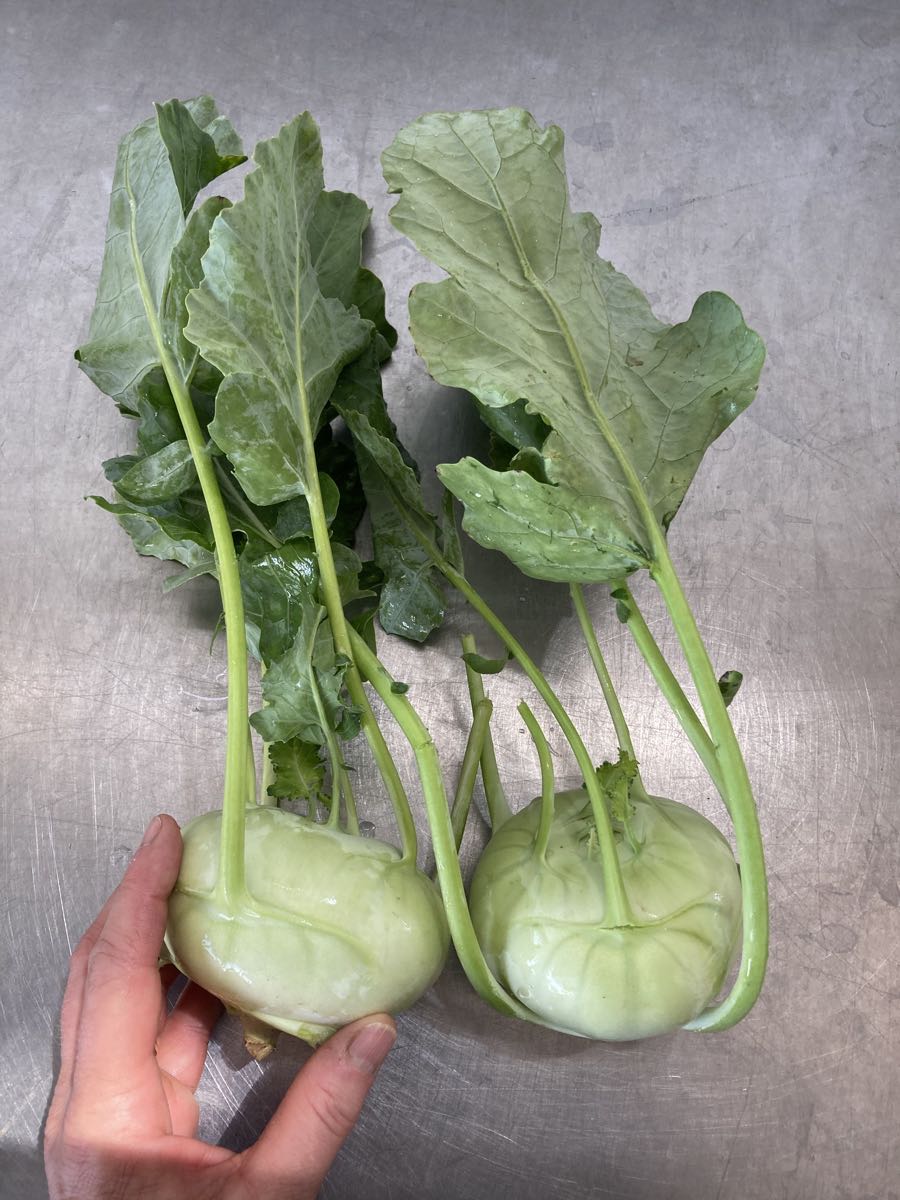
Kohlrabi
RECIPES
Visit our 2020 Recipe Log or our 2019 Recipe Log or join our Facebook discussion group.
LOCAL THYME/ Cooking 101
Romaine Salad with Peanut Dressing
Eggs Scrambled with Three Greens, Radish and Feta
Aloha Chicken Salad
LOCAL THYME/ Cooking 202
Lettuce Wrapped Fish
Spiced Kohlrabi Fries with Spicy Mayo
Farro Salad with Salad Turnips, Turnip Greens, Mint and Walnuts
LOCAL THYME/ Quick & Easy Meal
Tofu Bok Choy and Radish LoMein
RECIPES FROM LAUREN
NOODLE LETTUCE WRAPS WITH PORK MEATBALLS & CRUNCHY GARLIC CHILI OIL
Serves 2-4
Takes 1 hour
1 bunch scallions, divided
Handful or two of spinach (or turnip greens), roughly chopped
1-1/2 pounds ground pork
1 tablespoon ground ginger
3 tablespoons fish sauce, divided
Zest of 1 lime
1/2 teaspoon Kosher salt
2 tablespoons maple syrup
2 tablespoons crunchy garlic chile oil (recipe below), plus more for serving
1 tablespoon lime juice
1 tablespoon sesame oil
6-8 ounces vermicelli, rice or ramen noodles (I used these!)
1 kohlrabi, peeled and cut into matchsticks
2 tablespoons vegetable oil
1 head lettuce, washed and leaves separated
Crunchy Garlic Chile Oil
1/2 cup vegetable oil
4 garlic cloves (or stalks green garlic, white and pale green portions), minced
1-1/2 teaspoons red pepper flakes
1/2 teaspoon Kosher salt
- Begin by preparing the garlic chile oil by pouring oil into a small saucepan and heating over medium heat until glistening (but not smoking). Add garlic and stir. Things will sizzle for a little bit. Let them do that for a minute or so and then add the red pepper flakes and salt into the pot. Reduce heat to medium low and let sizzle for 5-10 minutes until the garlic has gotten a little browned and crispy. You don’t need to watch this too carefully so feel free to start your meatballs while this is going.
- In a food processor, combine half of the scallions (cut into 1 or 2-inch pieces) and greens. Process until finely chopped. Add pork, ginger, 1 tablespoon fish sauce, lime zest, and salt. Process until the mixture comes together (it doesn’t need to be especially smooth, just uniform). Roll the mixture into 20-30 meatballs and chill in the freezer for 10 minutes.
- Meanwhile, bring a pot of water to a boil.
- In a large bowl, combine maple syrup, crunchy garlic chile oil, lime juice, toasted sesame oil and 2 tablespoons fish sauce. Whisk to combine. Add kohlrabi and remaining scallions (thinly sliced) to the bowl. Toss to coat.
- Cook noodles according to package directions. Drain and rinse under cold water when finished. Add to bowl with kohlrabi. Thinly slice remaining scallions (white and pale green portions only) and add to bowl.
- In a large skillet, heat 1 tablespoon oil over medium heat. Cook half of the meatballs for 10-12 minutes until well-browned on all sides and cooked through. Repeat with the second half of the oil and second half of the meatballs.
- Serve noodle mixture and meatballs over several lettuce leaves. Drizzle the whole thing with several spoonfuls of the crunchy garlic chile oil.
.
????
SPINACH & TURNIP DIP
Adapted from Bon Appetit
Takes 30 minutes
Serves many
2 tablespoons butter
2 garlic cloves (or stalks green garlic, white and pale green parts only), minced
1 bunch turnips, roots shredded and greens, roughly chopped
2-4 cups spinach, roughly chopped
1 teaspoon Kosher salt
8-ounce cream cheese
2 ounces Parmesan cheese (about 1 cup)
1/2 teaspoon freshly ground black pepper
- Melt butter in a medium saucepan. Add garlic and saute for 1 minutes over medium heat until very fragrant. Add radishes and cook, tossing, until well-coated in butter, 1-2 minutes longer. Add spinach and radish greens along with salt. Cook until wilted and most of the liquid is cooked off., 5-10 minutes. Add cream cheese and cook until melted. Stir in Parmesan and pepper until melted and creamy. Taste and adjust seasonings.
- Serve warm with toast, in a bread bowl or with crackers.
.
????
BOK CHOY & RADISH SLAW
Adapted from Dishing Up The Dirt
Takes 20 minutes
Serves 4 (as a side)
1 bunch radishes
1 medium head Bok Choy (or 1 small head and 1/2 bunch kale)*, stems and leaves very thinly sliced
2 scallions, thinly sliced
1 garlic clove (or 1 stalk green garlic, white and pale green portions), minced
2 sprigs mint, leaves removed and very thinly sliced
1-2 limes, zested and juiced
1/4 cup peanut or walnut oil
2 tablespoons soy sauce
1 tablespoon toasted sesame oil
1 tablespoon maple syrup
1 teaspoon Kosher salt
- Halve radishes if small, quarter if large. Very thinly slice and toss into a large bowl with bok choy, scallions, garlic and mint. Add the zest of 1 lime then squeeze in juice.
- Drizzle salad with peanut oil, soy sauce, sesame oil, maple syrup, and salt. Stir well to combine all ingredients then taste and adjust seasonings as desired. You may want to add more lime juice and zest. I love things to be a little zingy so I used a full second lime.
- Right before serving toss with sesame seeds. Serve as a salad, alongside some grilled salmon or atop a chicken taco (as Andrea Bemis does).
*If using a combination of bok choy and kale, be sure to remove the stems from the kale.
“To protest against injustice is the foundation of all our American democracy.”
- On: June 03, 2020
- 0
Thurgood Marshall, US Supreme Court Justice
This captures how we feel.
.
Veggie List & Veggie Notes
Week #3, June 4/5, 2020 (Th/Fr sites)
– Weekly shares
– EOW/ green
NOTE: Please work with us on the mushroom schedule.
We realize that the EOW/green group is getting two batches of mushrooms. Six weeks ago, I made a mistake while harried with other worries. In turn, I created trouble for our lovely mushroom suppliers Mary and Ed, so we have to take shiitakes this week instead of next week. If we pack mushrooms again in fall, we’ll make sure they are delivered on an EOW/purple week. Thank you.
Shiitake mushrooms, 8 oz
Asparagus, ~1/2 lb
Escarole
Amara kale, 1 bunch
Lettuce (red leaf or red Romaine)
White salad turnips, 1 bunch
Radishes, 1 bunch
Scallions, 1 bunch
Next week’s box will probably contain spinach, lettuce, white salad turnips, bok choy (maybe), scallions and more.
Shiitake mushrooms – These are from Hidden Valley Mushrooms, the same people who grow button mushrooms for us. I love shiitakes cooked with spinach or other greens. Shiitakes must be cooked. A small subset of people can have a toxic reaction to raw or undercooked shiitakes. Once cooked, they are harmless. And tasty! Lightly sauté in butter and add to any dish. We will use ours in a frittata, as well as sauteed and mixed into pasta salad. Sauteed shiitakes and spinach are a great topping for rice bowls, e.g. bibimbap.
Storage, general: Refrigerate in a dry paper bag, but not in your crisper drawer with other vegetables, especially brassicas. Do not cover the paper bag. Mushrooms are perishable so use soon.
Storage, this week: Check your mushroom bag as soon as you get home. If the paper bag is wet, remove the shiitakes and put in a fresh, dry bag. Our new liner bags trap water shed by our greens, eg kale, lettuce, turnip greens. This is bad for mushrooms, so it’s worth a bit of attention when you get home.
Escarole (broad head of wavy green leaves) – This member of the chicory family can be eaten raw or cooked. Its slightly bitter flavor is a good addition to mixed salads. It is excellent cooked alone or mixed with other greens. It cooks quickly, but not as quickly as spinach. Cover and refrigerate.
Amara kale – We’ve grown this variety just a few times and included it this spring for variety among cooking greens. Here’s the seed catalog description: “While technically a mustard, Amara is known by several different names including Ethiopian kale, highland kale, Abyssinian mustard, and Texsel greens. The attractive, dark green leaves are tender, slightly savoyed with a wavy margin, and have an excellent rich flavor. Good in salads or as a cooked green.” This stuff is pretty interesting. It has the texture of kale but the spiciness of mustard. I’d say it’s about half as spicy as mustard greens. The flavor is strong once cooked but quite good.
Use: Use like any kale or mustard green. Eat the leaves and mid veins. Discard the stems and petioles, which are too tough.
Storage: Cover and refrigerate.
White salad turnips (bunched white roots with green tops) – I know that returning members look forward to these sweet and delicious turnips, which taste nothing like the turnips that are harvested in fall.
– Storage: Cover and refrigerate.
– Uses: Both the turnip roots and tops are edible. The roots are excellent raw; Slice and add to salads. They can be cooked and are especially good when lightly sauteed in butter. Stir as little as possible so they brown on at least one side. The turnips greens are excellent cooked. Treat them like mustard greens.
– Our favorite use: Slice the roots very thinly and combine with a mixture of rice vinegar, mirin, soy sauce, sesame oil. Eat immediately or marinate.
Scallions (bundle of green onions) – These are useful raw or cooked. Thinly-sliced raw scallions can be folded into biscuit dough or sprinkled on top of soups or salads. Terrific garnish for pasta dishes. Think pad thai.
RECIPES
Visit our 2020 Recipe Log or our 2019 Recipe Log or join our Facebook discussion group.
LOCAL THYME/ Comforting Classics
Ethiopian Kale Caesar Salad
Braised Escarole and Radish with White Beans and Capers
Lettuce Wraps with Ground Pork, Shiitake, Radishes, Salad Turnips and Greens
LOCAL THYME/ Outside the Box Recipes
Black Eyed Pea and Two Greens Soup</a
Gulf Coast Gumbo Z’herbes
Early Summer Veggies Stewed with Roasted Red Chili Paste
LOCAL THYME/ Quick & Easy Meal
Teriyaki Beef, Shiitake and Asparagus Stir Fry
????
RECIPES FROM LAUREN
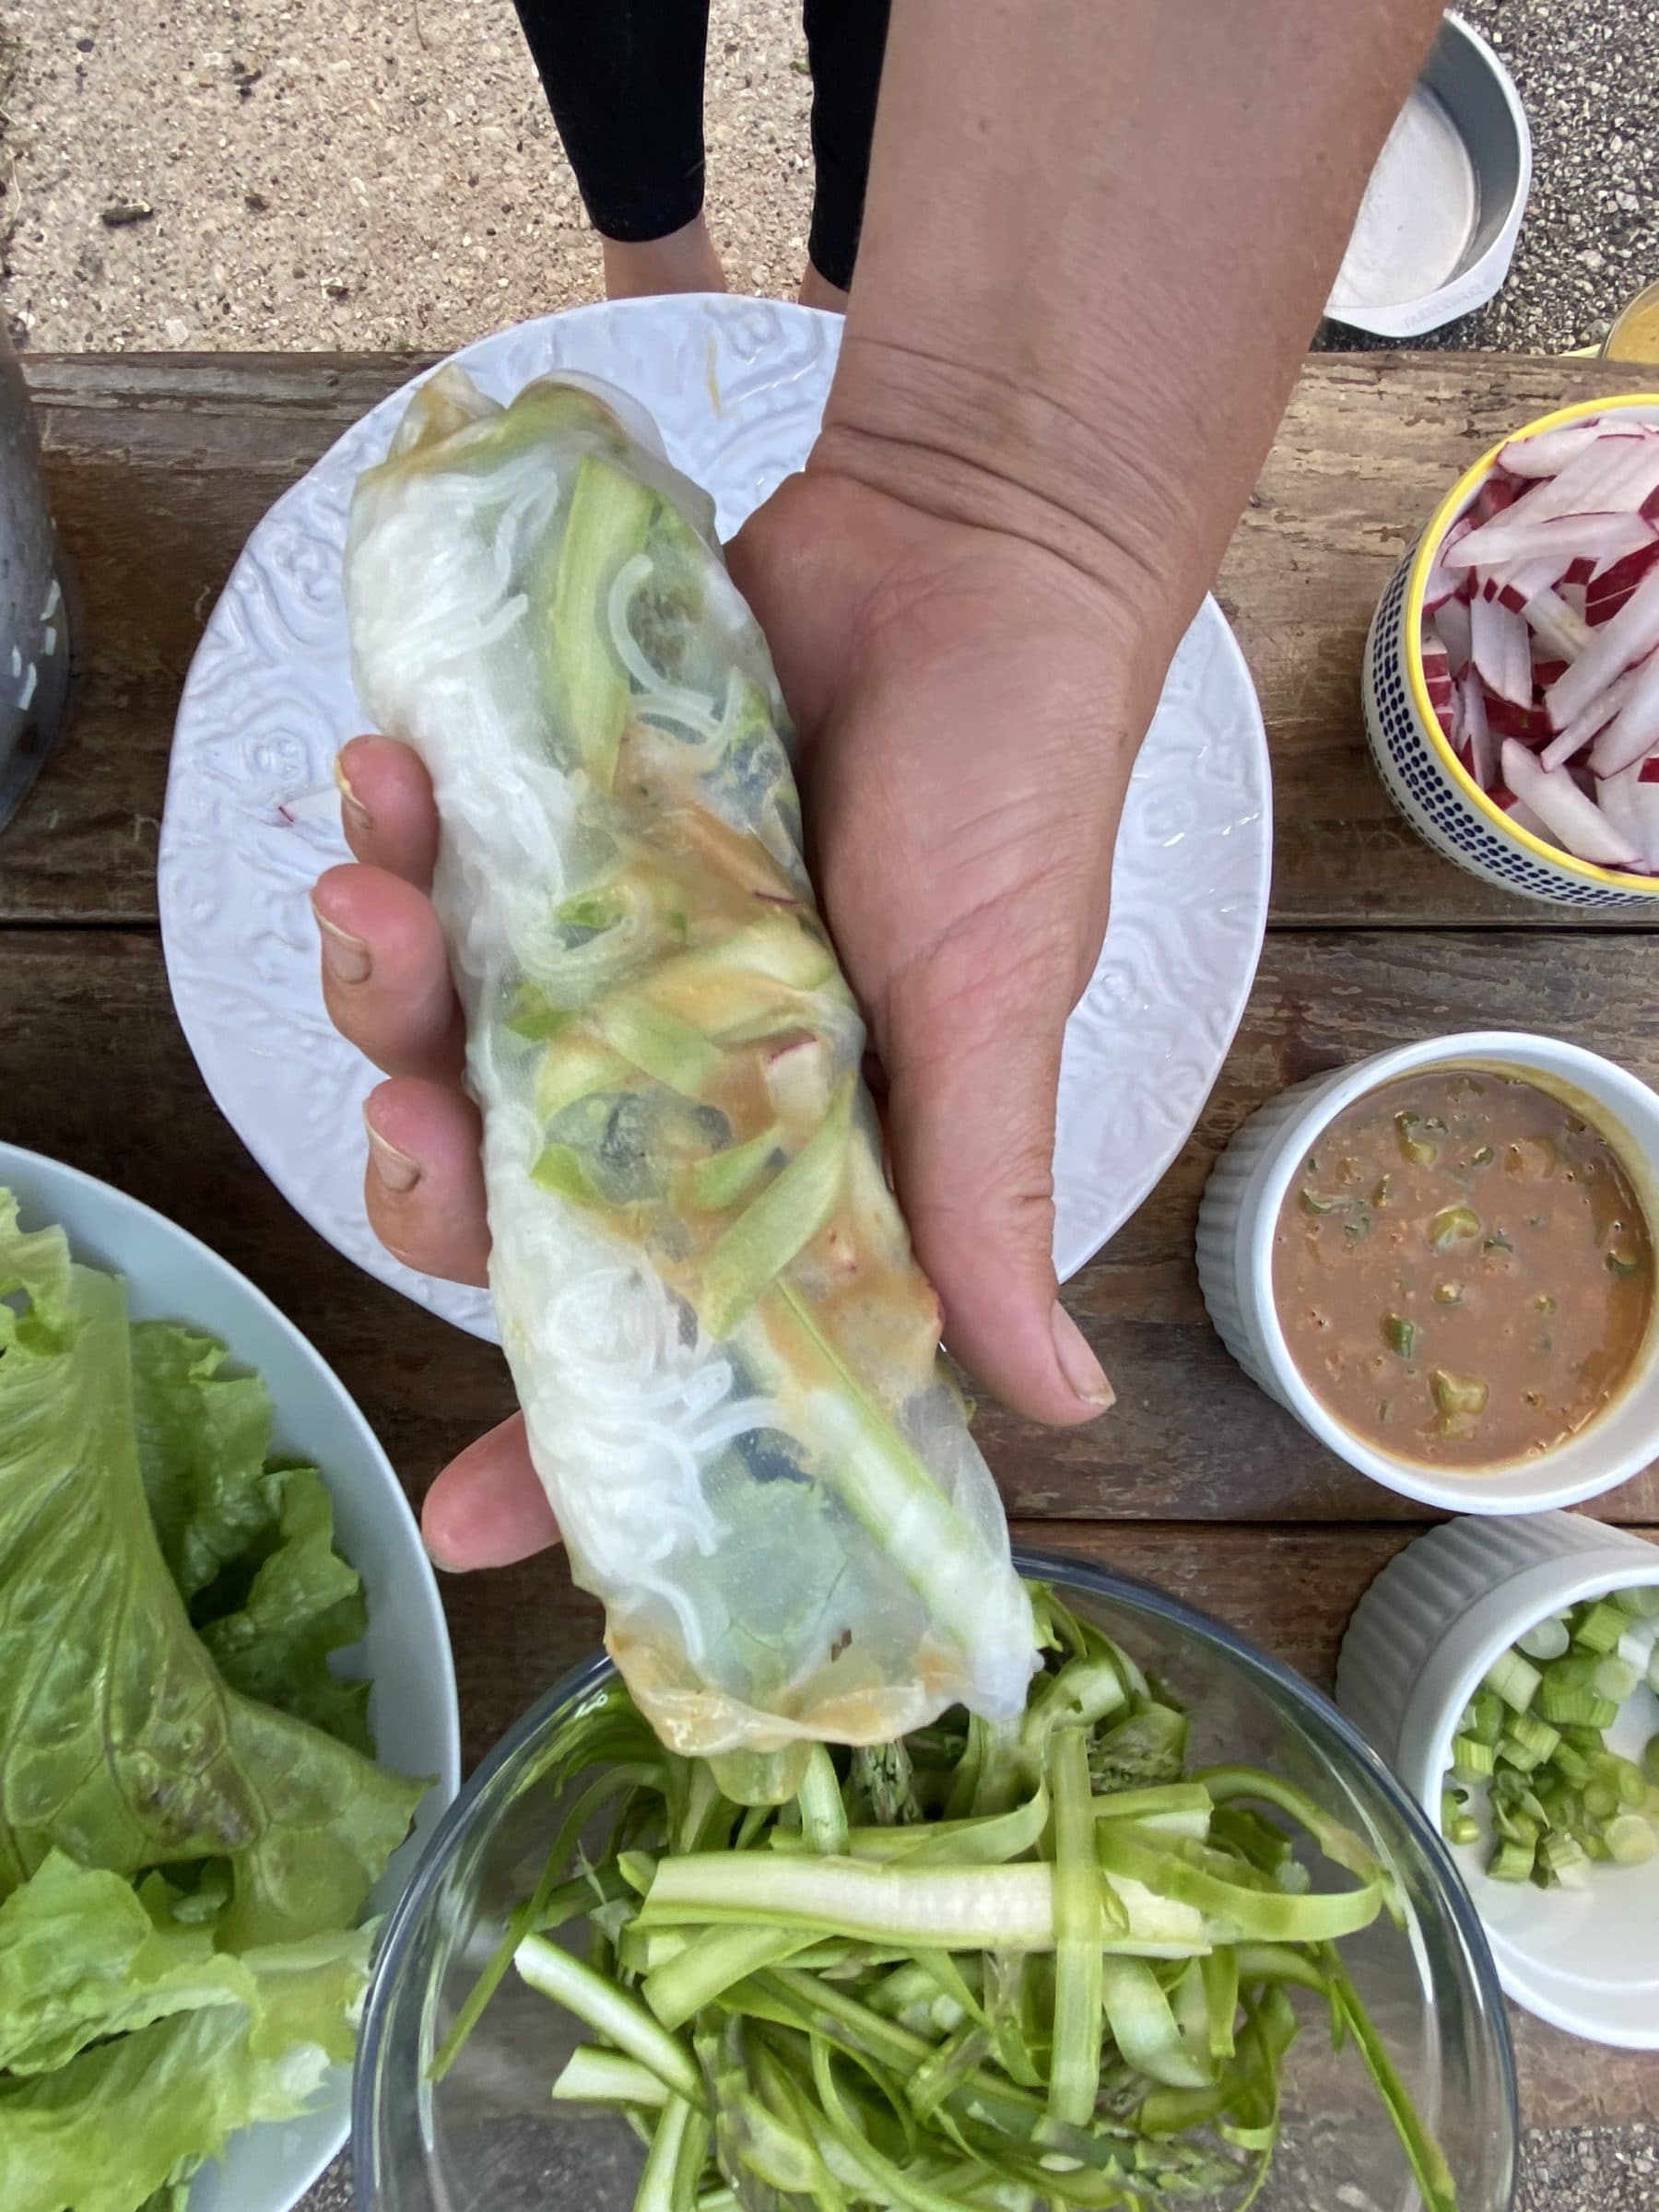

SPRING ROLLS (two ways!)
Two parts of this recipe are optional: 1) the sauce (this is just our favorite dipping sauce for spring rolls- feel free to find or use a favorite of your own!) and 2) the use of spring roll wrappers. I love a spring roll when I’m a little overwhelmed by the third head of CSA lettuce but with the prepping of vegetables and wrapping of delicate little pieces of rice paper, they can get a little frustrating. A spring roll salad (also pictured above) is a great easy alternative!
Serves 4-6.
Takes 20 minutes + time to wrap your spring rolls.
4 ounces rice noodles
1 head lettuce, washed and leaves torn apart
1 bunch radishes, cut into matchsticks
1/2 bunch scallions, thinly sliced, divided
1/2 pound asparagus, shaved
2-3 avocados, optional
Spring roll wrappers, optional
Dipping sauce:
1/3 cup peanut butter
2 tablespoons apple cider vinegar
2 tablespoons soy sauce
2 tablespoons maple syrup
1 tablespoon toasted sesame oil
1-3 tablespoons water, as needed
- Bring a large pot of water to a boil on the stove. Cook rice noodles according to package directions. Drain and set aside.
- Prep your veggies and get everything all together on a table or counter for easy assembly.
- Prepare your dipping sauce by combining all ingredients with half of the sliced scallions. If needed, add water to thin.
- Make your salad: Top lettuce with radishes, scallions, and shaved asparagus. Drizzle with sauce. Add salt to taste.
- Make your spring rolls: Submerge spring roll wrapper in water until pliable (but not super soggy/floppy). I typically fill a 9″ cake pan with an inch or so of water to easily do this. Place your spring roll wrapper on a plate and top with desired filling ingredients. I always put a bit of everything in along with a little of the dipping sauce. Wrap up like a burrito (or however you can get things contained). I usually tuck in either ends and then roll it closed. If this is too frustrating, opt for the salad option listed in step #4.
.
.
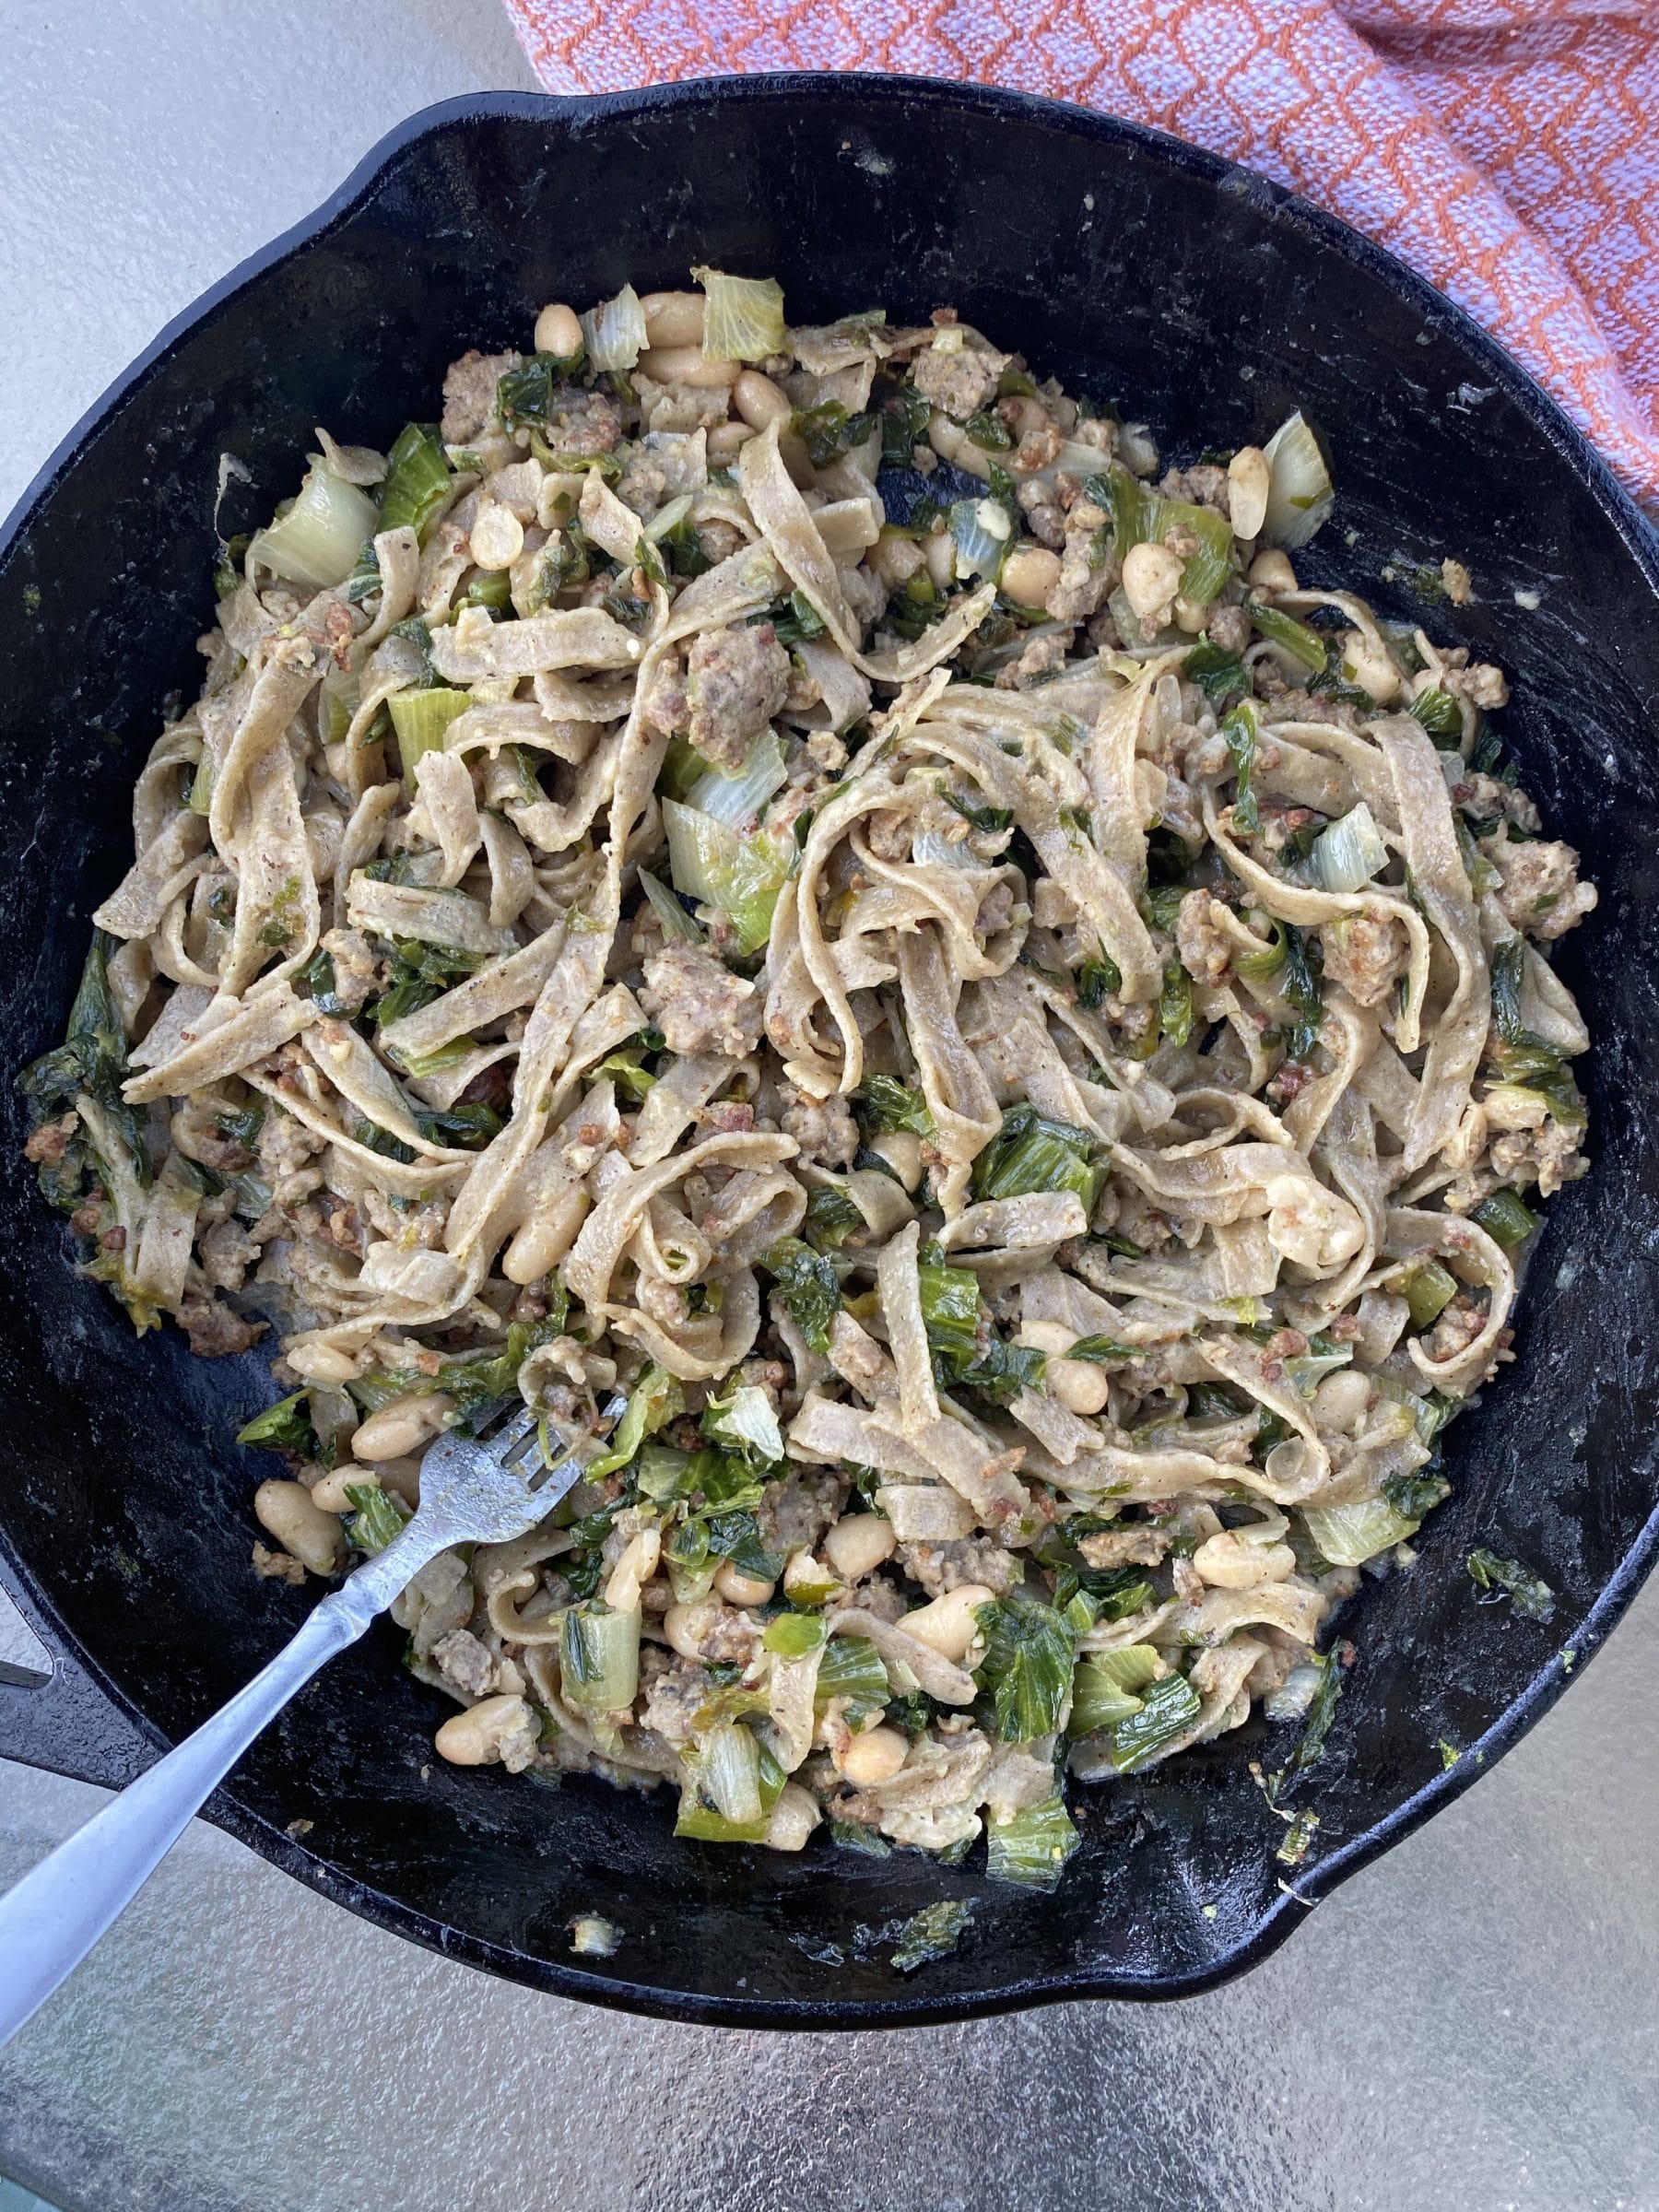
ESCAROLE WITH SAUSAGE & WHITE BEANS
Adapted from Food Network
Serves 4-6
Takes 30 minutes
1 tablespoon olive oil
1 pound pork sausage
1/2 bunch scallions, thinly sliced
8 ounces pasta
1 head escarole, roughly chopped
1 teaspoon chicken soup base (or boullion)
15-ounce cannellini beans
1/2 cup – 1 cup finely shredded Parmesan
1/4 teaspoon red pepper flakes
- In a large skillet (preferably cast-iron), heat olive oil over medium high heat. Add sausage and cook 5-10 minutes until well-browned and even a little crispy in places. Reduce heat to medium low, add scallions, and cook 5 minutes longer. You want them to also get a little crispy but not burn.
- On another burner, get a large pot of salted water boiling. When boiling, add noodles. Cook according to package directions then drain, reserve 1-1/2 cups of the pasta water for the sauce.
- Add escarole to skillet of sausage and scallions. Saute gently until wilted, about 5 minutes then add reserved pasta water, chicken soup base, and beans. Let simmer until reduced by half (5-8 more minutes). Add pasta along with the 1/2 cup of cheese and the red pepper flakes. Stir vigorously to incorporate all ingredients together. Add a little more water if you need to loosen the mixture.
- Taste and adjust seasonings (and cheese) as desired.
.
.
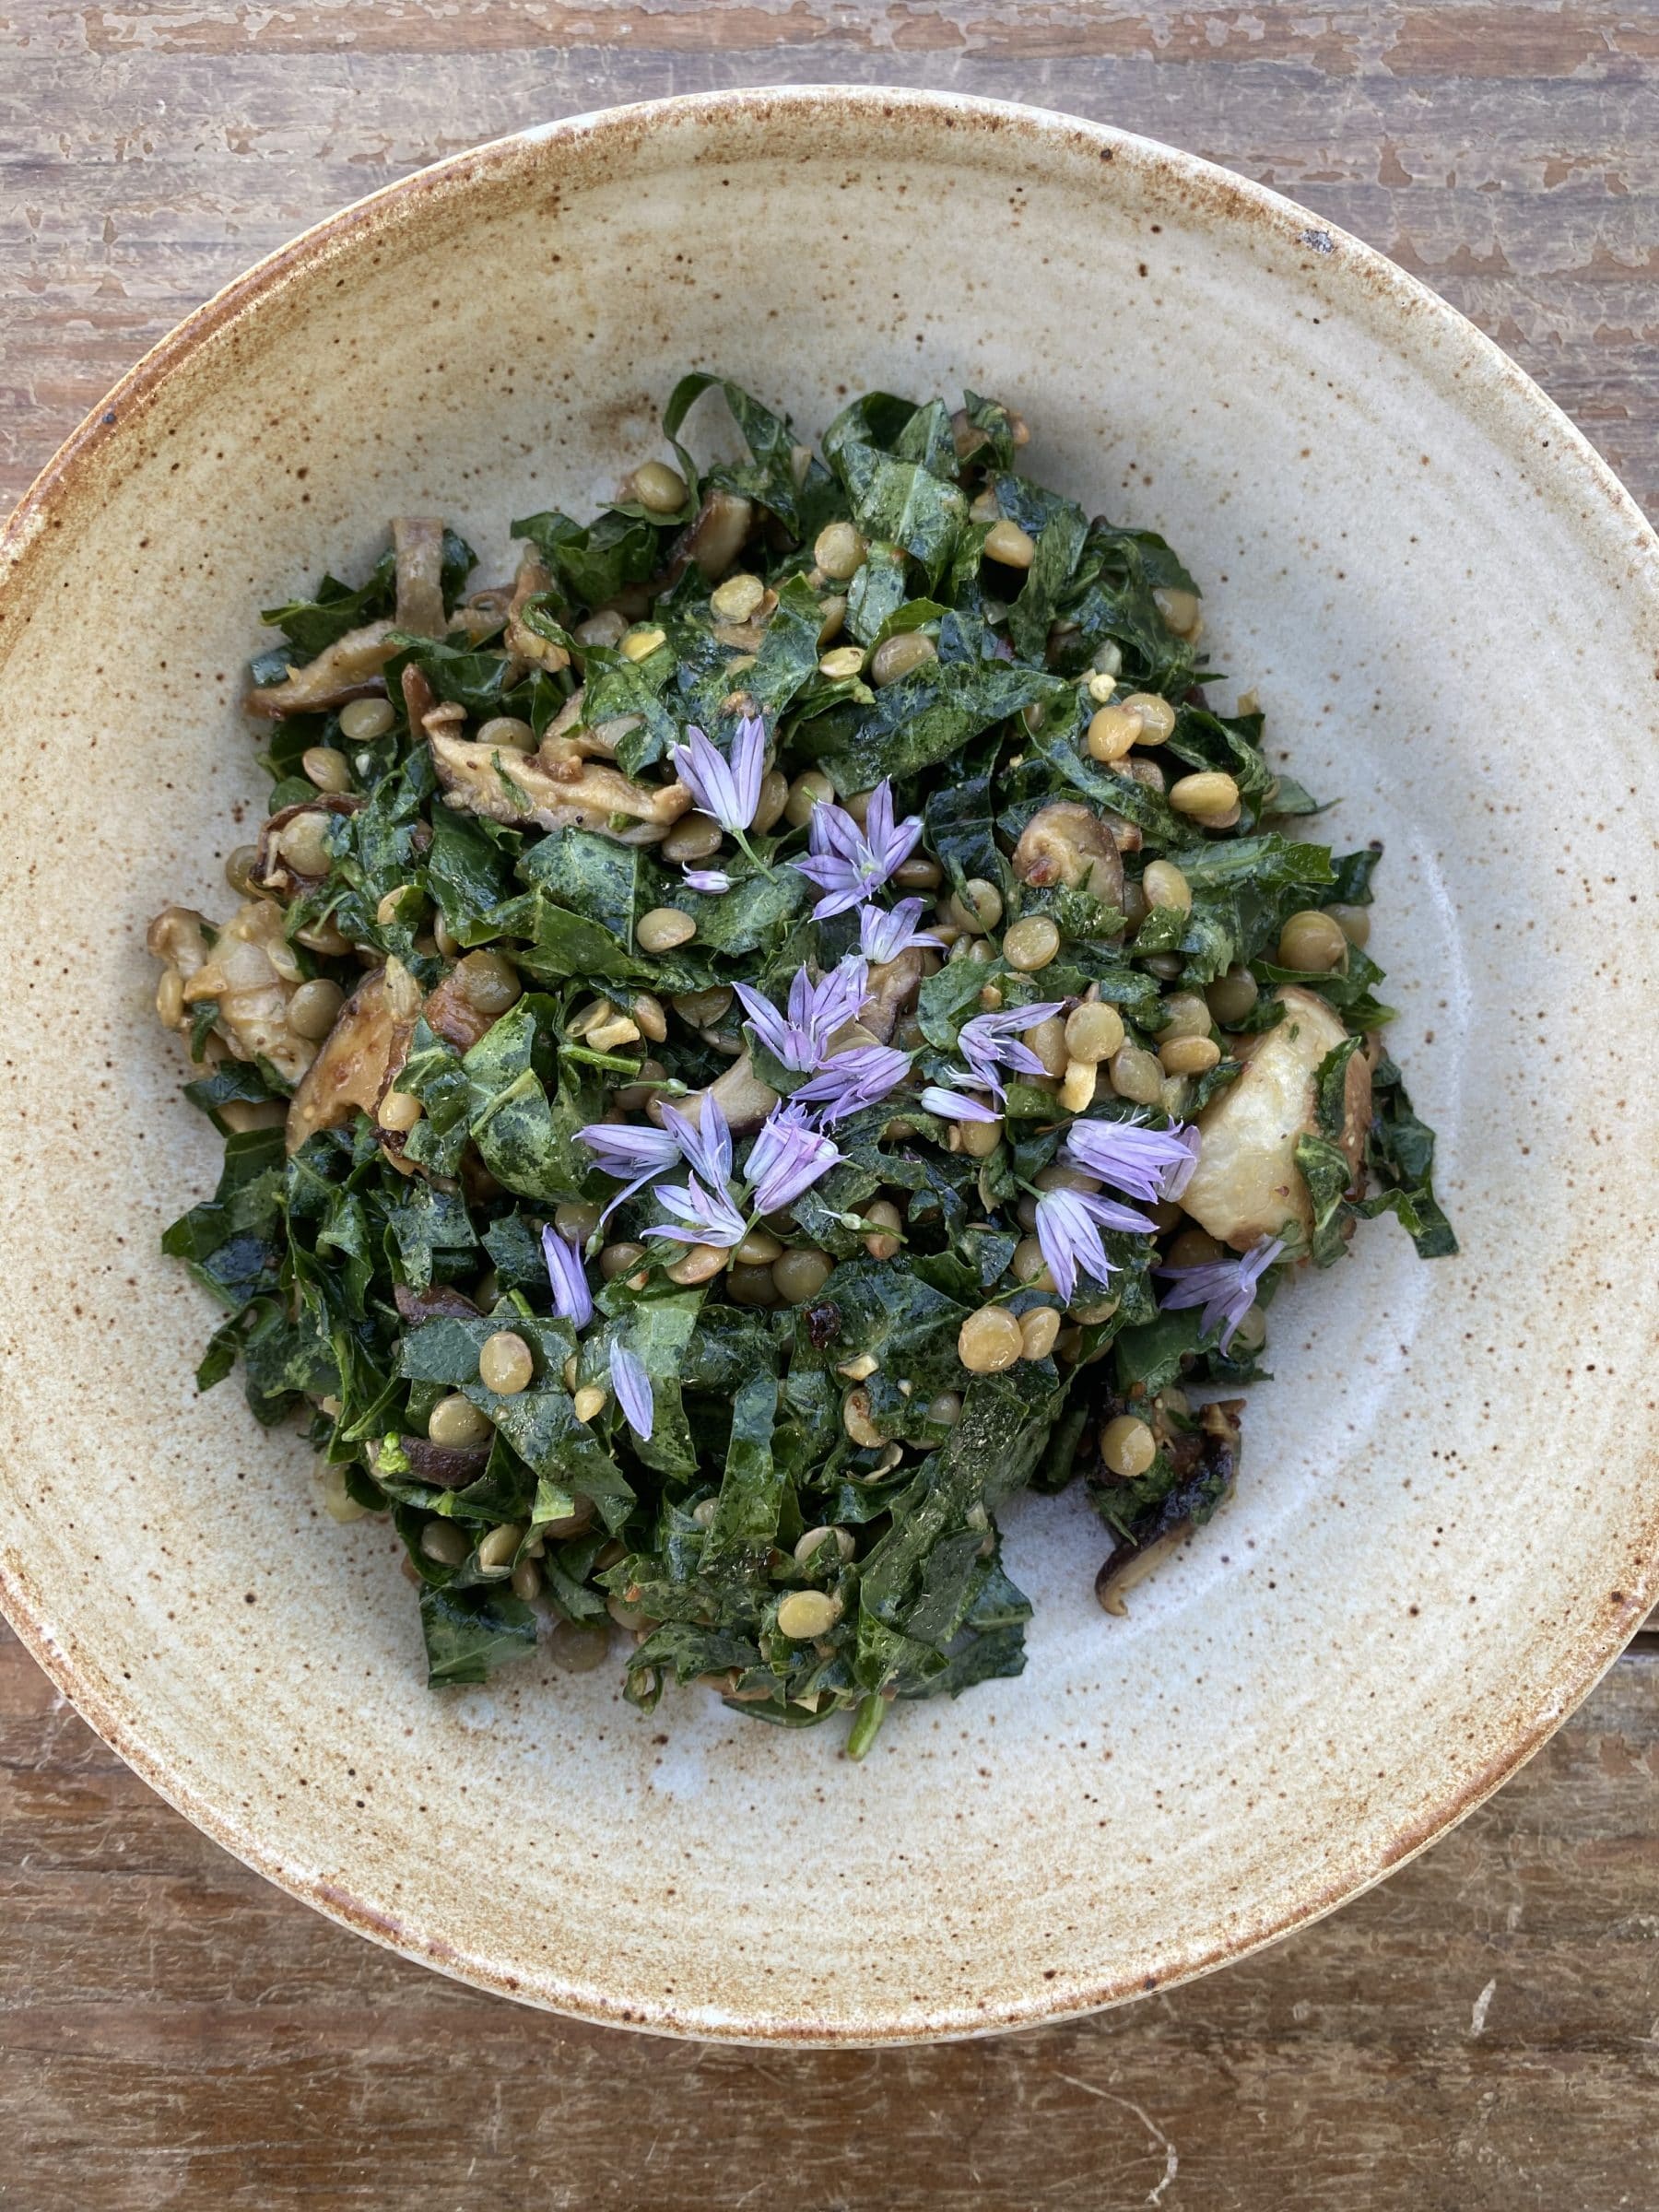
KALE WITH MUSTARD ROASTED TURNIPS & MUSHROOMS
Adapted from Grown & Gathered
Serves 2 for dinner, 4 as a side
Takes 1 hour
1/2 cup lentils (puy or brown will work best)
2 cups water (bring to a boil, reduce to a simmer and cook gently for 15 minutes (until tender but not mushy)
1 bunch turnips, greens removed for another use, roots quartered
3 garlic cloves, minced
8 ounce shittakes, sliced
1 bunch Amara kale, stems removed and roughly chopped
2 tablespoons olive oil
1/2 lemon, squeezed
Kosher salt, to taste
Red pepper flakes, to taste
Dressing:
1/4 cup olive oil
2 tablespoons mustard powder
2 tablespoons maple syrup
1 tablespoon stone ground mustard
1 teaspoon Kosher salt
1/4 teaspoon freshly ground black pepper
- Preheat oven to 350 degrees. Turn on the convection if you have it.
- Prepare your lentils by combining lentils and water in a small pot with a pinch or two of water. Bring to a boil, reduce to a simmer, and cook for 15 minutes until tender but not mushy. Drain and set aside.
- Combine all dressing ingredients in a small bowl. Toss turnips with half of the dressing on a baking sheet. Roast for 15 minutes, stir, and roast for an additional 10 minutes until beginning to brown. Some of the mustard may burn a little– just scrape it up and add it to the mixture.
- Meanwhile, combine garlic and shittake with the remaining dressing. Toss to coat. Add to turnips (after they have been roasting for the full 25 minutes) and roast an addition 15 minutes.
- Combine roasted turnips and mushrooms in a bowl with lentils and allow to cool slightly. Add mustard greens and toss to combine. Drizzle with additional olive oil and the juice of 1/2 lemon. Add salt and red pepper flakes to taste.
.
Week #2; May 28/29, 2020
- On: May 27, 2020
- 2
![]()
Transplanting zucchini on Friday night.
A round of applause
Let’s hear it for our incredible, hard-working crew. The photo above was taken at 7:00pm on Friday, way past our usual 5:30 ending time. Rain was coming, we were short-handed all week, and needed to get those zucchini plants in the ground. Everyone stepped up, even while social distancing. Powerhouse crew leader Maggie egged everyone on with speed competitions. It was fun and got the job done, but we cannot end every week like this.
Otherwise, I do not have anything coherent to report this week. We are working so hard, figuring out new farm systems and getting your produce ready. I will catch you up on farm news in a week or so.
Enjoy the produce this week.
Beth
June 1 checks
Many of you paid us with checks post-dated to June 1. I plan to deposit the checks this coming week.
Veggie List & Veggie Notes
Week #2, May 28/29, 2020
– Weekly shares
– EOW/ purple
– Sampler/ sun
It’s another week for salad! Please wash your greens and asparagus well, using the techniques we described in last week’s newsletter. It rained a lot this week and rain splashes grit into asparagus tips and anything that forms a head (lettuce, bok choy).
‘Goldrush’ potatoes, 3.3 lb
Asparagus, 0.9 lb
Romaine lettuce, 1 large
Bok choy, 1 medium
Spinach, 1 bunch
Arugula, 1 small bunch
Salad radishes, 1 bunch
Green garlic, 1 bunch
Rhubarb, 1.5 lb
Next week’s box will probably contain asparagus, lettuce, spinach, some kind(s) of greens, scallions and more.
See last week’s newsletter for storage and cooking information for these vegetables:
Asparagus, spinach, lettuce, arugula, salad radishes, green garlic, rhubarb
‘Goldrush’ russet potatoes – Please refrigerate these potatoes. They are in great shape now but will sprout within days if stored at room temperature. They’ve been stored all winter and want to grow. Store in a paper bag to protect from light, even in the fridge. We grow everything we send in our CSA boxes except potatoes and mushrooms and some asparagus, all of which we buy from organic growers that we trust. We purchased these potatoes from Jesse Perkins at Vermont Valley Farm. ‘Goldrush’ are good all-around potatoes with outstanding flavor. Jesse says the potatoes have a higher sugar content because of starch to sugar conversion during cold storage. The potatoes taste a bit sweet, and will blacken slightly when fried. It’s a harmless color change due to the sugar conversion.
Asparagus – This week’s asparagus is from our farm and from LOTFOTL Farm in Elkhorn, run by our friends Tim Huth and April Yuds. Tim has planted an organic asparagus field larger than they need. Our asparagus is less productive this year because of Japanese beetle attacks last summer. We have the perfect joint solution; Karen, Kristin and Ben went down this week and harvested the asparagus, to deliver to you folks. This week’s delivery is about half our crop and half LOTFOTL.
Romaine lettuce (upright head of lettuce with crisp leaves) – More sturdy and less fragile than our other spring lettuces. Great for Caesar Salad or lettuce wraps. If you’re intimidated by the amount of salad greens this week, Ceasar salad is a good option because it really shrinks a big head of lettuce and everyone will fight over the leftovers. Poof, it’s gone.
Bok choy (large rosette with thick white stems and green leaves) – This Asian green is good for stir-frying or sautéing or in soup. You can think of the stems and leaves as two separate vegetables. The stems require longer cooking. The leaves will cook almost as quickly as spinach. Bok choy stores well, so feel free to pull off leaves as you need them, or use the whole head at once. Refrigerate in a plastic bag or other container.
Rhubarb – If you are looking for rhubarb ideas, head over to our private Facebook group. Wow, I am impressed with everyone’s creativity and energy, and not just with rhubarb.
Storage: Rhubarb is the easiest thing to freeze. Wash, chop and pop it in a freezer bag. That’s it; no need for blanching. When baking muffins or cakes, just add the frozen rhubarb to the batter.
RECIPES
Visit our 2020 Recipe Log or our 2019 Recipe Log or join our Facebook discussion group.
LOCAL THYME/ Comforting Classics
Pasta Salad with Feta, Asparagus and Arugula
Salmon with Bok Choy, Ginger, Garlic and Sesame
Garlicky Three Greens Soup
LOCAL THYME/ Outside the Box Recipes
Veggie Sauté with Bok Choy, Radishes and Asparagus
Soba, Pork and Bok Choy Stir Fry
Arugula, Radish Salad with Tuna
LOCAL THYME/ Quick & Easy Meals
Lentil Soup with Rhubarb
Hot Pot with Tofu, Noodles, Spinach and Radish
.
Recipes from Lauren

SPICY PORK TACOS WITH GREEN GARLIC CHIMICHURRI & RADISHES
Serves 4-6
Takes 15 minutes.
2-3 pounds pork shoulder, bone-in or out are both fine
Kosher salt and freshly ground black pepper
12-ounce lager of your choice (does not need to be fancy; I usually keep a bunch of Miller Lite around for this purpose)
2 teaspoons favorite chili powder (the spicier the better)
1 bunch green garlic, white and pale green parts only, trimmed and cut into 1-inch pieces
1/4 cup rice wine vinegar
1 tablespoon honey
1/2 teaspoon red pepper flakes
1/2 cup olive oil
Tortillas
3-4 radishes, julienned
1/4 pound arugula, roughly chopped, optional
1-2 avocados, optional
- Season pork shoulder well with salt and pepper. Place in crock pot. Pour beer into crock pot and cover. Turn on low for 8 hours (longer is fine) or high for 4 hours.
- When you get home, remove the meat from the crock pot and allow it to cool while you make the chimichurri.
- Combine green garlic, vinegar, honey, red pepper flakes and 1 teaspoon salt in food processor. Process until combined and finely chopped. Drizzle in olive oil with processor running until smooth.
- Shred the pork, toss it with chili powder and serve on tortillas with chimichurri and julienned radishes as well as arugula or avocado if using.
????
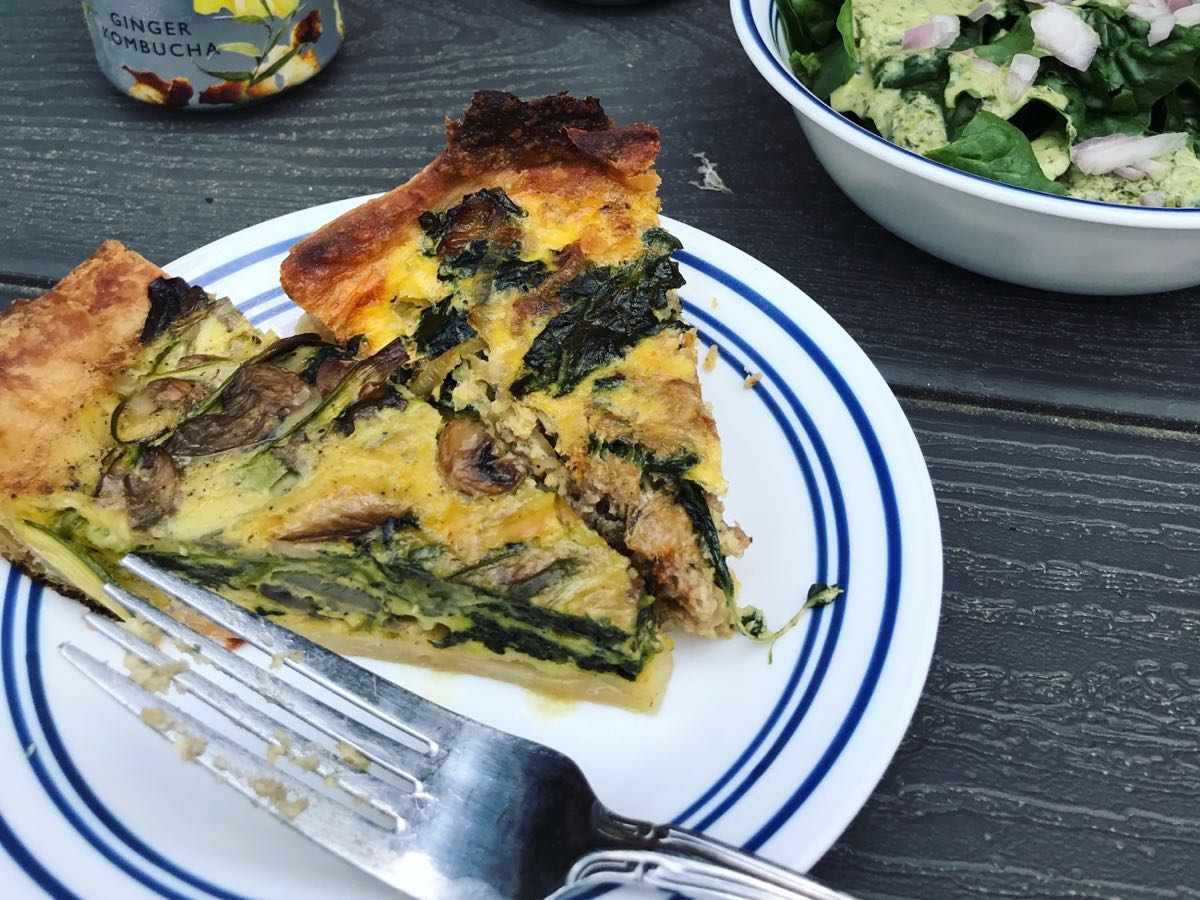
SHAVED ASPARAGUS, SPINACH & MUSHROOM QUICHE
One 9-inch quiche
Serves 4-6
Takes 1 hour if making crust from scratch (and if not made in advance)
1 cup cold water
2 sticks + 2 tablespoons butter, cold, divided
2-1/2 cups all-purpose flour
1 tablespoon sugar
2-1/2 teaspoons salt, divided
12 ounces button, cremini or shittake mushrooms, cleaned and sliced
1/2 pound spinach, leaves torn or roughly chopped
1-1/2 teaspoon Kosher salt, divided
1/2 pound asparagus, shaved
4 eggs
1/2 cup heavy cream
1/4 cup whole milk
1/2 cup shredded Parmesan
1/2 teaspoon freshly ground black pepper
- Preheat oven to 400 degrees.
- Now, let’s start your pie dough! Are you ready?! (If you used store-bought crust or have your own great pie dough recipe skip to step 5). Fill your liquid measuring cup with 1 cup cold water and place it in the freezer. Next get your butter out of the fridge and cut it into small cubes. Place it in the freezer until ready to use.
- Meanwhile, measure flour, sugar and 1 teaspoon salt into the bowl of a food processor. Pulse once or twice to combine. Add chilled cubes of butter and process for 10-15 seconds until butter is broken into smaller pieces. Drizzle in cold water while the processor is running, first 1/2 cup then a couple drops more. Let it keep processing for 10-15 seconds after you’ve added the water. Add a little more water if the dough isn’t coming together. It should form a ball in the processor. Immediately remove it from the food processor with a spatula, wrap in plastic and place in the freezer for 15 minutes while you slice your mushrooms, chop your spinach, shave your asparagus and grate your Parmesan. (If you made this in advance, it could be kept in the fridge and ready for you immediately).
- Remove the dough from the freezer, cut in half and roll out into a 14-inch circle. (The other half of the dough can be kept in the fridge about a week or just make a double batch!). Press the dough into a 9 or 10-inch pie pan, cover with foil and pie weights then bake for 15 minutes. If you are using a store-bought crust, follow package directions.
- Meanwhile, in a large saute pan, melt butter over medium heat. Add mushrooms and 1/2 teaspoon salt. Saute for 5-10 minutes until just beginning to release their juices then add the spinach. Stir to combine and cover. Turn off the heat but leave pan on burner for five minutes just to steam the spinach. Add shaved asparagus along with remaining salt and pepper. Stir to combine and then pour into pre-baked crust.
- In a medium bowl, combine eggs, cream and milk. Whisk until smooth then add Parmesan. Pour over asparagus mixture. Shake pan to even out the filling. Bake for 30-35 minutes until cooked through.
????
.
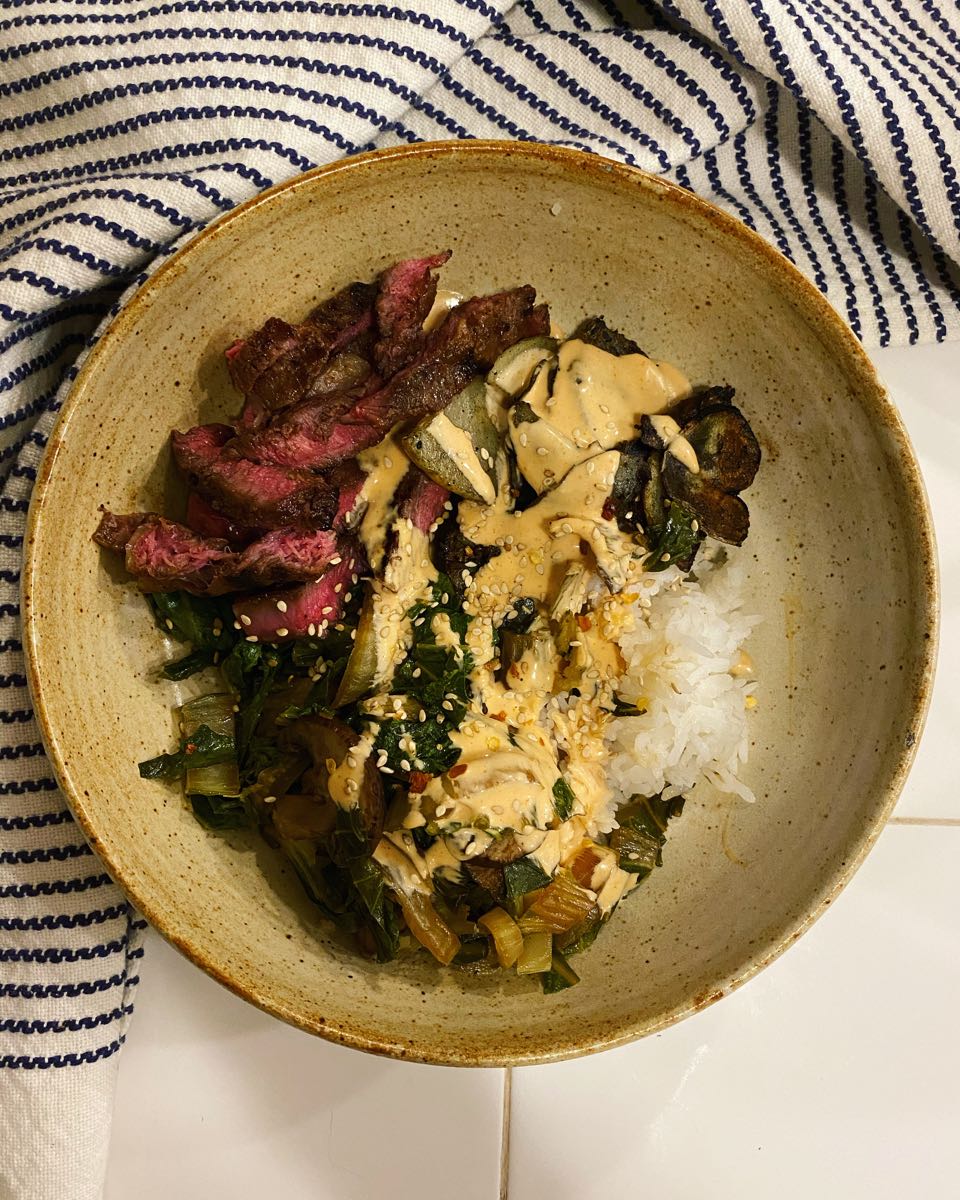
BEEF, POTATO & BOK CHOY BOWLS
Takes 40 minutes
Serves 2-4
4 garlic cloves
1/2 cup soy sauce
3 tablespoons maple syrup
3 tablespoons rice wine vinegar
1 tablespoon toasted sesame oil
1 teaspoon red pepper flakes
1 pound favorite steak (flat iron or skirt steak work great here)
1/4 cup olive oil, divided
1-1/2 pounds Gold potatoes
2 teaspoons Kosher salt, divided
1/2 teaspoon freshly ground black pepper, divided
1 head bok choy, stems and leaves thinly sliced
Siracha mayo (recipe below), optional
Toasted sesame seeds, optional
- In a small bowl, whisk together first five ingredients. Set 1/3 of the mixture off to the side and pour the rest over steak. Let things marinate while you cook the veggies.
- Heat a heavy skillet over medium high heat. Add two tablespoons until almost smoking and then add potatoes followed by 1 teaspoon Kosher salt and 1/4 teaspoon freshly ground black pepper. Set the timer for 15 minutes and let those potatoes crisp up. You’ll want to use a metal spatula to scrape the bottom of the pan every 2-3 minutes or so.
- Remove the potatoes, reduce heat to medium low and heat an additional 2 tablespoons of olive oil in the same skillet. Add mushrooms along with additional teaspoon of salt and 1/4 teaspoon pepper. Cook for 3-5 minutes until browned. Add bok choy and reserved marinade. Cook down until reduced slightly, about 3 more minutes.
- When everything is just about ready, cook the steak over a medium high grill until cooked to desired doneness.
- Serve steak, potatoes and bok choy mixture in a bowl with a drizzle of sriracha mayo and sesame seeds, if using. Add rice or another grain if desired.
.
SRIRACHA MAYO
1/2 cup mayonnaise
2 tablespoons sriracha
1 tablespoon soy sauce
1/2 lime, squeezed
Combine together in a small bowl. Whisk to combine.
.
First delivery!
- On: May 20, 2020
- 4
Welcome to our CSA! Deliveries begin this week for:
– Weekly members, and
– Every-other-week/ green group
Go here to check the delivery schedule for other shares.
Things you need to know.
♦ We post this newsletter/blog each Wednesday night, with a list of veggies for the week, quantities, information about storage and preparation, news of the farm, recipes, and a forecast for the next week’s box. We alert you by email on Wednesday night once the newsletter is posted and ready to read.
♦ Want earlier notice of what will be in the box? Check the sidebar on our website homepage around 7 – 8 p.m. on Wednesday night. I’ll post the list under “Box Contents.” I also provide a tentative list for the following week in the Veggie List section of this newsletter. The next week’s list is rarely complete but the items listed are ones we feel confident about.
♦ EOW, sampler and weekly members, we assume you read all the newsletters, even on your “off” weeks. This newsletter (and our emails to you) are our means to communicate with you.
♦ The first few boxes of the season are often the lightest. EOW members, do not worry that you have signed up for the wrong share! Our deliveries get heavier and more abundant as the season progresses.
♦ Wash your produce well this week to remove grit. It has rained a lot lately, driving grit into the asparagus and anything that forms a head (lettuce, arugula, spinach). Our crew took extra care with washing but expect to wash everything. You should always wash your produce!
♦ On Thursday, we deliver CSA boxes to Evansville, Fitchburg, Madison, McFarland, Middleton, Oregon and Verona.
♦ On Friday, we deliver CSA boxes to Brookfield, Janesville, Mequon, Milwaukee, Waukesha and Wauwatosa.
Mushroom experiment
We are experimenting with paper bags this year, instead of foam trays. We arranged this in winter with Mary from Hidden Valley Mushrooms, our mushroom supplier, as part of an ongoing effort to switch from plastic to paper. Now our plastic liner bags dwarf these efforts. Sigh. Anyway, you are part of the experiment. We think you should keep the mushrooms in the paper bag, but cover it with a plastic bag to reduce moisture loss. Handle as little as possible to avoid bruising. I am curious how well they hold up for you. After eating them, tell us your experience.
How to wash greens efficiently and to maximize storage life
Everything needs careful washing this week. All the rain splashed grit into the lettuce, escarole, etc. Here’s our approach. It works.
1. We have one kitchen sink so we use a 4 gallon Rubbermaid basin. Fill halfway with cold tap water. If you have two sinks, fill one sink partway with cold water.
2. Chop your lettuce, spinach, escarole or other green to the size you wish.
3. Dump it into the water and swish around gently but thoroughly.
4. Working in two batches (for average lettuce head) or more batches (big spinach bunches, Romaine), pull handfuls out of the water and drain in the basket of a salad spinner.
5. After all the greens have been rinsed one time, dump the water. Rinse the basin and refill with cold tap water.
6. Repeat the process.
7. Spin your greens dry and store in a dry container. They store much longer when spun dry.
This works because …
– pre-chopping the greens frees soil trapped in the head.
– the large amount of water washes and dilutes away the grit.
– By pulling the greens out of the water, you take advantage of the draining action to pull the grit with it.
Veggie List and Veggie Notes
May 21/21, 2020 (Th/Fri sites)
Overall, quality of the produce is very nice, with a few caveats. The greens have grown beautifully in the cool weather. Notice how dense and tender your lettuce head is, and how lush and thick the spinach. However, many crops show silvering on a few leaves. Most of this is frost-damage, even on crops that were sheltered under row cover during recent cold nights.
Spinach, 1 big bunch
Green leaf lettuce
Arugula, 1 bunch
Button mushrooms, 12 oz.
Salad radishes, 1 bunch
Asparagus, ~1/4 lb
Green garlic, 1 bunch
Rhubarb, 1.5 lb
Next week’s box will probably contain spinach, lettuce, potatoes, asparagus, radishes, rhubarb and more.
Lettuce and spinach – Wash your greens to remove grit splashed into the heads by rain. Cut to the size you like, submerge in water, swish gently, then pull from the water and drain in a colander. Some weeks, you will need to repeat in fresh water. I find it useful to use a kitchen tub for this job, so you don’t have to run an entire sink of water.
Storage hint – To extend the storage life of your tender greens, wash them, dry in a salad spinner, then store in a dry container or bag. Lettuce, spinach and arugula last much longer when handled this way.
Arugula – (bunch of green leaves with pungent scent) – This is a spring treat! Arugula is good mixed with lettuce or spinach in salads, or added to cooked dishes such as lasagne or quiche. I love it on sandwiches. This arugula is thin-leaved and tender and will not store for long. Eat soon. Cover and refrigerate.
Button mushrooms – These are from Hidden Valley Mushrooms in the WI Dells. As mentioned above, this is the first time we’ve delivered button mushrooms in paper bags. We suggest that you cover the entire paper bag with a plastic bag.
Salad radishes – These are so good right now; tender, crisp and not too spicy. They are great in salads or thinly sliced on sandwiches. A few years ago, I was served open-faced radish and butter sandwiches on toast and was impressed with how tasty they were. Use good quality butter.
Storage: cover and refrigerate.
Asparagus – Asparagus has grown very slowly this week, following frost and cold nights. There’s more to come in the next few weeks! It’s a small amount this week, but let’s discuss how to use it well, for this week and future deliveries.
Prep: Wash your asparagus thoroughly to remove hidden grit. Submerge in water with the tips pointing down, soak briefly, then swish vigorously and pull out of the water. The draining action helps pull the grit out of the asparagus tips. Repeat several times.
Storage: Asparagus is perishable, so eat it as soon as possible. Store in a paper towel, cloth or paper bag, then wrap loosely in a plastic bag. The paper bag protects the asparagus tips from direct contact with the plastic bag. The plastic bag keeps the asparagus from wilting.
Preparation: We snap our asparagus at harvest, rather than cutting. Therefore, there is no need to snap the stalks to remove fibrous ends. For the same reason, it is not necessary to peel the asparagus stalks. It’s OK to trim the cut end a bit.
Cooking: If your asparagus stalks vary greatly in size, you will want to cook the thicker ones longer. Put an empty steamer pot over water, and bring the water to a boil. Add the asparagus. Cover and steam over medium heat until just tender. Use two forks or a spatula to turn the asparagus during cooking, rotating the bottom spears to the top. Drain and serve. Alternatively, you can lay spears flat in the bottom of a broad pan, with ½ inch of water. Also excellent broiled or grilled. Good dressed with vinaigrette, or with lime juice, salt and pepper.
Green garlic (looks like scallions, tastes like garlic) – Last fall, we planted garlic cloves that grew into the stalks we harvested this week. If left to grow until mid-summer, the slim white bulb on this week’s garlic will divide and form the usual cluster of cloves in a garlic bulb. This year’s green garlic is robust.
Preparation: Green garlic is more pungent than scallions, so slice thinly and use sparingly when raw. It mellows when cooked. Chop and add to any cooked dish that would benefit from garlic. Use the white bulbs and pale green stems. Avoid the dark green stems and leaves, as these are fibrous.
Rhubarb – Refrigerate in a plastic bag. FYI, 2 lb of rhubarb yields 6 – 6.5 cups when chopped.
Stewed rhubarb: This is the simplest way to prepare rhubarb. Chop rhubarb into one inch chunks. Stir over medium heat with a small amount of water in the bottom of the pan. The rhubarb will release moisture as it cooks. Stew until it softens and falls apart. Sweeten to taste with honey or sugar. Eat warm on its own, over vanilla ice cream, on pancakes, etc.
Recipes from Local Thyme
Comforting Classics
Arugula Salad with Shaved Parmesan and Balsamic Vinaigrette
Pappardelle Florentine
Gingered Rhubarbade
Outside the Box Recipes
Spinach, Radish,
Mushroom, Asparagus Salad with Rhubarb Vinaigrette
Pan Seared Chicken Breasts with Curried Spinach and Apples
Rhubarb Bread with Almonds and Orange Zest
????
RECIPES FROM LAUREN
SPRING HARVEST GRAIN SALAD
Serves 4-8 depending on whether it’s a meal or a side
Takes 30 minutes
1 cup quinoa
1-1/4 cup beef broth
1/3 pound asparagus, cut into 1-inch pieces (spears halved if larger)
2 tablespoons butter
12 ounces button mushrooms, sliced
2 green garlic stalks, white and pale green portions only, minced
1/2 cup (or more) arugula
1 cup (or more) spinach
1 tablespoons toasted sesame oil
1/4 cup olive oil
2 tablespoons rice wine vinegar
2 tablespoons low-sodium tamari (or soy sauce)
1 tablespoon maple syrup (or honey)
1-3 avocados, optional
Extra sliced green garlic, optional
- This first step is my fool-proof method for making quinoa (learned from I am a Food Blog). If you have your own tried and true method, feel free to do that instead and ignore this first step. Rinse your quinoa is a fine-mesh strainer. Add to a medium saucepan and toast over medium heat for 1-2 minutes until fragrant but way before it begins to burn. Add broth and bring to a boil. Reduce to a simmer, cover and cook for 15 minutes. Once the timer goes off. Turn off the heat but leave the pan on the burner and leave the cover on for 5 minutes more.
- Meanwhile, steam your asparagus for 5 minutes until just tender (but still crisp). I don’t have a steamer so I put a metal colander with handles in a stock pot and cover it to get that steamed effect.
- Then in that same stock pot (if you used one), drain the asparagus water and melt butter over medium heat. Add mushrooms and minced green garlic. Saute for 7 minutes until mushrooms begin to release their juices and are cooked but not too soft.
- Combine your quinoa, asparagus, mushrooms, and green garlic together in a large bowl.
- Cut your greens into a delicate chiffonade (roll a stack of leaves and slice them thinly; then roughly chop the thin strands of greens) and add them to your bowl.
- In a small bowl combine oils, vinegar, tamari and maple syrup. Whisk until smooth. Pour over salad and stir to combine. Serve right away or chill before eating. Serve with avocado slices (or cubes) and extra green garlic on top, if using.
.
????

RHUBARB HAND PIES
Inspired by Smitten Kitchen
Makes 20-30 (depending on the size you make)
Takes 2 hours (30 minutes inactive)
1 cup butter (2 sticks)
2-1/4 cup all-purpose flour
2/3 cup + 1 tablespoon sugar, divided
1 teaspoon Kosher salt
1/2-3/4 cup ice cold water
4 cups rhubarb, cut into 1-inch pieces
2/3 cup sugar
1 tablespoon fresh lemon zest, optional
1 teaspoon fresh lemon juice, optional
4 ounces cream cheese
1 egg, whisked
Turbinado sugar, for sprinkling
- Cut your butter into small cubes and place in freezer while you collect the rest of your pie ingredients.
- In a large bowl, combine flour, 1 tablespoon sugar, and salt. Fill a measuring cup with 1/2 cup of cold water and add 3-4 ice cubes. Set aside.
- Remove your butter from the freezer and add to flour mixture. Use a pastry blender, two forks, or your fingers to incorporate the butter and break it into small pieces. You are looking for a crumbly mixture with butter pieces no larger than the size of green pea. Work quickly so the butter doesn’t warm. Drizzle in cold water, stir to incorporate and then knead together gently with your hands. If the dough isn’t coming together, add a little more water to your ice cube measuring cup (to quickly chill it) and then add to your pie dough. A dry dough is better than a wet dough, but you do need the mixture to fully come together.
- Break the pie dough into two discs, wrap in plastic and place in the fridge to chill for at least an hour.
- In a medium saucepan, combine rhubarb and remaining sugar over medium low heat. Reduce down for 30 minutes, stirring every 5-10 minutes to ensure the mixture is not sticking. Remove from heat and add lemon zest and juice. If you don’t have a fresh lemon, just skip the lemon.
- Pour the rhubarb mixture in a small bowl and place in the fridge to cool for at least 30 minutes. Leave in the fridge until ready to use.
- When ready to bake your pies, preheat your oven to 400 degrees and line a baking sheet with parchment paper.
- Flour your counter well and remove one disc of pie dough from the fridge. Sprinkle pie dough with more flour and roll out it out thinly (about 1/8 inch thick). Use a biscuit cutter or upside down glass to cut out the pie dough into small circles or squares. Use something between 2-1/2 or 3-inches in circumference. Use a knife to mark half of the circles with a small X.
- Cut your cream cheese into 1 x 1-inch squares that are about 1/4-inch thick. Don’t worry about getting too exact. What you really want is to divide the cream cheese evenly(ish) so you have enough for each of your hand pies. If you go to big and wind up using 6 ounces of cream cheese instead of 4, or run out and have some handpies without cream cheese, it is totally fine.
- Place a cream cheese piece on half of the dough circles (the ones WITHOUT the X’es). Remove the rhubarb mixture from the fridge and top the cream cheese with a tablespoon(ish) of rhubarb mixture (more if making larger pies, less if using smaller ones). Place the remaining circles of pie dough (the ones with the X’es) on top of the rhubarb (making a little pie sandwich). Use a fork to seal up the pies.
- Brush each pie with egg and sprinkle with turbinado sugar (regular sugar will also work fine). Bake for 15 minutes until lightly browned. Repeat process with remaining pie dough, cream cheese and rhubarb mixture.
.
????
SIMPLE SPRING SALAD
Serves 2-4
Takes 20 minutes
1 bunch radishes
1 teaspoon Kosher salt
1/2 lemon, squeezed
1 head lettuce, washed and roughly chopped
1/2 cup toasted pistachios, finely chopped
1/4 cup finely shredded Parmesan
1-2 tablespoons olive oil
Flaky sea salt, optional
- Remove the greens from your radishes and trim the ends. Thinly slice half of the radishes and quarter the rest. Toss in a small bowl with salt and lemon juice. Gently massage to incorporate the salt and lemon into the radishes. Let sit for at least 10 minutes.
- Wash and roughly chop the lettuce and place in a large bowl. Sprinkle with half the pistachios and Parmesan, and then drizzle with half the olive oil. Top with the marinated radishes and all their liquid. Drizzle with the remaining olive oil then sprinkle with the remaining pistachios and Parmesan. Finish with a little flaky sea salt.
.

