Blog
Week #14, August 20/21, 2018
- On: August 22, 2018
 0
0
Weather report
Occasionally, I ask Steve what information he’d like to share in the newsletter. Without fail, he says “the heat wave,” “how wet it is,” or “what a windy week.” Weather is a big deal for any farm. I stopped writing about weather in the newsletter after a few years when it became monotonous. Also, I try to obsess less about the weather than Steve does. This week is different because of the intense rain on Monday.
We are fine and the farm is fine. Thank you to everyone who expressed concern. We were lucky (!) to get just 3 inches, combined with Friday’s rain for a total of 6 inches. That left our fields muddy but undamaged. We are usually grumpy about 6″ but that’s nothing compared to the 11″ and 15 ” that fell in Middleton and Cross Plains respectively. The news footage was terrible. Tipi members in that area, we hope you are OK. We’re hoping for the best for our farmer friends west of Madison too. Word is still trickling in how everyone fared.
Heavy rain takes a toll. Repeated rain takes a toll. It’s worth discussing how this summer’s extended wet weather has affected the farm. We’ve had wet spells before but this is a genuinely wet summer. Too much rain has lasting effects.
Too much rain = weeds. The fields are too wet to cultivate or hoe. Our fall crops are getting so, so weedy. Steve is anxious about recovering control of those fields.
Too much rain = disease. Oh, the tomato plants are not happy. In messages with farmer friends yesterday, everyone was sad about their tomato fields. Leaf diseases are rampant. Enjoy this week’s tomatoes because we don’t know how long we’ll have them. Weather like this shortens a tomato season. There’s not much we can do about it. We really need the rain to stop before it causes trouble with our fall brassica crops (broccoli, cabbage, cauliflower, greens). They look fine so far but wet weather causes problems as the nights get cooler in fall.
Too much rain = rot. We harvested tomatoes a little underripe this week because the ripest fruits split. We also picked bell peppers less ripe than usual. If water sits in the sunken area of a pepper crown, there’s too much risk it will go bad. It’s better to pick the pepper early. Storage life can be shorter too because the fruits are fragile and loaded with water. It’s not a disease problem, but some vegetables are less flavorful if they mature during wet weather. Tomatoes in particular can taste watery and diluted. They have their best, concentrated flavor under sunny, dry conditions.
What’s the upside? What’s done well this season? It has been a ridiculously productive summer for every crop in the cucurbit (squash) family. That’s muskmelons, watermelons, cucumbers, zucchini, etc. I was concerned about overwhelming you with cucumbers but kept sending them. That’s the CSA deal, right? When a crop thrives, we all share in the bounty. We hope the winter squash and pumpkins do as well. We’ll find out next month. Beth
Irony

Our daughter worked at a Chocolate Shoppe ice cream shop this summer. (She also interned at Olbrich Gardens.) Check out her work t-shirt. That gave us such a laugh.
#2 Grade Red Peppers
I write about pepper grading every year. Returning members can say “yeah, yeah” and skip ahead. New members, please read.
Many of the red bell peppers we send in the CSA boxes will be our #2 grade. We do this to avoid waste and to deliver good value to our CSA members. The #2 grade peppers are excellent eating quality, but are not quite pretty enough to sell to stores. As a result, we place a much lower value on these peppers. This allows us to provide generous amounts of peppers over the course of the season. We feel this is a good exchange, even if it means you occasionally open a pepper and find that it needs trimming. Here are the reasons that peppers are downgraded from #1 grade to #2 grade:
- They may have a minor blemish, or
- They may have minor insect damage, or
- They may be very ripe and beginning to wrinkle. (These are especially sweet and delicious as they are fully ripe. These cannot be sold to stores because their shelf life is short. You will find that the texture is less crisp than a #1 grade pepper, but the flavor more than makes up for it.)
- They might be partially red and partially green.
- Others are just too small.
The eating quality is fine (or excellent) for all these #2 peppers. We throw away ALL peppers that we suspect have rot inside (although one may occasionally slip through in either #1 or #2 grade.)
This week’s peppers
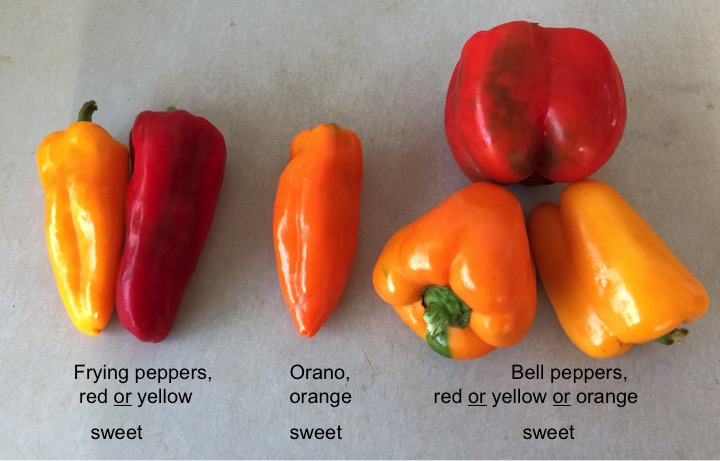
This week’s peppers are a mix of #1 and #2 grade. Everyone receives some of the sweet peppers above, for a total about four peppers.
– Frying peppers are thin-walled with low moisture, which allows them to fry readily in hot oil. They are so fragrant! Identify this week’s frying peppers by their slender shape and color (red or yellow).
– Oranos are sweet snacking peppers. They resemble frying peppers but don’t fry as well. If you get an Orano, just eat it as a snack. The flavor is excellent and they have few seeds. All Oranos peppers are orange (or orange and green.)
– Bell peppers are thicker-walled and juicy, great for eating raw in salads or roasting on the grill. This week’s bells are mostly red, but a few sites will get an orange or yellow bell.
Veggie List and Veggie Notes
Week #14, August 20/21, 2018
Weekly, purple EOW, sun SMP
Sweet corn, 9 – 10 ears
‘New Orchid’ orange watermelon
Tomatoes, plum, ~1.6 lb
Tomatoes, slicing, ~3.3 lb
Cucumber, 1
Silver Slicer cuke, 1
Colored bell peppers, 2
Frying peppers OR Orano, 2
Yellow onion, 1 or 2
Cilantro, 1 bunch
Next week’s box will probably contain melon, peppers, tomatoes, onions, hot pepper, garlic, an herb and more.
Sweet corn – This week’s variety is ‘Fabulous.’ The seed breeders are not modest but they don’t need to be. This is a very excellent corn variety. We got a lot of positive feedback about last week’s corn. This batch is just as good, maybe better.
‘New Orchid’ watermelon – This is my (Beth) favorite type of watermelon, with beautiful sherbet orange color, great flavor and texture.
Tomatoes – OK, we’ve hit peak tomato season. This week, more tomatoes than usual are slightly underripe; the ripest tomatoes split after the heavy rain.
Storage: Store at room temperate on your kitchen counter. Watch closely. If soft spots develop, eat quickly.
Other storage: If there are more than you can use, just freeze the extras. We freeze plum tomatoes intact and whole. When it’s time to use them, we run the frozen tomatoes under tepid water and the skins slip right off. This should work with slicers too. It’s OK to cut up either type and freeze in a bag or container to save freezer space.
Yellow onion – This is the first storage onion of the season. These have lower moisture than sweet Walla Wallas, so these will fry nicely. Storage: please refrigerate this week’s onion to be sure it stays in good shape.
RECIPES
Visit our 2018 Recipe Log or our 2017 Recipe Log or join our Facebook discussion group.
LOCAL THYME/ Comforting Classics
Watermelon Cucumber Feta Skewers
Corn, Pepper and Tomato Flatbreads
Black Beans and Yellow Rice
Chicken Cacciatore
LOCAL THYME/ Outside the Box Recipes
Watermelon Vinaigrette
Mexican Corn Salad
Stuffed Pepper Soup
Tomato Salad with Lime and Herbs
LOCAL THYME/ Quick & Easy Meal
Quinoa Salad with Watermelon, Cucumber and Cilantro
RECIPES FROM LAUREN
SUMMER TIME PIZZA
Serves 2-4.
Takes 30 minutes (if using store-bought or already prepared dough; takes 90 minutes if making dough from scratch).
1 batch favorite pizza dough
1 large red bell pepper
2 tablespoons olive oil, divided
3/4 cup whole-milk ricotta (or tomato sauce or pesto if you prefer)
2-3 tomatoes, cored and sliced
1/4 yellow onion, thinly sliced
2 ears corn, cooked however you find easiest (in a pot of boiling water for 3 minutes, on the grill or in the microwave)
1 cup shredded mozzarella
1/2 teaspoon Kosher salt
1/4 teaspoon freshly ground black pepper
1/4 teaspoon red pepper flakes
2-3 tablespoons roughly chopped cilantro
- If making your dough from scratch (and it isn’t already prepped) make that first and get it rising.
- Preheat the broiler of your oven to high. Place a small piece of parchment paper on your pizza pan. Add red pepper and roast under high heat of broiler for 10-12 minutes, rotating occasionally until all sides are blackened. (This can also be done on a grill if you are using it for some other reason).
- As soon as the peppers are done in the oven turn off the broiler and preheat the oven to 525 degrees (or as hot as the oven will go). Place your pizza pan in the oven immediately (even as it preheats).
- Let red pepper sit for 5 minutes outside of the oven and then peel off skin as best you can. Remove the seeds from the pepper and slice thinly.
- Roll out your risen pizza dough. Remove the pan from the oven and quickly drizzle with a tablespoon of oil. Add pizza dough. It hopefully will sizzle a bit. Using a spatula, spread ricotta over dough followed by tomatoes, peppers, onions and sweet corn. Add mozzarella then sprinkle with salt, pepper and red pepper flakes. Drizzle with remaining tablespoon oil and then place in hot oven. Bake for 10-13 minutes until crust begins to turn golden brown. If the cheese is nicely browned, perfect! If not, feel free to turn the broiler back on for just a couple minutes.
- Serve warm with a sprinkle of cilantro and more salt to taste.
.
WATERMELON GAZPACHO
Adapted slightly from Bon Appetit
Serves 2-4.
Takes 25 minutes (excluding time to chill gazpacho).
4 cups cubed watermelon, seeds removed
2 pounds tomatoes, cored and roughly chopped
1 cucumber, peeled, seeded and roughly chopped
1/2 Silver Slicer, peeled, seeded and roughly chopped
1 red frying pepper, seeds removed and roughly chopped
2 tablespoons olive oil
2 tablespoons Sherry vinegar (or red wine vinegar)
Kosher salt
Freshly ground black pepper
For serving:
1/4 cup almonds, toasted and coarsely chopped
2 ounces feta, crumbled
1/4 cup Greek yogurt
3 tablespoons whole milk
1 cup watermelon (cut into 1/2-inch pieces)
1/2 silver slicer, seeded, peeled and cut into 1/2-inch pieces
More olive oil
More Kosher salt
More freshly ground black pepper
- Puree watermelon, tomato, cucumber, red pepper, oil, and vinegar in a food processor or blender until smooth.
- Transfer to a large bowl; season with salt and pepper. Cover and chill for at least 1 hours before serving.
- To prepare topping, combine feta, yogurt and milk in a small bowl. Whisk with a fork until combined. It won’t be smooth because of the feta; that’s how it should be so don’t stress.
- Serve chilled gazpacho with a dollop of feta mixture, some almonds, some cubed watermelon and cucumbers, a drizzle of olive oil and more salt and pepper.
.
Week #13, August 16/17, 2018
- On: August 15, 2018
 0
0
Badger!
I looked up and found a curious badger watching me. I was lucky to catch a video snippet.

The badger has taken up residence in our sand pit, near the place I found a badger living last year. Apparently it’s a prime spot! The sand pit walls are steep and sandy but stabilized by young trees growing at the rim. The wooden boards in the photo cover a cubby that our son Ari dug as a secret hiding place years ago.
This sand pit has been a wonderful place for our family. It was dug when the previous owners sold sand for road construction. Our kids spent countless hours digging in their own enormous sand box, hunting for fossils, sledding down the slopes or having bonfires with friends. Steve still digs sand to fill farm potholes.
Over the years, it’s become wilder as the surrounding area grew up with shrubs and trees. The kids don’t play there any more. I’m the only visitor, there to tend prairie plants I’ve seeded on the walls. Badgers, skunks, raccoons, deer and farm cats all visit the sand pit now. (I have a trail camera.) It’s been interesting to watch this develop on our small farm, especially because the pit is quite close to farm buildings.
The facial markings for this year’s badger are different enough from last year’s resident that I think it’s a new visitor. I suspect it has lived in the sand pit all summer, as I’ve seen extensive tunneling and characteristic prints. I didn’t mention the tunnels to Steve. One weekend, he spent hours hauling away sand by tractor. The badger didn’t seem to care; it stayed in residence and as active as ever.
I doubt I’ll see this one again in person. Last year’s sighting was prolonged. The badger popped its head out to watch me for about 3 minutes. I returned to look for it every day but never saw it again. Our outdated trail camera captured a few blurry images but that’s all. This year’s encounter was shorter. I’ll return to look for it (from a distance!) but might not see it again. It’s time for us to get a better trail camera, Beth
Veggie List and Veggie Notes
Week #13, August 16/17, 2018
Weekly shares & green EOW
Sweet corn, ~9
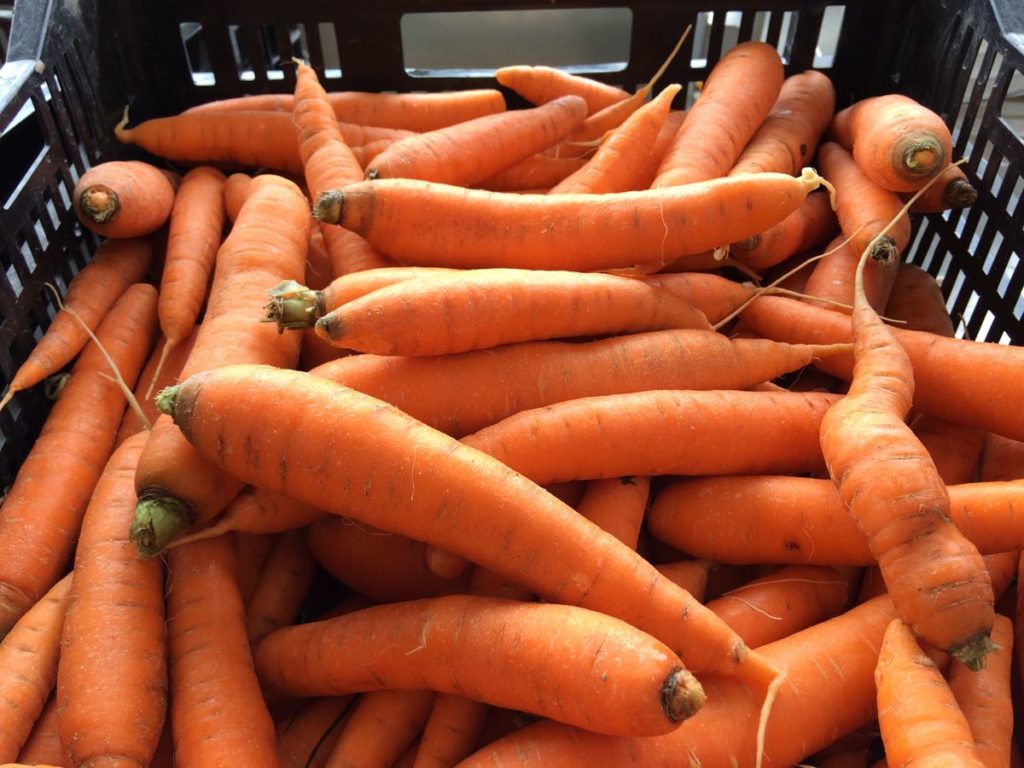
Carrots, 2 lb
Muskmelon, 1
Tomatoes, plum, ~2.3 lb
Tomatoes, slicing, ~1.7 lb
Cucumbers, 2 – 3
Silver Slicer cukes, 2 or 4
Red bell &/or frying peppers, ~3
Walla Walla onion, 1 or 2
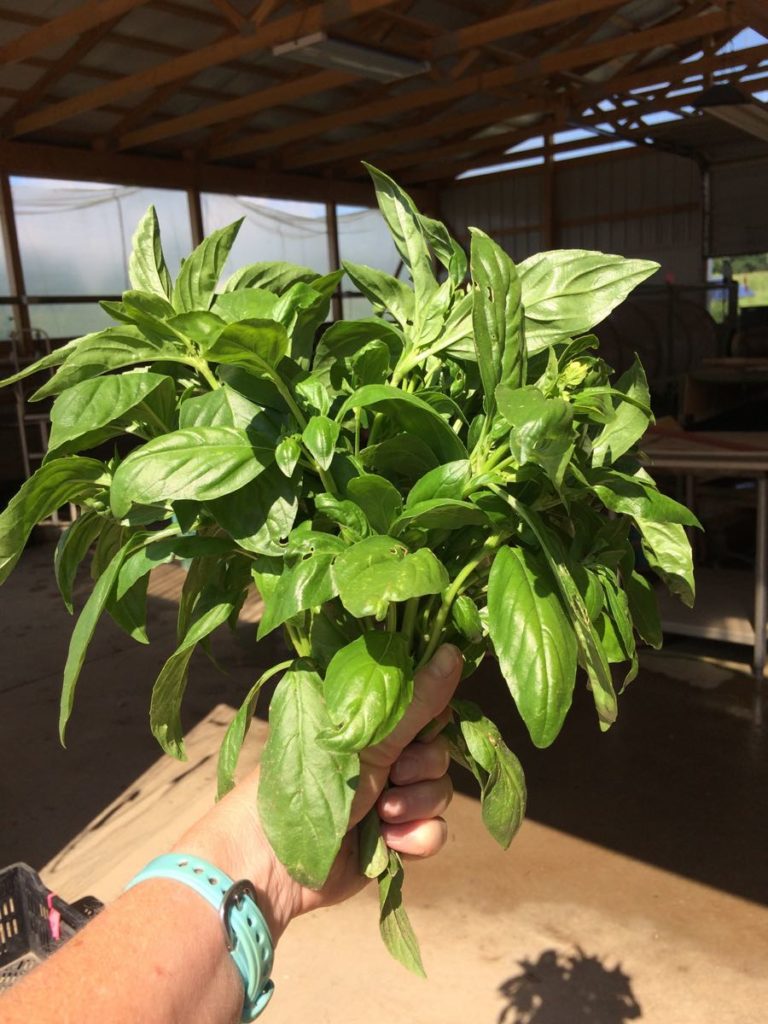
Basil, generous bunch
– A few sites get an eggplant or a handful of pickles.
Next week’s box will probably contain tomatoes, peppers, melon, cucumbers, an herb and more.
Sweet corn – This variety (named “Enchanted”) is new to us. Organically-raised sweet corn seed is rare so we were glad to try it. Unfortunately, too many husks strip off as we pick the corn. See photo. Handle it gently to avoid bruising since some ears have lost protective husks.
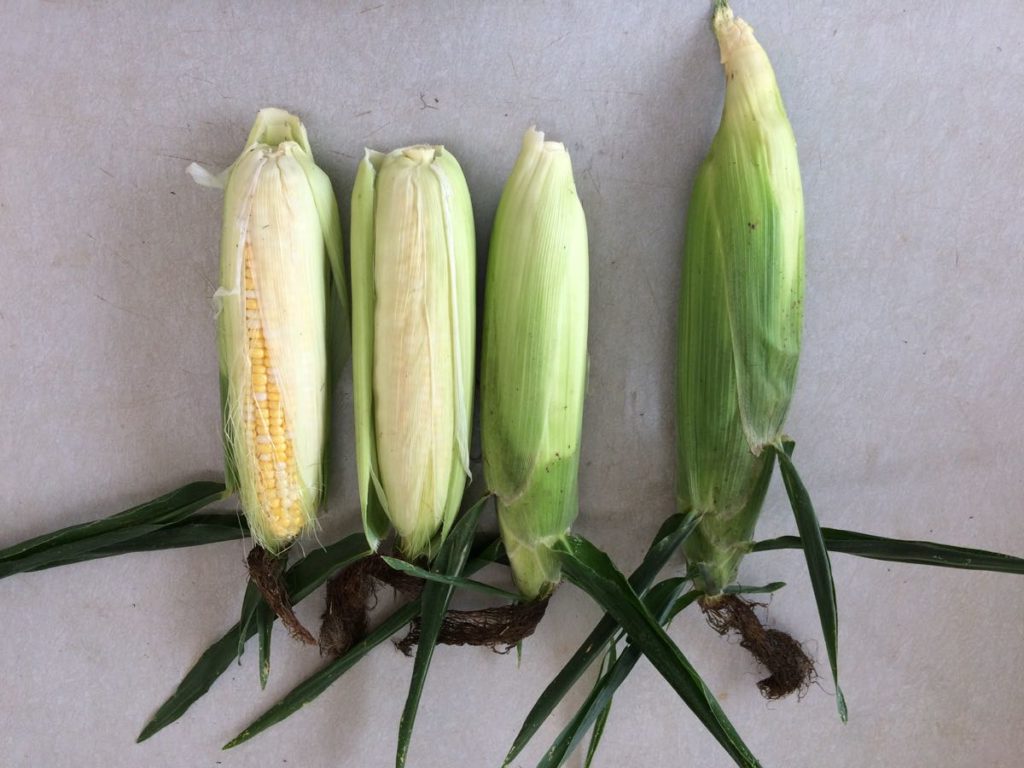
As we snapped off the stems, husks pulled away on some ears. See the two ears on right. We can’t leave the stems on or the corn doesn’t fit in the CSA boxes. The ear on the left isn’t snapped properly and you can see how much longer it is. We will not be growing this variety again.
RECIPES
Visit our 2018 Recipe Log or our 2017 Recipe Log or join our Facebook discussion group.
LOCAL THYME/ Comforting Classics
Orecchiette with Tomato Concasse
Prosciutto and Melon
Tomato, Cucumber and Corn Panzanella
Shrimp or Cashew Biriyani
LOCAL THYME/ Outside the Box Recipes
Basil Oil Marinated Caprese Salad
Orange Blossom Water Scented Melon with Basil
Sweet Corn and Basil Lasagna
Cinnamon Carrot Pie
LOCAL THYME/ Quick & Easy Meal
Black Bean, Shredded Carrot and Pepper Burrito
Recipes from Lauren
LOW-MAINTENANCE FREEZER LASAGNA
I know lasagna may not scream summer, but hear me out. I love making lasagna this time of year, when abundance can be overwhelming, for a lot of reasons. First, it is a really effective way to “deal with” several vegetables in one massive dish that will feed your family for several days. I think a hearty batch of lasagna can round out your week when most of what you are eating are hearty vegetable side dishes and loads of fresh delicious simple salads.
However, what I really recommend folks do is make this lasagna as a simple way to preserve the bounty inherent in August for later in the year. I love making this recipe and freezing it before the baking step (you can freeze in Pyrexes or those nice aluminum pans from the grocery store; either can go straight into the oven) and cooking it up any night I run short on time and don’t know what to make for dinner, or (even better) I wait until December when local veggies are less plentiful and I am really craving summer flavor. Lauren.
Makes 6 hefty servings
Takes 1 hour, 50 minutes
1 tablespoon + 1 teaspoon Kosher salt, divided
8 ounces lasagna noodles
1 pound ground beef or Italian sausage (vegetarian? substitute 1-2 cups of cubed eggplant!)
1 onion, diced
3-4 carrots, peeled and diced
2 red peppers, diced
1-2 pounds tomatoes, cored and roughly chopped
16 ounces cottage cheese or ricotta
1 whole egg
1 teaspoon dried parsley
1/2 teaspoon dried basil
1/2 teaspoon dried oregano
4 cups favorite pasta sauce (homemade is great; but the jarred stuff works too!)
3 to 4 cups shredded mozzarella cheese
Ω cup Parmesan cheese
- Preheat oven to 350 degrees F (if baking lasagna right after assembling) and grease 9◊13 baking dish.
- Bring a large pot water to a boil on the stove top. Add 1 tablespoon Kosher salt. Cook pasta according to package directions and drain.
- Combine meat with onion, carrots, peppers and tomatoes in a large skillet. Sprinkle with 1/2 teaspoon Kosher salt. Cook over medium heat for 10-15 minutes until carrots get a little caramelized and meat is fully cooked.
- Mix cottage cheese (or ricotta), egg, remaining 1/2 teaspoon Kosher salt and dried herbs in a large bowl.
- Spread approximately one cup of sauce on the bottom of baking dish. Place a third of the noodles on top of the sauce. Add another cup of sauce followed by half of the meat mixture, half of the cottage cheese (or ricotta) mixture, and a third of the mozzarella. Top with another third noodles, another cup of sauce, and the rest of the meat mixture and cottage cheese mixture. Cover with another third of the mozzarella followed by the rest of the noodles and sauce. Top with the remaining mozzarella and Parmesan. The lasagna can be refrigerated or frozen at this point. Let lasagna defrost in the refrigerator for a day prior to baking.
- Cover with foil. Bake at 350 degrees for 1 hour. Increase baking time if lasagna is cold. Remove foil and bake uncovered for 5-10 minutes for top cheese to brown (or place under the broiler for a minute or two). Let stand 15 to 20 minutes before serving.
.
TOMATO & CORN PANZANELLA
Adapted from Six Seasons
Honestly, the corn, tomatoes, Walla Wallas and cucumbers are perfect after the second step. These fresh veggies with a tough of vinegar, salt and pepper are a dream snack so feel free to stop right there. But if you’re feeling a little fancier go a bit further and follow the recipe for the torn croutons from Joshua McFadden’s great Six Seasons cookbook and add the toasted walnuts, Parmesan and basil! You’ll be thrilled either way. Lauren.
Serves 4-6 as side or 2-3 as a meal
Takes 30 minutes if making the croutons, 15 minutes if not
4 ears corn, shucked
1-2 pounds tomatoes, the more shapes, sizes and colors the better, cored and sliced or cut into wedges (or some of both)
1/2 Walla Walla onion, thinly sliced
2 cucumbers or silver slicer, cut in half lengthwise, seeded and sliced
1/4 cup white wine vinegar
1 teaspoon Kosher salt
1/4 teaspoon freshly ground black pepper
1 cup toasted walnuts
1/2 cup fresh grated Parmesan
3 cups torn croutons (recipe below)
1/4 cup olive oil
1 handful basil leaves, cut into a chiffonade
- Bring a large pot of water to a boil. If making the torn croutons, also preheat your oven to 400 degrees at this time.
- Once water is boiling, add corn to pot and cook for 4 minutes. Once finished cooking, drain and rinse under cold water until cool enough to handle. Using a knife, cut kernels of corn off ear.
- Place corn in a large bowl with tomatoes, onion and cucumber. Add vinegar, salt and pepper. Toss gently with a spatula to combine.
- Add walnuts, Parmesan and torn croutons and toss again. Drizzle with olive oil and sprinkle with basil. Serve chilled or at room temperature.
.
Torn Croutons
1/2 loaf favorite fancy bread (6-8 ounces), I used Pepitas Polenta from Madison Sourdough
2 tablespoons olive oil
1/2 teaspoon Kosher salt
1/4 teaspoon freshly ground black pepper
Tear loaf into bite-size pieces. The pieces can and should be uneven to allow for different amounts of soft and crispy pieces. Add pieces to a baking sheet, drizzle with olive oil and sprinkle with salt and pepper. Bake for 15 minutes until crispy on the edges but not cooked all the way through.
.
Week #12, August 9/10, 2018
- On: August 08, 2018
 0
0
Small victory
We have beautiful basil for you, despite the dreaded Japanese beetles. I’ve spent the last two weeks plucking beetles from our new basil planting (among a few other jobs of course.) As I explained last week, if you trap the first Japanese beetles to arrive in an area, you can discourage other beetles from congregating. Each morning, I knock as many as I can into a pail of soapy water. Morning is best, while they are still sluggish.
A member said this sounds like a lot of work. Nope; it’s an easy, quiet job. We plant the later basil patches near the buildings, where they are convenient for this small job. If we can keep ahead of the beetles, and if downy mildew doesn’t blow into WI, then maybe I will have some extra basil to sell. We’ll see. Beth
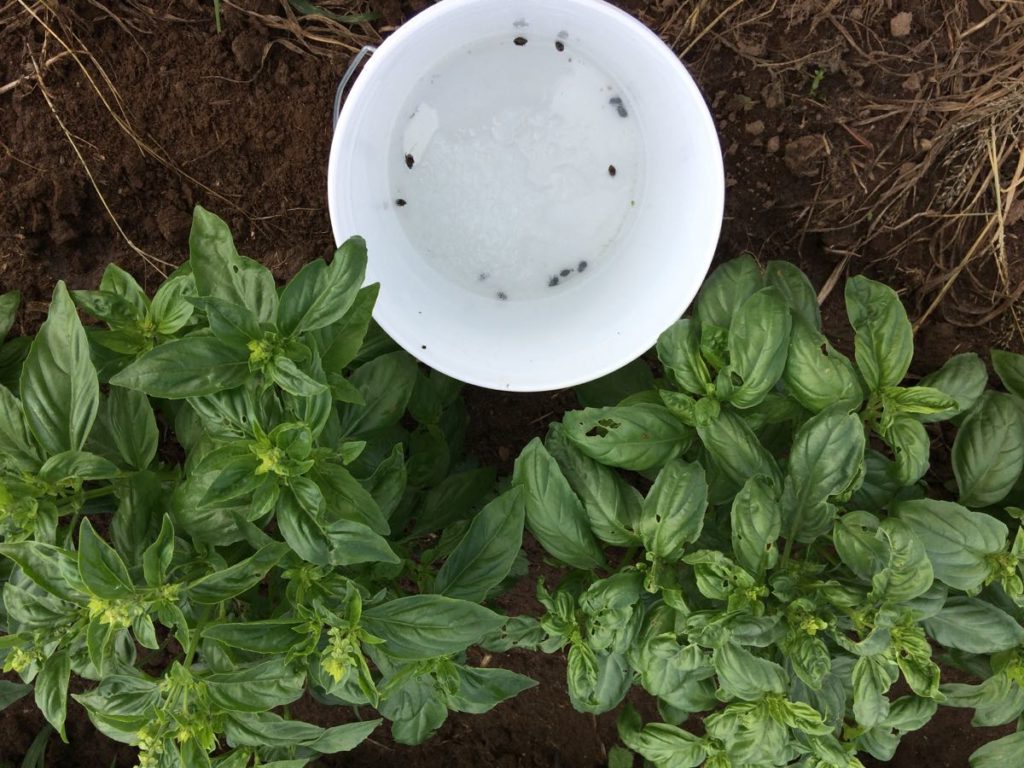
There’s still some damage on the leaves but it’s not bad. The most beetles I’ve caught in one day was about 100. The photo above was a better day.
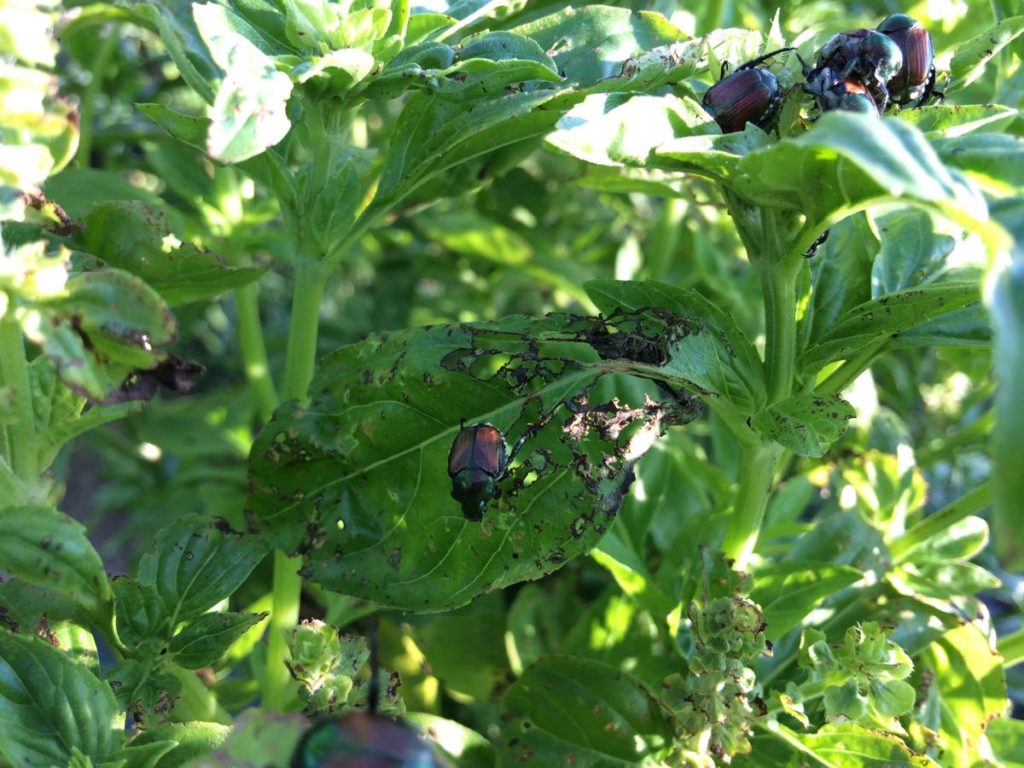
Japanese beetles are pretty but the damage is not.
Veggie List and Veggie Notes (week #12, Aug. 9/10, 2018)
– weekly shares
– purple EOW
– moon sampler
Plum & slicing tomatoes, ~2.5 lb
Red watermelon
Cucumbers, 3
Silver Slicer cucumbers, ~3
(Pickles, a handful, maybe)
Lettuce
Red frying or bell peppers, 2 – 3
Green beans, 0.7 lb
Walla Walla onion, 1 – 2
Jalapeno chile (HOT), 1
Basil, 2 – 3 husky sprigs
There might be 1 – 2 yellow summer squash.
– One site gets eggplant.
– Sites that didn’t get Sun Jewel melon last week get them this week.
Next week’s box will probably contain tomatoes, peppers, sweet corn, cucumbers, carrots, basil and more.
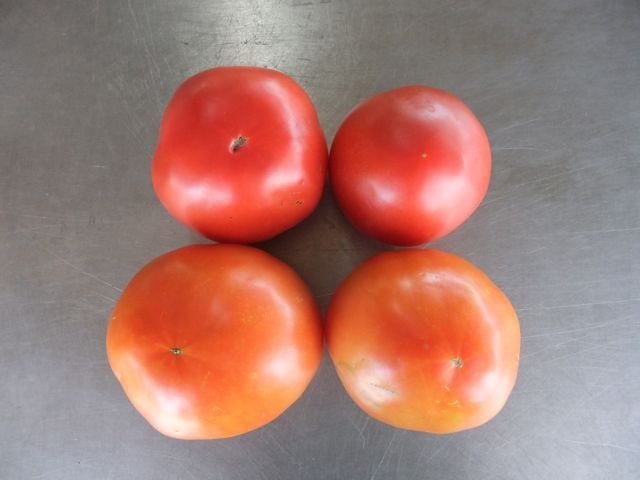
Ripe (top) and less ripe tomatoes (bottom).
Tomatoes – Our large tomato fields are ready. The plants are healthy and the tomato quality is very good. We will pack a mix of ripe and less-ripe tomatoes so you can stretch them through the week. The top tomatoes in the photo are ready to eat. The bottom tomatoes need to ripen at room temperature for a few days. Put on your counter or keep in a brown paper bag.
Storage: Tomatoes retain their best flavor and texture when stored at room temperature, no lower than 55oF. However, you should refrigerate your tomatoes if they are fully ripe and you don’t expect to eat them right away. It is better to sacrifice a little flavor and texture than lose your tomatoes to rot. Also, fully-ripe tomatoes are less sensitive to chilling injury.
Red watermelon – Uncut watermelons can be held at room temperature for one week. Refrigerate after cutting.
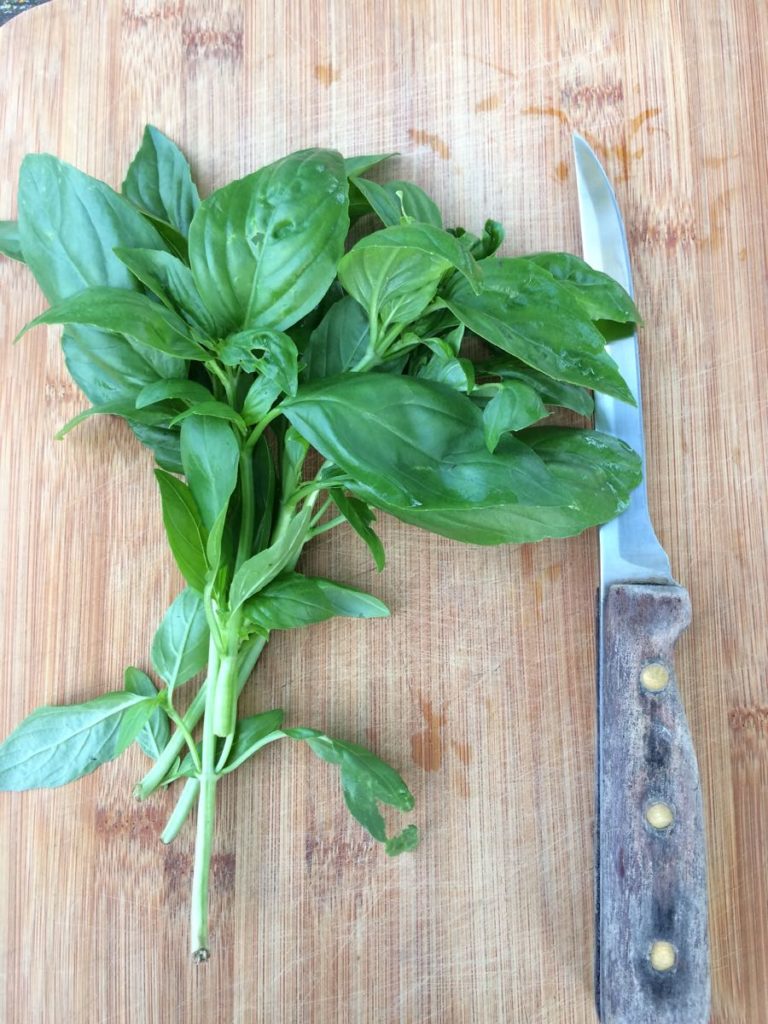
Basil – Have fun with this nice bundle of basil. Freeze any that you don’t expect to use soon. Chop by hand (see below) or in a food processor, mix with olive oil and press into a freezer-proof container. It helps if the basil is dry. I choose a container that results in a 1/3 to 1/2 inch layer of basil. I have sets of these containers, and nest an empty one on top of the basil layer, to press it in place while freezing. You can usually break frozen chunks off a sheet of that size as needed.
Sun Jewel melons (for some sites) – We’re sending Sun Jewel melons to the sites that didn’t get them last week. This is a sweet, crisp melon that tastes like a very good honeydew. It’s not a spaghetti squash although it looks just like one! We’ve figured out how to judge ripeness of this new melon.
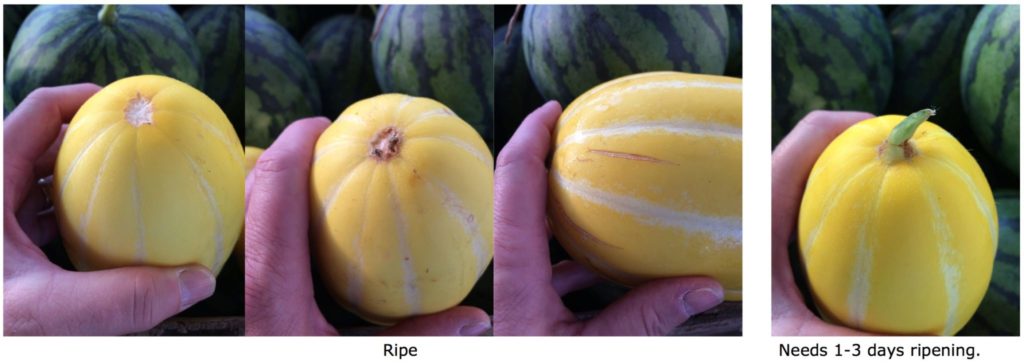
If the stem end of your melon has detached cleanly, or if the melon has small cracks, then it is ripe and ready to eat. If the stem is intact (rightmost photo) then ripen it on your kitchen counter for 1 to 3 days. When ripe, it will smell faintly sweet, but not as fragrant as a ripe muskmelon. I’m soliciting feedback in our Facebook discussion group to find out if you all like this new melon. That’s how we’ll decide whether to grow it again. Thanks for any feedback!
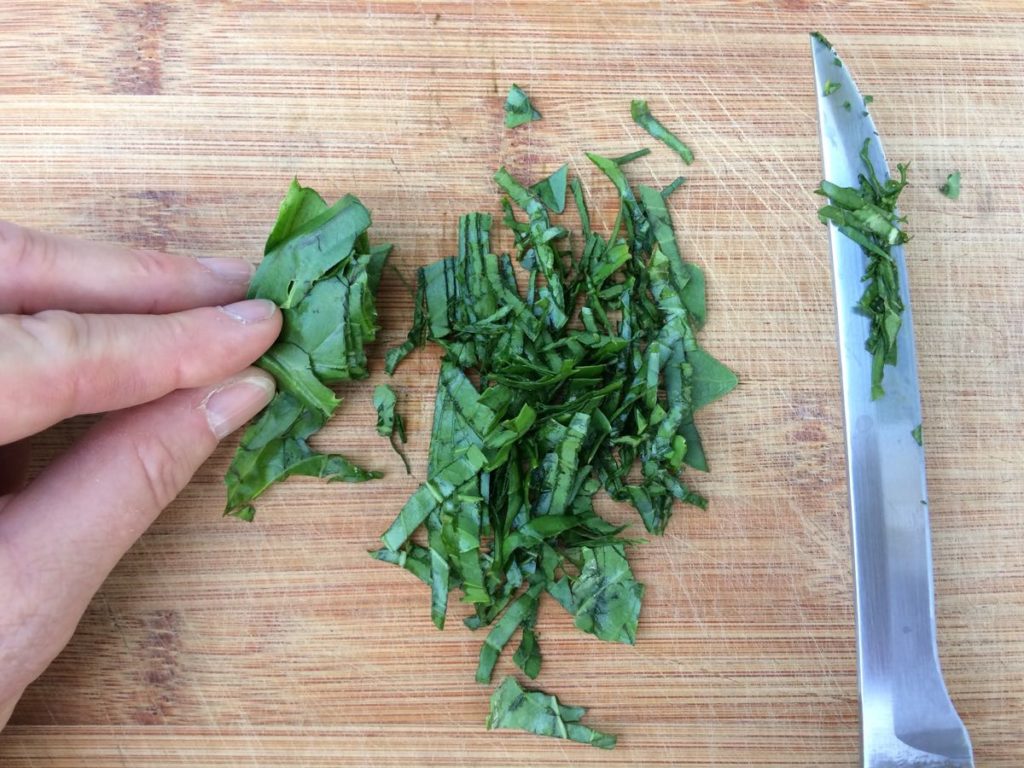
Basil chiffonade
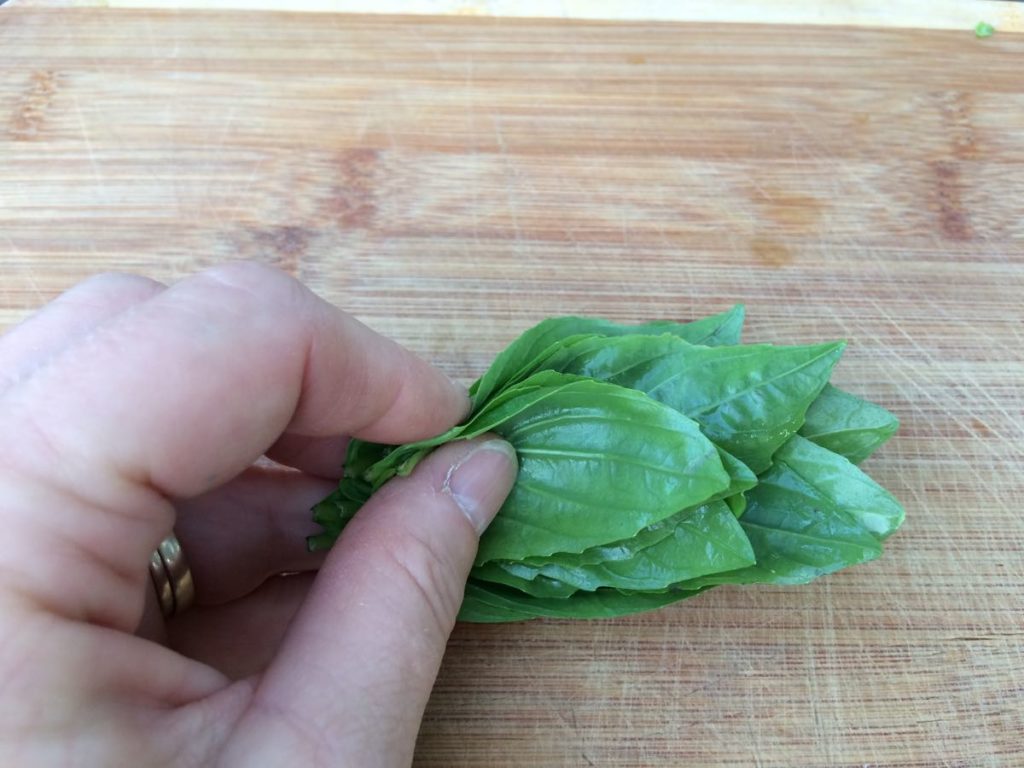
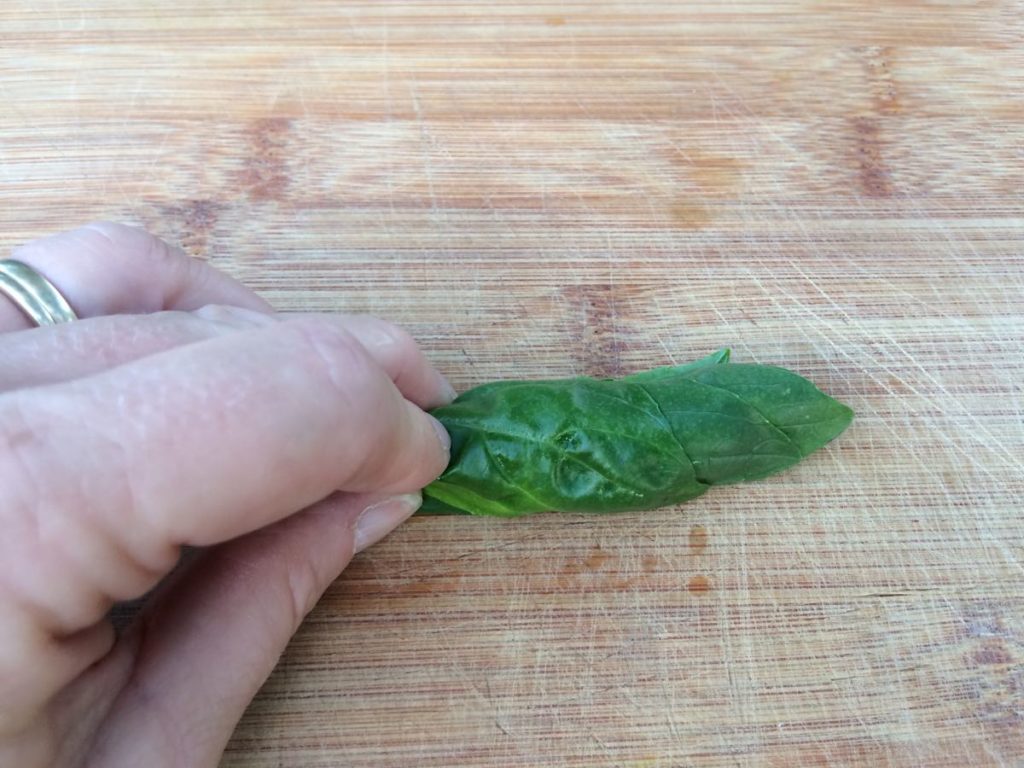
A chiffonade is the best way to cut any flat leaf into ribbons. It works for basil, works for kale. Wash the leaves. Remove the mid vein from kale, collards and chard but not basil. Stack the leaves, then roll the stack like a cigar. Slice across the roll with a sharp knife. If the leaves are large, e.g. kale, cut across the resulting pile for the size ribbons you want. No need to do that with basil! For basil, it helps to start with dry leaves. That doesn’t matter much with the larger kale, chard or collard leaves.
RECIPES
Visit our 2018 Recipe Log or our 2017 Recipe Log or join our Facebook discussion group.
LOCAL THYME/ Comforting Classics
Basil Oil
Gazpacho de Sevilla
Marinated Tomato and Cucumber Pasta Salad
Roasted Pepper Salsa
LOCAL THYME/ Outside the Box Recipes
Basil Salt
Hot Process Spiced Pickle
Rosalie’s Padella
Teriyaki Noodle Stir Fry with Peppers and Green Beans
LOCAL THYME/ Quick and Easy Meal
Bacon, Lettuce and Tomato Sandwiches with Basil Mayo
Recipes from Lauren
WATERMELON, CUCUMBER & AVOCADO SALAD
Adapted every so slightly from Heartbeet Kitchen
If you are anything like me then you get a little tired of melons after the first couple and get wondering if there is anything fun you can do with it. I made a cocktail with all these ingredients first (watermelon, cucumber, jalapeno, and basil alongside tequila, lime juice and honey) and although absolutely incredible tasting, the pink watermelon juice and green cucumber jalapeno juice combined into a color that was truly unappetizing so I changed course completely. This salad, though slightly less fun then a cocktail, is as beautiful as it is delicious so I really hope you enjoy it!
Oh and if you don’t have watermelon, just leave it out. The cucumber, avocado, basil and jalapeno still work wonderfully together though it will obviously be a much smaller salad. Lauren
Takes 15 minutes.
Serves 2-4.
3 cups uniformly cubed watermelon
1 silver slicer cucumber, cut in half, seeded and very thinly sliced
1 ripe avocado, scooped into small balls with a melon baller (or if you don’t have a melon baller, just cut them into a large dice)
1 jalapeno, seeded and minced
1 lime, juiced
3 tablespoons olive oil
2 tablespoons freshly chopped basil
Salt and pepper to taste
Prepare watermelon, cucumber, avocado and jalapeno and place together in a large bowl. Squeeze lime over the top and gently stir. Add olive oil, basil and a small sprinkle of salt and pepper. Stir gently, taste and adjust seasonings to your liking. Serve immediately.
.
GYRO BURGERS
Serves 6-8.
Takes 30 minutes.
3 red peppers (a mix of bell and fryers is fine), cores and seeds removed but left in large, easily grill-able pieces
Olive oil
Salt and pepper
2 pounds ground beef (or lamb)
3 tablespoons dried minced onion
2 teaspoons Kosher salt
1 teaspoon granulated garlic
4 ounces feta, crumbled
Tzatziki Sauce:
2 cucumbers (could be regular or silver slicers)
1 cup full-fat Greek yogurt
1/4 cup olive oil
2 tablespoons white wine vinegar (or lemon juice)
1 teaspoon sugar
1 teaspoon Kosher salt
1 teaspoon granulated garlic
1/2 teaspoon dried dill (unless you happen to have fresh lying around)
For Serving:
6-8 burger buns, buttered and toasted if you’re feeling extra ambitious
6-8 slices Jack cheese
3-4 sliced tomatoes
1/2 large Walla Walla onion, thinly sliced
- Preheat your grill as high as it goes. While it preheats, toss your peppers with a couple drizzles of olive oil and some salt and pepper in a medium bowl. Head out to your grill with a pair of tongs and roast those babies over the hottest part of the grill until they are getting quite a bit of char on them (but take them off before they get completely blackened). Return the roasted peppers to a bowl and cover with a plate for 5 minutes to “steep” them so that the skins become easy to remove. Turn your grill off if you don’t have any other grilling to do, but multi-task here if you feel like it because we will turn the grill back on for the burgers in about 10 minutes.
- Meanwhile, prepare your tzatziki sauce by cutting your cucumbers in half, removing the seeds with a spoon and dicing very small. Combine cucumbers with all other sauce ingredients in a medium bowl and stir until well-combined.
- Now your pepper skins should be nice and softened. Remove the skins as best you can– if some pieces stay on, it’s totally fine. Chop the peppers up real small and add to a large bowl with ground beef, minced dried onion, salt, garlic and crumbled feta. Mix together with your hands and then shape into 6-8 patties.
- Grill burgers over medium heat for 3-5 minutes per side depending on the done-ness you like. During the last minute or so of cooking top with the Jack cheese.
- Serve burgers on a toasted bun with sliced tomato, sliced onion and tzatziki sauce.
.
Week #11, August 2/3, 2018
- On: August 01, 2018
 0
0
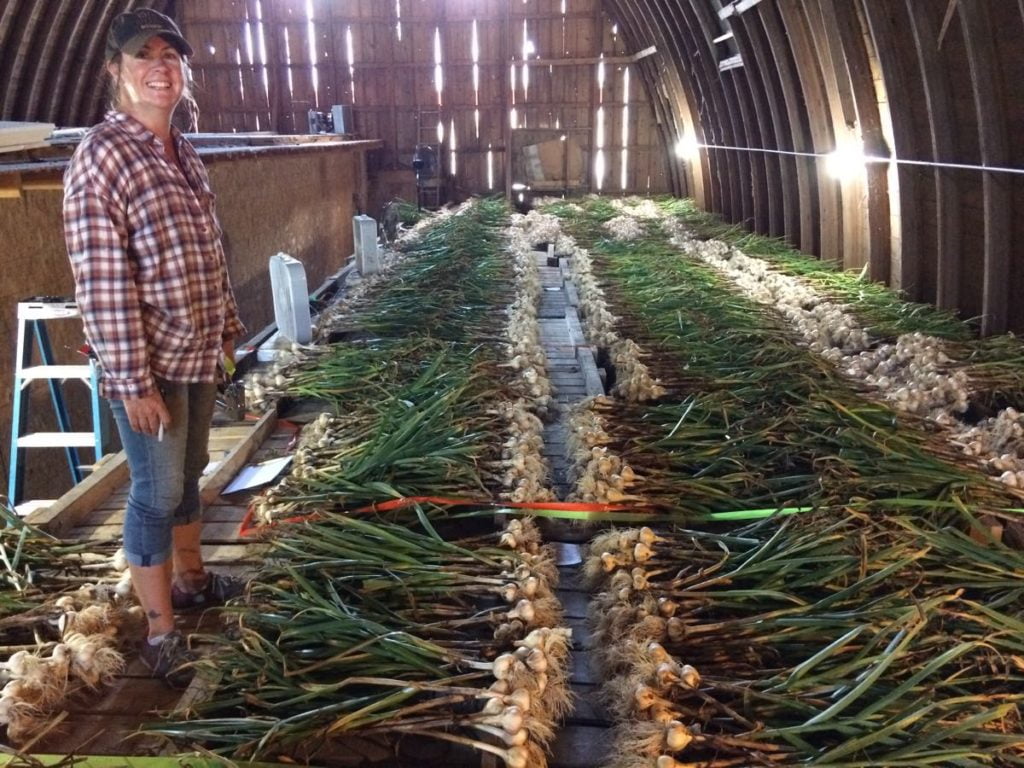
Our garlic harvest is in. It is a very satisfying crop. We didn’t lose plants any over the winter and the bulbs are plumb and beautiful. They need to dry for a month, then we’ll begin packing them in the CSA boxes. Above, Karen carefully laid the plants in rows to dry. Our barn loft is a good place to cure garlic because it’s dry with good circulation.
No bulk basil this year.
Japanese beetle pressure is high right now, cutting into the basil we expected to offer for extra sales. If you have the chance to buy bulk basil elsewhere, you should do it. There will be plenty of basil for the CSA boxes. We’ve seeded extra plantings and plan to harvest the basil smaller than usual, before the beetles find it. I visit the basil plantings each morning to knock Japanese beetles into a pail of soapy water. A few pioneering beetles arrive, then are followed within days by congregating beetles, drawn by pheromones. If I keep the pioneering beetles under control, the rest of the beetles don’t congregate. If you have basil in your garden, give this approach a try.
Veggie List & Veggie Notes
Week #11, Aug 2/3, 2018
– Weekly shares
– Green EOW shares
Green beans, ~1.4 lb
Muskmelon, 1
Cucumbers, ~4
Silver Slicer cucumber or a few pickles
Tomatoes, slicing & plum, ~2.3 lb
Peppers, 2, maybe 1bell + 1fryer
Lettuce, 1 medium
Zucchini or yellow summer squash, 1 or 2 pieces
White onion, 1 or 2
– Some sites get Sun Jewel melon; some get Yellow Doll watermelon.
– Some sites get globe eggplant, some get a small cabbage, some get more pickles, beans or peppers.
Next week’s box will probably carrots, cucumbers, lettuce, tomatoes, peppers, melons, onion and more.
Green beans – The string beans are very nice quality, at the perfect stage as we picked them. Use raw or cooked. Refrigerate.
Muskmelon – Some are ripe and ready to eat. Some need to ripen a day or two on your kitchen counter.
Cucumbers – We just began harvesting the next cucumber field so this batch is beautiful. Now we have pickles and Silver Slicer cucumbers to share. We’ll scatter them among the boxes as they are ready. Silver Slicers are medium-sized white cucumbers with thin skins. Pickles are small, stubby cucumbers with thin skins. Both can be used interchangeably with slicing cucumbers in cucumber recipes, or mixed together. However, their best use is as a snack. Hand these to the kids on the ride home from picking up your CSA box. There’s no need to peel the thin-skinned pickles or Silver Slicers. As usual, store all types of cucumbers/pickles in the warmest part of your fridge.
Tomatoes – Store at room temperature and keep a close eye on these tomatoes. Quality has improved a bit over last week. Soon we’ll be done with this rain-weakened first field.
Peppers – You’ll get two peppers, probably one bell and one fryer. Many will be “suntans”; peppers that are partially red and partially green. It’s always a little risky to leave the first peppers on the plants too long so we harvest at this stage. The growing plants will provide more shade and shelter for the next round of peppers. They are coming!
Lettuce – This is SummerCrisp, a variety that does pretty well in summer. The weather has cooled down so we were able to let this lettuce grow larger than the last batch.
White onions – Mild to moderate pungency. Store at room temperature. These are more pungent than the recent sweet Walla Wallas.
Eggplant – Store eggplants at room temperature for 2 – 3 days for best flavor. If holding for longer than three days, store in the warmest part of your refrigerator. Eggplants do not store well for long periods of time. Many recipes instruct you to salt and drain eggplant “to remove bitter flavors.” Eggplant this fresh is not bitter so you can skip the salting step.
There are so many ways to use versatile eggplants. Here are a few ideas:
– Roast in the oven or over coals to cook and smoke your eggplant, then transform into baba ganouj with lemon, tahini, and garlic. See recipe link below.
– Cut in 1/2 to 3/4 inch slices, peel, and rub with a little salad dressing (I use Newman’s balsamic dressing), then grill slowly until soft and smoky. At this point, you can cut into cubes to make eggplant caponata with chopped tomatoes, onion, garlic, olives, capers, olive oil and red wine vinegar.
– Use the grilled cubes in casseroles or to top pizza.
– I recently made an easy, less caloric version of eggplant & zucchini parmesan. Follow the grilling instructions above but cut the raw eggplant into thinner slices, 1/4 to 1/2 inches. I layered grilled slices of eggplant and zucchini with thinly sliced raw tomatoes and onions. I added tomato sauce, bread crumbs and parmesan between each layer. In the middle, I added a thick layer of ricotta cheese mixed with fresh garlic. Baked at 400 for 30 minutes and it was good.
– Alternatively, use thin, grilled eggplant slices in grilled cheese sandwiches. Use hearty bread – this doesn’t work well with soft sandwich bread.
Sun Jewel melons (for some sites) – This is our first year growing these interesting Asian melons. They are sweet and crisp. We think their taste falls somewhere between honeydew and crenshaw. The rind is a pretty yellow and the flesh is white. Any melons with small cracks in the rind are ready to eat, and should be refrigerated. Otherwise, ripen on your counter for a few days. These melons are new for us so we can’t tell you what signs to watch for as the melons ripen. We’re guessing one to three days at room temperature should do it. I have a collection ripening in our kitchen. I’ll post in the Facebook group if I learn anything useful.
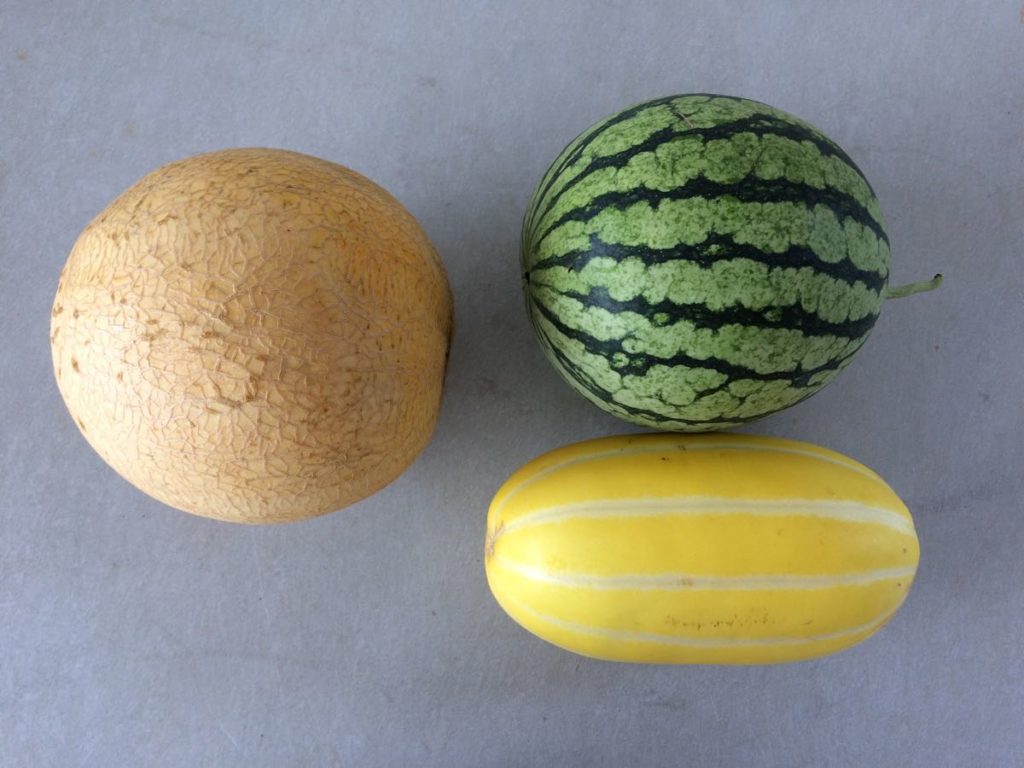
Everyone gets a muskmelon (left) plus either a Sun Jewel melon (bottom right) or a Yellow Doll watermelon (top right).
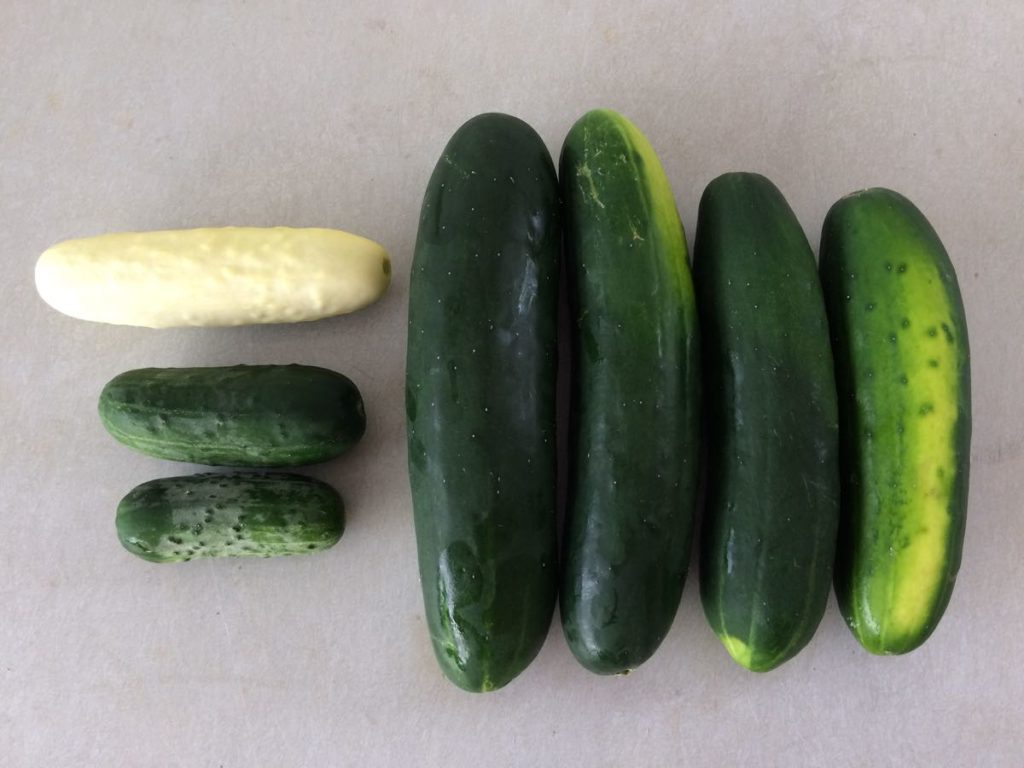
Slicing cucumbers at left. Pickles (top right) and Silver Slicer cucumbers (bottom right) are great for salads or snacking.
RECIPES
Visit our 2018 Recipe Log or our 2017 Recipe Log or join our Facebook discussion group.
LOCAL THYME/ Comforting Classics
Simple Streamlined Refrigerator Pickles
Shrimp Stir Fry with Rice, Green Beans, Zucchini and Pepper
Chilled Sun Jewel Soup
Risotto with Braised Red Cabbage
Baba Ganouj
Eggplant Parmesan
LOCAL THYME/ Outside the Box Recipes
Citrus Rice Salad with Feta, Tomatoes and Cucumbers
Thai Cucumber, Green Bean and Tomato Salad
Sun Jewel Collins
Braised Red Cabbage with Balsamic Vinegar and Cranberries
Eggplant and Lamb Moussaka
LOCAL THYME/ Quick & Easy Meal
Southwestern Black Bean and Vegetable Salad
No recipes from Lauren this week
She’s preparing to host a big Soil Sisters event and tour.
Week #10, July 26/27, 2018
- On: July 25, 2018
 0
0
Farm News
We had our heads down this week, with Steve very focused on carrots. He harvested our first carrots of the year. (They are in your box this week.) That means getting the carrot harvester out of storage in the neighbor’s barn, greased up and ready to go. He and Roger always mull over ways to tweak and upgrade it.
At the same time, Steve is nurturing newly-planted carrot fields. These will be ready to harvest in fall for fresh eating and for sale through the winter. The big carrot plantings are a lot of work for him. Most years, one planting fails after heavy rains and need to be re-seeded. Each field needs daily irrigation for 12 days after planting, plus flame weeding with propane torches, plus precise cultivation. It’s a relief when all the fields are successfully planted. It will be a bigger relief once they are weeded as well.

Raul cultivates a field of carrot seedlings. Can you see them?

He can get pretty close to the seedlings, leaving 3-inch bands of untilled soil near the carrots.

Sometimes just frilly carrot seedlings emerge (left). Sometimes there are many weeds too (right). We have to hoe out the weeds by hand, a huge job for the coming weeks. Steve has seeded eight fields (about 4 acres), with staggered planting dates to give us a chance to weed each field in succession.
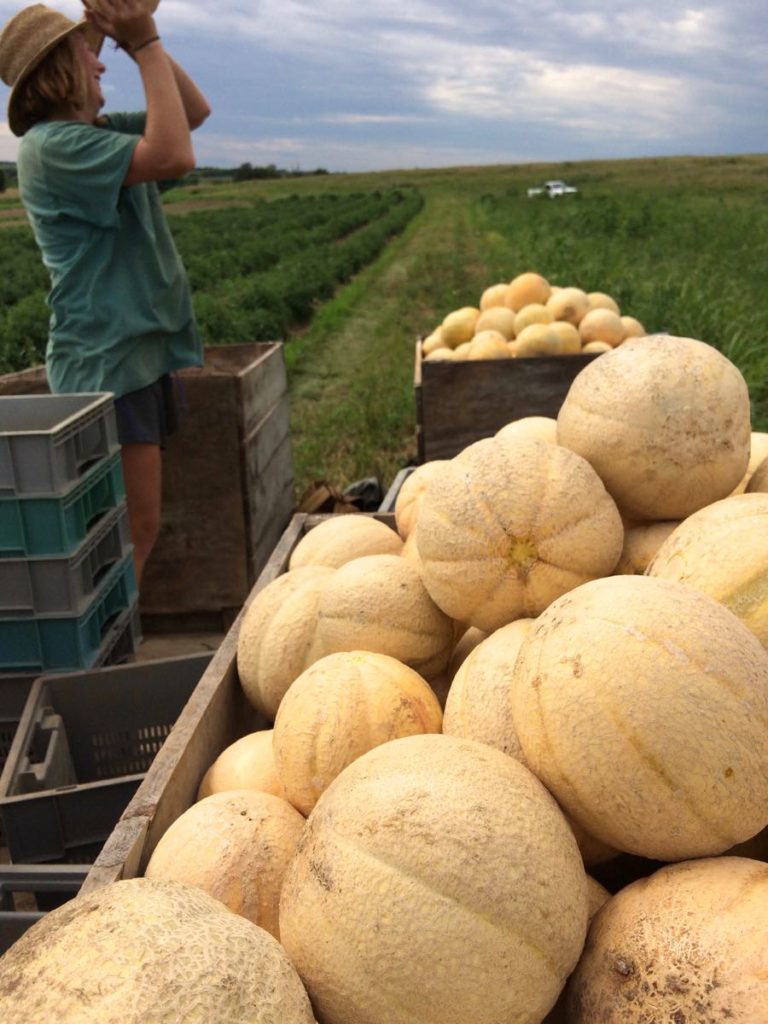
In the meantime, the rest of us are focussed on harvests. Above, Mari catches muskmelons thrown from the field by the rest of the melon crew. These muskmelons are in your boxes.
August 1 checks
Many of you paid us with checks dated August 1. I’ll deposit the checks on August 4 or 6.
Soil Sisters Events
If you are interested in exploring small scale farms in our part of the state, check out the Soil Sisters events on August 3 – 5. All the participating farms are run by women. I am not hosting a workshop but many of my farmer friends are. The workshop list is here but there are also farm-to-table meals plus lots of free farm tours.
Veggie List and Veggie Notes
Week #10, July 26/27, 2018
– Weekly shares
– Purple EOW
– Sun Sampler
Sweet corn, 6 – 7 ears
Muskmelon, 1 medium
Carrots, 2 lb
Tomatoes (slicing or plum), 2 – 2.5 lb
Cherry tomatoes, 1 pint
Pepper, 1
Cucumbers, 1 or 2
Zucchini, a few
Walla Walla onion, 1 or 2
Basil, 1 sprig
You might get a little broccoli.
Next week’s box will probably contain melon, tomatoes, cucumbers, onion, and more.
Sweet corn – This batch of corn is “Vision”, Steve’s favorite variety. If you receive 7 ears, one will be smaller, with about half the ear useful.
Storage: Refrigerate.
How to cook: see last week’s newsletter.
Carrots – Refrigerate in a plastic bag.
Tomatoes – You should refrigerate your tomatoes this week. Our first planting was weakened by rain, so those tomatoes are not storing well. The next two plantings are stronger. We’ll let you know when you can keep your tomatoes at room temperature again.
Pepper – You’ll get a bell pepper or a frying pepper. Some are green, some are partially red.
RECIPES
Visit our 2018 Recipe Log or our 2017 Recipe Log or join our Facebook discussion group.
LOCAL THYME/ Comforting Classics
Shrimp with Tomatoes and Feta
Grilled Corn
Melon Smoothie
Carrot Bran Muffins
LOCAL THYME/ Outside the Box Recipes
Moroccan Tagine with Carrot, Zucchini and Tomato
Corn Pudding with Chicken
Melon Cucumber Salad
Shrimp with Carrots, Cherry Tomatoes and Zucchini in Tikka Spice
LOCAL THYME/ Quick & Easy Meal
Hummus, Cucumber, Carrot Wraps
RECIPES FROM LAUREN
VEGETABLE GRILLED CHEESE
This is a recipe inspired by my mother: the queen of tossing a ton of vegetables into something ooey, gooey, cheesy and wonderful. My mom often sautees random combinations of vegetables into what she calls a “sandwich spread.” She keeps the bowl in her fridge and throws it on grilled sandwiches whenever she can’t think of anything else for dinner. I’ve made this other times with diced peppers, roughly chopped kale, or shredded carrots. If you have any of these on hand feel free to add them to the mix. No matter the combination of vegetables, this simple grilled sandwich satisfies. You can also add sliced ham or turkey if you want to make it a bit heavier. The pesto is totally optional, but I really love pesto on grilled cheese sandwiches so always keep a jar in my fridge. Lauren
Takes 30 minutes.
Serves 4.
2 tablespoons olive oil
1 Walla Walla onion
3-4 garlic cloves, minced
1 teaspoon Kosher salt
1/2 teaspoon freshly ground black pepper
1 bell pepper, cored and diced
2 medium zucchini, shredded (about 1-1/2 cups)
1 head broccoli, florets roughly chopped
2-3 tablespoons butter, softened
8 slices bread, preferably sourdough
1/4 cup prepared pesto, optional
4 ounces of favorite cheeses, sliced (we used a combination of smoky cheddar and havarti)
1-2 tomatoes, cored, trimmed and sliced
- Begin by cooking down your veggies. In a large, heavy skilled warm oil over medium heat. Add onion and garlic along with salt and pepper. Cook until just softened. Reduce heat to medium low and add pepper, zucchini, broccoli, and any other veggies you want! Cook for 10 minutes until broccoli is tender.
- While the veggies continue to cook down, get your bread toasting. Butter all eight slices of bread on one side.
- In another skillet or large pan, lay as many pieces of bread† (butter side down) as will fit and begin toasting over medium low heat. Cover half of the bread with cheese slices so it begins to melt. Slather the other half of the bread slices with pesto.
- When the veggies are fully cooked, add a few spoonfuls to each cheesy slice. Top with a few tomato slices. When the pesto slice is grilled to a nice golden brown, place on top of the tomatoes to complete the sandwich. Press down gently with a spatula.
- Remove completed sandwiches to a cutting board and cut sandwiches in half before serving. Repeat with remaining slices of bread and ingredients.
.
SUMMER CORN, TOMATO & CUCUMBER SALAD
This time of year, super simple salads are king and this dish will taste great eaten alongside something prepared simply on the grill. A steak, some ribs, a nice piece of fish; whatever you have, just add this salad and you’ll have a great meal! Lauren
Takes 15 minutes.
Serves 4-6 as a side.
3 ears corn
1-2 tomatoes, cored and diced
1 pint cherry tomatoes, halved
1 cucumber, seeded and cubed
1/4 cup fresh basil leaves, cut into a chiffonade
3 tablespoons olive oil
2 tablespoons white wine vinegar
1/2 teaspoon Kosher salt
1/4 teaspoon freshly ground black pepper
- Bring a large pot of water to a boil on the stove over high heat. Once boiling, add the corn and cook for 4 minutes. Drain and rinse under cold water until cool to the touch.
- Remove kernels from ear with a knife and add to a large bowl. Add tomatoes, cherry tomatoes, cucumber and basil followed by oil, vinegar, salt and pepper. Taste and adjust seasonings as desired.
.
Week #9, July 19/20, 2018
- On: July 18, 2018
 0
0
Another new weeding tool

Steve just bought a “weed puller” in hopes of dealing with overgrown weeds. The wet weather from mid-May to early July got in the way of cultivating and hoeing. The window to deal with some of these weeds is dwindling. Here’s how the weed puller is supposed to work. Each pair of rubber wheels rotates inward as you drive down the row, grabbing weed tops and yanking them out of the ground. Some crops will get pulled too but that’s life. At least, that’s the theory. So far, we’ve had middling results. Sometimes it pulls the weeds, sometimes it tears them. New implements always have a learning curve. Steve will fine-tune its use before handing it over to Raul or Roger to use.
We would not have bought this tool in a normal year. It’s expensive and a little odd. If it works in a wet year like this, it will pay for itself with saved crops so it’s worth the risk. There was a time when I used to approve equipment decisions. (Steve and I each have right of veto in purchases and big decisions.) I abandoned my right of veto over equipment purchases years ago because the successes pay for themselves quickly. Steve has good instincts with machinery. Beth
This week
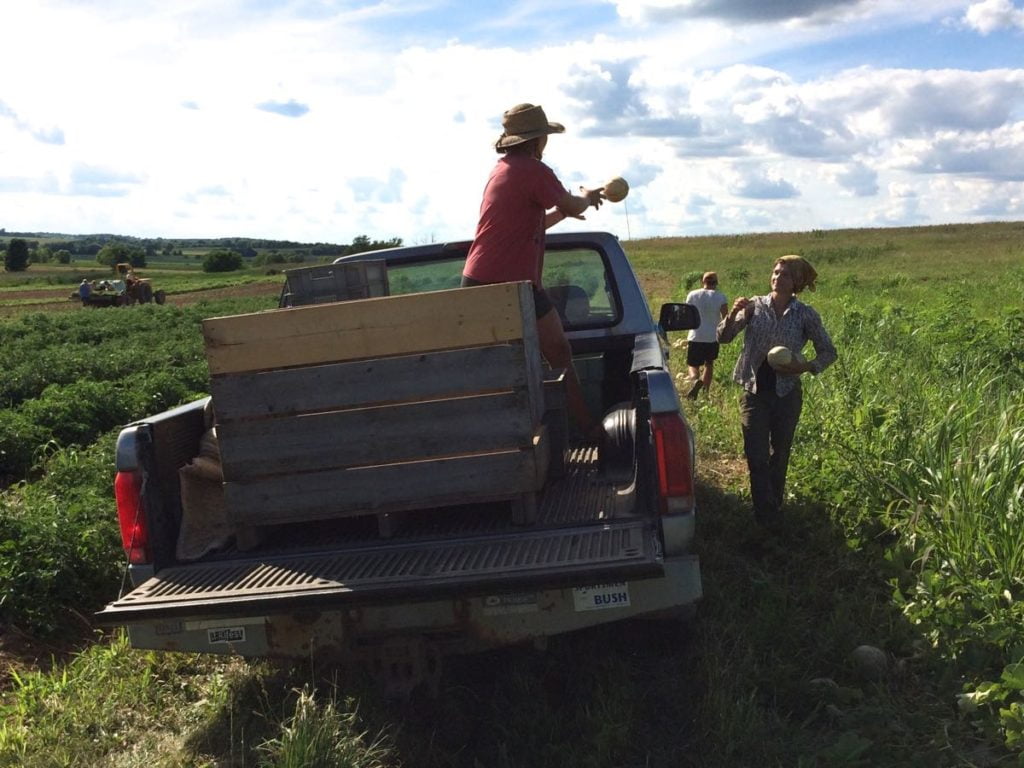
Ellen (right) tosses muskmelons to Mari, who keeps count while stacking them in the bin. Ben works up ahead. Steve and Billy are teaching Ellen how to harvest muskmelons, a coveted job. It’s a fast-moving harvest, the melons smell incredibly good and it’s a useful skill. Of course, other people help; melons are heavy. Muskmelon harvest is less exacting than watermelon harvest (Steve’s job), allowing our crew to take care of it once trained.
Earlier this week, Steve projected that we would have enough melons for one CSA site, maybe two. I fretted about what to put in the CSA boxes that didn’t get melons. So much wasted energy! The crew departed for melon harvest with a few crates, then returned for a wooden bin and more crates. By the time they were done, they filled the bin, all the crates and bed of the pickup truck. That was a surprise but good news. We have enough muskmelons for everyone.
See the tractor and crew in the distance to the left? …
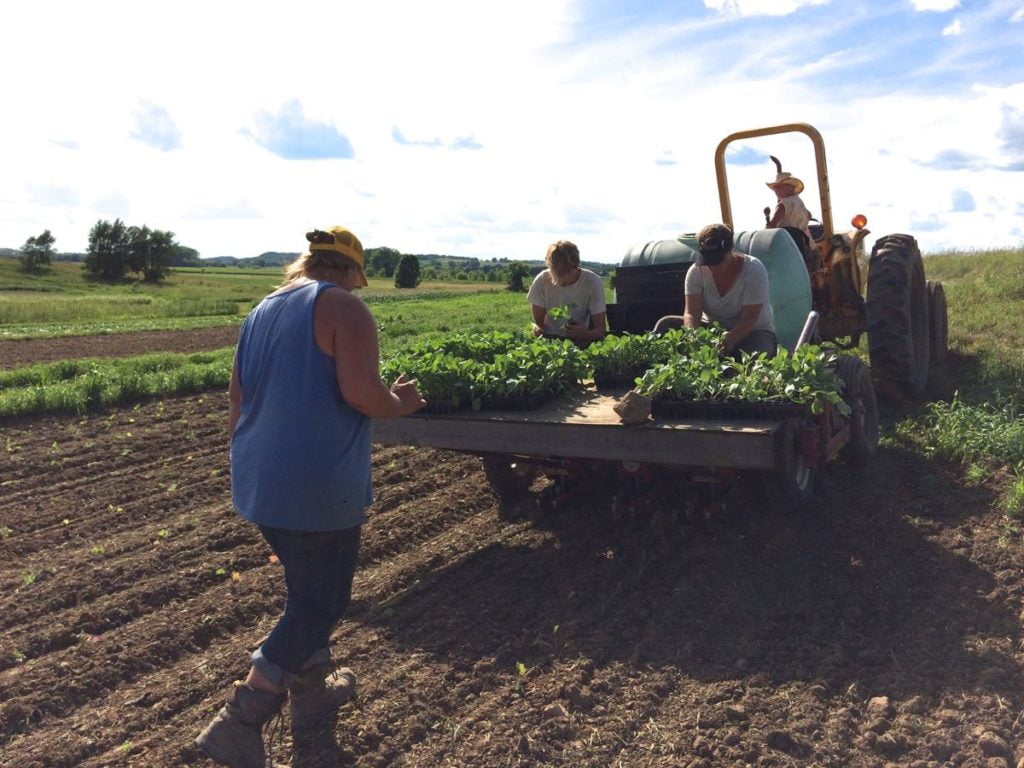
That’s a transplant crew (from left, Maggie, Michio, Kristen and Simone). We’re using this rare dry week to catch up with transplanting. The wet weather has limited our field work to harvests and some crude weeding by hand. When I called Steve last week, he was excited because “it hasn’t rained in six days!” More rain is coming on Friday but we should be caught up on transplanting by then.
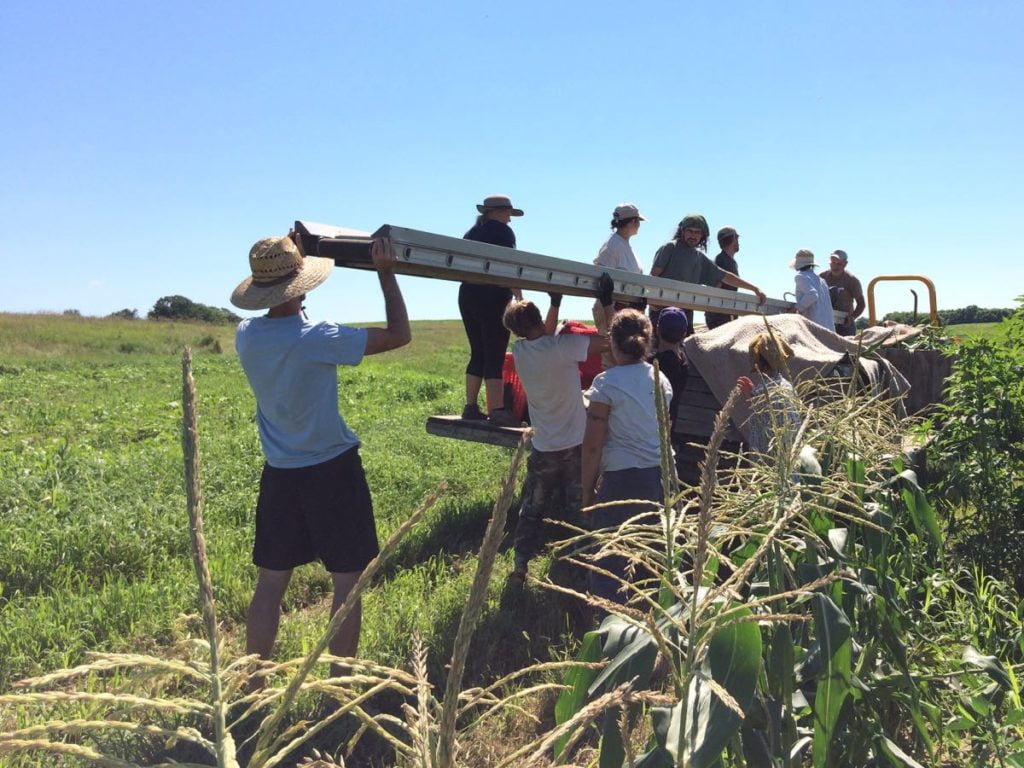
We need a big crew for sweet corn harvest. Above, it takes everyone to position the conveyor belt on the wagon after harvest is done. (During harvest, it extends from the wagon over the corn, putting it within easy reach of everyone picking corn.)
At left is Jon Fagan, who worked for us for five seasons before moving on. He’s returned to work for us for a month. I didn’t tell anyone that Jon was returning. It was a great surprise when he showed up at morning meeting today. Working side-by-side is a good way to forge friendships, and Jon has many friends among the crew. We’re glad he’s back, even if only for a short time.
Veggie List & Veggie Notes
Week #9, July 19/20, 2018
– weekly members
– green EOW
Sweet corn, ~10 ears
Muskmelon, 1
Green beans, ~1.7 lb
Cucumbers, 5
Cherry tomatoes, 1 pint
Slicing or plum tomatoes, ~3 ct
Walla Walla onion, 1 or 2
Salanova lettuce, 1 small
Zucchini &/or summer squash, up to 2 lb
You might get a little broccoli.
Next week’s box will probably contain sweet corn, melon, cucumbers, tomatoes, onion and more.
Sweet corn – Now it’s summer! Some ears have bugs at the tip. If you are squeamish, I suggest cutting off the tips before shucking the corn.
Storage. Sweet corn is best when fresh, so we encourage you to eat it asap. Store in the refrigerator, in the husks if you have the room.
Cooking. It is quicker to steam sweet corn than to boil it.
1.) Stand ears of corn upright in a tall pot. Put one inch of water in the pot.
2.) Bring the water to a boil. If the corn is cold when you begin cooking, steam for 5 – 6 minutes. If the corn starts at room temperature, steam for 4 – 5 minutes. The cooking time will vary somewhat depending on how many ears are in the pot. Pay attention to how the corn smells. The scent changes once the corn is ready. Another clue: water will bead on the corn until it is cooked. Don’t overcook it.
Muskmelon – These are ripe and ready to eat. Keep at room temperature but refrigerate if not eaten within 2 – 3 days.
Green beans – Keep in bag and store in the warmer part of your fridge.
Salanova lettuce – These are tiny heads! We harvest young in summer so the lettuce doesn’t get bitter. Remember, Salanova is the lettuce variety that you can cut across the base and it falls apart into salad mix. Wash well.
RECIPES
Visit our 2018 Recipe Log or our 2017 Recipe Log or join our Facebook discussion group.
LOCAL THYME/ Comforting Classics
Caprese Skewers
Swedish Cucumber Salad
Fresh Tomato Pesto Pasta Salad with Green Beans and Corn</a>
LOCAL THYME/ Outside the Box Recipes
Orzo with Smoky Tomato Vinaigrette
Blackened Catfish with Cucumber Raita
Green Beans with Smoked Almonds
LOCAL THYME/ Quick and Easy Meal
Orzo Salad with Grilled Summer Vegetables
Recipes from Lauren
CORN & ZUCCHINI SALAD WITH FRESH CHEVRE
Adapted from Bon Appetit
Sweet corn, Walla Wallas, zucchini and goat cheese are literally a match made in heaven. You could eat this combo about any which way, but I love it as a salad. It is absolutely dreamy with crunch from the corn, meatiness from the squash, creaminess from the rich fresh chevre and sweetness from just about everything. But, if you aren’t feeling salad, feel free to skip the oil and vinegar and throw this together with a dozen eggs for a quick frittata.
Also, don’t let the chevre confuse you. Chevre is just another name for fresh goat cheese– it has a little more funk than the stuff labeled goat cheese at the store. If you can’t find it, plain old goat cheese or feta with both work just fine. Lauren
Serves 4-6 as a side (2 as a main)
Takes 15 minutes
4 ears of corn, husked
2 teaspoons Kosher salt, divided
1-1/2 pounds zucchini or summer squash, thinly sliced
1/2 Walla Walla onion, thinly sliced
4 ounces fresh chevre (if you can find it–feta if you can’t), crumbled
1 tablespoon olive oil
1 teaspoon champagne vinegar (rice vinegar, white wine vinegar or white vinegar would all also work if you don’t have champagne)
1/2 teaspoon red pepper flakes
- In a large pot, season water with 1 teaspoon salt and bring to a boil. Once boiling, add corn and cook for 7 minutes. Drain and rinse with cold water until cool to the touch. Remove to a cutting board and cut kernels off cob.
- Add corn, zucchini, Walla Walla and chevre to a large bowl. Stir together until well mixed (the zucchini can stick together causing this to take a bit of stirring). Drizzle with oil and vinegar. Add remaining salt and red pepper flakes. Stir to combine once more. Taste and adjust seasonings to taste.
.
.
SUMMER LOVE SALAD
Takes 20 minutes
Serves 4-6 as a side (or 2 as a meal)
1 head Salanova lettuce
1 teaspoon Kosher salt
1 pound green beans, ends trimmed, and cut into 1-inch pieces
2 cucumbers
1 pint cherry tomatoes, halved
Dressing:
1/4 olive oil
2 tablespoons cider vinegar
1 teaspoon maple syrup
1 teaspoon Kosher salt
1/4 teaspoon freshly ground black pepper
1 cup walnuts, finely chopped
- Cut base of salanova so that the head of lettuce falls into leaves. Rinse well and put in a colander to dry while you prepare the rest of your salad.
- Fill a stock pot half full of water. Add 1 teaspoon salt and bring to a boil. Once boiling, add beans. Cook for 5 minutes then drain immediately. Rinse with cold water until cool to the touch. Place drained, cooled beans in large bowl with halved cherry tomatoes.
- Cut cucumbers in half. Scrape the seeds out with a spoon. Slice and add to bowl with beans and tomatoes.
- Prepare you dressing by whisking together olive oil, vinegar, maple syrup, salt and pepper in a small bowl until emulsified. The mixture will get cloudy when the oil and vinegar come together (this is emulsification). Add the walnuts and stir them in gently with a spatula. Pour dressing over the veggies.
- When ready to serve, add salanova lettuce to the mix. If you don’t plan to eat this all at once, just add the amount of lettuce to the amount of veggies you plan to eat. The greens don’t store well when mixed with the dressing.
.
Week #8, July 12/13, 2018
- On: July 11, 2018
 0
0
Veggie List and Veggie Notes
Week #8, July 12/13, 2018
– Weekly shares
– Purple EOW shares
– Moon Sampler shares
Kale, 1 small bunch
Beets, 1.7 lb
Broccoli, ~3/4 lb
Cucumbers, 2-3 (probably 3)
Green frying or bell pepper, 1 0r 2
Red leaf lettuce
Zucchini &/or summer squash, 2+ lb
Walla Walla onion
Basil
Sunflower
– Some sites get ~1 lb slicing &/or plum tomatoes.
– Some sites get cherry tomatoes.
Next week’s box will probably contain green beans, tomatoes, cucumbers, zucchini, Walla Walla onion and more.
Broccoli – Inspect your heads for cabbage worms. If you submerge the heads in water, the caterpillars will float out of the heads.
Tomatoes, slicing or plum or cherry – Enjoy the first harvest! Store tomatoes at room temperature. Tomatoes become mealy and lose flavor when stored below 55 degrees. These are ripe, but underripe tomatoes will ripen nicely on your countertop.
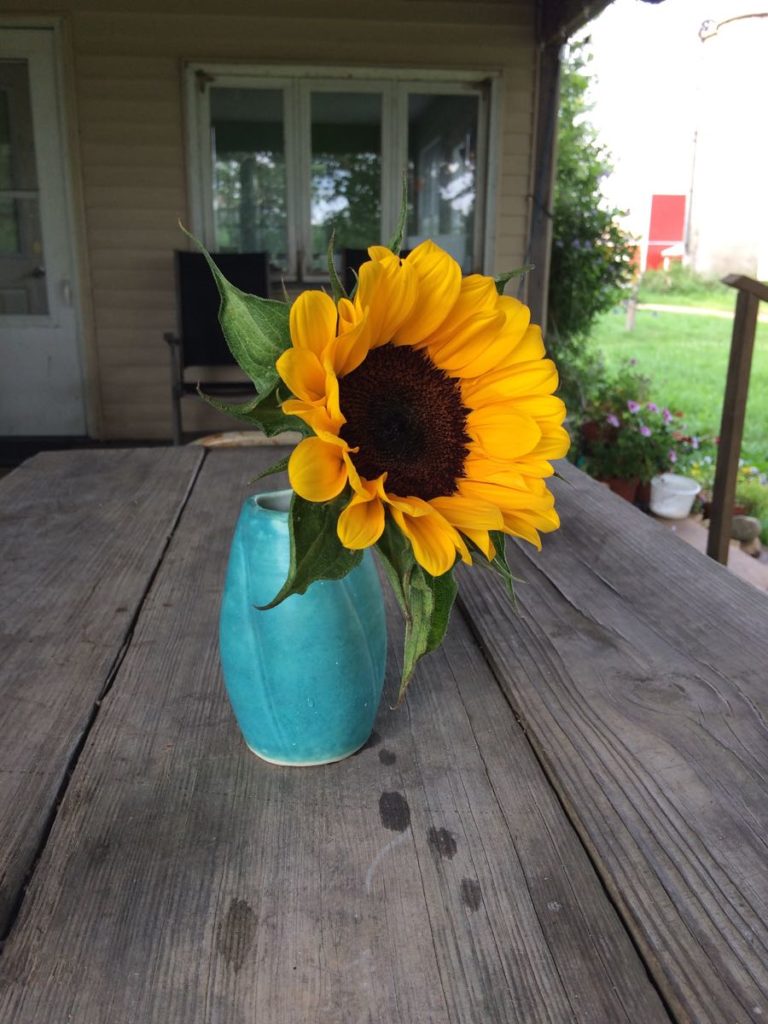
If you receive a sunflower, cut the stem(s) under running water. Place in clean water. Replace the water every day or two.
RECIPES
Visit our 2018 Recipe Log.
Visit our 2017 Recipe Log.
Join our Facebook discussion group.
LOCAL THYME/ Comforting Classics
Summer Squash Carpaccio
Salad with Grilled Walla Wallas, Skirt Steak, Shredded Beets and Blue Cheese
Broccoli Cheddar Quiche
Creamy White Bean Soup with Kale-Walnut Pesto
LOCAL THYME/ Outside the Box Recipes
Szechuan Grilled Shish Kabobs with Shrimp or Tofu, Summer Squash and Cherry Tomatoes
Roasted Beet and Goat Cheese Puff Pastry Tart
Steamed Broccoli with Sumac Lemon Garlic Butter
Maple Massaged Kale
LOCAL THYME/ Quick and Easy Meal
Composed Greek Salad
RECIPES FROM LAUREN
Beet, Cucumber & Tomato Salad
Takes 45 minutes
Serves 4-6
2 pounds beets, quartered (or cut into eighths if the size of a baseball or larger)
1 teaspoon Kosher salt, divided
2 cucumbers, chopped
1/2 Walla Walla onion, sliced
1 pound tomatoes, cored and diced (or pint cherry tomatoes, halved)
1/2 cup rice wine vinegar
3 tablespoons olive oil
1 tablespoon maple syrup
1/4 teaspoon freshly ground black pepper
- Place beets in a large saucepan or stock pot and cover with water. Add 1/2 teaspoon Kosher salt and bring pot to a boil. Boil beets for 30 minutes until beets are tender and easily pierced with a fork.
- Meanwhile, chop your cucumbers, slice your onions and dice your tomatoes. Place in a large bowl. Add vinegar, olive oil, syrup, remaining salt and pepper.
- Once the beets are tender, peel them and slice the pieces. Add to the bowl and mix together. Let marinade for a few minutes and then enjoy at room temperature or chilled.
.
Zucchini Basil Soup
Takes 45 minutes
Serves 4-6
2 tablespoons olive oil
1/2 Walla Walla onion, diced
1 green bell pepper, seeded and diced
1/2 teaspoon Kosher salt
1/4 teaspoon freshly ground black pepper
2 pounds zucchini, halved and sliced
3 cups chicken (or vegetable) broth
13.66-ounce can full-fat coconut milk
3-4 kale leaves, stems removed and roughly torn
1/3 cup basil leaves (packed)
- Heat oil over medium heat. Add onion, bell pepper, salt and pepper. Cook for 5-8 minutes until softened and fragrant then add zucchini. Cook for 8-10 minutes longer until beginning to take on color and then pour broth and coconut milk over zucchini. Bring to a boil, then add kale. Cook for 2-3 minutes until kale is wilted and then remove from heat.
- Allow mixture to cool slightly (5-10 minutes is fine), add basil and puree with an immersion blender, food processor or blender until smooth. Enjoy warm.
.
Week #7, July 5/6, 2018
- On: July 04, 2018
 0
0

Chicken dinner hosted by the Lions Club plus a pie sale.

Everyone stakes their place to watch fireworks at Lake Leota.
Looking forward to Evansville’s 4th of July celebration brings back memories of our farm search during 1999-2001. We were renting a farm in Fitchburg but it was time to leave. That place was for sale at a very high price. Finding a new farm became my job. I was working PT in the business and taking care of little Sophie. The thought of choosing the farm where we would “live for the rest of our lives” was intimidating. We weren’t choosing just farmland; we were choosing a community to raise our family. I began visiting rural towns in a radius around Madison, arranging visits with school superintendents, picking up the local paper, and hanging out in the local park to see if anyone would talk to me. Some towns were quite welcoming. In others, every head turned as I drove down the street. Not much going here, eh?
My Evansville visit was promising. Other moms in the park spoke to me! The local paper was filled with news of the upcoming 4th of July celebration. Steve and I decided to visit on the 4th and were blown away. The park surrounding Lake Leota was filled with families and kids. There was chicken dinner, and a homemade pie sale, and live music (in a beer tent!) and kids’ games. Most of these attractions were hosted by local volunteer groups. The entire town turned out. We thought “here’s a town that can pull together and create community.” Eventually we found our farm and it was in the Evansville school district. The forecast has proven true. It’s a welcoming place.
Farm News
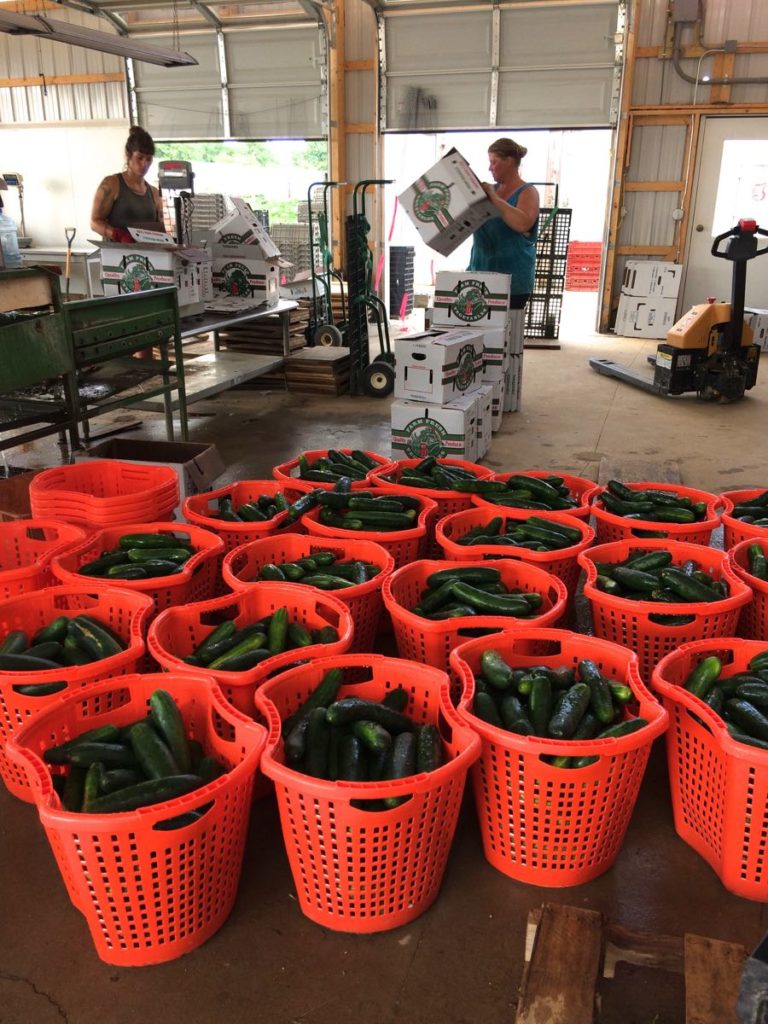
Charlotte and Maggie wash a bumper crop of cucumbers in shiny new baskets. We won’t lose these baskets in the field.
We worked today, despite the holiday. First, we need to feed you folks. That’s the deal, right? Second, we had to get as much field work done before the next rain. Each rainy spell pushes us further behind with weeding and transplanting. It was finally dry enough yesterday to get in the fields. Everyone hustled to transplant while Steve and Raul cultivated. We transplanted the next sweet corn, melons, zucchini, Brussels sprouts and lettuce. That’s a lot. It started pouring this afternoon just as we finished. Steve is bummed that it rained so hard again. It was a deluge. I’m relieved we could finish before the storm. We are both thankful for our crew who were willing to work on a holiday. That’s the nature of farming but we appreciate everyone’s efforts.
Veggie List & Veggie Notes
July 5/6, 2018
Weekly and green EOW shares
‘Caraflex’ cabbage, 1 or 2
Swiss chard, 1 bunch
Cucumbers, 4+
Zucchini &/or summer squash, 3+ lb
Green bell pepper, 1
Green frying pepper, 1
Purple daikon radish, several
Walla Walla onion, 1 large
Scallions, 1 bunch
Basil, 1 bunch
Some sites get 1 sunflower.
– Some sites get broccoli.
– Some sites get an extra cucumber.
Next week’s box will probably contain cucumbers, Walla Walla onions, zucchini &/or squash, and more.
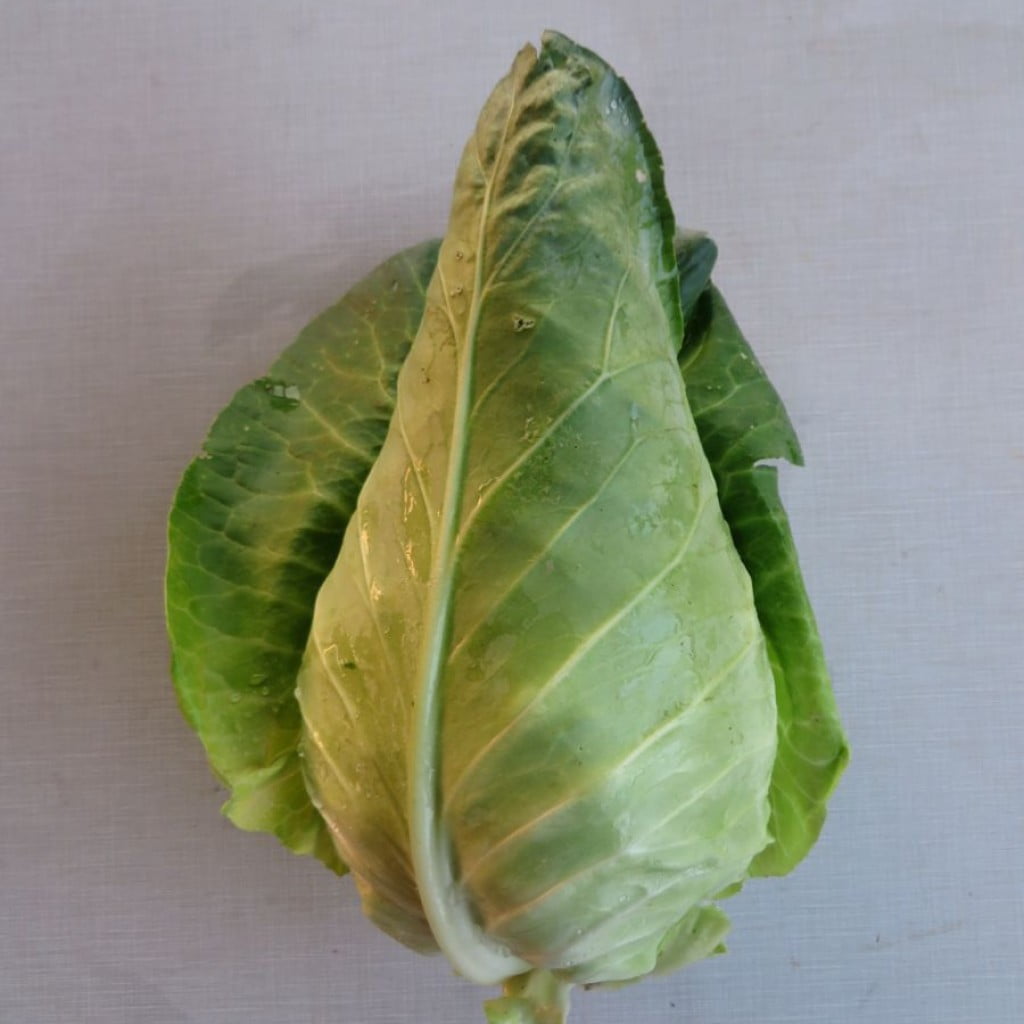
Caraflex – This is a nice salad-type that we grow in summer. Don’t you love the pointy shape? It has thinner, more tender leaves than the usual green cabbage. Great in salads and slaws but can also be cooked. Here’s the description from the seed catalogue: “Inner leaves are tender, crunchy, and have an excellent, sweet and mild cabbage flavor. Perfect for summer salads, slaws, or cooked dishes.”
Swiss chard (pretty bundle of green leaves) – Our crew did a nice job mixing colors for pretty bunches. Swiss chard is a close relative of spinach, but requires a bit more cooking. Use as a substitute in any recipe that calls for spinach, just cook the chard a little longer. Both stems and leaves are delicious. The stems requite longer cooking, so cut them free from the leaves when preparing. That allows you to cook the stems longer.
Cucumbers – Woohoo! The first cucumbers are ready. We should have a steady supply for many weeks. We’re glad to have the first Walla Walla onions to share with the cucumbers. They are great together in cucumber salad. We alternate between yogurt cucumber salads and vinegar-based ones. Storage: Refrigerate but in the warmest part of your fridge. Cucumbers get chilling injury when stored too cold.
Walla Walla onion – These fat onions are sweet, crisp and very mild. Wonderful raw or lightly cooked. Try cutting into wedges, threading on a skewer and grilling. Do not try to fry these onions – it doesn’t work because of their high water content. Storage: It’s OK to store at room temperature for up to one week. Otherwise, refrigerate.
Purple daikon radish (oblong, purple root) – We began growing these beautiful purple Korean daikon last year. This variety is lovely both inside and out. Korean daikon are sweeter and less harsh than the long Japanese types, and can be recognized by their fat, stubby shape. Storage: Cover and refrigerate. Uses: These Asian radishes are good cooked or raw. We often make a sliced radish salad, with Asian-style dressing (rice vinegar, mirin, sesame oil, soy sauce, minced garlic). Even a brief marination mellows the radish’s sharpness, although it’s less necessary with these Korean types. These are good radishes to serve sliced with dip. Kids and adults are both drawn to the color. For authentic Korean dishes, check out Maangchi’s website. She has incredible Korean recipes and videos, including an extensive list of daikon recipes.
Sunflower (for some sites) – This is an experiment. Sunflowers are one of the few flowers that we can send dry in the CSA boxes. This cheerful variety is called ‘Vincent’s Choice’ does not produce pollen, making it a good choice to pack with vegetables. Trim the stem and place in water. Replace with fresh water every day or two. It might last 5 – 7 days.
RECIPES
Visit our 2018 Recipe Log.
Visit our 2017 Recipe Log.
Join our Facebook discussion group.
Note from Beth: Both Pat and Lauren have given us recipes that include daikon. If you want to peruse further, check out Maangchi’s website. She has incredible Korean recipes and videos, including an extensive list of daikon recipes.
LOCAL THYME/ Comforting Classics
Penne with Chard, Bacon and Feta
Ensenada Slaw with Grilled Tofu Adobo
Cabbage and Daikon Fried Rice
Cucumber, Summer Squash Salad with Turkey, Great Northern Beans and Lemon Basil Dressing
LOCAL THYME/ Outside the Box Recipes
Swiss Chard Falafel with Lemon Tahini Dressing atop a Bed of Cabbage
Cucumber Soup
Curried Daikon
Fish and Cabbage Tacos with Quick Pickled Purple Daikon
LOCAL THYME/ Quick and Easy Meal
Sesame Noodles with Cucumbers and Cabbage
RECIPES FROM LAUREN
GREENS GALORE PIZZA
Inspired by Half Baked Harvest
I love to make a batch of the pizza dough linked below on Sundays and leave it in the fridge until I’m ready to bake some pizza during the week. The dough only gets better with time and easily lasts 5 days in the fridge. And pizza topped with veggies is a great, quick weeknight dinner if you’ve already made the dough. Lauren.
Takes 45 minutes (if using store-bought crust or have already made the dough in advance)
Serves 2-4
1/2 batch homemade favorite pizza dough (or 1 batch store-bought dough)
4 cups swiss chard, stems removed (and reserved for another use), torn into bite-size pieces
Olive oil for message chard + drizzling
1/4 teaspoon Kosher salt
1/4 teaspoon freshly ground black pepper
1 cup basil pesto (store-bought or prepared in advance)
1/4 cup parmesan cheese
2 medium zucchini (or 1 large), shaved into ribbons (drag a vegetable peeler on the side of the zucchini)
1/4-1/2 Walla Walla onion, thinly sliced
6-8 ounces shredded mozzarella cheese
1/4 cup fresh basil leaves
- Preheat oven to 450 degrees. Grease a baking sheet (or round baking sheet) with olive oil. If using a pizza stone, skip the oil.
- In a large bowl, add chard along with a drizzle of olive oil as well as salt and pepper. Massage the chard with your hands for 1-2 minutes until well-coated with oil.
- On a lightly floured surface, roll out pizza dough to the size of the pizza pan and transfer dough to pan. Bake for 5 minutes.
- Spread pesto over the pre-baked crust followed by the parmesan. Add massaged chard then shaved zucchini and onion. Top with mozzarella. Bake for 15-20 minutes until the cheese is melted and crust is golden. Add basil leaves and bake 2-3 more minutes.
.
CABBAGE & CUCUMBER SALAD
Takes 15 minutes
Serves 4-6
1 Caraflex cabbage, shredded
2 teaspoons Kosher salt, divided
1 cucumber, halved, seeded and sliced
1 daikon radish, quartered and thinly sliced
4-5 scallions, sliced
1/2 cup Greek yogurt
1/4 cup mayonnaise
1/2 lemon, juiced (about 1/4 cup juice)
1/2 teaspoon sugar
1/4 teaspoon freshly ground black pepper
- Place cabbage in a large bowl and add 1 teaspoon salt. Let it sit and release its juices while you chop the other veggies.
- Add cucumbers, radish and scallions to bowl. Add remaining salt then squeeze lemon over bowl. Toss to combine.
- In a small bowl, combine yogurt, sugar and pepper. Whisk to combine and pour over veggies. Serve at room temperature or chill for up to 3 days. The longer it sits, the more juicy the mixture will become.
.
Week #6, June 28/29, 2018
- On: June 27, 2018
 0
0

It was a beautiful day for the strawberry upick. Considering the weather the rest of the week, we were very lucky. Billy (in orange shirt) greets members and shows them where to pick.
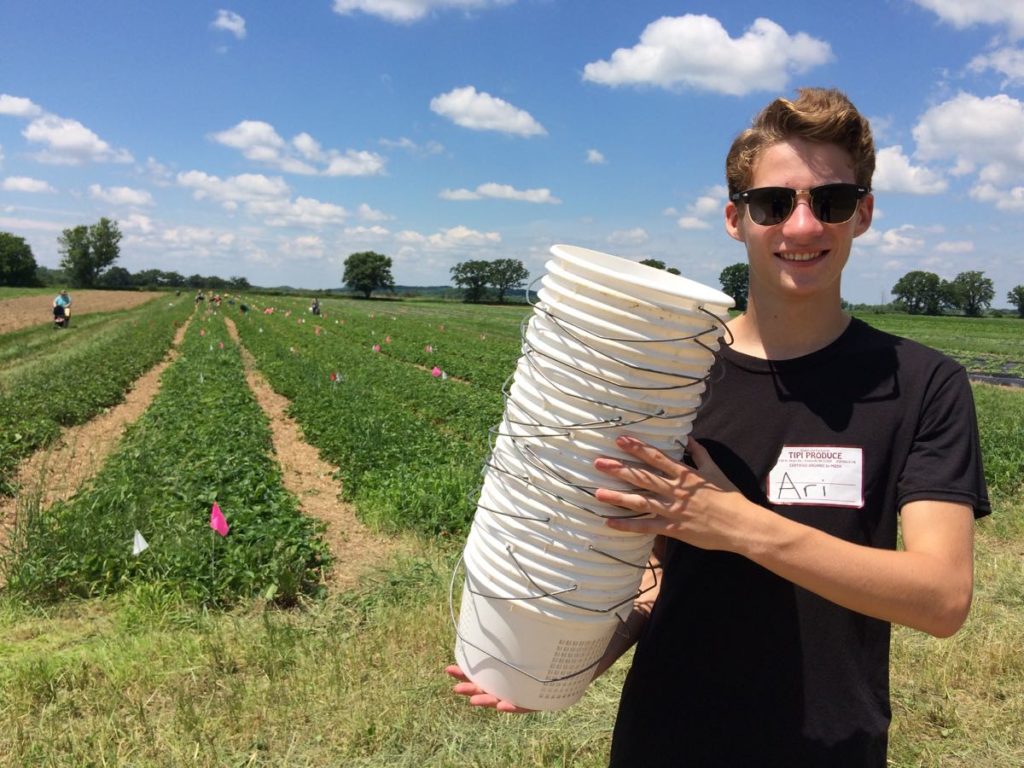
Ari was ready to share both pails and lifetime’s experience picking strawberries.

Steve (with beard, 6th from left) led a tour of the farm. He agreed to make this year’s tour a little shorter. He loves showing everyone the farm but sometimes we find members quietly backing away mid-tour because they want to pick more berries.

Well, we got more rain this week, just like all of you.
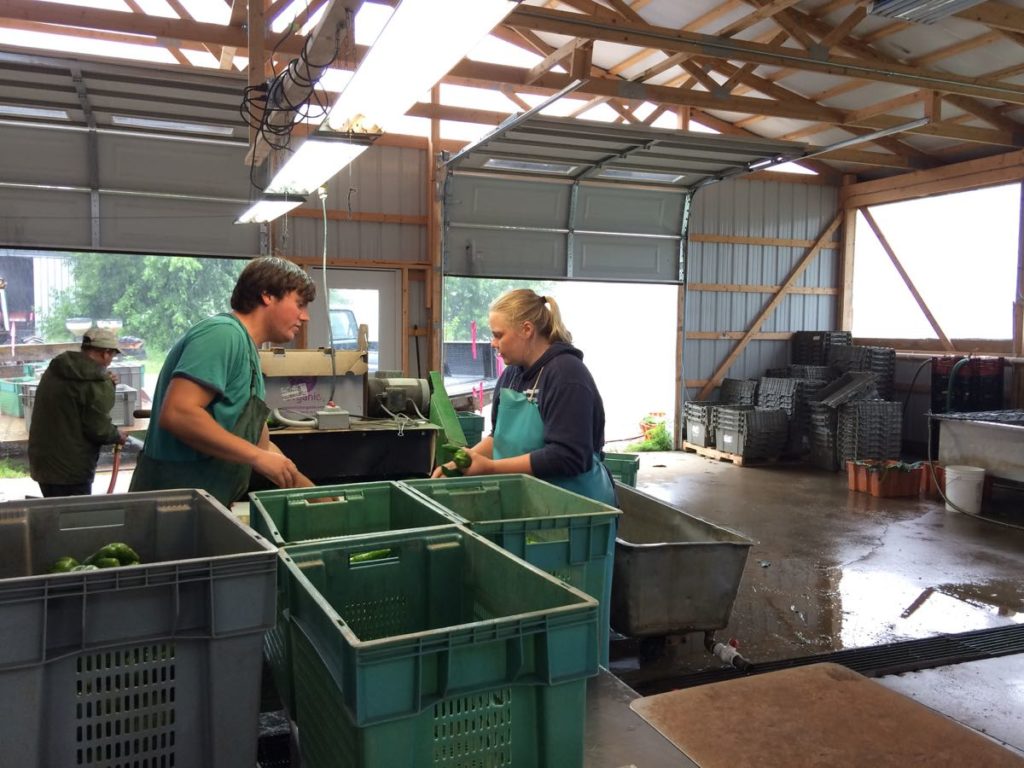
We were strategic with our time, harvesting between storms and saving indoor jobs for during downpours. Above, Raul, Jory and Sena wash your peppers.

I have to say that our crops are loving the moisture + heat. Look at the lush tomato plants.
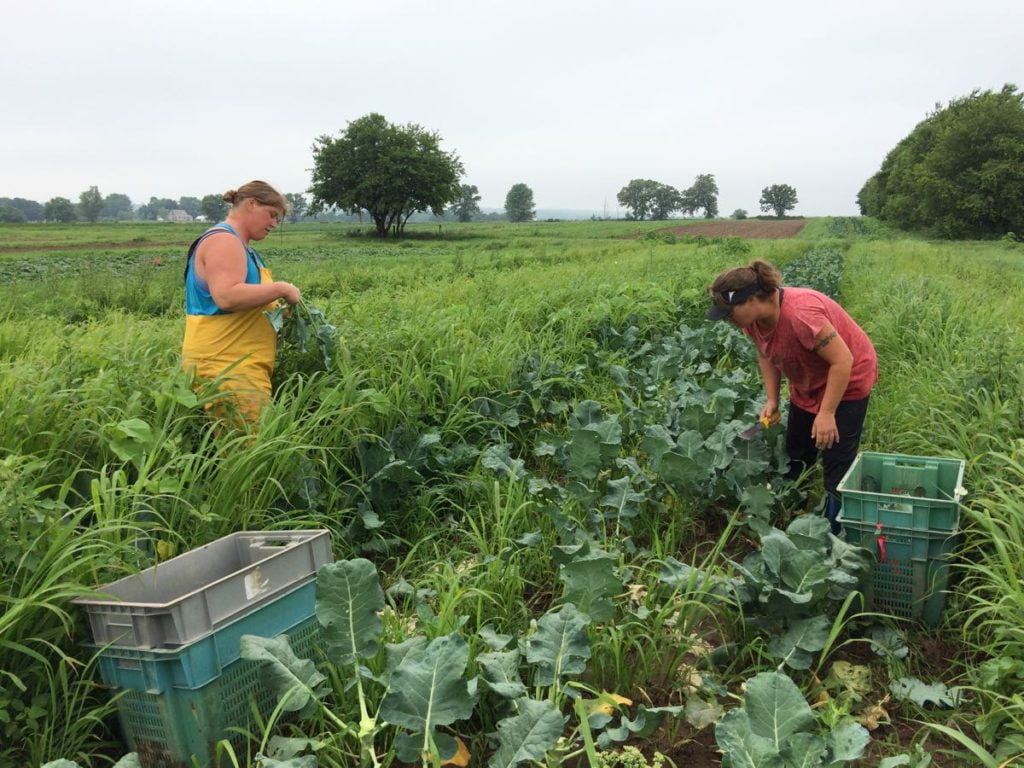
However, we are getting behind on weeding. Maggie and Kristen harvest broccoli. These weeds are very big because we’re almost done with this field. We’re using our dry spells to cultivate and weed as much as possible, trying to keep ahead of the weeds that are thriving after the rain.
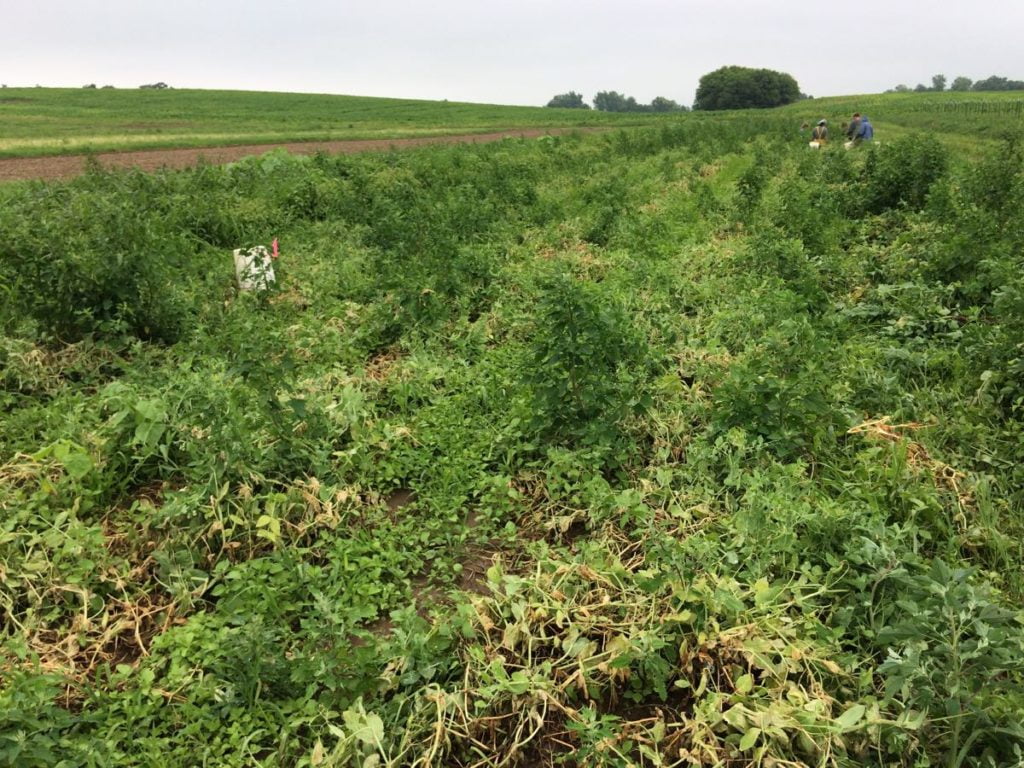
No snap peas this week. We usually get two (or more) harvests from each pea field. Last week’s harvest in the mud wrecked the plants. Now we wait for the next pea field to be ready.
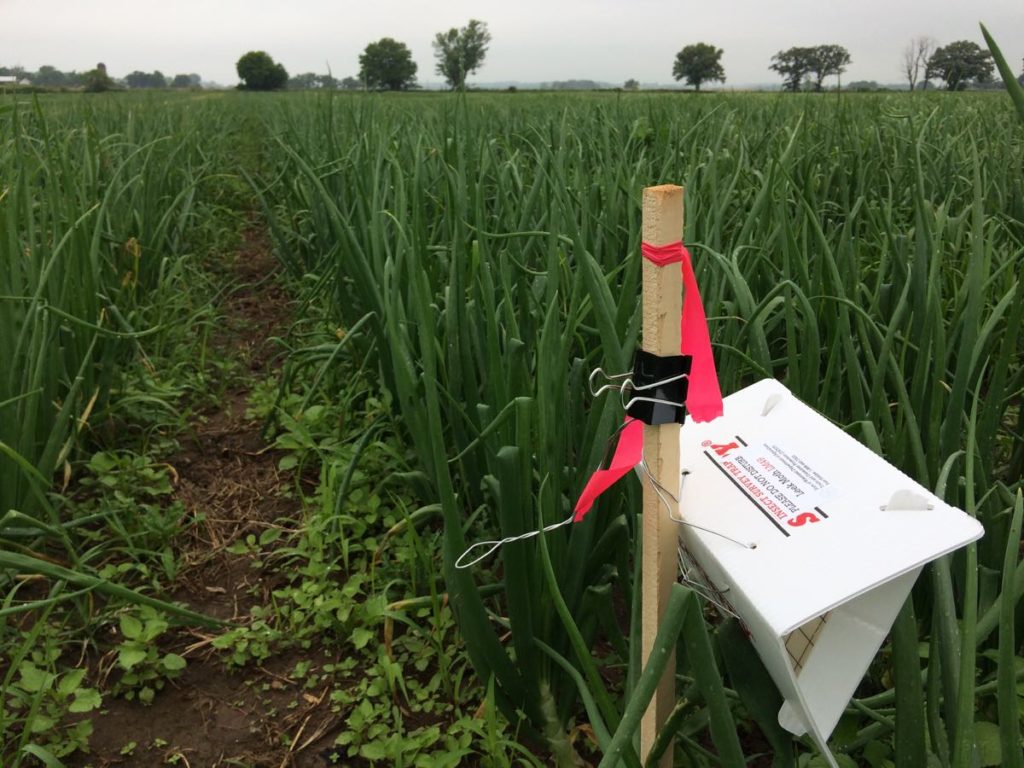
A visiting entomologist from DATCP installed insect traps. She is monitoring for several vegetable pests that are found in neighboring states but haven’t made it to Wisconsin yet. Advance monitoring like this is extremely valuable, so we volunteered to host the traps. Hopefully we won’t find anything.
Veggie List and Veggie Notes
Strawberries, 1 quart
Napa cabbage
Zucchini and summer squash, 3.5 – 4 lb
Broccoli, ~2 modest heads
Green bell or green frying pepper, 1 – 2
Kohlrabi, 1
Scallions, 1 bunch
Basil, 1 large branch
Garlic scapes, 1 small handful
– Some sites get 1/4 lb snow peas.
– Some sites get a second pepper.
Next week’s box will probably contain Caraflex cabbage, Walla Walla onion, zucchini/summer squash, basil and more.
Strawberries – Refrigerate and eat soon! These berries are in better shape than last week’s but are still perishable after all the rain.
Napa cabbage (large, pale green cabbage with crinkled leaves) – This week’s napa average 2.75 lb in size. This is an interesting vegetable, useful for both fresh, raw salads and for cooking. Napa’s most famous use is fermented kimchi. I like to prepare a fresh, unfermented kimchi. Same seasonings, but it’s ready to eat right away. You will be amazed at how much shredded napa cabbage shrinks when prepared this way. See here for an example, but cut the salt in half: Grilled Flank Steak with Kimchi-style Coleslaw.
Storage: Napa stores very well. Cut off wedges as needed and keep the rest covered and refrigerated, and it will keep for several weeks. Peel off the outer layer and it will be ready to use. Here are a few preparation ideas from the ‘Asparagus to Zucchini’ cookbook.
– Chop raw napa into green salads.
– Substitute napa in traditional coleslaw.
– Chinese cabbage cooks quickly. Steam 3-5 minutes, or until leaves are wilted down but remain slightly crisp.
– Substitute napa cabbage for common cabbage in recipes, but reduce the cooking time by 2 minutes.
– Napa cabbage is the main ingredient in egg rolls. Try making an egg roll mixture to eat as a cooked side dish instead of preparing time-consuming egg rolls.
Broccoli – Refrigerate in a plastic bag or a container. Make sure there’s no free water puddled in the bag or container, to avoid rot. It’s a bad idea to store broccoli uncovered in the fridge; it will wilt.
Green bell or frying pepper – You’ll get a green bell pepper (blocky) and/or a green frying pepper (long, slender). Both types are sweet. Frying peppers have lower moisture which makes them particularly suited to frying. Other than frying, the two types can be used interchangeably in recipes. It will be a few weeks before we have more peppers. Our plants set one early pepper, then there’s a lag while the next set develops.
Kohlrabi (pale green, round vegetable with thick skin) – Crunchy and sweet, kohlrabi is a great addition to salads.
Storage: Kohlrabi bulbs will store for a month in the refrigerator.
Uses: Kohlrabi are good peeled and eaten out of hand, or added to sandwiches, or added to salads. It makes a nice salad on it’s own. You can grate it, slice it, or cut it into matchsticks. It’s also good cooked. If you have it, the Asparagus to Zucchini cookbook has a long list of kohlrabi suggestions.
Basil (either curly or flat-leaved) – Some people will get flat-leaved basil. Others will receive the ‘Napoletano’ variety with frilly leaves. Storage: Basil will blacken if stored in the refrigerator. It is best stored at room temperature with the cut ends in water, for example in a jar or vase. Treat it like a flower. Give the stem a fresh trim and change the water every day or two.
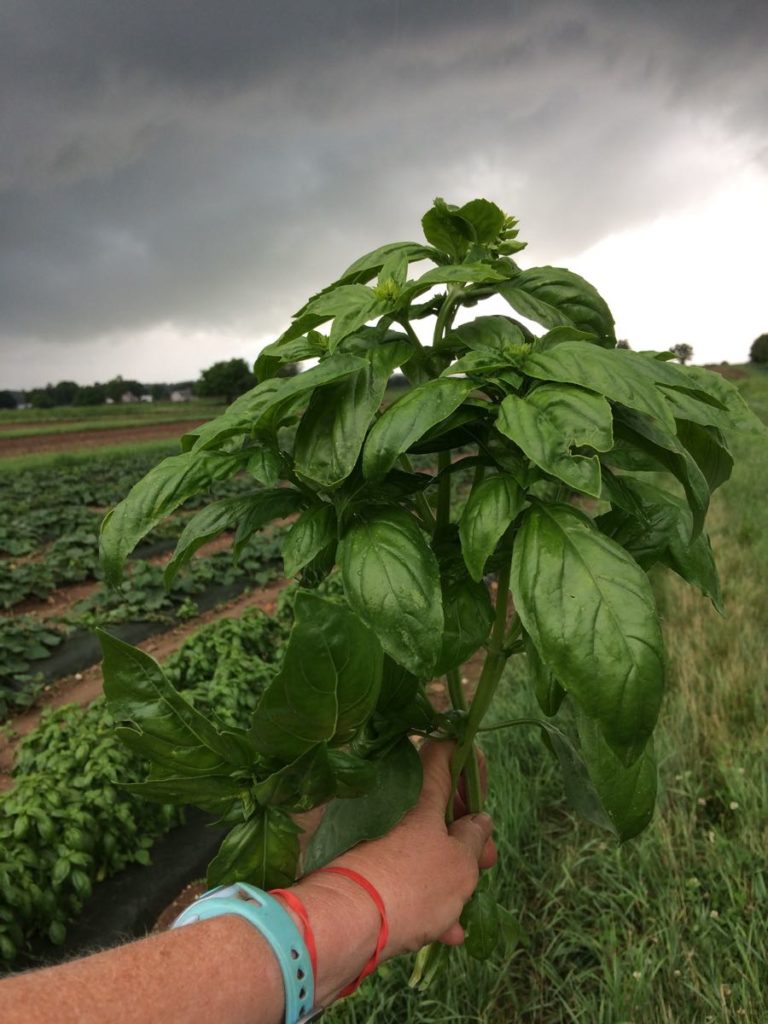
Everyone gets one sturdy basil sprig this week. It looks tree-sized when held up to the horizon! It will look more compact after we’ve washed and packed it.
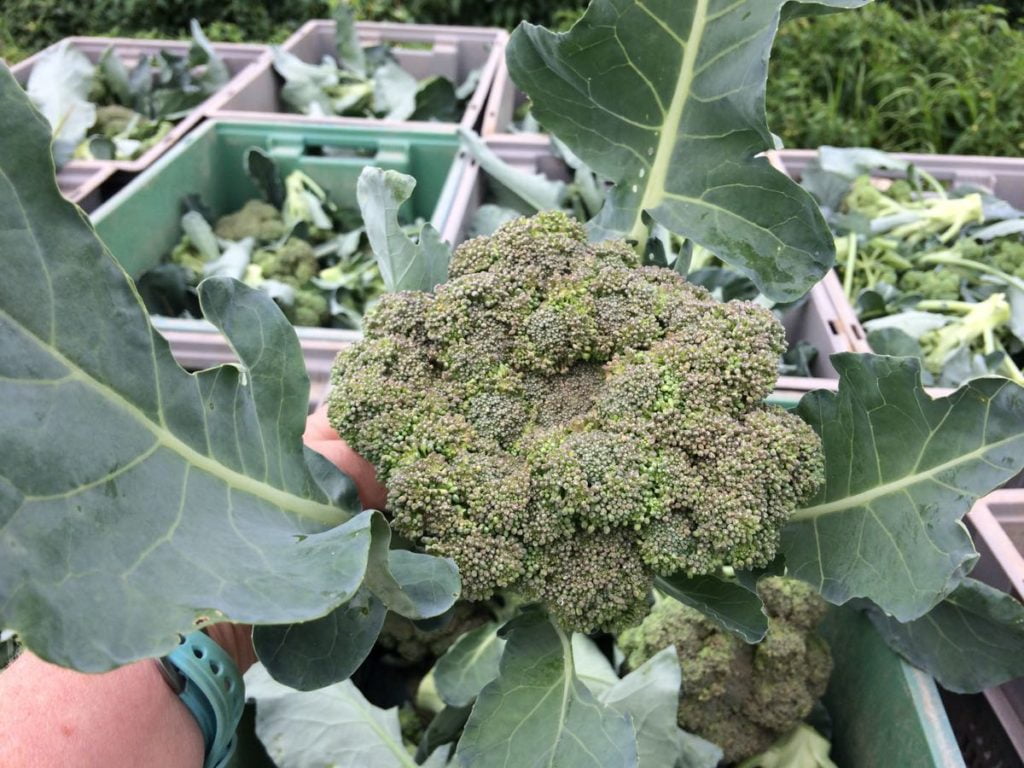
The broccoli heads are uneven this week. This is typical after hot weather.
RECIPES
Visit our 2018 Recipe Log.
Visit our 2017 Recipe Log.
Join our Facebook discussion group.
LOCAL THYME/ Comforting Classics
Thai Tofu Fried Rice with Broccoli and Napa Cabbage
Chipotle Slaw
Broccoli and Kohlrabi Salad
Pasta Salad with Summer Squash, Crushed Almonds and Parmesan
LOCAL THYME/ Outside the Box Recipes
Lake Trout en Papillote with Napa Cabbage Salade
Napa Kimchi
Kohlrabi Fries
Stuffed Zucchini and Summer Squash with Basil
LOCAL THYME/ Quick and Easy Meal
Curried Kohlrabi Cakes
Recipes from Lauren
NAPA CABBAGE NOODLE SALAD
Adapted from Bon Appetit
For this recipe the steak will need to marinate for 10-15 minutes, but you can still prepare this meal in 30 minutes if you get that started right away! While the meat is marinating you will have plenty of time to cut up your cabbage, kohlrabi, scallions, basil and peanuts!
Serves 4
Takes 30 minutes
3 tablespoons toasted sesame oil, divided
1 green bell pepper, seeded and diced
1 garlic scape, sliced
1/4 teaspoon red pepper flakes
Kosher salt
6 tablespoons fresh squeeze lime juice
3 tablespoons fish sauce
3 tablespoons honey
1 pound sirloin steak, bone removed and thinly sliced
6 ounces wide rice noodles
1/2 head Napa cabbage, stems removed and shredded
1 kohlrabi, peeled, quartered and thinly sliced
4-5 scallion greens (dark green portions only), sliced
1/2 cup basil, cut in a chiffonade
1 cup roasted peanuts, roughly chopped
- In a large skillet (preferably cast iron if you’ve got one), heat one tablespoon toasted sesame oil over medium heat. Add the bell pepper, garlic scape, red pepper flakes and a pinch of salt. Saute for 2-3 minutes. Pour into a large bowl followed by lime juice, fish sauce, honey, one tablespoon toasted sesame oil and 1/2 teaspoon Kosher salt. Whisk to combine until smooth.
- Remove 1/4 cup of sauce from large bowl and place in small bowl. Add steak and use a spoon to coat. Let marinade for 10-15 minutes while you cook your noodles and chop remaining ingredients. Stir every once and while to ensure all steak pieces are marinating.
- Bring a large pot of salted water to a boil. Cook rice noodles according to package directions and drain once finished.
- Make sure the cabbage, kohlrabi, and scallion greens are well drained and then add to the large bowl with the majority of the dressing left in it. Add another couple pinches of salt and toss to combine.
- Now get your steak cooking. Pour the last tablespoon of sesame oil into your skillet (the same one you used before; you don’t need to wash it out) and get it nice and hot over medium high heat. Use a fork to transfer the steak (but not the marinade) into the skillet. Cook for 2-3 minutes until cooked through and then let rest for 5 minutes. Add steak and noodles to large bowl of cabbage mixture. Toss to combine and then add basil and peanuts and toss once more. Serve warm.
.
SQUASH TUNA MELT CASSEROLE
Adapted from Six Seasons
Not a fan of canned tuna? Feel free to substitute 10 ounces of shredded chicken breast or some other mild, neutral meat.
Serves 2-4
Takes 1 hour, 10 minutes, most of it inactive
2 pounds zucchini or summer squash
1 tablespoon + 1/2 teaspoon Kosher salt, divided
1/4 cup olive oil, divided
4-5 scallions, white, pale green and 1/2-inch from green tops, sliced
3-4 garlic scapes, sliced
1 teaspoon dried thyme leaves
1/2 teaspoon red pepper flakes
1/4 teaspoon freshly ground black pepper
Two 5-ounce cans oil-packed tuna
1-1/2 cups shredded, good-quality sharp cheddar cheese
1/2 cup breadcrumbs
- Trim off the ends of the squash and halve lengthwise if small or medium in size (under 6 inches long). If larger, quarter them lengthwise. Sprinkle with 1 tablespoon Kosher salt and let sit cut-side up for 30 minutes. This will drain out some of the moisture inherent in squash.
- When the squash has about 10 minutes to go, preheat the oven to 450 degrees.
- Spread the squash cut-side down in a single layer on a baking sheet so that it is not crowded. Roast for 15 minutes until the squash is tender but not mushy.
- Meanwhile, heat one tablespoon olive oil to a medium or large skillet over medium heat. Add the scallions, garlic, remaining 1/2 teaspoon Kosher salt, thyme, red pepper flakes, and pepper. Cook for 4-5 minutes until fragrant and softened but not browned.
- Arrange the roasted squash pieces in a baking dish so that they all fit together snugly together, this side cut-side up. Distribute the scallions and green garlic over the top followed by the tuna. Flake and crumble it evenly atop the squash. Drizzle with a tablespoon of olive oil. Top with cheese, then breadcrumbs and another couple tablespoons of olive oil.
- Return to the oven and bake until the cheese is nicely melted and beginning to bubble and brown, 10-15 minutes. Let cool for 5 minutes before serving.
.
Week #5, June 21/22, 2018
- On: June 20, 2018
 0
0
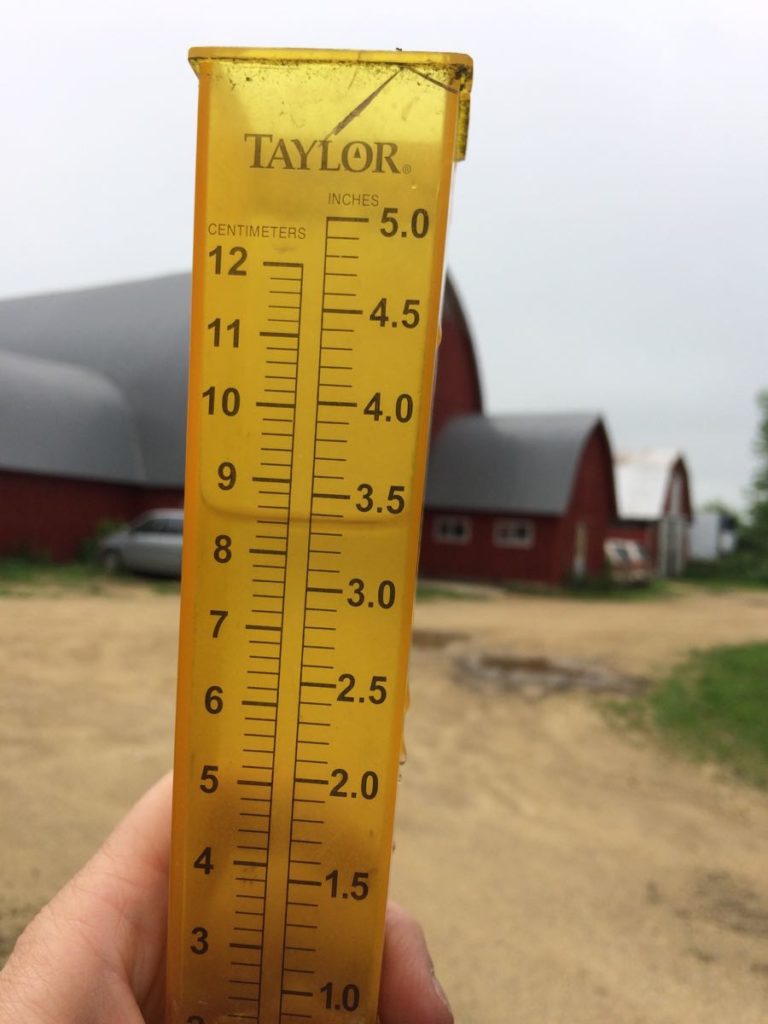
I guess we won’t be weeding this week.
That was a lot of rain.
Honestly, this has been a stressful spring, with such changeable weather. It was over 95 degrees last weekend (again) followed by too much rain. That was very hard on your strawberries, lettuce and peas. We should have twice as many berries for you this week but we lost many to the heavy rain on Monday and Tuesday. It is very frustrating to nurture a strawberry field for a full year then lose berries to bad weather just as they ripen. We’ll see how the younger berries develop. There are a gazillion due to ripen this weekend and next week. Generally it’s only the ripe berries that are sensitive to too much moisture, and the younger berries look OK as yet. Keep your fingers crossed. See Veggie Notes below for lettuce info.
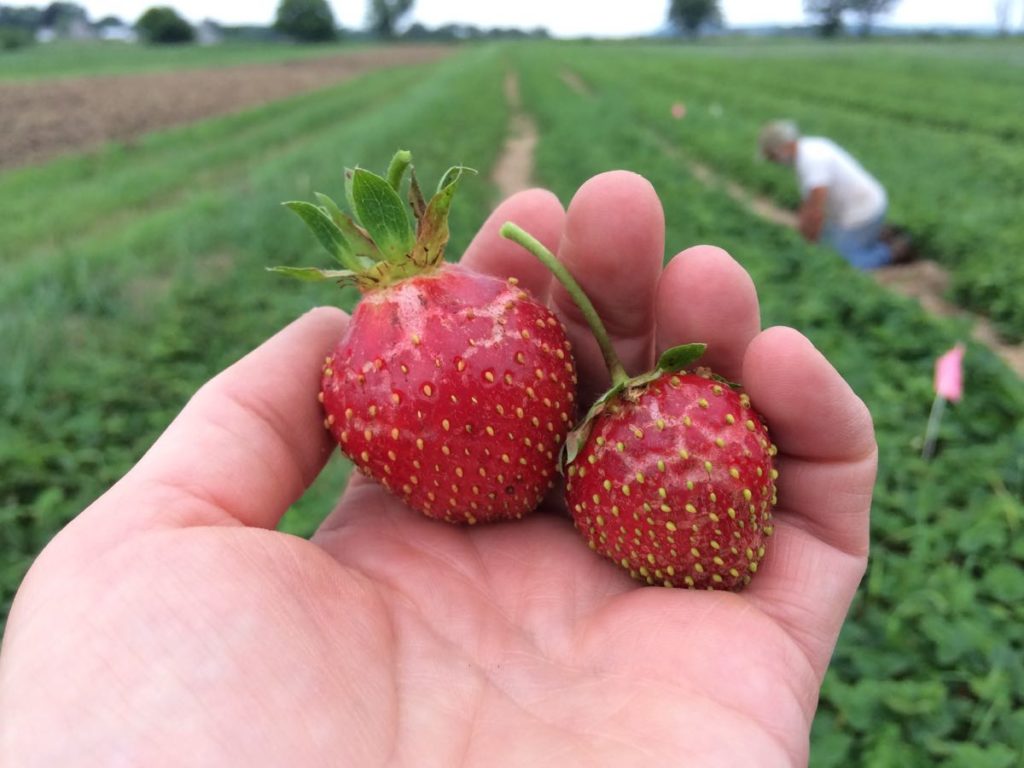
Eat your berries soon. Most have expansion cracks because they swelled after the rain. They are delicious now but will not last.

Fortunately, Steve did a beautiful job mulching the strawberry field. Without it, soil would splash all over the berries. Instead, they are quite clean. We’ve enjoyed working in this well-mulched field. I like this photo because you can see Steve racing off on his bike plus a bug that flew into view in the top right corner. It could be a damselfly.
Cooking Ideas from Beth and from members
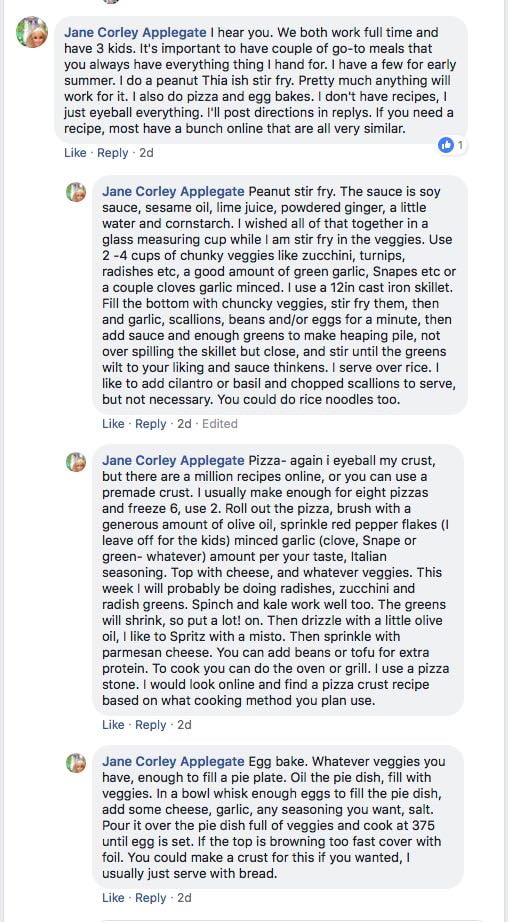
My friend Victoria wrote in our Tipi CSA Facebook group that she’s newly returned to full-time work and struggling to find time for food prep. She sparked a discussion. I think we all struggle with juggling busy lives and getting meals on the table. Here’s a very cogent response from member Jane Applegate, followed by ideas from our household. Jane and everyone else, thank you for sharing your ideas in the group. Keep discussing in the Facebook group, and I’ll bring some ideas here to the newsletter (with permission!) for those who don’t use Facebook.
BETH’S IDEAS
I love Jane’s proficiency with pizza. It’s wonderful to have pizza dough ready in the fridge. I use this pizza dough recipe most often (using half whole wheat flour), but am still experimenting.
Here is some advice from our household.
– Get everyone in the family involved. Stay-at-home parents, ask for help if you transition back to work. Sure, everyone is used to you doing all the cooking but that cannot continue. I switched from PT to FT on the farm when our kids were 1 and 4 years old. I often worked at night (a persistent habit!). After wrangling an uncooperative database until 3 am one night, I asked Steve to take over breakfast and packing lunches. He did, growing proud of his skill as a short-order breakfast cook.
– Kids can help. They can peel garlic, shuck corn, wash salad greens, learn to make simple dishes, and take on more responsibility as they get older. I haven’t made smoothies, cooked tofu, or washed spinach in years. Those are Sophie and Ari’s jobs, among others. Cooking with your kids is a nice thing to do together.
– Cook on the weekend. This is a well-known strategy but essential for us. We have Sunday dinner every week and I make sure there are leftovers for Monday dinner plus a few lunches.
– Prep on the weekend. By the end of Sunday, choose a few dishes for the week and do whatever advance prep you can. Sometimes decision-making is the hardest part. It’s tough to walk in the door and pull together a meal if you don’t have a plan.
– Prep your salad greens in advance. We cut, wash, and spin-dry our lettuce so we’re ready to make salads with whatever else is on hand. We also cut, wash and spin-dry our spinach and Swiss chard, even without a plan for using them. If nothing else, we just wilt them into noodles near the end of cooking (chard) or just after the noodles are drained (spinach). I don’t prep kale or collards in advance. Those are inherently cleaner because they grow further from the ground.
– Be strategic with leftovers. I’ve started making frittatas with handfuls of leftover cooked vegetables, using this base recipe. This is the recipe I offered in the newsletter two weeks ago. I’ll post a photo below. It’s very quick, sort of my version of Jane’s egg bake.
– Make and freeze your favorite pasta salad sauce(s). Most spring and summer CSA boxes have ingredients to anchor a pasta salad. We start with asparagus, spinach, scallions, radishes, turnips, snap peas, etc. Almost all spring vegetables will work. Maybe not the rhubarb. In summer, we switch to cucumbers, sweet onions and grilled vegetables. Grilled zucchini is another thing I prep first, then find a way to use later. We never waste it!
– In spring, we have lemon vinaigrette in the fridge. It’s good with asparagus, or as pasta salad sauce, or for fresh salads. In fall, we switch to mustard vinaigrette, good for Brussels sprouts or potatoes.
– Cooking and cleaning the kitchen are separate jobs. I cook most dinners. Steve and the kids wash the dishes.
Thanks for reading! If you have your own strategies to share, post them on our Facebook page for others to see. Beth
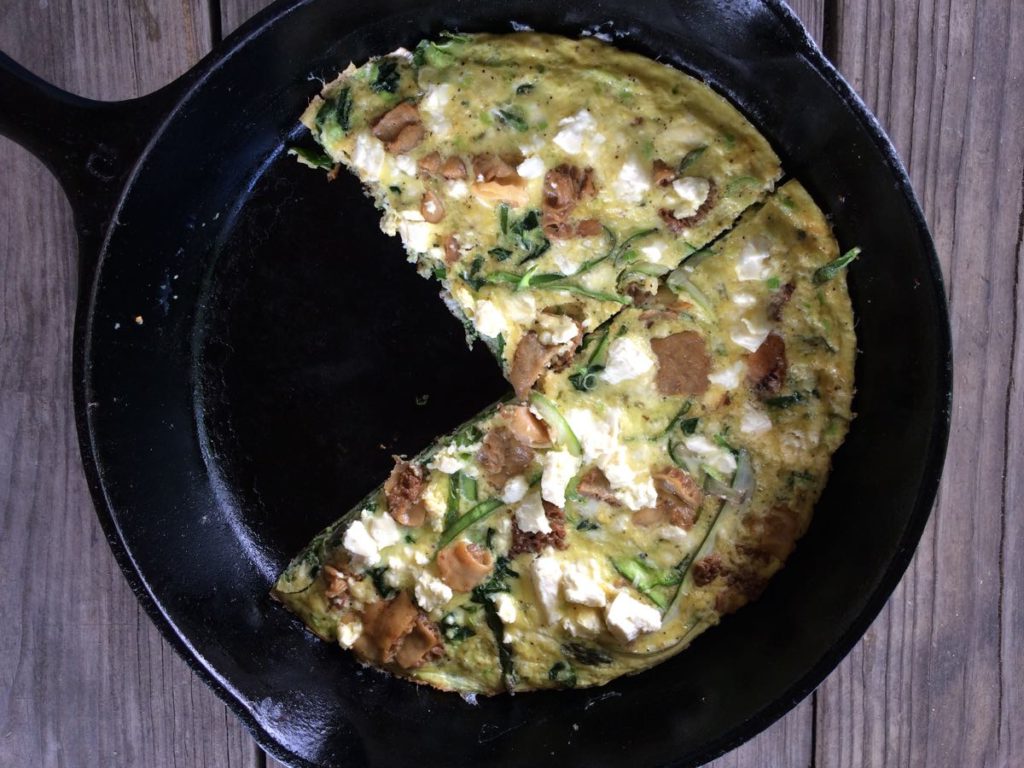
Frittatas are adaptable. This one from a few weeks ago had sautéed mushrooms and green garlic plus spinach, asparagus and feta cheese.
Veggie List and Veggie Notes
June 21/22, 2018, week #5
Weekly & green EOW shares
Strawberries, 1 quart
Snap peas, 0.9 lb
Snow peas, 0.45 lb
Fennel, 1 large or 2 small bulbs with fronds
Kale, 1 bunch, red russian or lacinato
Zucchini and summer squash, 2 – 2.2 lb
Scallions, 1 bunch
Garlic scapes, a small handful
Oregano, 1 bunch
– Some sites get a small lettuce. See below for types.
– Some sites get 1 medium broccoli head.
Next week’s box will probably contain strawberries, peas, zucchini, napa cabbage, scallions and more.
Strawberries – Eat these soon!
Snap peas and snow peas. These will be together in one bag. Both types have strings to remove. Snap off the stem end and pull the string down the concave side of the pod (the inward-curing side). Throw away the string and eat the pod. The thicker pea pods will usually have a string along both edges. Remove them when you snap off the stem.
– Snap peas (plump pea pods) – These peas should be eaten pod and all. They are delicious raw, or very lightly cooked or stir-fried. Preparation: They will need a quick rinse to remove faded gray blossoms. Storage: Refrigerate.
– Snow peas (flat pea pods) – These are excellent stir fried or in raw salads.
Kale – Each site gets either Red Russian kale (green leaves, pink midveins) or lacinato kale (dark green, pebbled texture). They can be used interchangeably. Super nutritious, this first picking of the year is great cooked or used in raw salads. Storage: Cover and refrigerate.
Fennel (large vegetable with a fat bulb and lacy fronds) – Fennel is a ‘swing vegetable’; it can be used raw or cooked. Clean well and slice as thinly as possible for use in raw salads. It is good simply prepared with olive oil, lime or lemon juice, salt and shaved parmesan cheese. Cooking softens and sweetens fennel, and mellows its anise flavor. Both the bulb and leaves are edible. Here are ideas from Alice Water of Chez Panisse about how to use fennel: ‘It’s strong anise characteristic seems to suit fish particularly well. … We use fennel all the time. We add the feathery leaves to marinades for fish and to numerous salads, sauces and soups and we use them as a garnish, too. … The bulbs are sliced and served raw in salads in various combinations with other vegetables, parboiled for pastas; caramelized and served as a side dish; braised whole; or cooked in vegetable broths & fish stocks.”
Garlic scapes (curly green things) – Garlic scapes grow at the top of garlic plants. They look like flower buds but are actually clusters of tiny bulblets. We snap off the young scapes to direct the plants’ energy into forming garlic bulbs underground. Use scapes as a substitute for garlic cloves. They can be minced, mixed with olive oil, and added to stir fries or simple pasta dishes. The scapes can be sautéed, but will not brown like garlic cloves. Expect them to retain their crunch even when cooked, and to be milder than garlic cloves, closer in pungency to the green garlic we’ve sent.
Greek oregano – We timed the oregano to go with zucchini and garlic scapes. Seems like a good combination! To store your oregano, you can …
– Wrap in a cloth or paper towel, place in a plastic bag and refrigerate. OR
– Alternatively, you can wash it well then hang it up to dry in a place with good air movement.
Broccoli (for some sites) – Cover and refrigerate.
Lettuce (for some sites) – If you receive lettuce, you will get either red bibb lettuce or red Salanova or green Salanova. Red bibb is a very round, crunchy head with buttery leaves. The Salanova types are in middling shape after the rain. There is a fair amount of ‘rust’ discoloration at the base of the stems. You can prepare as I show below (with photos from last year!) but you will need to cut high enough to remove the rust. It will work.
Salanova is a new innovation in lettuce breeding that lets you prepare salad mix easily. Cut the head across the base and it will fall apart into individual leaves. Dunk and swish in a tub of water. Drain and spin dry to store.
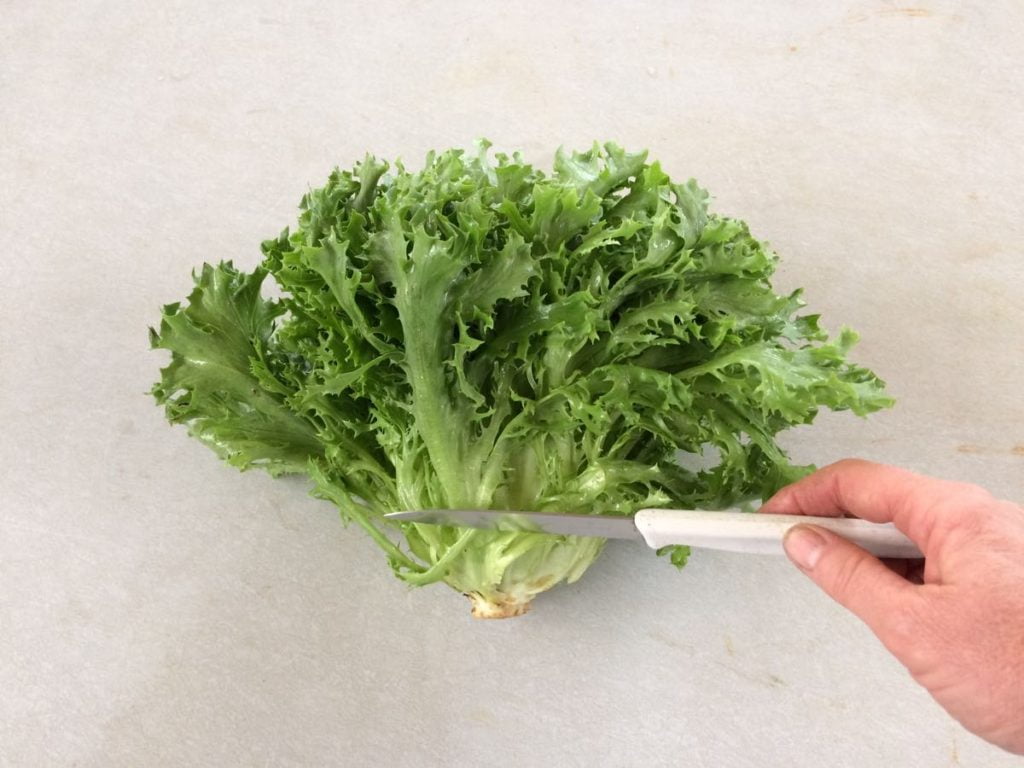
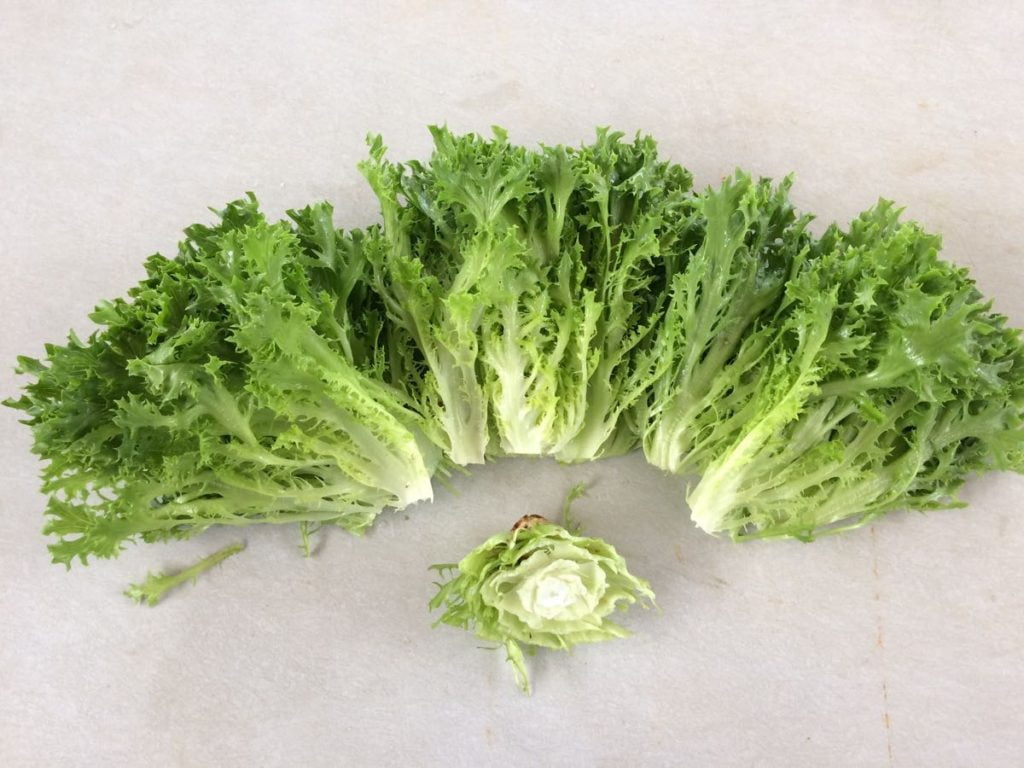
Cut the lettuce head at the base and it falls apart into salad mix.
RECIPES
Visit our 2018 Recipe Log.
Visit our 2017 Recipe Log.
Join our Facebook discussion group.
LOCAL THYME/ Comforting Classics
Fennel, Kale or Mustard Greens and Pastina Soup
Quinoa Salad with Zucchini and Snap Peas
Fennel Slaw with Olive Vinaigrette
Greek Kale Fritters
LOCAL THYME/ Outside the Box Recipes
Bibimbap with Kale, Summer Squash, and Ground Pork or Tofu
Grilled Salmon with Summer Squash and Snap Pea Relish
Kale Pesto Pizza
Fennel Risotto
LOCAL THYME/ Quick and Easy Meal
Pan Fried Tofu on Chopped Snap Pea Salad
RECIPES FROM LAUREN
SPRING PEA, FENNEL & PICKLED STRAWBERRY SALAD
Fennel gets such a bad rap and it’s really not fair. Fennel is a beautiful, delicate vegetable that you can learn to love if you can just find ways to mellow it’s strong flavor. I love it sauteed, roasted or grilled (all things that make the flavor much milder) but I also really love the texture when it’s sliced super thin and eaten raw— especially in bright salads like this one. The technique outlined below where you soak both scallions and fennel in ice cold water really helps make the flavors of fennel more palatable.
Serves 4-6 easily
Takes 30 minutes (including time to pickle strawberries though you can absolutely do that in advance)
1 cup hulled and halved strawberries
1/2 cup balsamic vinegar
1/4 cup champagne vinegar (just use 3/4 cup balsamic if you don’t have champagne vinegar on hand)
1/3 cup water
2 tablespoons sugar
1 tablespoon + 1/2 teaspoon Kosher salt, divided
1 large fennel bulb (or two small), halved, cored, and very thinly sliced (it should almost look like coleslaw)
3-5 scallion, white, pale green and dark green portions, sliced thin
1/2- 3/4 pound mixture of snow and snap peas (or as many as you can stand to spare), ends trimmed and cut in half
1/2-1 teaspoon red pepper flakes
1/4 teaspoon freshly ground black pepper
1/4 cup olive oil
1/2 cup pistachios
8 ounces burrata, optinoal
- You will start by pickling your strawberries! Place the strawberries in a mason jar. Then in a small sauce pan combine vinegars, water, sugar and 1 tablespoon Kosher salt. Bring to a boil over high heat and as soon as it starts boiling pour over strawberries. Seal jar and flip upside down. Allow to cool while you cut up your vegetables for the salad.
- Start first by cutting up your fennel and scallions. Place in a medium bowl, fill it with cold water and a few ice cubes. Let sit in the bowl of ice water for 20 minutes then drain well and pat dry with a towel if the veggies still look super wet. This will dull the sharpness and intensity of the raw scallions and fennel.
- In a large bowl, combine the fennel, scallions, and pickled strawberries with peas, 1/4 cup pickling liquid, remaining 1 teaspoon salt, red pepper flakes, and freshly ground black pepper. Drizzle with olive oil. Taste and adjust flavors as desired. You may want a bit more of the pickling liquid for more brightness or red pepper flakes for more heat. Once you get the flavors right, top with the pistachios.
- You can absolutely be done right here and serve the salad immediately with no more frills. It’s perfect. I promise. But, if you can find burratta (available at the Willy Street Co-op) you should absolutely buy 8 ounces and serve this salad with a ball of beautiful burrata in the middle.
.
VEGETABLE LASAGNA WITH WHITE SAUCE
Recipe by my darling mother: a woman who is unparalleled in her ability to make simple recipes with abundant veggies from the garden. This recipe does use a lot of dishes (which I hate to do to you all) but it’s okay because it also makes a LOT of food! Lauren.
Makes 1 large lasagna
Serves 6-8
Takes 1 hour, 15 minutes
4 tablespoons butter, divided
1 tablespoon olive oil
3-4 medium zucchini or summer squash, halved lengthwise and thinly sliced
8 ounces carton of fresh mushrooms, sliced
3 or 4 sliced scallions , white and light green portions only, sliced
3 or 4 garlic scapes, sliced
1-1/2 teaspoon Kosher salt, divided
1/2 teaspoon freshly ground black pepper
1 kale bunch, center stems removed and thinly sliced
2 tablespoons minced fresh oregano
16 ounce container of cottage cheese (lowfat is fine)
2 eggs
12-16 lasagna noodles
1/4 cup flour
2-1/2 cup warm or room temperature milk
1/4 cup grated Parmesan cheese
8 ounces sliced or shredded mozzarella
- Preheat oven to 350 degrees and bring a large pot of salted water to a boil.
- In a large skillet, melt 1 tablespoon butter with 1 tablespoon olive oil. Saute first zucchini, mushrooms, scallions and garlic scapes until tender, season with 1 teaspoon salt and pepper. Add kale and oregano, and stir until wilted. Remove from heat, set aside.
- Once water is boiling, cook lasagna noodles according to package directions. Drain, set aside.
- In a medium sauce pan, melt remaining 3 tablespoons butter, stir in flour and cook for one minute until smooth. Whisk in milk and stir until mixture is smooth. Cook over medium heat until thickened, about 10 minutes. Remove from heat, stir in remaining 1/2 teaspoon salt and parmesan cheese.
- In a medium bowl, stir together cottage cheese and eggs, set aside.
- Assemble lasagna: In a 9 X 13 baking dish, spoon 1/2 cup sauce over the bottom of the pan. Then layer 1/3 of noodles, 1/3 cottage cheese mixture, 1/3 veggie mixture and 1/3 shredded or sliced cheese. Top with 1/3 of sauce. Repeat 2 more times. For final layer, put cheese last after sauce.
- Bake 40 to 45 minutes or until hot and bubbly. Let stand 10 minutes before cutting.
.


