
Blog
Week #4, June 14/15, 2018
- On: June 13, 2018
 0
0
Farm News
I watched Steve slowly relax on Saturday night as the rain began. He loves gentle rain on Friday or Saturday night, perfect timing so it doesn’t get in the way of field work. It’s great when it falls from the sky without any irrigation effort from us. Free water!
We accomplished a lot this week. Sweet potatoes and winter squash are both in the ground. It will be a long time until those are ready to harvest but this is the first step.
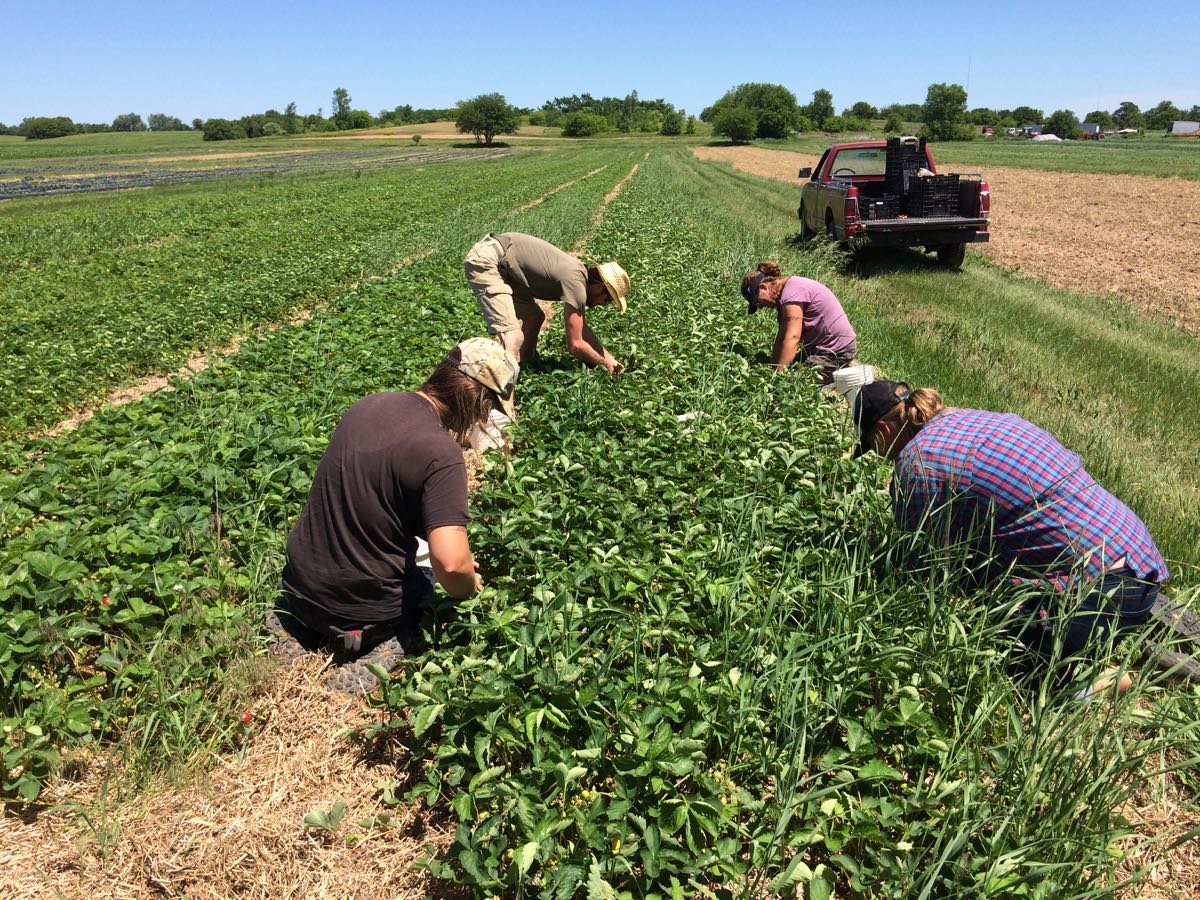
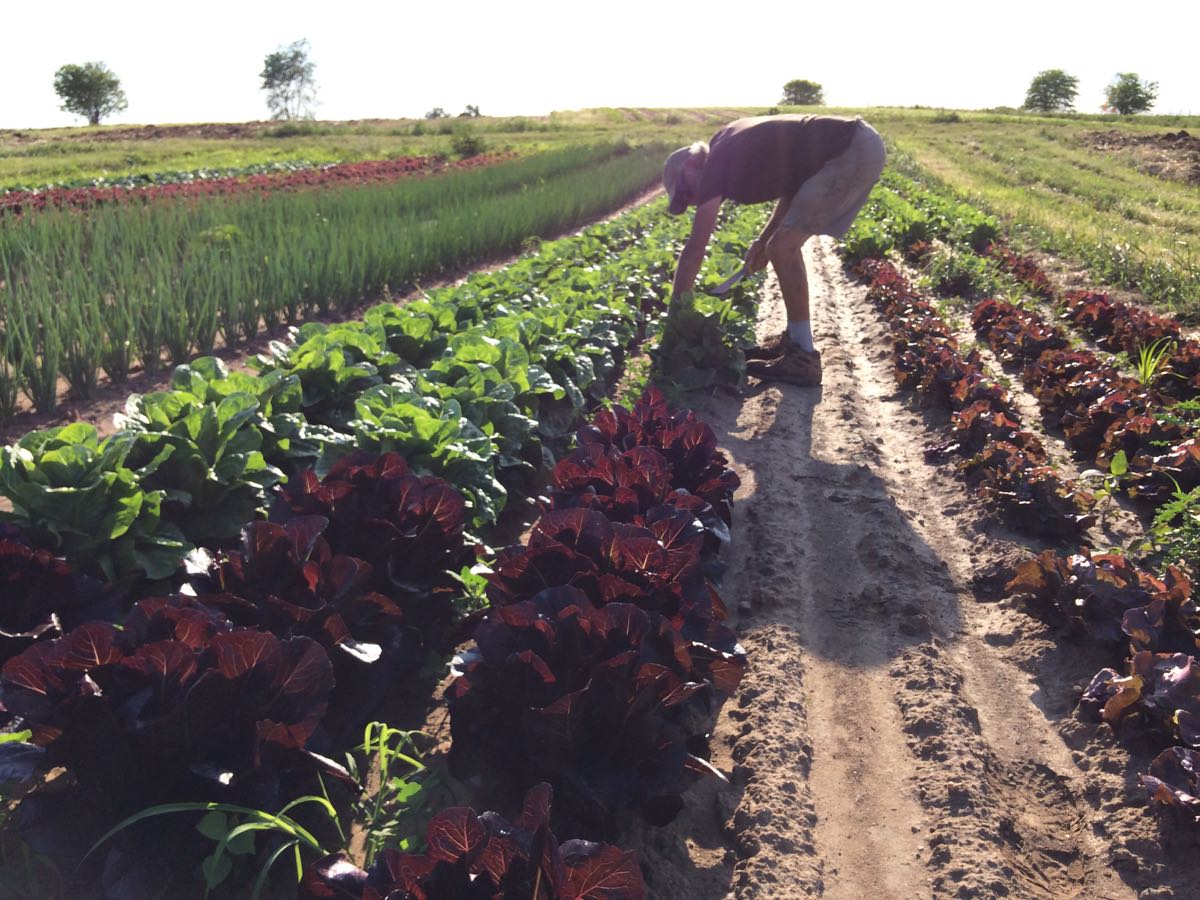
We have a pretty strawberry field this year. It’s weed-free and the rows are clear and nicely mulched with straw. Steve weeded the field last summer with our new finger weeder cultivator. It really worked. We planted the field a year ago, took care of it all summer, and will harvest berries this year and next. Then the field is finished. Strawberries are big time investment but are worth the effort. From left, Charlotte, Billy, Kristen and Maggie pick this week’s berries.
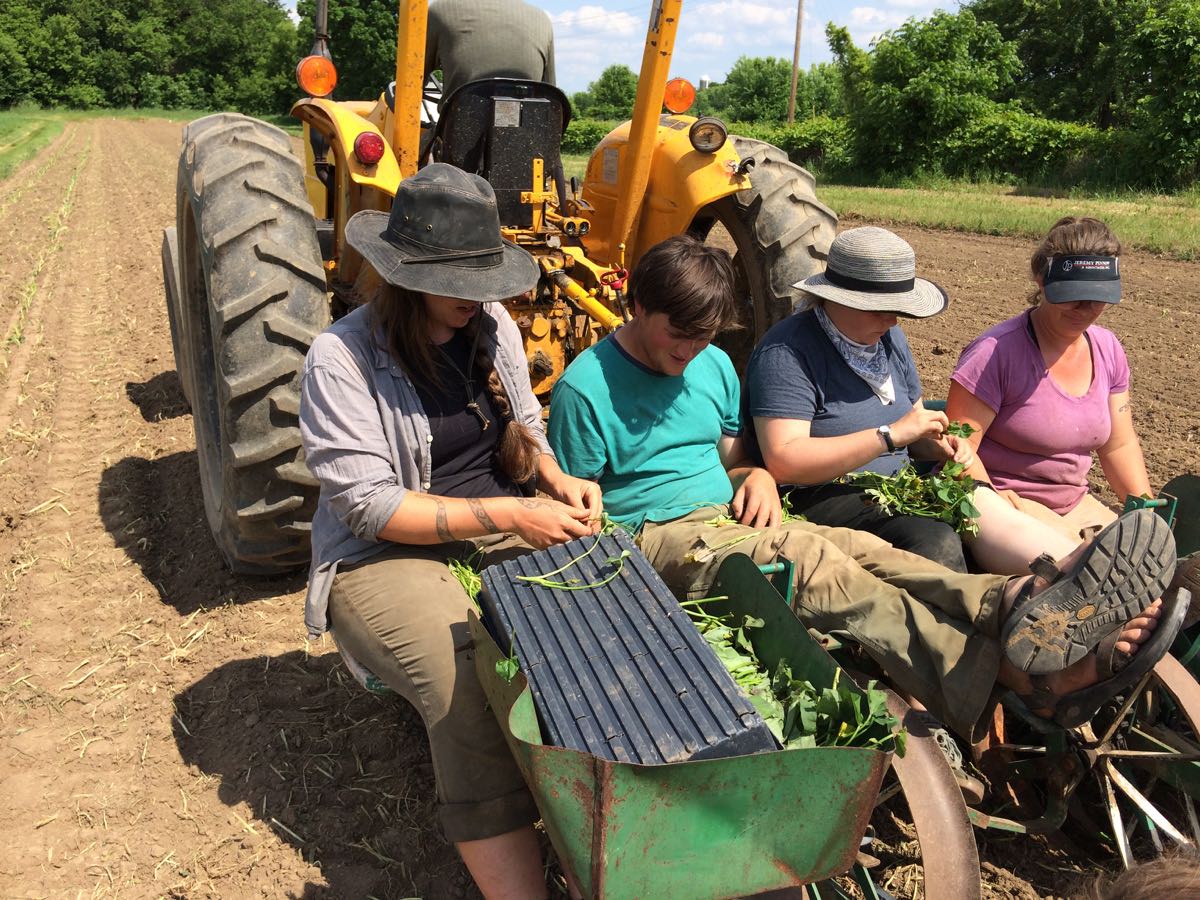
Planting sweet potato slips with an old strawberry transplanter. It’s practically an antique (look at the wheels) but still functions. This is an easy job but you have to like the people you work with; it’s a snug fit with four people. From left, Charlotte, Jory, Sena and Kristen. Raul drives the tractor.
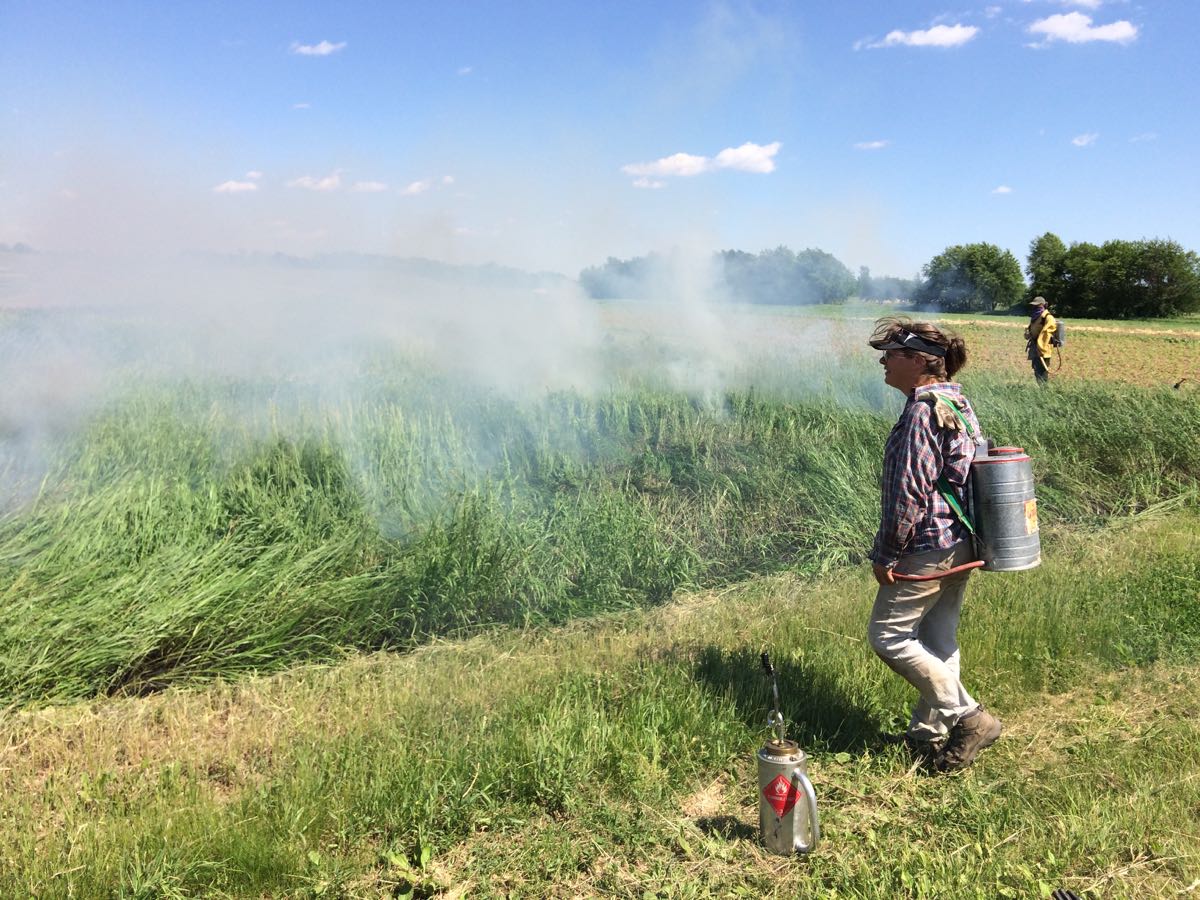
Late prairie burn
We burned our experimental prairie last week. This is a bizarre time to burn prairie but it’s thought to suppress introduced cool season grasses in favor of native species. This is an experimental approach. Our goal is to convert this neglected field to prairie to provide habitat for beneficial insects. In the process, it’s developed into an engrossing hobby for me. Steve reviewed this newsletter for me and said “Hmm, there are many more photos of your prairie than of the rest of the farm.” Yeah, that’s how it is. Beth
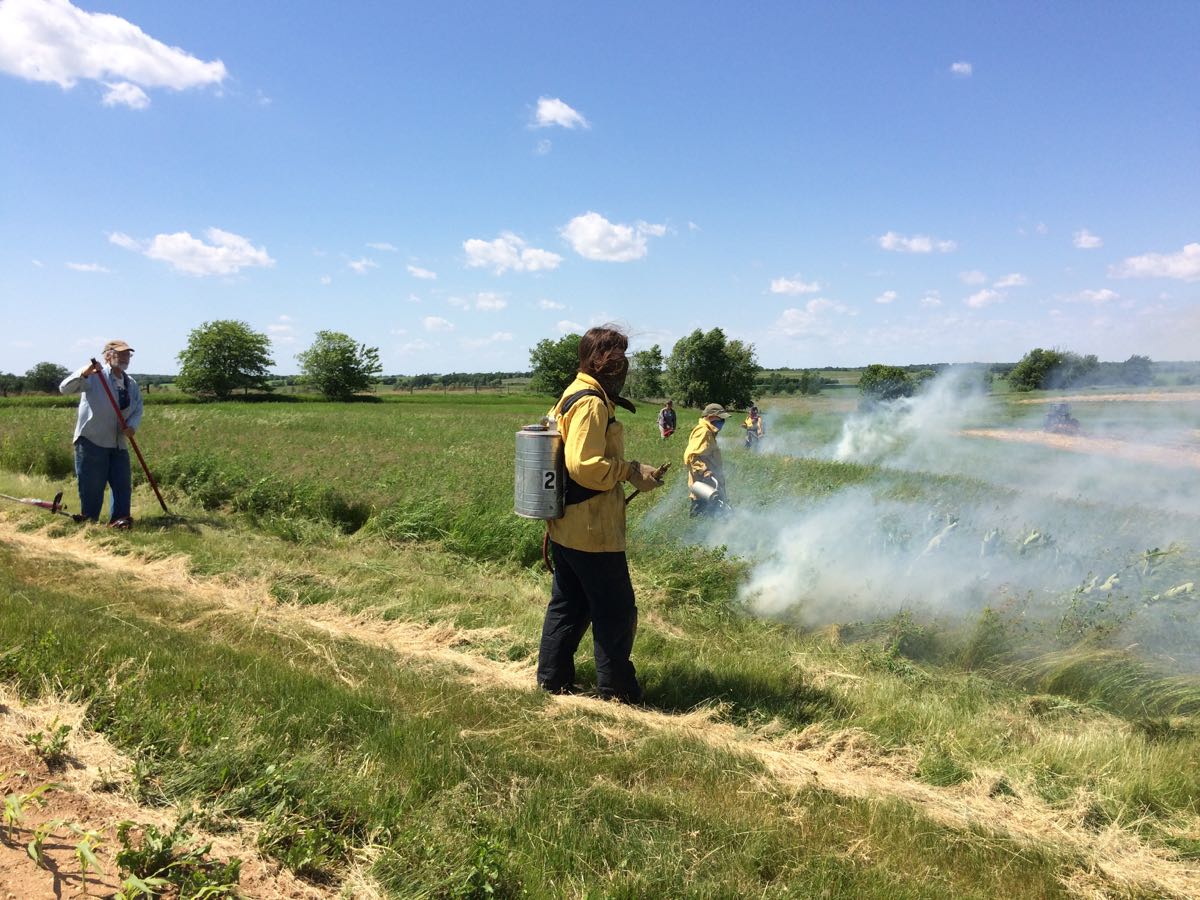
It’s hard to believe that a field this green would burn but it does. The fire stays close to the ground, burning flammable duff at the soil surface. The grass leaves remain green but fall over as the fire passes.
Burn boss Kristen. She has years of experience with prairie management and burns. She works for us now, and it’s been great having her here as a resource with this project.
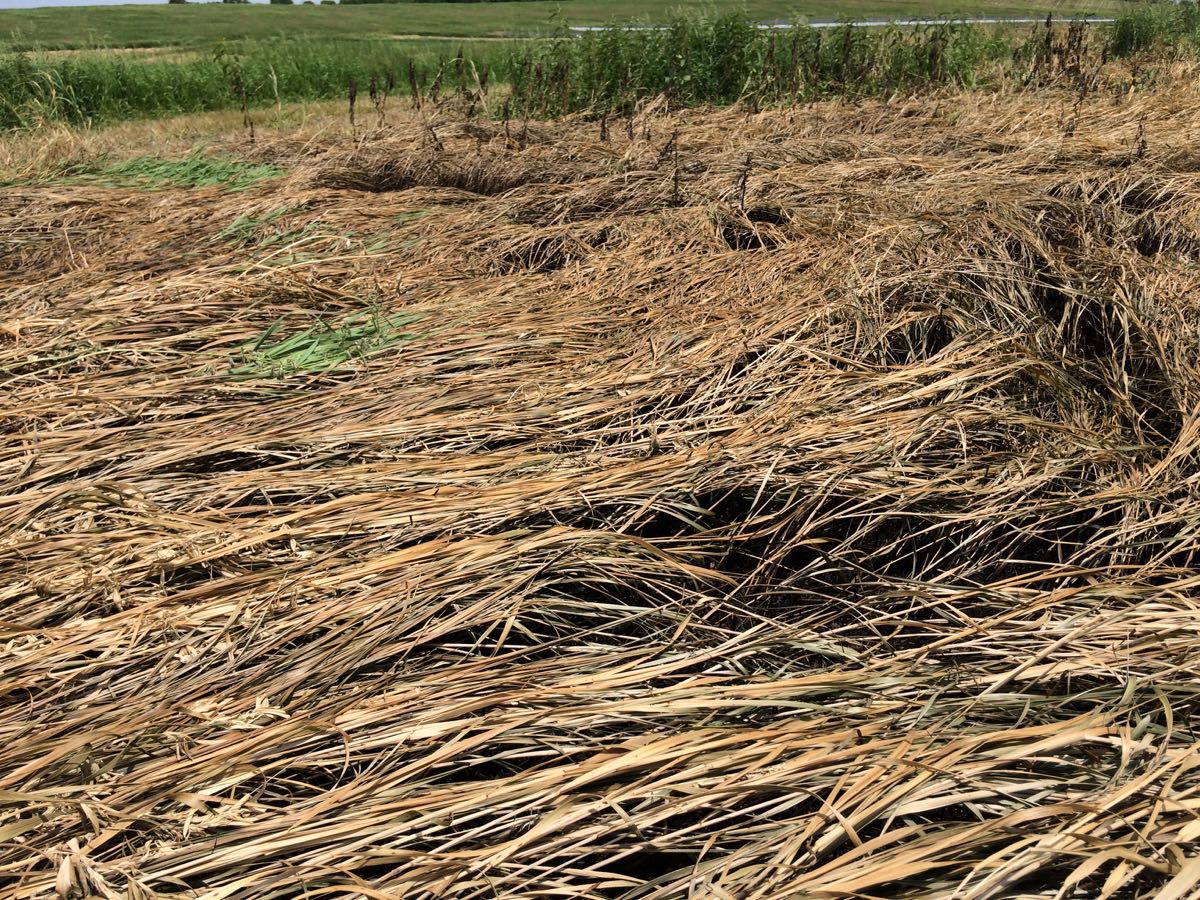
By two days later, the grass leaves had withered.
![]()
Then we chopped the dry residue and planted seedlings that I grew in the greenhouse this spring. Most of the seed is from local prairies. Over the past year, I volunteered with the local Prairie Bluff chapter of The Prairie Enthusiasts (TPE). We collect seed to expand TPE plantings and I get to keep some for my own use.
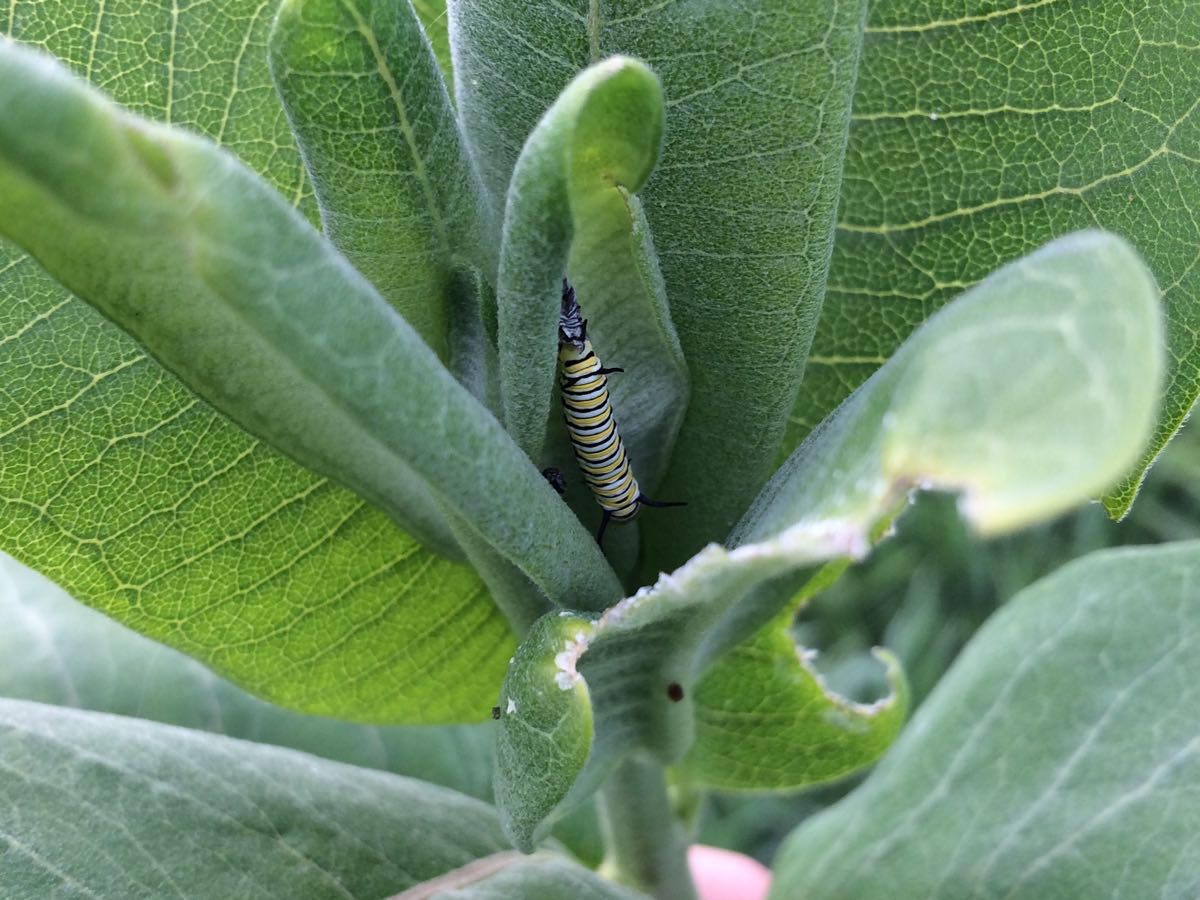
Before the burn, I collected monarch butterfly caterpillars and moved them to safety. There are many this year.
Veggie List and Veggie Notes
Strawberries, 1 scant pint
Sugar snap peas, 0.4 lb
Bok choy, 1
Zucchini & summer squash, ~3 lb
Swiss chard, 1 bunch
Scallions, red or white, 1 bunch
Italian parsley, 1 bunch
Red Romaine lettuce
Rhubarb, ~1.75 lb
Next week’s box will probably contain strawberries, snap & snow peas, zucchini, lettuce, scallions, garlic scapes, and more.
Strawberries! – We’ve been waiting for these. This first picking is small but more are ripening for next week.
♦ Ripe strawberries are perishable. Eat them immediately, or store in the refrigerator. Most berries are quite clean. If you want to clean your berries, rinse gently. Don’t soak them, just rinse.
♦ Please recycle your strawberry containers. We no longer collect them for re-use. Please don’t return them to your pick-up site.
Sugar snap peas (plump pea pods) – These peas should be eaten pod and all. They are delicious raw, or very lightly cooked or stir-fried.
Preparation: They will need a quick rinse to remove faded gray blossoms.
Remove the strings before eating: snap off the stem end and pull the string down the concave side of the pod (the inward-curving side). Throw away the string and eat the pod.
Storage: Refrigerate.
Zucchini & summer squash – It was a very productive squash week, so we’re sending lots. Zucchini and summer squash need refrigeration but do not do well at very cold temperatures, as they will soften and form pits in their surface. Refrigerate these squash but in the warmest part of your fridge.
Swiss chard (pretty bundle of green leaves) – Our crew did a nice job mixing colors for pretty bunches. Swiss chard is a close relative of spinach, but requires a bit more cooking. Use as a substitute in any recipe that calls for spinach, just cook the chard a little longer. Both stems and leaves are delicious. The stems requite longer cooking, so cut them free from the leaves when preparing. That allows you to cook the stems longer.
Scallions – You will get either red or white scallions. They can be used interchangeably. We started growing the red ones because they are so darn pretty.
Parsley – We have harvested flat-leaved Italian parsley for you this week. It looks a bit different than curly parsley but they are used interchangeably.
RECIPES
Visit our 2018 Recipe Log.
Visit our 2017 Recipe Log.
Join our Facebook discussion group.
Beth’s box logic.
– We’re sending rhubarb this week because we have the time to harvest it. Next week will be too busy with time-consuming pea and strawberry harvests, plus the other veggies. If you want to use your rhubarb in combination with the upcoming strawberries, just freeze it. Wash, dry, and chop it, then freeze in a plastic bag or any container. You can use the frozen rhubarb in most baked recipes without thawing. Of course, it’s ready to use fresh as well.
– I like to pack parsley and scallions together because they combine well in grain salads like tabouleh. This week, I plan to make a farro salad with snap peas, grilled zucchini, scallions and parsley. We’ll add lots of lemon-olive oil dressing, then eat it over lettuce.
LOCAL THYME/ Comforting Classics
Flourless Rhubarb-Almond Upside Down Cake
Soba and Bok Choy Stir Fry
Black Eyed Pea and Chard Soup
Wilted Chard with Almonds
LOCAL THYME/ Outside the Box Recipes
Chicken with Lemon Rhubarb Sauce
Grilled Bok Choy
Moroccan Chard and Couscous Stuffed Zucchini
Raw Chard and Rice Noodle Salad
LOCAL THYME/ Quick and Easy Meal
Herbed Ricotta Pesto with Linguine and Summer Squash
RECIPES FROM LAUREN
ZUCCHINI, CHARD & CHICKPEA TACOS
I love this dish over the grill for the char I get, but also because I love cooking outside as much as possible this time of year, but it does require one of those fancy grill pans that could keep small zucchini pieces and chickpeas from falling into the fire. If you don’t have one of those, do the broiler method instead. Both are mentioned below. Lauren.
Makes a lot of little tacos
Serves 6-8 with a side dish (4-6 as a meal)
Takes 30 minutes
2 medium zucchini, cut into strips (about 1/4-inch wide by 3/4-inch long as best you can)
1 (15 ounce can) chickpeas, rinsed
1/4 cup olive oil, divided
2 teaspoons chili powder
1 teaspoon ground cumin
1 teaspoon salt + pinch or two
1/2 teaspoon garlic powder
1/2 teaspoon onion powder
1/2 teaspoon paprika
1/2 teaspoon ground coriander
1/4 teaspoon black pepper
1 bunch chard, ribs removed and sliced, leaves rinsed, left wet, and roughly chopped
1/4 teaspoon red pepper flakes
1/2 lime
3-4 scallions, sliced
Corn tortillas
3-4 avocados
Sour cream
- Preheat your grill to medium high or preheat the broiler of your oven.
- In a large bowl, combine zucchini and chickpeas. Toss with two tablespoons of olive oil until well-coated. Add chili powder, cumin, 1 teaspoon salt, garlic powder, onion powder, paprika, coriander, and pepper. Toss until zucchini is as evenly coated as possible. Place on a grill pan or baking sheet. If using the grill, cook for 15-20 minutes until charred in spots. If using the oven, broil for 10-15 minutes until charred in spots. I had to do mine on two pans (or in two batches) for the best char.
- Meanwhile, heat remaining two tablespoons olive oil over medium high heat. Toss the sliced chard stem into the pan and cook for 2-3 minutes. Add the just rinsed chard leaves (while still wet). The pan will spit and splatter a bit, but don’t worry about it. Add a pinch or two of salt and the red pepper flakes and stir a couple times. Let cook over high heat until wilted. Again, it will char in a couple spots and that’s fine. Squeeze half a lime over the chard once it’s cooked to your liking and remove from heat.
- Just before serving, toss your corn tortillas on the grill to warm. Serve with grilled zucchini and chickpeas, chard, sliced scallions, a generous amount of avocado and sour cream.
.
SPRING COBB SALAD
I love a good cobb salad this time of year when we’re all swimming in lettuce and craving something hearty. I always put bacon, egg and feta cheese on mine but you could certainly also add some cold cuts (turkey and ham are common) or substitute blue or gorgonzola for the feta. The veggies too can be super versatile but I love things that are fresh and crunchy so I put scallions, bok choy stems and sliced snap peas into the mix. Lauren.
Serves 4 as a meal (more as a side salad)
Takes 25 minutes
8 slices bacon, preferably thick-cut
6 eggs
1/2 head lettuce (or approximately 8-12 cups), washed, dried and roughly chopped
4 scallions, white and pale green parts only (dark green tops saved for dressing), sliced
4-6 bok choy stems, sliced
1/3 pound snap peas, ends trimmed and sliced
4 ounces feta, crumbled
Parsley Buttermilk Ranch
Makes 1 cup
4 scallions, dark green tops only
1/2 bunch parsley
3/4 cup buttermilk
3 tablespoons Greek yogurt
2 tablespoons lemon juice
1 teaspoon Kosher salt
1 teaspoon garlic powdder
1/2 teaspoon freshly ground black pepper
1/4 teaspoon dried dill
1/4 cup olive oil
- Cook bacon however you usually do. Or if you want to try what we do at our home, preheat your oven to 400 degrees and lay bacon on a baking sheet. Place in oven (right away- before its preheated) and set the timer for 20 minutes. Ta da! Perfect bacon every time. If you did find the thick-cut stuff, it may take more like 26-28 minutes to get it crispy.
- While the bacon cooks, hard-boil your eggs. Bring a medium saucepan of water to a boil. Once boiling, add the eggs and cook for 12 minutes. Remove to an ice bath for at least 2 minutes (this will make the eggs easier to peel) and then get to peeling.
- Then, prepare your dressing. Toss your scallion greens and parsley in the bowl o f a food processor and process until finely chopped. Add buttermilk, yogurt, lemon juice, salt, garlic powder, pepper and dill. Process until smooth. With the top of the food processor open, drizzle in olive oil until the dressing comes together. Taste and adjust seasonings as desired. (This is easiest in a food processor but if you don’t have one you can just finely mince your dark green scallions tops and parsley leaves and combine all ingredients in a medium bowl and whisk until smooth).
- Serve your salad by putting a quarter of the lettuce in each of four bowls. Add cooked bacon, sliced hard-boiled egg, scallions, bok choy stems, snap peas and feta. Drizzle with dressing and serve/eat immediately!
.

Week #3, June 7/8, 2018
- On: June 06, 2018
- 0
Farm Updates
Almost all our summer crops are in the ground. Tomatoes, peppers, melons, greens, zucchini, cucumbers, sweet corn, etc; they are all planted and growing. We still have winter squash and pumpkins to transplant this week. After that we move on to seeding fall crops like cauliflower and sweet potatoes. Soon we’ll spend most of our time harvesting and weeding. This moment is an annual milestone for Steve. He really hustles to get the farm ready with tilled cover crops, compost and final tillage to smooth the fields. This week, he stayed one step ahead of the crew, preparing beds just ahead of the transplant crew.
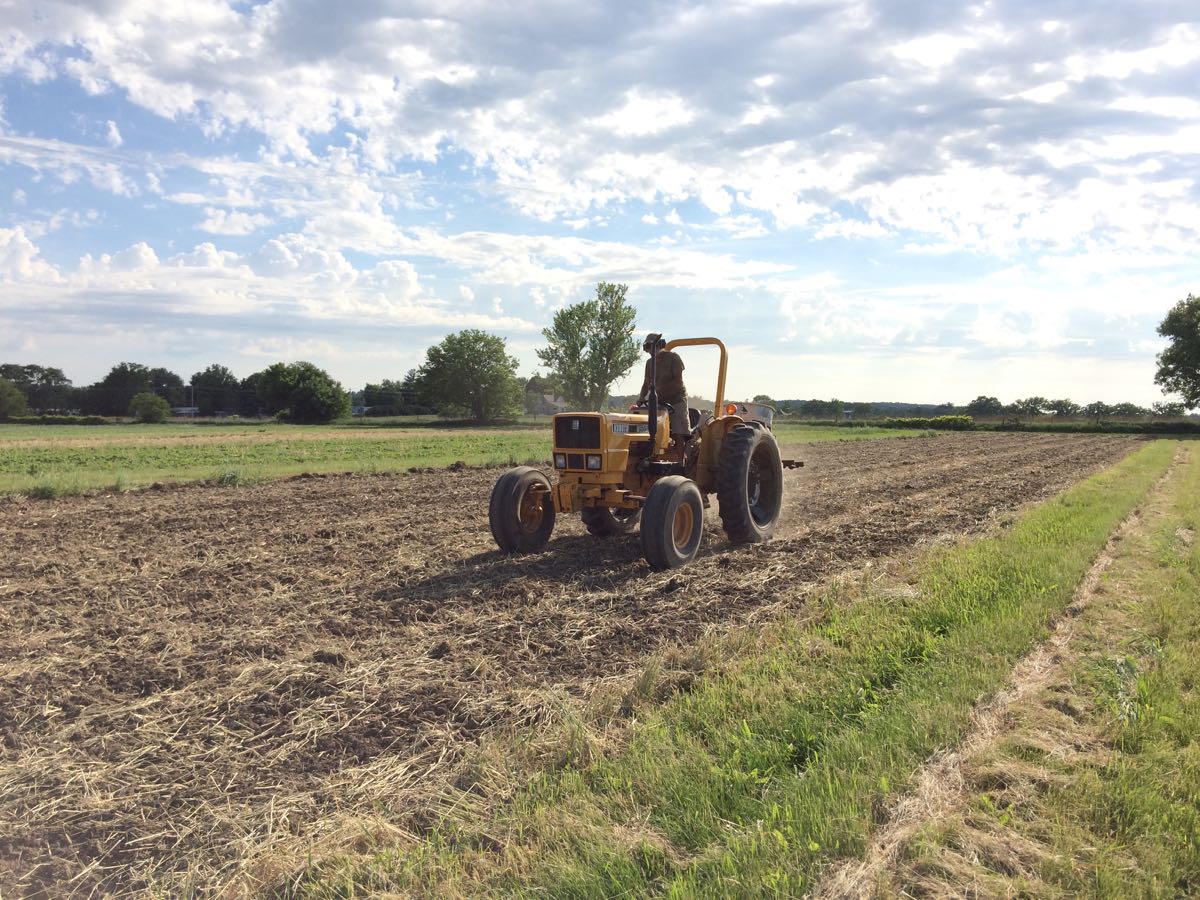
Steve spreads composted chicken manure to prepare the next melon field. You can see straw-like cover crop residue which has been chopped and incorporated into the soil, and beginning to decay. The cover crops feeds our soil microbes and release nitrogen as they decompose. The chicken compost provides nutrients before the cover crops decay.
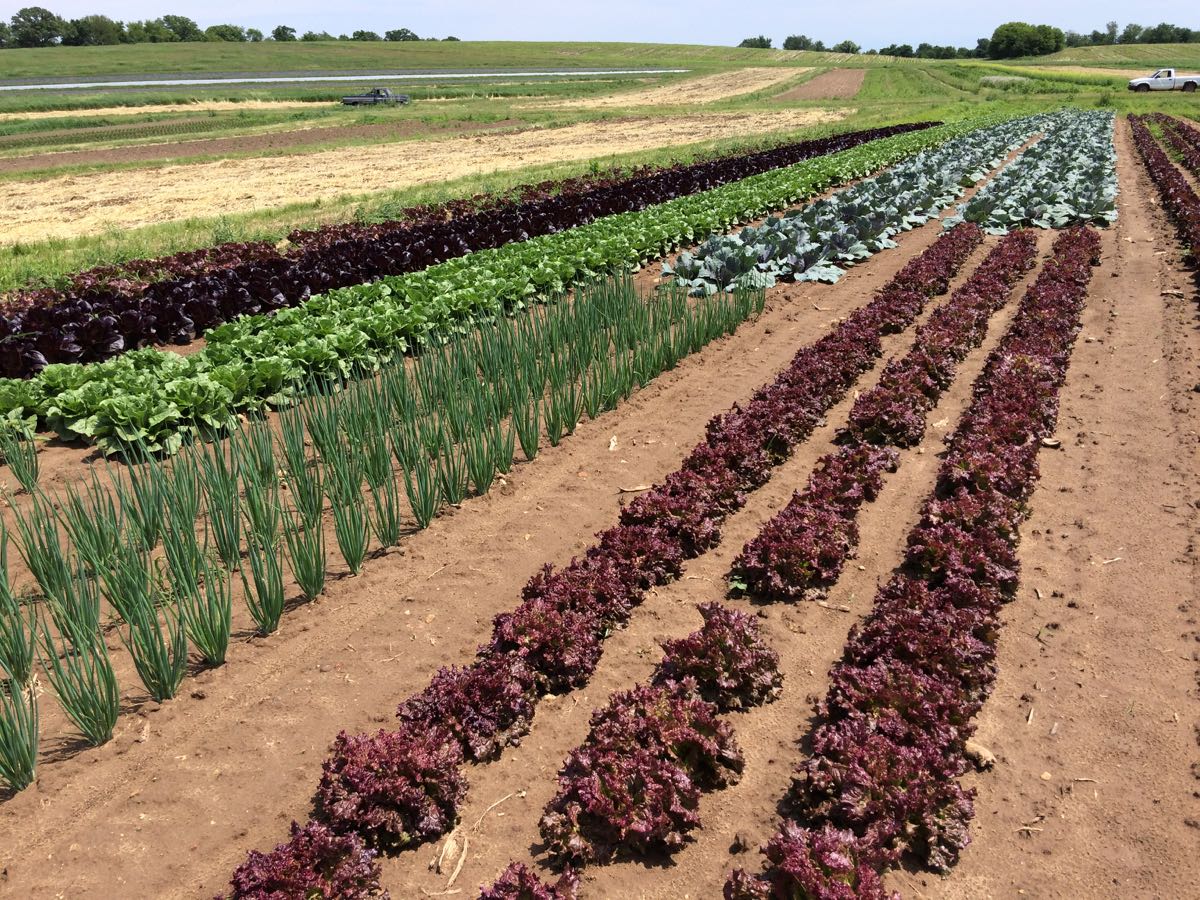
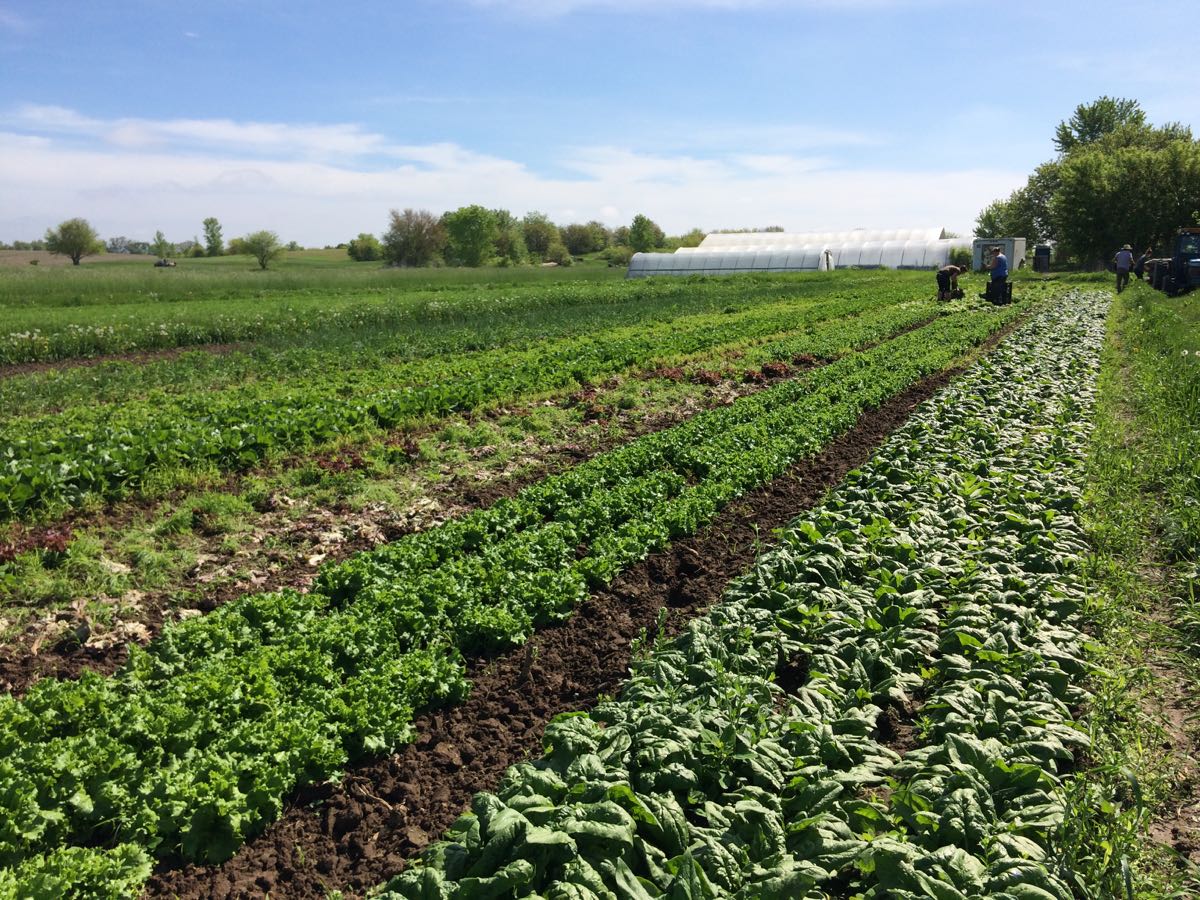
This photo shows our next field of lettuce, scallions and cabbage but it also the tapestry of the farm, a mix of planted fields, green crops and tan chopped cover crops.

The colors are beautiful right now! At top, Steve checks the same lettuce and scallion field late in the day. At bottom, gorgeous red chard glows in the sun.
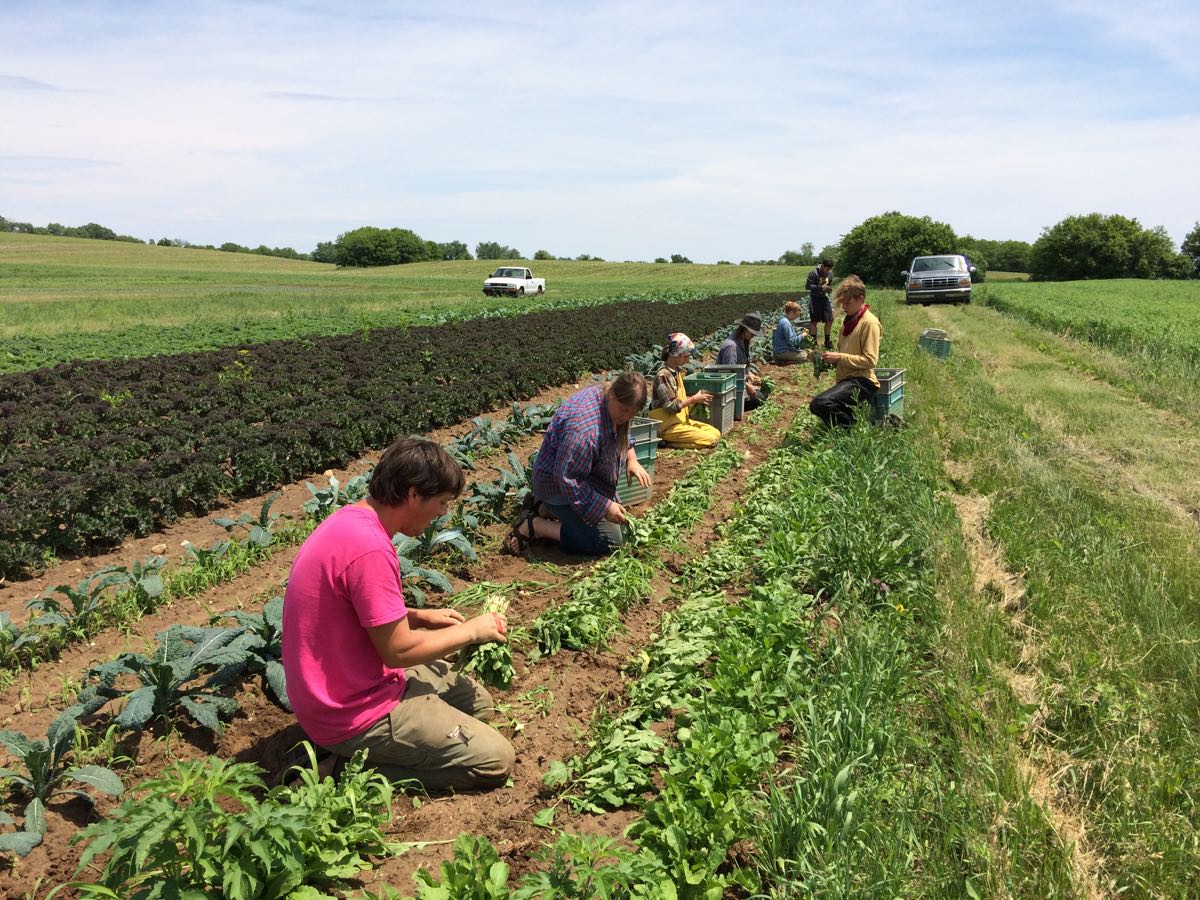
We all enjoyed the cooler weather this week. It’s make our lives much more pleasant. Above, all hands on deck for the arugula harvest.
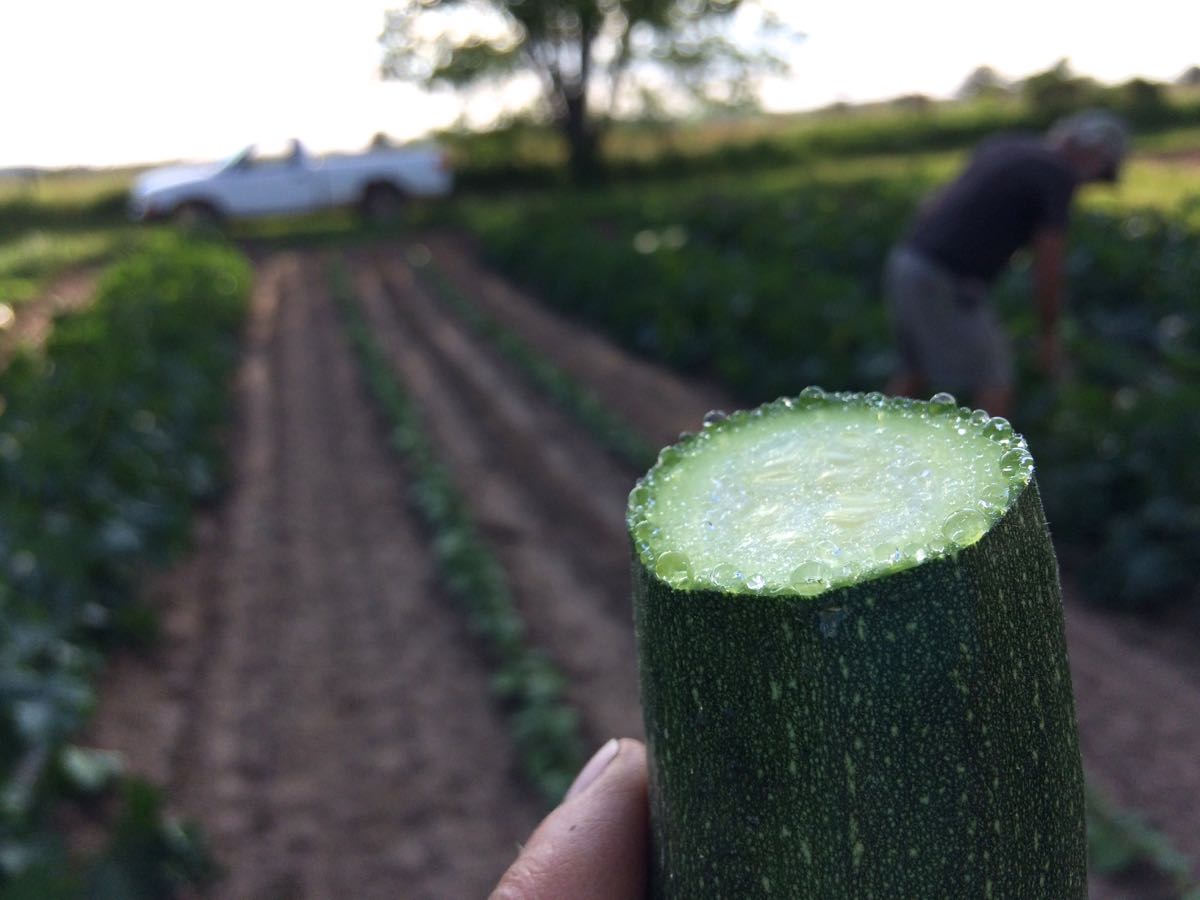
We picked the first zucchini for you this week. The plants are healthy and bursting with sap. Look how much juice emerged immediately after cutting.
How to wash greens efficiently
Members asked this week how to remove grit from greens like lettuce and spinach. Here’s our approach. It works.
1. We have one kitchen sink so we use a 4 gallon Rubbermaid basin. Fill halfway with cold tap water. If you have two sinks, fill one sink partway with cold water.
2. Chop your lettuce or spinach to the size you wish.
3. Dump it into the water and swish around gently but thoroughly.
4. Working in two batches (for average lettuce head) or more batches (big spinach bunches, Romaine), pull handfuls out of the water and drain in the basket of a salad spinner.
5. After all the greens have been rinsed one time, dump the water. Rinse the basin and refill with cold tap water.
6. Repeat the process.
7. Spin your greens dry and store in a dry container. They store much better when spun dry.
This works because …
– By pre-chopping the greens, you free soil trapped in the head.
– You are using a large amount of water to wash and dilute away the grit.
– By pulling the greens out of the water, you take advantage of the draining action to pull the grit with it.
I hope this helps!
Veggie List and Veggie Notes
Tomato juice, 1 quart
Romaine lettuce
Asparagus, 0.4 – 0.5 lb
Spinach, 1 medium bunch
Zucchini, 2 – 2.4 lb
Shiitake mushrooms, ~6 oz
White salad turnips & greens, 1 bunch
Radishes, 1 bunch
Arugula (spicy!), 1 bunch
Scallions, 1 bunch
Green garlic, 2 stalks
Next week’s box will probably contain kale, lettuce, zucchini, scallions and more.
Tipi tomato juice – We had this juice bottled from our tomatoes last summer. It’s a great way to capture ripe tomatoes at peak season, at a moment when we are swimming in tomatoes. Drink it or try making an easy soup. Simmer diced zucchini in the juice. Add spinach, minced scallions and green garlic near the end of cooking. Voila! Soup!
Storage: Store the juice out of sunlight at room temperature when unopened. Refrigerate after opening. The juice is already seasoned so do not add salt if you cook with it.
Ingredients: organic tomatoes from Tipi Produce, salt, organic garlic, organic onion, organic black pepper. I’ve posted the nutritional information here.
Romaine lettuce – It’s a robust head of lettuce this week! We plan to make lettuce wraps and Caesar Salad this week.
Asparagus – This is the final asparagus. It was a short season but we need to let the plants regrow and replenish their root reserves for next year. We had trouble with weeding last year and it showed up in this year’s small harvests. The hot spell did not help. We’ll coddle the plants well this summer.
Zucchini & summer squash – The first picking!
Shiitake mushrooms – These are from Hidden Valley Mushrooms, the same people who grew last week’s button mushrooms. Most years, we buy portobellos for this box but decided to try the shiitakes instead because I think they will combine well with the spinach and green garlic. These must be cooked. A small subset of people can have a toxic reaction to raw or undercooked shiitakes. Once cooked, they are harmless. And tasty!
Storage: Refrigerate in a paper bag. These are perishable so use soon. Lightly sauce in butter and add to any dishes. I used mine this week in a a frittata (favorite Smitten Kitchen recipe below), as well as sauteed and mixed into pasta salad. Sauteed shiitakes and spinach are a great toppings for rice bowls, e.g. bibimbap.
Arugula – This arugula is very spicy, a legacy of the recent hot weather. I suggest that you add it to other dishes in small amounts, either raw or cooked. That helps dilute the heat but you still get the arugula flavor.
Scallions (bundle of green onions) – These are useful raw or cooked. Thinly-sliced raw scallions can be folded into biscuit dough or sprinkled on top of soups or salads. Terrific garnish for pasta dishes. Think pad thai. We will send both scallions and green garlic so see photo below.
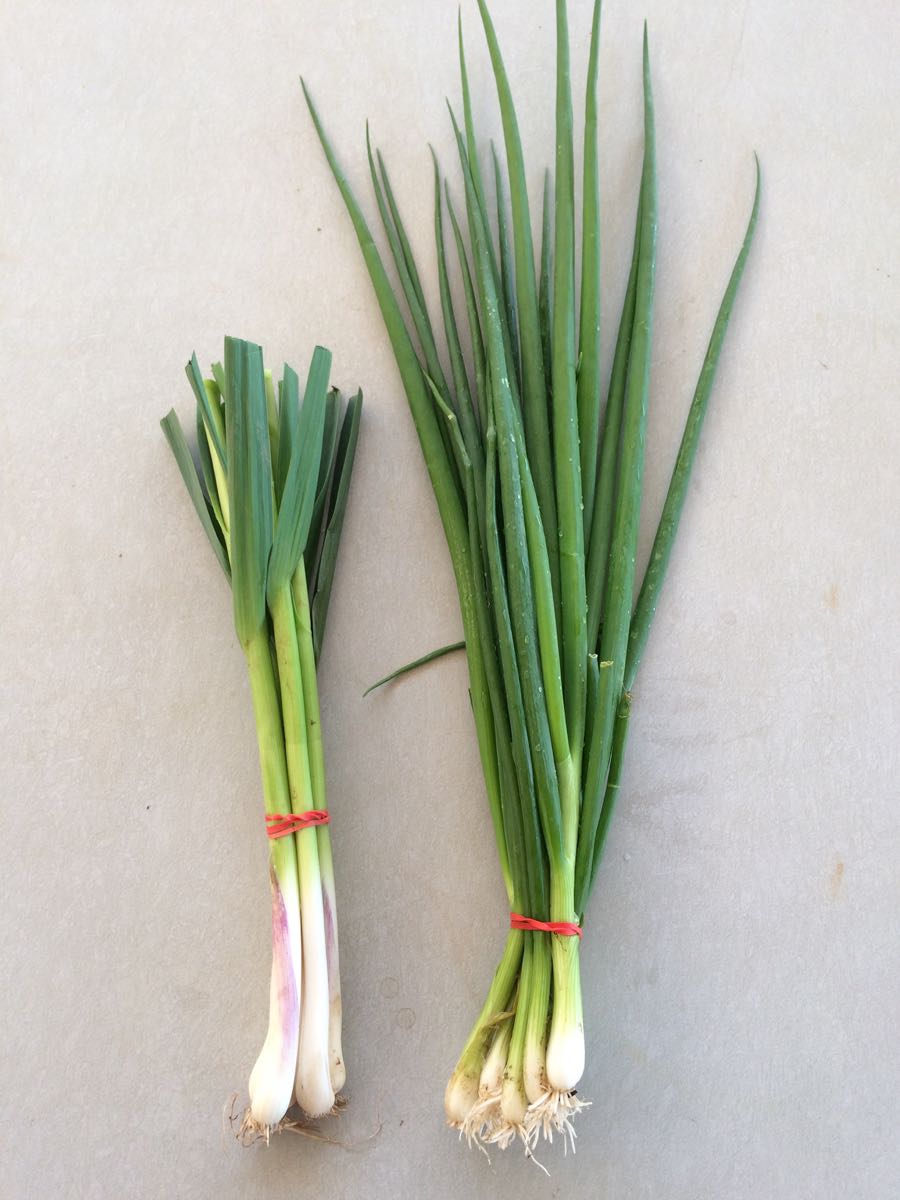
Green garlic (left) and scallions (right) look so much alike! Distinguish them this week by whether the leaves are trimmed (green garlic) or untrimmed (scallions). They smell very different too. However, it’s not a crime if you interchange them in recipes. The green garlic leaves are increasingly fibrous; use just the white and pale green sections. You can use scallions all the way to the tips. You will get just two green garlic stalks this week and they probably be loose not bundled.
RECIPES
Visit our 2018 Recipe Log, a week-by-week list of 2018 recipes.
Visit our 2017 Recipe Log, a week-by-week list of last year’s recipes.
Beth’s Favorite Frittata Recipe
Smitten Kitchen has a terrific, easily adapted frittata recipe. The egg to milk ratio and the cooking times are perfect. I’ve made the recipe several times, starting with frozen roasted peppers and early spinach, then moving on to asparagus, spinach, mushrooms and green garlic. I tried shaving the asparagus (as in the recipe) but find it easier to just save a handful of cooked asparagus to use with this recipe. Sautee the mushrooms in the pan, remove, then proceed to the recipe.
LOCAL THYME/ Comforting Classics
Zucchini Scallion Fritters
Asparagus, Salad Turnip and Shiitake Stir-Fry
Asparagus and Arugula Frittata
Honey Braised Radishes
LOCAL THYME/ Outside the Box Recipes
Greek Stewed Zucchini with Tipi Tomato Juice
Grilled Shiitake Mushroom Salad on Arugula with Ponzu Dressing
Chicken Positano with Arugula and Tomato Juice Dressing
Blackened Catfish with Radish Raita
LOCAL THYME/ Quick & Easy Meal
CousCous Salad with Arugula, Radish and Feta
LAUREN/ Spring Harvest Grain Salad
I fell in love with grain salads last summer thanks to a beautiful Bon Appetit recipe that featured loads of herbs, steamed veggies, raw veggies and a tangy, sweet, salty dressing. I had never had such a variety of textures and flavors in one bowl of food. I’ve been experimenting with those elements every since. Since there aren’t herbs in your box this week I used arugula, scallions and green garlic as the “herbs”. You could easily add a whole lot more than I used here so make as instructed, taste and then add more greens if you desire. Lauren
Serves 4-8 depending on whether it’s a meal or a side
Takes 30 minutes
1 cup quinoa
1-1/4 cup beef broth
1/3 pound asparagus, cut into 1-inch pieces (spears halved if larger)
2 tablespoons butter
6 ounces shitakes, sliced
2 green garlic stalks, white and pale green portions only, minced
1/2 cup (or more) arugula
1 cup (or more) spinach
3-4 scallions, ends trimmed, sliced
1 tablespoons toasted sesame oil
1/4 cup olive oil
2 tablespoons rice wine vinegar
2 tablespoons low-sodium tamari (or soy sauce)
1 tablespoon maple syrup (or honey)
1-3 avocados, optional
- This first step is my fool-proof method for making quinoa (learned from I am a Food Blog). If you have your own tried and true method, feel free to do that instead and ignore this first step. Rinse your quinoa is a fine-mesh strainer. Add to a medium saucepan and toast over medium heat for 1-2 minutes until fragrant but way before it begins to burn. Add broth and bring to a boil. Reduce to a simmer, cover and cook for 15 minutes. Once the timer goes off, turn off the heat but leave the pan on the burner and leave the cover on for 5 minutes more.
- Meanwhile, steam your asparagus for 5 minutes until just tender (but still crisp). I don’t have a steamer so I put a metal colander with handles in a stock pot and cover it to get that steamed effect.
- Then in that same stock pot (if you used one), drain the asparagus water and melt butter over medium heat. Add shitakes and green garlic. Saute for 7 minutes until mushrooms begin to release their juices and are cooked but not too soft.
- Combine your quinoa, asparagus, mushrooms, and green garlic together in a large bowl.
- Cut your greens into a delicate chiffonade (roll a stack of leaves and slice them thinly; then roughly chop the thin strands of greens) and add them to your bowl with the scallions.
- In a small bowl combine oils, vinegar, tamari and maple syrup. Whisk until smooth. Pour over salad and stir to combine. Serve at this temperature or cold with avocado slices or cubes on top.
.
LAUREN/ Radish & Turnip Yogurt Salad
This dish is just screaming to be served next to a nice juicy cut of steak or something else delicious just off the grill. It is cold and refreshing with just enough spice and bite. It’s also incredibly simple and even simpler if you have a mandolin (which makes for very easy slicing) and coming together in 10 minutes flat. Lauren.
Serves 4-6 as a side
Takes 10 minutes (less with a mandolin)
1 bunch radishes, ends trimmed and greens removed, sliced as thin as you can
1 bunch turnips, ends trimmed and greens removed, sliced as thin as you can
3-4 scallions, ends trimmed and sliced
3/4 cup Greek yogurt
3 tablespoons olive oil
2 tablespoons fresh lemon juice
1/2 teaspoon Kosher salt
1/4 teaspoon freshly ground black pepper
- In a large bowl combine sliced radishes, turnips and scallions together.
- In a small bowl, combine yogurt, oil, lemon juice, salt and pepper. Whisk until smooth and yogurt has thinned a bit.
- Toss yogurt dressing over veggies.***
***If you don’t plan to eat this all at once, just toss enough dressing to coat the veggies you plan to eat tonight. This doesn’t store well as the dressing gets a little runny. I store the veggies and dressing separately in my fridge if there are leftovers.
.
Week #2, May 31/June 1, 2018
- On: May 31, 2018
- 0
June 1 check reminder
Many of you paid us with checks dated to June 1. We will deposit the checks on Monday June 4.
Fast-moving week
The heat this week was ridiculous. Perhaps you noticed. Madison set a record with four days in the 90’s. We are proud of our work crew – they soldiered through, drinking lots of water and gatorade and taking breaks in the shade. Even seasoned farmhands (like most of our crew) have to re-acclimate to hot weather.
The heat wave advanced most of our crops. We’ve quickly switched from running behind schedule to running ahead of schedule. It is head spinning. This week’s box contains next week’s spinach, escarole and mint. In turn, some of the following week’s crops will be ready next week (lettuce field #2, zucchini). We lost a few spring plantings that couldn’t handle the heat: radishes, some spinach, and the new Abyssinian mustard we planted. We have more radish and spinach plantings and will see how those younger plants fare. The asparagus did not respond well to the hot weather. We’ll harvest again next week but then have to decide whether to end the asparagus season early to let the plants recover and store root reserves for next year. We’ll let you know.
Bright spots of the week: It was a big relief when the temperatures dropped. It rained gently on Wednesday. The heat-loving crops grew a lot (tomatoes, peppers, squash). Our mama farm cat moved her kittens back into the garage where we can tame them. Life is good again.
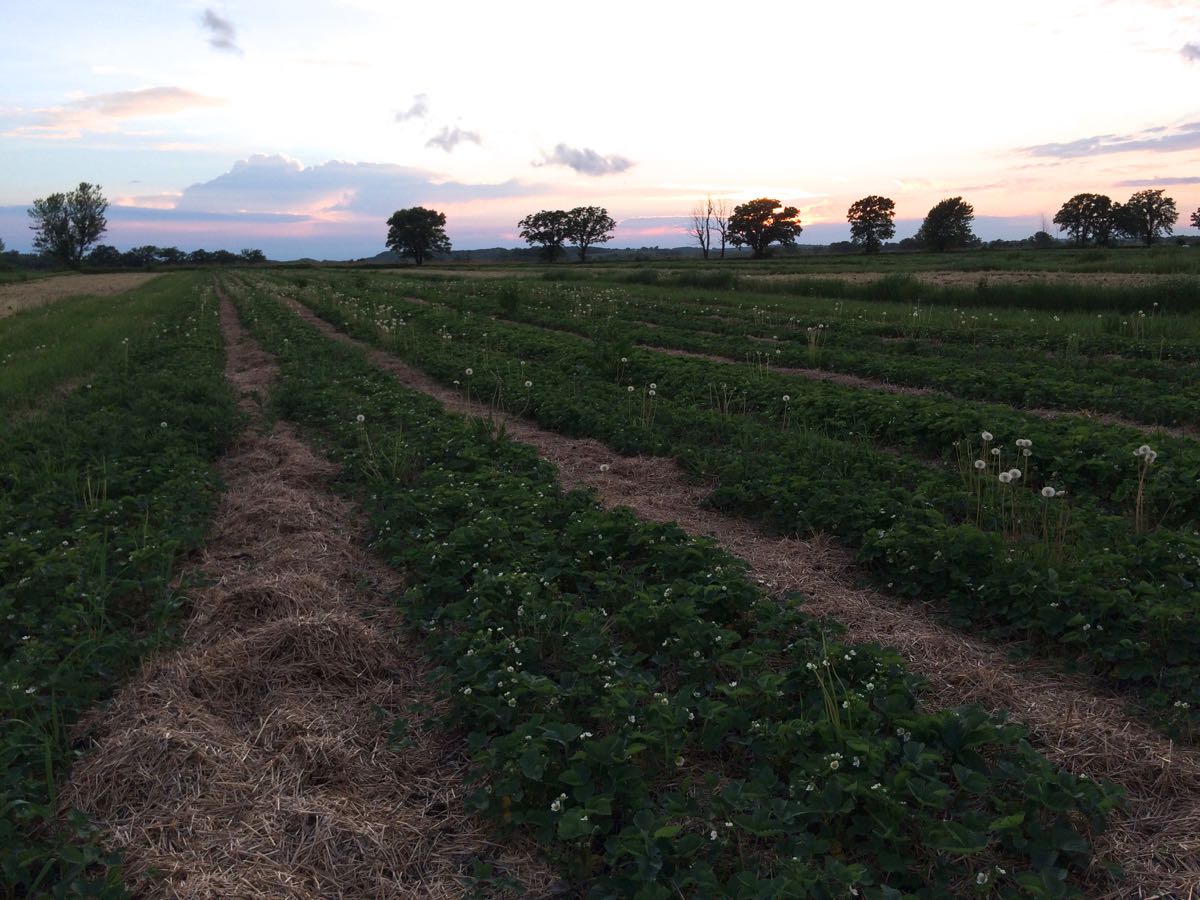
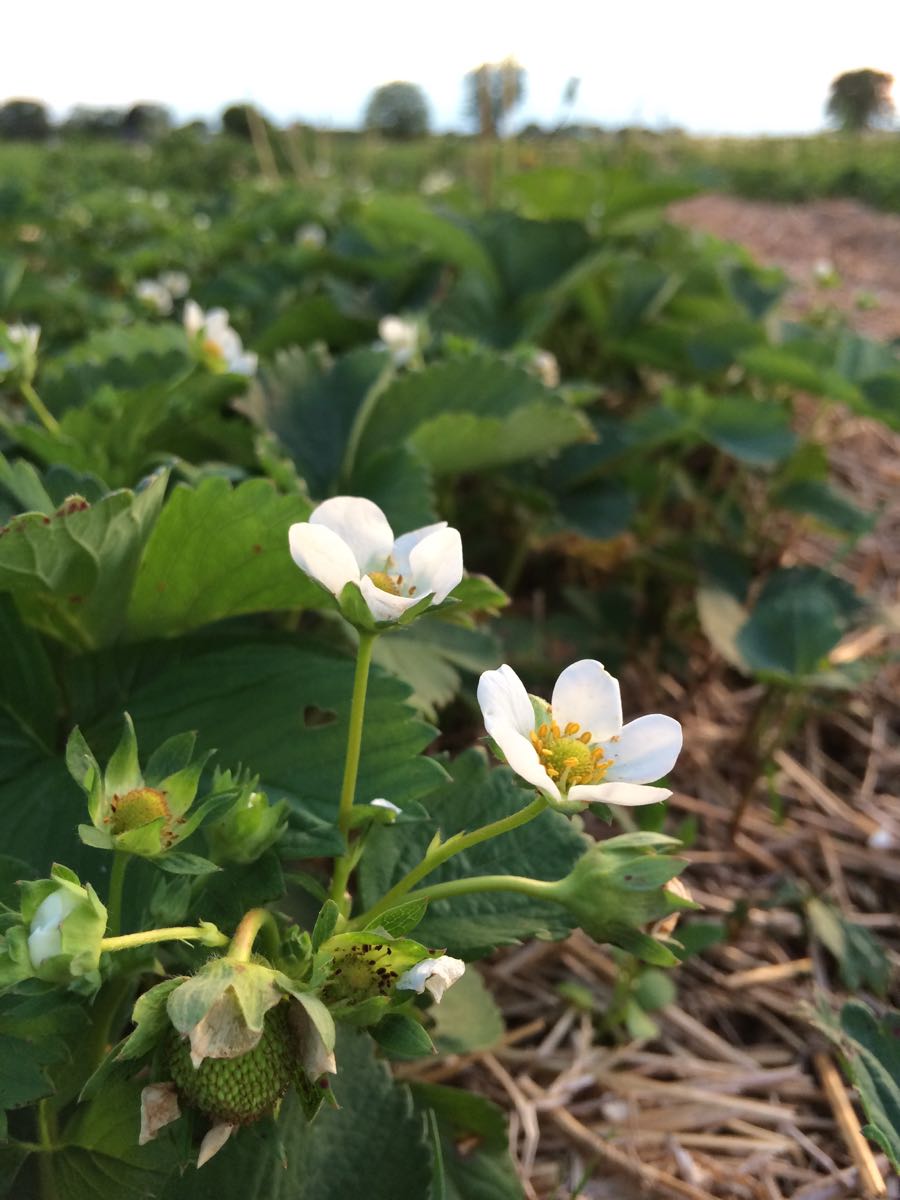
Top; the strawberry field is blooming beautifully. You can see young berries forming in the bottom photo. Steve thinks the first berries might be ready in two weeks but that’s a guess.
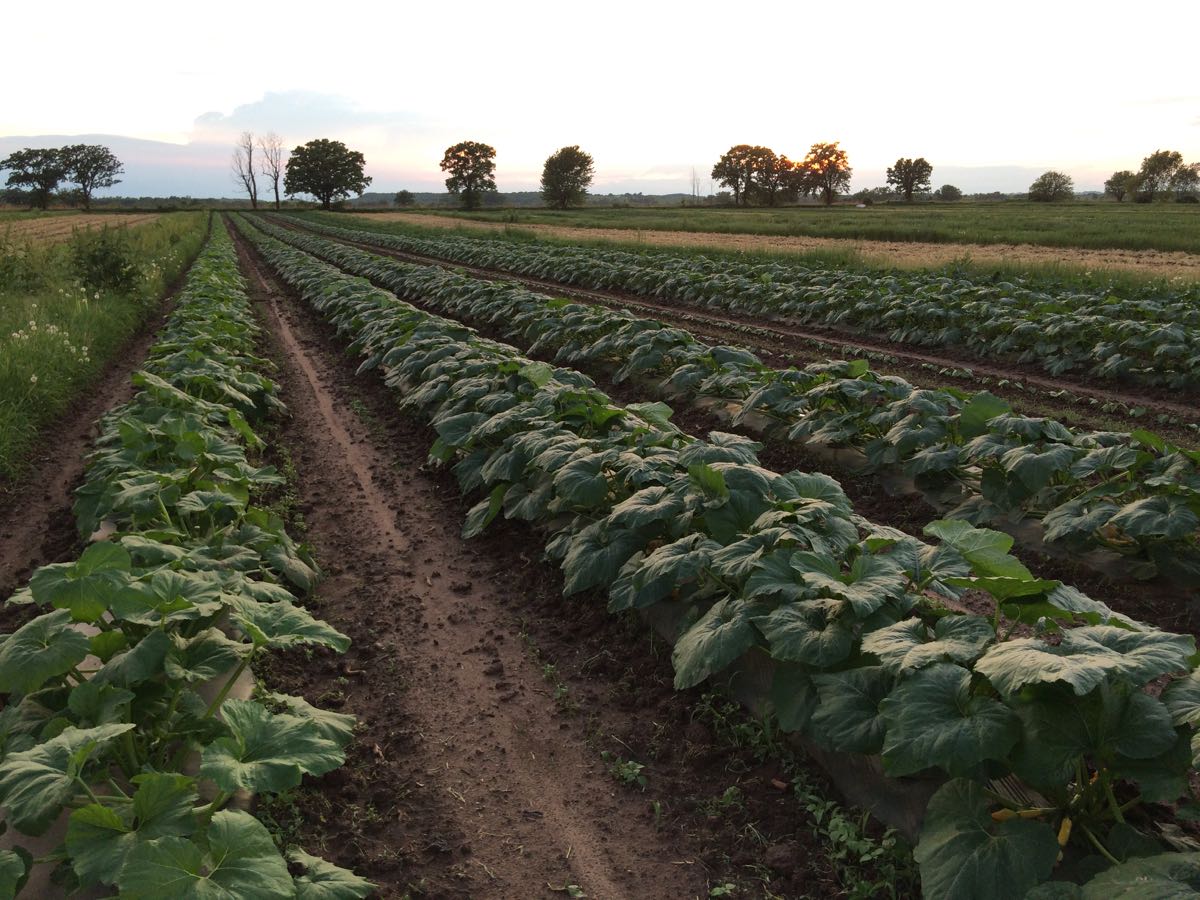
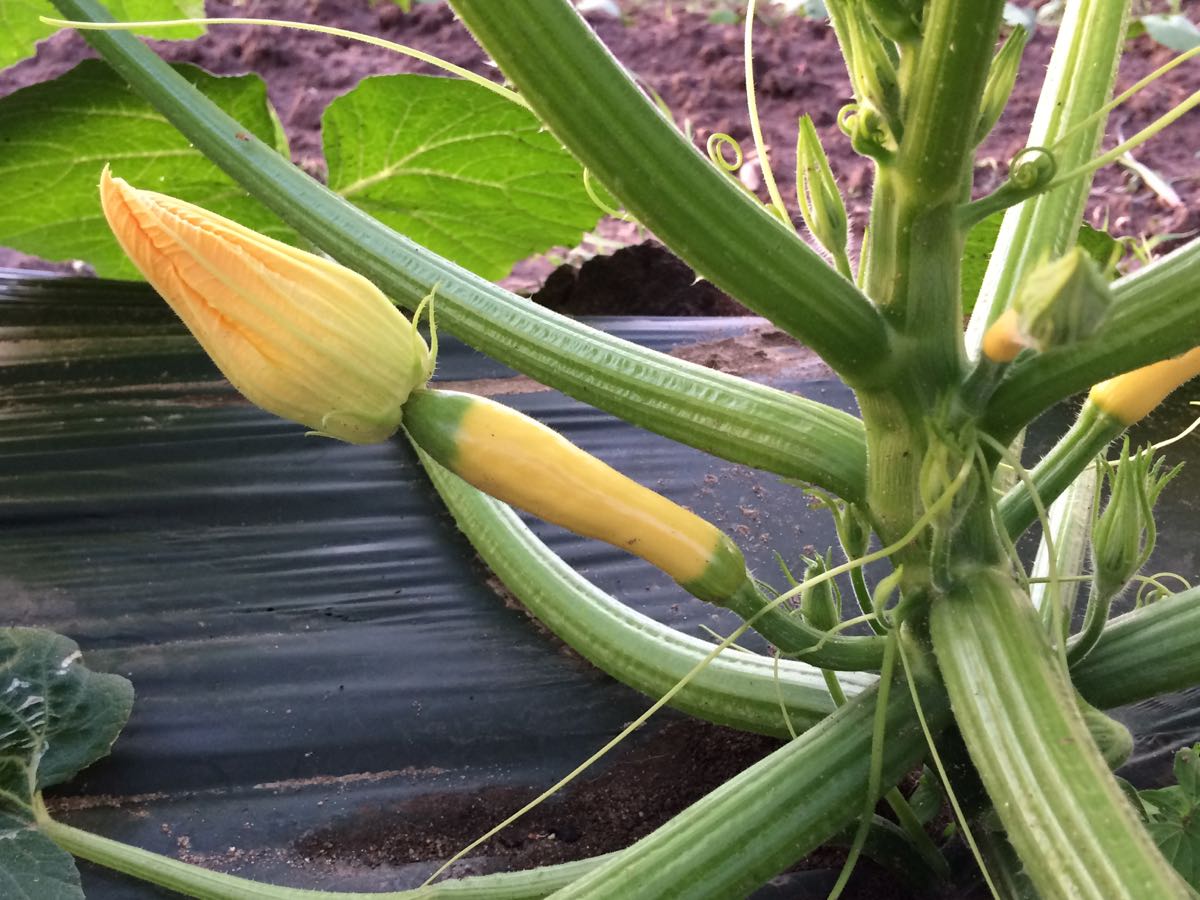
The zucchini and summer squash fields loved the heat! These should be ready to pick next week.
Veggie List and Veggie Notes
May 31/June 1, 2018 (Thurs/Fri sites)
Week #2, purple EOW and sun Sampler
Remember, we list storage, prep and cooking information on each vegetable the first time we pack it in the CSA boxes. See last week’s newsletter for info on asparagus, spinach, lettuce, green garlic and rhubarb. If we have special instructions or insights to offer, we’ll list them here. For example, I’ve included freezing instructions for rhubarb.
Asparagus, 0.6 lb
Escarole, 1
Spinach, 1 big bunch
Button mushroom, 12 oz
Red leaf lettuce
White salad turnips & greens, 1 bunch
Green garlic, 1 bunch
Mint, 1 sprig
Rhubarb, ~1.75 lb
Next week’s box will probably contain kale, lettuce, white salad turnips, scallions, shiitake mushrooms and more.
Escarole (large head of wavy green leaves) – This member of the chicory family can be eaten raw or cooked. Its slightly bitter flavor is a good addition to mixed salads. It is excellent cooked alone or mixed with other greens. It cooks quickly, but not as quickly as spinach. Cover and refrigerate.
Button mushrooms – These organic mushrooms are from Hidden Valley Mushrooms from Wisconsin Dells. We buy mushrooms from Mary every year; they are a great addition to spring salads and quiches. Here are Mary’s suggestions for storing the mushrooms. Store separate from leafy greens, which hasten mushroom aging. If storing for more than a few days, remove from the box and store in a paper bag with holes punched in the side. Keep dry. Don’t wash to clean, just wipe with a damp cloth.
White salad turnips (bunched white roots with green tops) – I know that returning members look forward to these sweet and delicious turnips, which taste nothing like the turnips that are harvested in fall.
– Storage: Cover and refrigerate.
– Uses: Both the turnip roots and tops are edible. The roots are excellent raw; Slice and add to salads. They can be cooked and are especially good when lightly sauteed in butter. Stir as little as possible so they brown on at least one side. The turnips greens are excellent cooked. Treat them like mustard greens.
– Our favorite use: Slice the roots very thinly and combine with a mixture of rice vinegar, mirin, soy sauce, sesame oil. Eat immediately or marinate.
Mint – Everyone gets one sprig with about 6 to 8 leaves. Refrigerate in a small container.
Rhubarb – Remember, rhubarb is easy to freeze. Simply chop and freeze in a freezer bag. It does not need to be blanched. When it’s time to bake, just add the frozen rhubarb to your batter. You’ll need to cook baked goods a few minutes longer, e.g. about 5 minutes longer for a cake in a 9 x 13 pan.
RECIPES
Visit our 2018 Recipe Log, a week-by-week list of 2018 recipes.
Visit our 2017 Recipe Log, a week-by-week list of last year’s recipes.
Beth’s box logic: The mint sprig is small but we included it specifically so you can make spring rolls with mint, spinach or lettuce, plus a few spears of cooked asparagus. We usually add strips of marinated cooked tofu but shrimp are good if you have them.
– Here’s a useful recipe for how to handle the rice paper wrappers: Rainbow Vegetable Spring Rolls.
– Use any vegetables you like.
– We make a dipping sauce of soy sauce + rice vinegar + thinly sliced scallions or green garlic. It’s easier to dip or spoon the sauce into your spring rolls as you eat them, rather than adding the sauce to the rolls as described in the recipe.
LOCAL THYME/ Comforting Classics
Asparagus and Spinach Pasta Salad with Feta
Wilted Escarole with Pine Nuts and Raisins
Farro Salad with Salad Turnips, Turnip Greens, Mint and Walnuts
Shaved Asparagus and Maple Mint Salad
LOCAL THYME/ Outside the Box Recipes
Green Curry Shrimp Soup with Spinach and Salad Turnips
Escarole, Salad Turnip and Apple Salad
Pan Seared Chicken with Creamy Spinach and Mushroom Sauce
Rhubarb Mint Vinaigrette
LOCAL THYME/ Quick and Easy Recipe
Spinach Frittata with Turnip Greens
Recipes from Lauren
SPRING SALAD WITH TURNIPS & LEMON CREAM
Every winter I get a new cookbook focused on vegetables to expand my repertoire of recipes and every year I am surprised by the variety of textures and flavors I discover within familiar foods. Re-discovering vegetables in new ways is my favorite thing about cooking. Inspired by Joshua McFadden’s Six Seasons cookbook, this recipe made me fall back in love with spring lettuces and salads. The lemon cream dressing is delicate and feminine really letting the fresh lettuce and floral turnip flavors take center stage. Enjoy! Lauren
Serves 4-6
Takes 20 minutes
1 bunch turnips
1/2 head red leaf lettuce, rinsed and dried well
5-10 fresh mint leaves, torn
1/2 cup lemon cream dressing (below)
Salt and pepper to taste
1/2 cup salted roasted sunflower seeds
- Remove the greens from the turnips. Wash, remove any yellowed pieces and pat dry. Roughly chop and add to a large bowl. Roughly chop lettuce and add to bowl. Trim the ends off the turnips and very thinly slice them (use a mandolin if you have one). Add the sliced turnips to the bowl of greens along with the mint leaves.
- Prepare the lemon cream dressing (below) and add to greens. Use your hands to evenly distribute the dressing (though tongs may also work). Season with salt and pepper. Taste and adjust seasonings as desired.
- Top with sunflower seeds.
.
Lemon Cream Dressing
Makes 1 cup
2-3 green garlic, quartered and sliced
2 tablespoons fresh lemon juice
1/2 teaspoon grated lemon zest
1/2 cup heavy cream
1 teaspoon Kosher salt
1/4 teaspoon freshly ground black pepper
2 tablespoons olive oil
- In a small bowl combine garlic, lemon juice and lemon zest. Add cream, followed by salt and pepper. Whisk to combine until it starts to thicken then add olive oil. Continue whisking until dressing gets a bit lighter and airy. Use within a day of making.
.
SHAVED ASPARAGUS, SPINACH & MUSHROOM QUICHE
One 9-inch quiche
Serves 4-6
Takes 50 minutes
1 batch favorite pie dough (this makes two servings) or a store-bought pie crust
2 tablespoons butter
12 ounces button mushrooms, cleaned and sliced
1 bunch spinach, leaves torn or roughly chopped
1-1/2 teaspoon Kosher salt, divided
1/2 pound asparagus, shaved
4 eggs
1/2 cup heavy cream
1/4 cup whole milk
1/2 cup shredded Parmesan
1/2 teaspoon freshly ground black pepper
- Preheat oven to 400 degrees.
- If you made your pie dough from scratch, pre-bake the crust with pie weights for 15 minutes. If you are using a store-bought crust, follow package directions.
- Meanwhile, in a large saute pan, melt butter over medium heat. Add mushrooms and 1/2 teaspoon salt. Saute for 5-10 minutes until just beginning to release their juices then add the spinach. Stir to combine and cover. Turn off the heat but leave pan on burner for five minutes just to steam the spinach. Add shaved asparagus along with remaining salt and pepper. Stir to combine and then pour into pre-baked crust.
- In a medium bowl, combine eggs, cream and milk. Whisk until smooth then add Parmesan. Pour over asparagus mixture. Shake pan to even out the filling. Bake for 30-35 minutes until cooked through.
.
Week #1, Let’s start!
- On: May 23, 2018
- 0
Welcome to our CSA! Deliveries begin this week for weekly members and for green every-other-week (EOW) members. Go here to check the delivery schedule for other shares.
Things you need to know.
♦ We post this newsletter/blog each Wednesday night, with a list of veggies for the week, quantities, information about storage and preparation, news of the farm, recipes, and a forecast for the next week’s box. We alert you by email on Wednesday night once the newsletter is posted and ready to read.
♦ Want earlier notice of what will be in the box? Check the sidebar on our website homepage around 7 p.m. on Wednesday night. I’ll post the list under “Box Contents.” I also provide a tentative list for the following week in the Veggie List section of this newsletter. The next week’s list is rarely complete but the items listed are ones we feel confident about.
♦ EOW, sampler and weekly members, we assume you read all the newsletters, even on your “off” weeks. This newsletter (and our emails to you) are our means to communicate with you.
♦ The first few boxes of the season are often the lightest. EOW members, do not worry that you have signed up for the wrong share. Our deliveries get heavier and more abundant as the season progresses.
♦ We will sometimes write “OR” in the produce list, e.g. green leaf OR red bibb lettuce. You will receive one of these crops. All the boxes at each site are identical; we pack the same crops for all the members at each site. Please don’t open other members’ boxes.
♦ Wash your produce well this week to remove grit. It has rained a lot lately, driving grit into the asparagus and anything that forms a head (lettuce, bok choy, spinach). Our crew took extra care with washing but expect to wash everything. You should always wash your produce!
♦ On Thursday, we deliver CSA boxes to Evansville, Fitchburg, Madison, McFarland, Middleton and Oregon.
♦ On Friday, we deliver CSA boxes to Brookfield, Janesville, Mequon, Milwaukee, Waukesha and Wauwatosa.
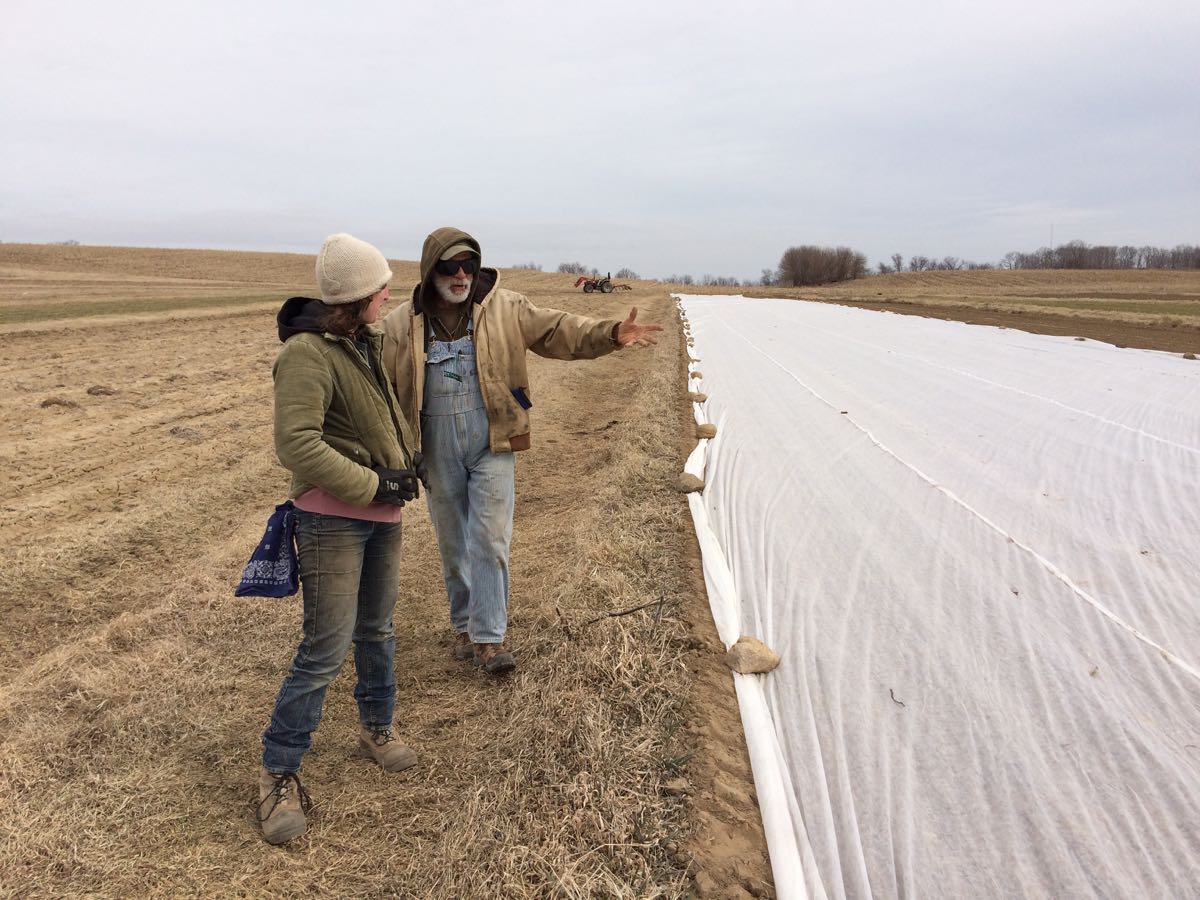
A Tricky Spring Decision
In mid-April, we had to decide whether to transplant our precious greenhouse seedlings the day before a predicted snow storm. Seems crazy, right? Why not just wait? Well, we were already two weeks behind schedule, the plants were growing actively and our greenhouses were completely full. We had a CSA schedule to meet!
We decided to plant. As a rule, we use every opportunity to plant and transplant in late March and early April. If the ground gets soaked, it can take a long time to dry. We use row cover (a lightweight fabric) as an insurance policy, to moderate the cold and wind and to gather the sun’s warmth. This is a situation where experience is so helpful. We’ve been through this before and have yet to lose a crop by putting it out too early. Of course, we did wait for the 15 degree nights to pass before transplanting. That’s just common sense.
Our greenhouse seedlings are precious. It takes 6 to 8 weeks for them to grow to transplanting size, which means that we cannot replace them.

We transplanted on a beautiful sunny day, and covered the plants with floating row cover. It snowed the next day, weighing down the plants and freezing the row cover to the ground.

The plants did fine. The row cover makes a nice shelter and traps heat from the ground.
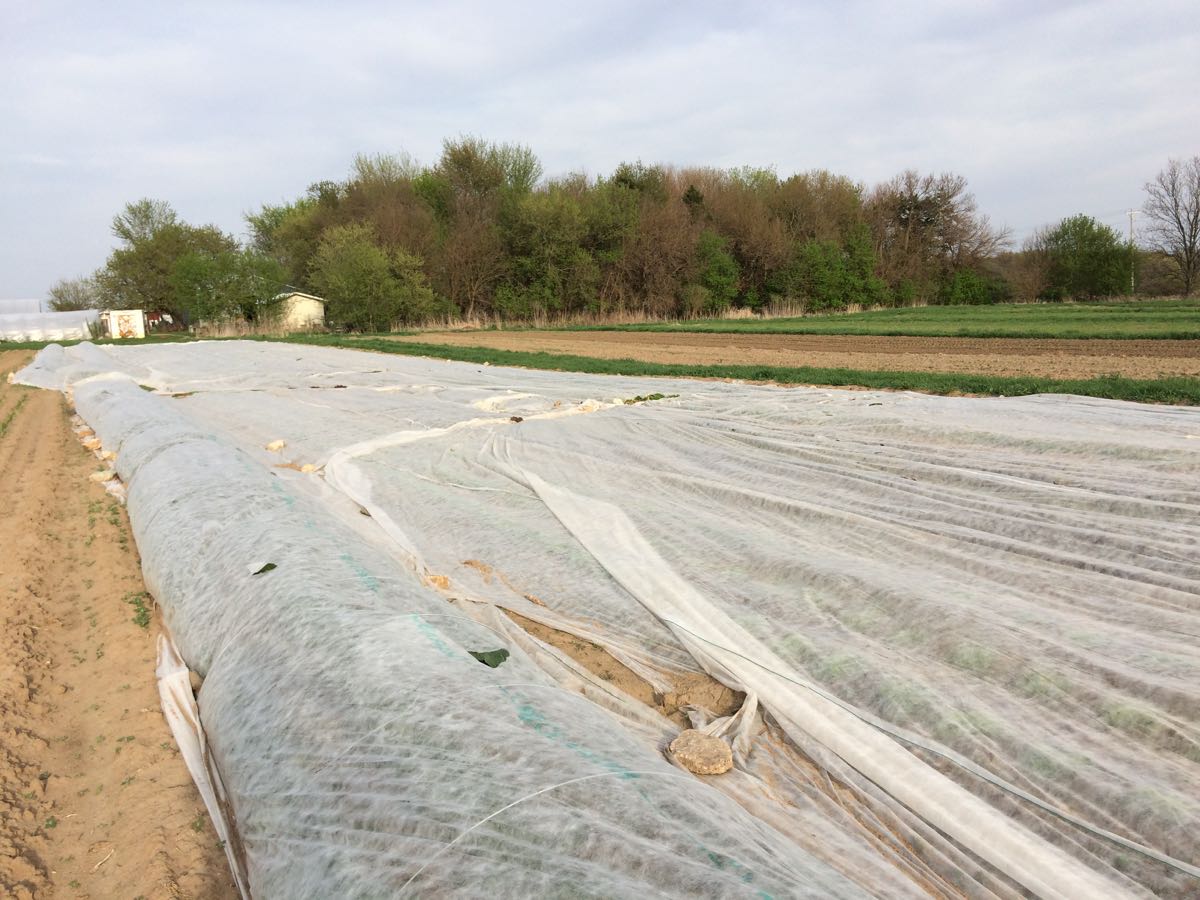
The row cover was seriously beaten up by the weather. We patched it together because we did not want to replace it with a new $300 piece. Your bok choy has some insect damage as a result; the flea beetles snuck in through the holes.
Otherwise, everything did very, very well.

Harvest day!
The happy resolution to the story.
Veggie List and Veggie Notes
May 24/25, 2018 (Th/Fri sites), week #1, green EOW
Asparagus, ~1 lb
Spinach, 1 big bunch
German Butterball potatoes, 3.5 lb
Green leaf lettuce
Salad radishes, 1 bunch
Green garlic, 1 bunch
Bok choy, 1 large
Rhubarb, 2 lb
Next week’s box will probably contain asparagus, spinach, button mushrooms, lettuce, green garlic, Abyssinian mustard, rhubarb and more.
Asparagus – Enjoy this spring treat! Your asparagus will be green or purple. The purple variety turns dark green when cooked. Its flavor is almost identical to normal green asparagus. Wash your asparagus thoroughly to remove hidden grit. Submerge in water with the tips pointing down, soak briefly, then swish vigorously and pull out of the water. The draining action helps pull the grit out of the asparagus tips. Repeat several times.
Storage: Asparagus is perishable, so eat it as soon as possible. Store it in the paper bag we packed it in, and wrap loosely in a plastic bag. The paper bag protects the asparagus tips from direct contact with the plastic bag. The plastic bag keeps the asparagus from wilting.
Preparation: We snap our asparagus at harvest, rather than cutting. Therefore, there is no need to snap the stalks to remove fibrous ends. For the same reason, it is not necessary to peel the asparagus stalks. It’s OK to trim the cut end a bit.
Cooking: If your asparagus stalks vary greatly in size, you will want to cook the thicker ones longer. Put an empty steamer pot over water, and bring the water to a boil. Add the asparagus. Cover and steam over medium heat until just tender. Use two forks or a spatula to turn the asparagus during cooking, rotating the bottom spears to the top. Drain and serve. Alternatively, you can lay spears flat in the bottom of a broad pan, with ½ inch of water. Also excellent broiled or grilled. Good dressed with vinaigrette, or with lime juice, salt and pepper.
German Butterball potatoes – Please refrigerate these potatoes. They are in great shape now but will sprout within days if stored at room temperature. They’ve been stored all winter and want to grow. Store in a paper bag to protect from light, even in the fridge. We grow everything we send in our CSA boxes except potatoes, some of the garlic, and mushrooms, all of which we buy from organic growers that we trust. We purchased these potatoes from Jesse Perkins at Vermont Valley Farm. German Butterballs are good all-around potatoes with outstanding flavor. This variety was the first place winner in Rodale’s Organic Gardening “Taste Off.” Best uses are roasted, boiled or fried. With the predicted weather this weekend, you might want to make potato salad! Jesse says the potatoes have a higher sugar content because of starch to sugar conversion during cold storage. The potatoes taste a bit sweet, and will blacken slightly when fried. It’s a harmless color change due to the sugar conversion.
Lettuce and spinach – Wash your greens to remove grit splashed into the heads by rain. Cut to the size you like, submerge in water, swish gently, then pull from the water and drain in a colander. Some weeks, you will need to repeat in fresh water.
Storage hint – To extend the storage life of your tender greens, wash them, dry in a salad spinner, then store in a dry container or bag. Lettuce and spinach last much longer when handled this way.
Bok choy (large rosette with thick white stems and green leaves) – This Asian green is good for stir-frying or sautéing or in soup. You can think of the stems and leaves as two separate vegetables. The stems require longer cooking. The leaves will cook almost as quickly as spinach. Bok choy stores well, so feel free to pull off leaves as you need them, or use the whole head at once. Refrigerate in a plastic bag.
Green garlic (looks like scallions, tastes like garlic) – Last fall, we planted garlic cloves that grew into the stalks we harvested this week. If left to grow until mid-summer, the slim white bulb on this week’s garlic will divide and form the usual cluster of cloves in a garlic bulb. This year’s green garlic is robust.
Preparation: Green garlic is more pungent than scallions, so slice thinly and use sparingly when raw. It mellows when cooked. Chop and add to any cooked dish that would benefit from garlic. Use the white bulbs and pale green stems. Avoid the dark green stems and leaves, as these are fibrous.
Rhubarb – Refrigerate in a plastic bag. FYI, 2 lb of rhubarb yields 6 – 6.5 cups when chopped.
Stewed rhubarb: This is the simplest way to prepare rhubarb. Chop rhubarb into one inch chunks. Stir over medium heat with a small amount of water in the bottom of the pan. The rhubarb will release moisture as it cooks. Stew until it softens and falls apart. Sweeten to taste with honey or sugar. Eat warm on its own, over vanilla ice cream, on pancakes, etc.
Recipes from chef Pat Mulvey at Local Thyme
Comforting Classics
Spinach Salad with Pan Seared Asparagus, Steamed Potatoes, Chickpeas and Oven Poached Egg
Pureed Potato and Asparagus Soup with Spinach
White Bean Stew with Potato and Bok Choy
Rhubarb Compote with Fresh Ricotta
Outside the Box Recipes
Grilled Pizza with Wilted Spinach and Shaved Asparagus
Saag Paneer
Rhubarb Glazed Bok Choy and Radish
Spatchcocked Chicken and Potatoes with Rhubarb Butter
Quick and Easy Recipe
Classic Warm Spinach Salad
Recipes from Lauren
BEEF & GREENS STIR FRY WITH RHUBARB SAUCE
Not many people realize that rhubarb is as amazing in savory dishes as it is in desserts. Just like citrus, rhubarb lends a complex acidity and sweetness to dishes. I love to use rhubarb in Asian style recipes with powerful flavors that can balance it (like toasted sesame oil and soy sauce). Whip up this dish for a quick weeknight meal and remember why you waited so long for fresh produce. Lauren.
Serves 4.
Takes 45 minutes.
1 large head Bok Choy
3 tablespoons toasted sesame oil, divided
2 tablespoons water, plus more as needed
1/2 pound spinach
2 cups rhubarb, diced
3 green garlic, minced
3 tablespoons soy sauce
2 tablespoons apple cider vinegar
2 tablespoons white sugar
1 tablespoon honey
1 teaspoon garlic powder
1/4 teaspoon red pepper flakes
1 pound raw flank steak, cut into strips
2 cups cooked rice
Toasted sesame seeds, optional
- If you don’t have cooked rice in the fridge, begin your rice according to package directions.
- Remove individual leaves from the bok choy and thoroughly wash. Thinly slice the stalks (like you would celery). Roughly chop the leaves and keep in a separate pile from the stalks.
- In a large wide saute pan, heat 1 tablespoon toasted sesame oil with 2 tablespoons water over medium heat. Add bok choy greens and spinach and toss with oil and water to coat. Cover pan and steam for 5 minutes until just wilted. Remove greens from pan with tongs and set aside. Leave juices in pan.
- Add 1 tablespoon toasted sesame oil, rhubarb, green garlic, soy sauce, white sugar, honey, garlic powder and red pepper flakes to the same pan you cooked greens in. Simmer gently (and reduce mixture) over medium heat for 10-15 minutes, adding a tablespoon or two of water if it gets too thick. Remove sauce to a small bowl and again, don’t wipe out your pan.
- Add last tablespoon of toasted sesame oil to the pan along with bok choy stalks and steak. Cook over medium high heat 5-7 minutes until meat is cooked through. Add sauce and greens back to pan. Stir to combine and cook for about a minute, just to warm. Serve over rice and garnish with sesame seeds, if using.
.
SPRING HASH
Ingredients adapted from Smitten Kitchen recipe
I have no shortage of amazing asparagus recipes in my repertoire but for some reason or another, I come back to this one every year. I love the combination of smoky bacon and fresh tender asparagus, but I also love the versatility and heartiness of this dish created by Smitten Kitchen. This time around I added green garlic and radishes. It’s a perfect place to hide radishes if you aren’t a huge fan. Cooked radishes don’t taste all that different from a potato and you’ll relish the slight spice and bite they bring. Enjoy! Lauren.
Serves 4 depending what you serve with it.
Takes 45 minutes.
1/2 pound bacon, cut into 1/4-inch dice
2 cups potatoes, cut into 1/2-inch dice
1 cup radishes, cut into 1/2-inch dice
2 green garlic, thinly sliced
0.90 – 1 lb asparagus, ends trimmed and cut into 1-inch pieces
Salt and Pepper to taste
- Heat a 12-inch cast iron skillet or other large frying pan over medium heat. Fry the bacon, turning it frequently so it browns and crisps evenly. This should take about 10 minutes. Remove it with a slotted spoon and drain on paper towels. Leave the heat on and the bacon grease in the pan.
- Add the potatoes and radishes and donít move them for a couple minutes. Use this time to season them well with salt and pepper. Once theyíve gotten a little brown underneath, begin flipping and turning them, then letting them cook again for a few minutes. The idea is not to fight them off the frying pan, once theyíve gotten a little color, itís easier to flip them and youíve gotten closer to your goal of getting them evenly browned.
- When the potatoes and radishes are as crisped and brown as youíd like them ó this takes about 20 minutes ó add the green garlic and asparagus. Stir to combine and then add a lid. (It doesnít have to fit perfectly). Cook for an additional 5-10 minutes (thin spears of asparagus will take closer to 5 minutes, thick spears will take a bit longer) until asparagus is softened. Remove the lid, return the bacon to the pan for another minute, to reheat. Taste for seasoning and adjust if needed.
- Serve immediately with a fried egg on top and maybe a small salad of lettuce and thinly sliced radishes on the side.
.
Spring news
- On: April 09, 2018
- 0
If you haven’t enrolled yet, we encourage you to sign up during the next two weeks. We need to know whether to plant for you!
– Returning Tipi CSA members, go here to enroll.
– New Tipi CSA members, go here to enroll.
CSA Updates (revised 4/14/18)
– We plan to delay our first CSA delivery by one week because of the cold spring weather. The plants have to grow! We’ll announce the delivery schedules during the first week of May. Watch for emails from us then.
– A few members have contacted me in search of someone to split a CSA share. If you are in the same situation, tell me your pickup site and I will try to match-make.
– Rebates for CSA share purchases are available to some people insured by the WEA Trust State Health Plan. The rebate is $100 for individual plans and $200 for family plans. Read more here.
Toasted Orzo Salad with Roasted Sweet Potatoes, Celeriac and Carrots

We are soooo close to our spring produce. Let’s enjoy the last of our lingering winter stash, and start thinking about spring recipes. Here is my current favorite winter recipe, which should adapt easily to spring or summer produce. Soon, I’ll try the dish with steamed asparagus and minced green garlic added to the lemon dressing. Olive oil is repeated multiple times in the ingredients list because it’s used in several steps. The rich fragrance of this dish comes from toasting the orzo and from the sumac spice. It’s worth hunting up sumac if you can find it. (I bought mine at Basics Coop in Janesville.) *Otherwise, substitute with paprika. Beth
Adapted from Food52.
Vegetables
1-1/2 lb sweet potatoes
1 medium celeriac
2 large carrots
olive oil
Dressing ingredients
4 tsp dijon mustard
4 Tbsp. lemon juice
1 clove garlic, minced
1/2 tsp salt
1/4 tsp pepper
4 Tbsp olive oil
1-2 medium shallots, minced
Pasta
2 cups orzo
1 Tbsp olive oil
Spices. Combine in a small bowl.
1 tsp oregano
1 tsp cumin
1 tsp sumac*
1 tsp sesame seeds, toasted and crushed
Toppings
3 – 4 oz feta cheese, crumbled
roasted cashews or your favorite nut
1. Heat the oven to 425o.
2. Peel the celeriac and carrots. Dice the sweet potatoes, celeriac and carrots into bite-sized pieces.
3. Oil a baking sheet (or two sheets). Keeping the vegetables separate by type, toss with olive oil and spread into a single layer.
4. Roast, turning once, until fork-tender and blackened in spots. The sweet potatoes will be ready in 20 – 25 minutes, the carrots and celeriac might take longer.
5. Make the dressing. Put the lemon juice, dijon mustard, garlic, salt and pepper in a pint jar. Mix with a fork, then add the oil in a slow stream and whisk to combine. Add the minced shallot. Set aside.
6. In one pot, bring 6-8 cups water to a boil. In a second pot, stir the dry orzo over medium heat until it is lightly browned and smells toasty. Turn off heat, wait 30 seconds, then add the boiling water. Watch out for steam! Be ready to stir! Turn the heat back on and cook until al dente. Drain, transfer to a mixing bowl and toss with 1 Tbsp. olive oil.
7. Sprinkle the spice mixture over the orzo and combine. Add the dressing and combine. Add the roasted veggies and mix gently. Transfer to bowls and top with feta and cashews.
Hints to speed the process
– Make the spice mixture in advance and store in a sealed jar.
– You can prep the dressing the morning of. The minced shallots pickle nicely in the dressing.
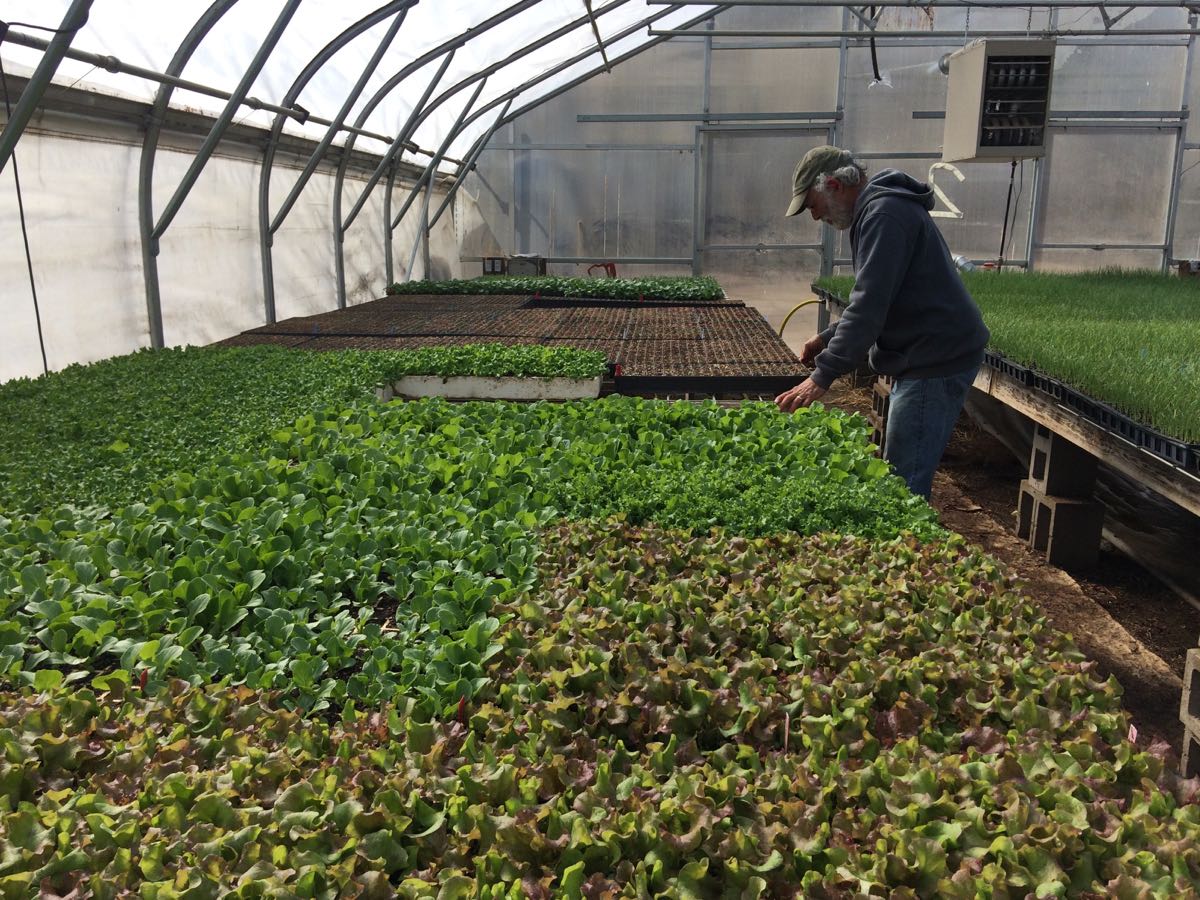
Farm News
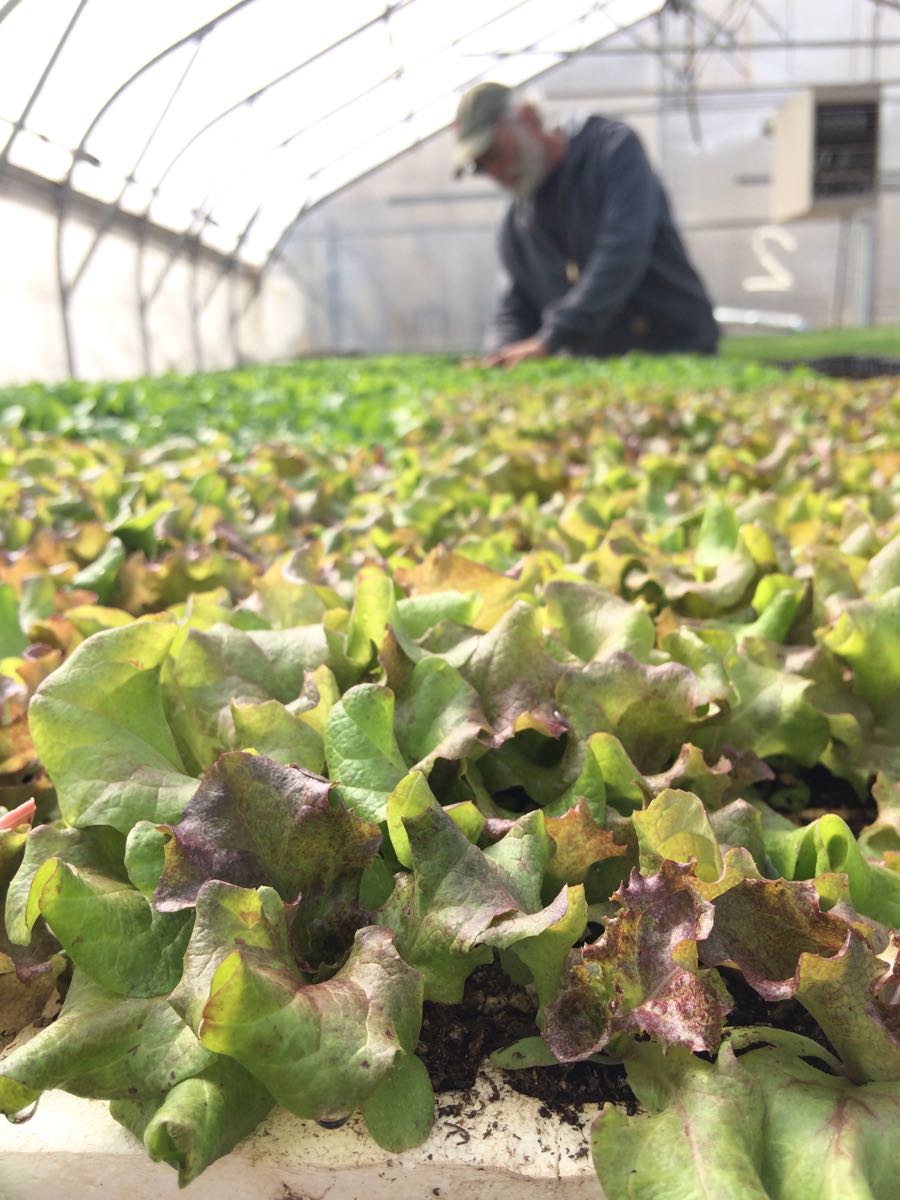
The sunny greenhouses are my favorite place. Above, Steve checks lettuce seedlings. In a normal year, we might have transplanted two weeks ago. Instead, we waited until the cold nights were over. We’ve experimented over the years with how much cold these early seedlings can handle. They are pretty resilient, and can tolerate temperatures down to about 20o if protected with floating row cover. The recent 11 and 14 degree nights were just too risky.
![]()
We transplanted lettuce, spinach, scallions and bok choy on Wednesday. The time was right; we needed to get the plants in the ground before this weekend’s rain. Everything is sheltered under row cover and will be fine, even if it snows. From left, Charlotte, Raul and Kristen feed lettuce seedlings into the transplanter. Maggie checks the planting depth. Steve comes to see how the job is progressing. Wow, it felt great to get so many plants in the ground.
![]()
From left, Simone, Kerry and Maggie move pepper seedlings into larger pots.
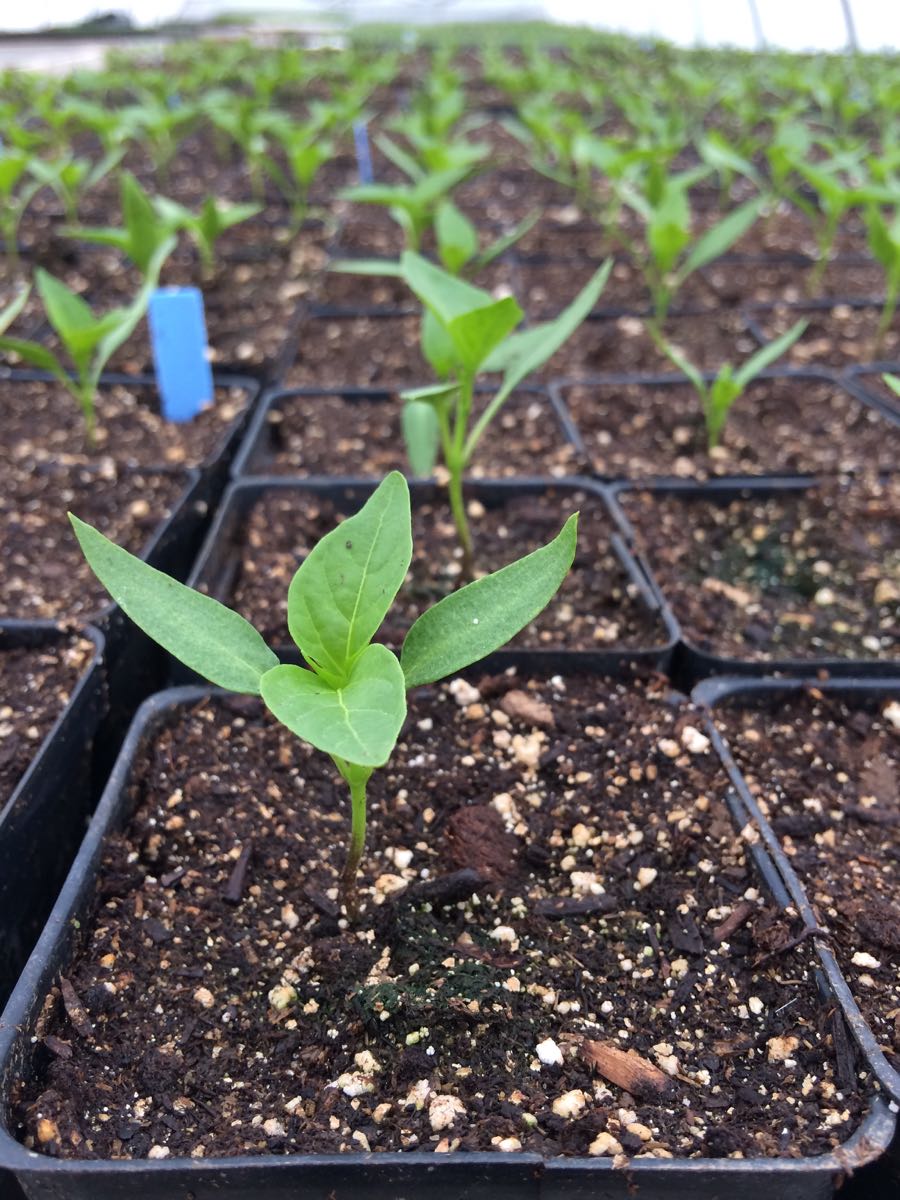
We’re raising an army of bell peppers. Chiles and Italian peppers get planted this coming week.
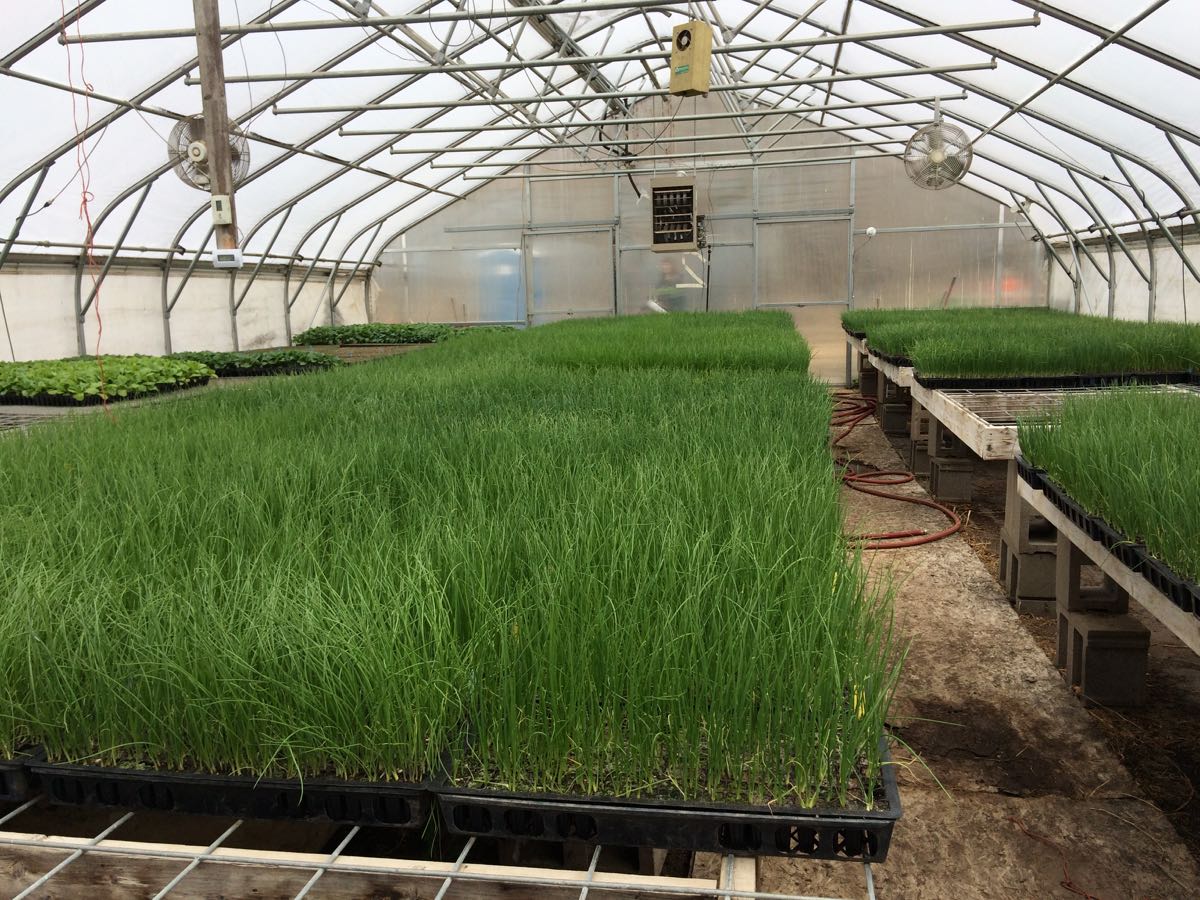
Lush, beautiful onion seedlings.
Steve planted cold-hardy spinach, radishes, arugula and sweet salad turnips outside weeks ago. The seedlings have slowly emerged. They are covered with floating row cover for protection and to warm the soil on sunny days.

I am apprenticing with the local Prairie Enthusiasts to learn fire management. It is both fascinating and scary. Healthy caution is a good idea, right?? We are raising prairie plants from seed I collected with the Enthusiasts last summer. The seedlings will go into our expanding habitat to support pollinators and beneficial insects. I love this project. Beth
Online forum to share cooking ideas?
- On: January 28, 2018
- 0
Let’s brainstorm. Many of you have expressed interest in how other Tipi CSA members use their CSA produce. (This has come up in the end-of-season survey for several years.) Members often devise recipe or cooking ideas that never occurred to me when planning the CSA box! Let’s share that creativity through an online forum where you can exchange ideas.
Help me choose the best platform to use on a weekly basis. I’ll post the box contents list (and maybe a photo), then you share your cooking plans or successes. Honestly, this needs to be community-based without too much input from me. I get so busy during the farming season.
What’s the best approach? A Facebook group (public? closed?)? Instagram? Something else I don’t know about? Is the comments section of our farm newsletter too out-of-the-way? We should choose a platform that people are already visiting. Posts to our Facebook page (i.e. not to a Facebook group) won’t work because of new algorithm changes at Facebook.
Send me an email if you have ideas or advice, or share in the comments section below. Thank you in advance. Beth
Storage Share, Nov. 16/17, 2017
- On: November 15, 2017
- 0
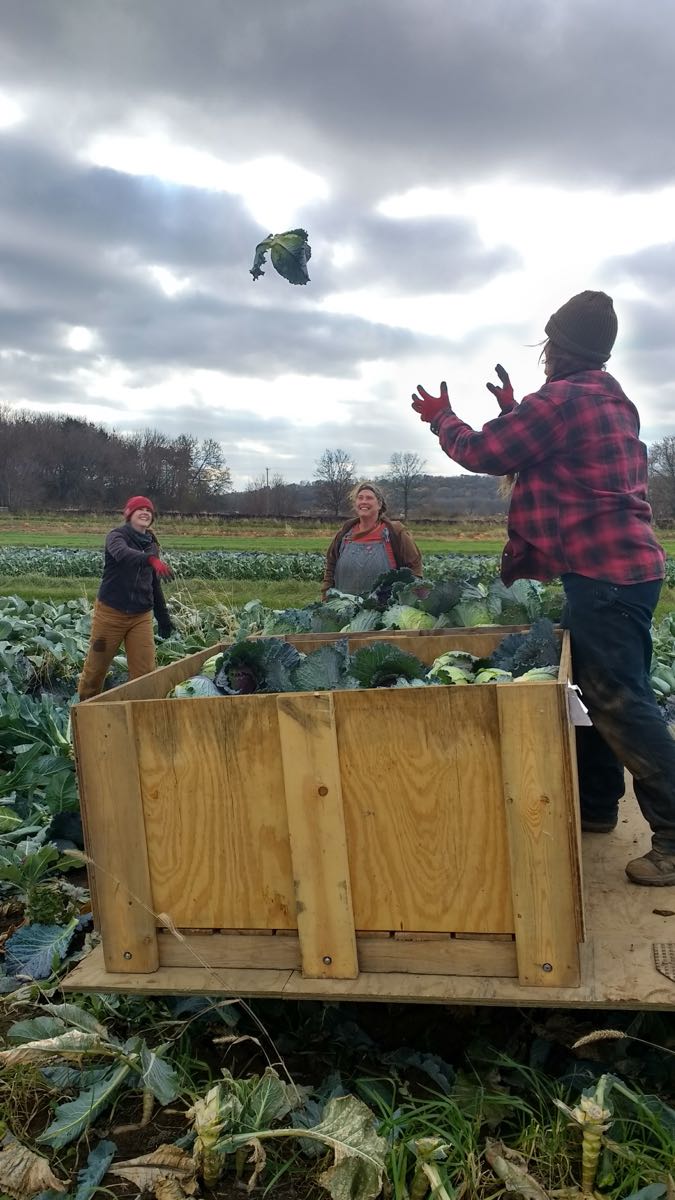
Cabbage in flight, on its way to you.
We are tantalizingly close to the end of our season. The cold spell last week hurried us along. 13 degrees! That will do some damage. With that deadline, we pulled in all but the hardiest crops. Cabbage, celeriac, even leeks can get damaged at 13o. We are still harvesting carrots. Protected in warm-enough soil, they survived the brief cold night without trouble.
Instead, trouble came as broken machinery. Our complex carrot harvester broke down unexpectedly. This is the machine we imported from Europe a few years ago. It’s a terrific harvester but largely unknown in the USA. We had to get a replacement part flown in from Germany, routed through the North American dealer in Canada. It took over a week to travel here and clear customs. Oh, this has been a tense week. As our kids say “The intensity intensifies!”
We pulled out our trusty older carrot harvester but it’s slower and requires a much bigger crew for harvest. Plus it’s more demanding physically for all of us. The replacement part arrived this morning and we got the big harvester back in the field by midmorning. If the weather holds through Friday, we will finish every field, leaving our coolers stuffed to the gills. Wish us luck.
We are ready to wrap up this season. Then we’ll enjoy the winter, with lots of cooking and ice skating and maybe even a vacation before we start plotting next year. Have a wonderful Thanksgiving! Beth & Steve
Storage Share this week
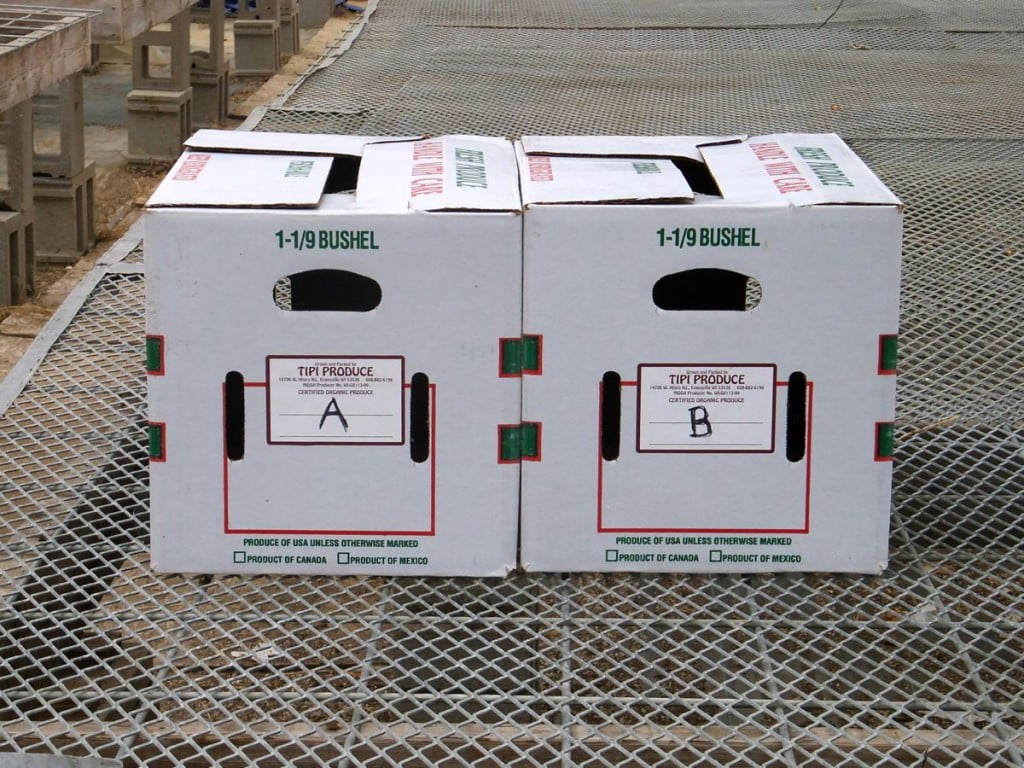
Take one box labelled “A” and one box labelled “B”.
Things you need to know about your winter share
* Your delivery will consist of two different boxes, labeled “A” and “B”. Take one “A” box and one “B” box. The boxes contain different vegetables.
* Please pick up your boxes on the day of delivery, during the normal hours for your site.
* Outpost members, please get your boxes on Friday. This is the busiest weekend of the year for the Outpost staff, so we cannot ask them to hold boxes past Friday.
* Members at outdoor sites, please carefully put the blankets back on the boxes. That keeps everyone’s produce in good shape.
* The boxes are heavy! It’s OK to take home the packed boxes, then return the empty boxes to your pickup site within two weeks. We’ll swing back and pick them up.
Veggie List and Storage Info (Storage share, Nov. 16/17, 2017)
We hope you enjoy this shipment of veggies. Strategize to use them well, as some will last longer than others.
* These are the most perishable vegetables: green cauliflower, fennel, Romanesco.
* These are the next-most perishable: Brussels sprouts, cabbage, leeks and onions. Keep an eye on your butternut, potatoes and sweet potatoes. The last two are susceptible to drying out. Expect the largest butternuts to last the longest.
* These will last the longest: Beauty Heart radish, beets, carrots, celeriac, garlic, parsnips, shallots.
Box “A”
Refrigerate everything in this box.
Beauty Heart winter radishes, 1 or 2
Brussels sprouts, on stalk(s)
Carrots, 6 lb total
….. orange ~4.5 lb
….. yellow ~1.5 lb
Celeriac, 1
Fennel, 1 fat bulb
Green cabbage
Green cauliflower, 1 very small
Leeks, ~3 lb
Parsnips, 3 lb
Romanesco cauliflower, ~2
Box “B”
The beets need refrigeration. Everything else in this box can be stored cool or at room temperature. See notes below for more detail.
Beets, 3 lb
Butternut squash, ~4
Potatoes, russet, 5 lb
Potatoes, Satina, 5 lb
Sweet potatoes, ~10 lb
Onions, 5 lb total
….. ~1 lb red
….. ~4 lb yellow
Shallots, 3
Garlic, 3
Beauty Heart radishes (round, white with pale green shoulders and bright pink interior) – Refrigerate. The interior color is lovely. Slice thinly and add to salads, cook lightly in mixed vegetable medleys or cut into matchsticks and add to pasta salads. We enjoy grated carrot and Beauty Heart salads all winter.
Beets – Refrigerate in a bag or container. Beets will store for two months or longer.
Brussels sprouts – Pluck from stalks and refrigerate in a bag or container. Do this the day you pick up your CSA boxes. Eat within 2 to 3 weeks.
Butternut winter squash – You will receive up to four butternuts, depending on size. Store your butternut in a cool, dry place. 50 F is ideal. Do not put in a plastic bag. Expect the largest butternuts to store the longest. Inspect your squash frequently and cook promptly if you see any soft spots developing. You can cook, mash and freeze the squash for future use. I find that you can refrigerate cut raw squash for up to one week. This runs counter to the accepted way to store squash, but is useful if you want to cook just half a squash. Try microwaving your squash for one to two minutes before cutting or peeling. This softens the squash and makes a large butternut easier to handle.
Cabbage – Refrigerate. Cut off chunks as needed.
Cauliflower, green – Refrigerate in a bag or container.
Carrots, orange. Refrigerate in a plastic bag. Will keep for several weeks.
Carrots, yellow. This variety is pretty AND they taste good.
Celeriac – Will store for months in your fridge. Cut off chunks as needed. Peel before using. I find it easiest to cut the celeriac into flat slices, then peel.
Garlic. Can be stored at room temperature.
Leeks. Refrigerate and eat within three weeks. Leeks are not a long-storage crop. You may need to strip off one or two outer leaves to freshen the leeks before you cook them. Your leeks will probably need washing. We finished preparing them after dark and didn’t realize how much soil was still on them.
Onions: Refrigerate or store in a cool, dark spot and protect from light. Exposure to light stimulates sprouting.
Parsnips (These look like large white carrots.) – Refrigerate in a plastic bag. Parsnips will store for two months but will darken in color. That is a harmless change.
Potatoes, Russets and Satinas – Can be stored at room temperature or in a cool spot, but must be kept in the dark so they do not turn green. A cloth or loose plastic bag draped over the paper bag will help avoid moisture loss, but do not close the plastic bag. Both types will store longer if kept cool. Around 40 – 50 F is ideal. The potatoes were grown by the Igl family near Antigo.
Russets– We got the big ‘baking’ grade so you have nice bakers for Thanksgiving. Excellent for mashed potatoes.
Satinas– These are good all-purpose potatoes, everything from roasted to potato salad. I really like this variety of yellow potato because they oven-roast so well and because they are less sweet than other yellow varieties like Yukon Golds.
Shallots – These look like small red onions, often with internal divisions into several bulbs. They can be round or oblong. Store at room temperature. This is the first time we’ve grown shallots! They seemed like a fun thing to try and have turned out nicely. Honestly, I am a novice with shallots but from what I’ve read (and eaten at restaurants) they are good in salad dressing, and caramelized and used to top dishes or sandwiches. We split some in half and roasted them with other veggies in a hot oven. They turned out mild and sweet, very nice.
Sweet potatoes – These are a mix of the Covington and Beauregard varieties. Both types have developed excellent flavor and sweetness. Some tubers have dark skins, the result of soil staining during wet weather. It’s unsightly but superficial and harmless. Store at room temperature, no lower than 55 F. Keep them on your kitchen counter where it’s easy to keep an eye on them. I like to keep ours in a paper bag so they don’t dehydrate. Cook promptly if they start to soften. The roots come in a wide ranges of sizes and all are good.
What are you cooking for Thanksgiving?
We are creatures of habit when it comes to Thanksgiving. Here are our plans so far: brined roast heritage turkey from our friends Jen and Bryce Riemer (Beth), Brussels sprouts with garlic-mustard vinaigrette (Steve), roasted sweet potatoes with garlicky yogurt dip (Sophie), glazed butternut squash (Beth), crunchy carrot-Beauty Heart salad with sesame-seed dressing (Steve), pickled onions (Beth & Ari), pickles (Beth & Ari), homemade applesauce (Ari), and apple pie (Sophie). I’ll probably make stuffing with lots of celeriac and onions but that might be overkill. We love celebrating Thanksgiving and the end of harvest season!
Menu Ideas
There are many terrific Thanksgiving menus and recipes online right now. Search any of the sites below if you are stumped about what to do with your storage share. Check out the online Thanksgiving collections soon; they get taken down quickly after the holiday.
♦ I like the lively Food52.com site. It’s a curated community site so judge a recipe’s rating and read the comments. Start at their Thanksgiving page and settle in. I want to read and cook everything on this site! Here’s a tiny subset of their current articles and recipes.
….. Thanksgiving Menu Maker
….. Freezer-Friendly Thanksgiving Dishes For the Ultra-Prepared
….. Make room for Spicy Raspberry Relish
….. The Genius Fix for Broken Gravy
….. 22 Pack-and-Go Thanksgiving Recipes
….. etc, etc.
♦ Smitten Kitchen is our go-to site for dessert recipes but has excellent veggie recipes too. Plus blogger Deb Perelman is funny. She has not posted a Thanksgiving menu yet but her recipes from last year are still accessible.
….. Thanksgiving recipe list
….. Last year, she was all about Team Casserole.
♦ 101cookbooks. Always has good vegetarian and whole-grain recipes.
♦ The New York Times has changed access to their Cooking app. They now require a paid subscription, although there appears to be occasional free access. This year, they’ve posted how to cook an entire Thanksgiving feast in a 400 degree oven, a very thorough Thanksgiving Menu Planner and many holiday-themed recipe collections, such as “Our 21 Most Popular Thanksgiving Pies“, “What to Bring to a Thanksgiving Potluck“, “Thanksgiving Casseroles” and more. If you can access it, start at their Thanksgiving 2017 page. In my opinion, Melissa Clark is the best NYT food writer. She’s practical and her dishes are always flavorful. David Tanis is my second-favorite. Recipes from Mark Bittman and Martha Rose Shulman are always worth a look.
♦ Finally, remember that we can use Local Thyme recipes all winter. Check them out for Thanksgiving ideas. Send me an email is you need the registration information.
Do you have favorite menu sites for fall and winter recipes?
If so, please share in a comment!
RECIPES FROM LAUREN
SHEET PAN CHICKEN WITH ROAST VEGETABLES
Recipe adapted from Food 52
I love the ease of this recipe. It uses one baking sheet and and a couple large bowls and comes together effortlessly while you do the dishes or tidy up. Honestly, the hardest part will be slicing the cabbage and fennel! If you feel like getting a second sheet pan dirty, throw some extra roast veggies on there and stock up on roasted veggies for the whole week! Carrots, sweet potatoes, parsnips, celeriac, potatoes and/or butternut squash would all go well with this tasty meal. Lauren.
Serves 6-8
Takes 1 hour
1 tablespoon toasted sesame oil
1/4 cup olive oil + more for drizzling
3 tablespoons soy sauce
1 tablespoon rice vinegar
1 tablespoon sriracha, optional
Kosher salt
Freshly ground black pepper
8 pieces chicken, bone-in, skin-on chicken thighs or drumsticks (or a mix)
1/2 head cabbage
1 head garlic, separated and peeled
1 large fennel bulb, cored and cut into 1-inch wedges
3 leeks, white and pale green parts only, cut int 1-inch thick slices
- Preheat the oven to 425 degrees.
- In a large bowl combine oils, soy sauce, vinegar and sriracha. Place chicken in a second large bowl. Sprinkle generously with salt and pepper. Pour 1/4 cup of the oil mixture over the chicken and let is marinade while the oven preheats.
- Cut the cabbage in half through it’s core. Set half aside for later use. Cut half you are using through to core again and keep slicing until you wind up with many wedges (all no thicker than 1-inch). Add cabbage to first large bowl (with remaining sauce not chicken) along with peeled garlic cloves, fennel, and leeks. Season with a bit of salt and pepper.
- Drizzle baking sheet with olive oil and add chicken. Spread it out evenly so not crowded and roast for 10 minutes. Remove pan from oven and nestle chicken with vegetables– tucking it under if necessary. It will feel like a lot. That’s fine! Roast for 25 minutes longer. Remove pan from oven and transfer chicken to a platter to rest. Also remove garlic if it seems to be beginning to brown at all (will depend on the size of your cloves). Continue roasting veggies for 10-15 minutes until juices have reduced and edges of veggies have caramelized ever so slightly.
- Serve veggies and chicken together with any residual sauce. Season with salt and pepper as desired.
.
JAPANESE VEGETABLE PANCAKES (OKONOMIYAKI)
Adapted from Smitten Kitchen
There is a chance that some people won’t get as excited about vegetable pancakes as me, but I swear I could eat them every single dang day. They are the perfect combination of crunchy, hearty, healthy, fresh and fried. They can be a side of a meal or a whole meal and despite all the chopping that goes into them, come together rather quickly. If you have a mandolin, this is a great time to use it.
And again, the recipe is pretty flexible. Feel free to swap in any other root veggies (in similar quantities) for the sweet potato, carrots and parsnip. Lauren.
Takes 45 minutes
Serves 4-6 (more if it’s a side dish)
1 pound Brussels sprouts, ends trimmed and very thinly sliced (you will want about 4 cups sliced sprouts)
1 medium sweet potato, peeled and julienned (about 4 cups)
2-3 carrots, peeled and julienned (about 3 cups)
1 parsnip, peeled and julienned (about 1 cup)
1 shallot, peeled and very thinly sliced
1 teaspoon Kosher salt
2/3 cup flour
4 large eggs
Vegetable oil
- In a large bowl combine Brussels sprouts, sweet potato, carrots, parsnip and shallots. Sprinkle with salt followed by flour and stir until flour coats vegetables. Stir in the eggs until mostly smooth.
- Heat a heavy large skillet over medium high heat. Coat the bottom with oil and warm until hot but not smoking. Drop 1/4 cup spoonfuls into the pan (about 4-5) so they do not crowd. Gently press the pancake down until almost flat. Cook until the edges begin to brown, about 3 minutes and then flip. Cook for 1-2 minutes until other side browns. Remove to paper towel to drain grease.
- Add more oil in between batches and continue cooking until no more batter remains. Feel free to keep the first ones warm and crisp in a 250-degree oven while you cook the rest.
- Serve warm with tangy ketchup (below), spicy mayo or other favorite Asian dipping sauce.
.
Tangy Ketchup
1/2 cup ketchup
2 tablespoons rice wine vinegar
2 tablespoons honey or maple syrup
1 tablespoon Worcestershire sauce
2 teaspoons soy sauce
1 teaspoon Dijon mustard
1/4 teaspoon ground ginger
Combine all sauce ingredients in a small saucepan and simmer until smooth and thick, about 3-5 minutes.
Extension share; Nov 2, 2017
- On: November 01, 2017
- 0
Carrot Team
We are hurrying our storage crops from the fields to the coolers. This week, we brought in the final parsnips and daikon, plus carrots and cabbage. We hope to finish the carrot and cabbage harvests next week but the work could continue into the following week.
It takes a team to bring in the carrot harvests.

Steve drives the root harvester. We imported this implement from Sweden two years ago. Steve appreciates what this machine can do, and continues to tinker and improve it.
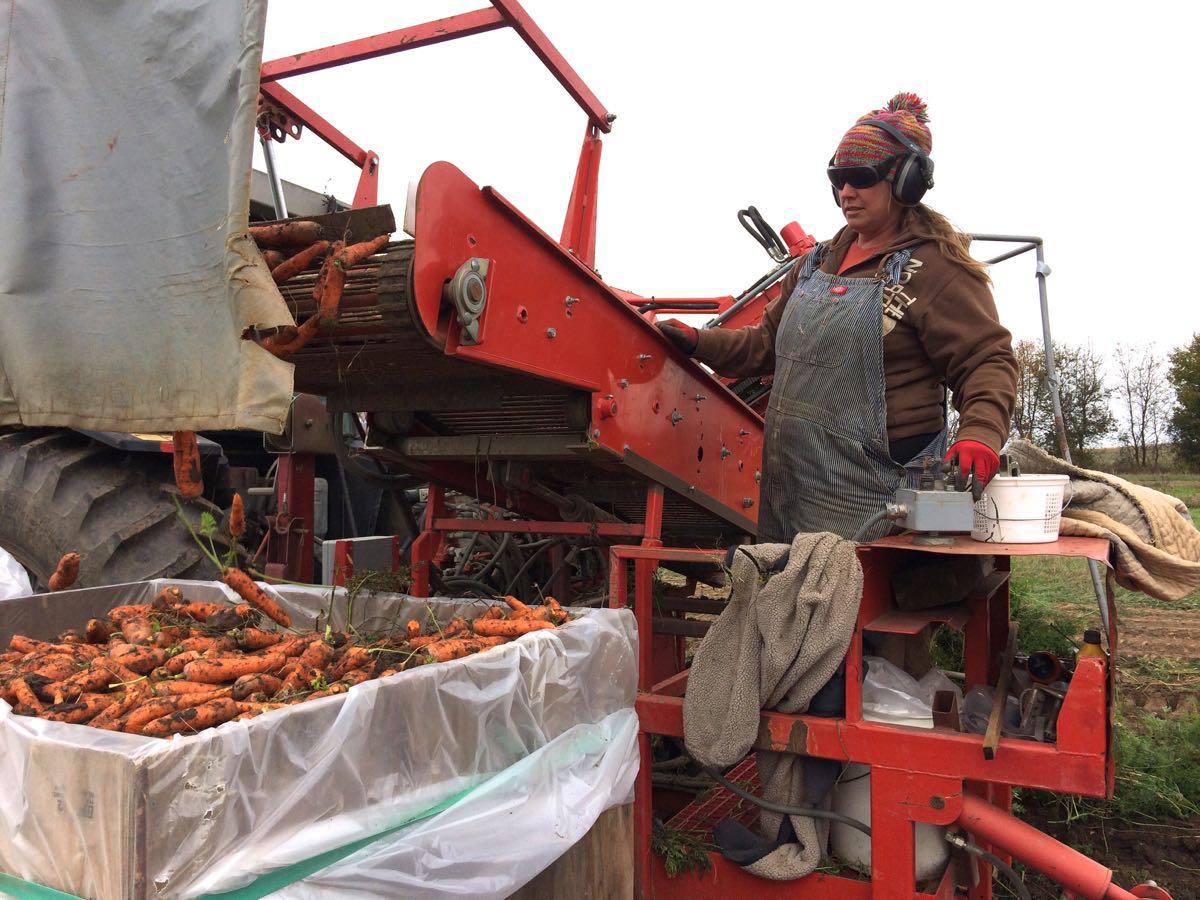
Maggie controls the harvester from the back platform. With the controls at her left hand, she distributes the carrots into a bin. Once the bin is full, she’ll send it down a ramp to the ground.
Charlotte and Kristen pick up carrots dropped by the harvester. They are too valuable to leave behind.
Matt picks up filled bins with the front end loader and places them on a wagon for transport back to the farmstead.

A wagon o’ carrots, plus parsnips at the front.

We cover the bins and tuck them in our cooler. We’ll wash the carrots and other roots all winter long, providing food for our customers and work for our longterm employees.
VEGGIE LIST and VEGGIE NOTES
Extension Share, 1 delivery, Nov 2/3, 2017)
Beth’s box logic:
(i) You can roast almost everything in this box. See Lauren’s recipe for roasting and sauce ideas. We routinely roast carrots, parsnips, and onions together. They cook at the same rate. Sweet potatoes get sliced, oiled, and roasted on their own sheet, because they cook more quickly. Even Brussels sprouts and Romanesco can be pan-roasted in the oven. We bought a convection oven a few years ago, and find the convection speeds roasting and evens the results.
(ii) We send the Beauty Heart radishes in combination with carrots because they make lovely, mixed salads, like Lauren’s Beauty Heart Radish, Carrot & Avocado Salad from last year.
Sweet potatoes, ~2 lb
Butternut squash
Brussels sprouts, ~1 lb
Romanesco, 1 head
Broccoli, 1 head
Carrots, 2 lb
Parsnips, 1.5 lb
Beauty Heart radish, 1 or 2
Yellow onion
Leek, 1 large
Jalapeno chile
Beauty Heart radishes (round, white with pale green shoulders and bright pink interior) – Refrigerate. The interior color is lovely. Slice thinly and add to salads, cook lightly in mixed vegetable medleys or cut into matchsticks and add to pasta salads.
RECIPE LOG
Visit our Recipe Log, a list of all our 2017 recipes. Look for Brussels sprout recipes in the past two weeks (Oct 19, Oct 26)
LOCAL THYME RECIPES
Comforting Classics
Squash Chickpea Curry with Parsnips and Romanesco
Vegan Miso Soup with Winter Squash
Mashed Carrots, Parsnips and Sweet Potatoes
Sweet Potato Posole with Black Beans
Outside the Box Recipes
Steamed Romanesco with Mustard Butter
Roasted Vegetables with Goat Cheese Crostini and Pumpkinseed Oil
Black Pepper Tagliatelle with Parsnips and Pancetta
Elbows with Sweet Potato, Capers and Parsley
Quick and Easy Meal
Hazelnut Butter Sandwich with Beauty Heart Radish
RECIPES FROM LAUREN
ROASTED FALL VEGGIES with TURMERIC TAHINI SAUCE
Adapted from Dishing Up The Dirt
Something about fall abundance just has me cooking in huge batches to prepare for the cold days ahead. I love roasting up tray after tray of veggie on Sundays, sticking them in my fridge and using them as a base all week long. These veggies are great on their own or you can turn them into a meal with some baked fish, grilled steak or a pile of wild rice. Lauren
Beth’s note: I love the sound of this tahini sauce. We roast vegetables every week through the winter. As Lauren points out, they make versatile leftovers. Our go-to sauces are sriracho mixed with mayo, or yogurt seasoned with salt, garlic, smoked paprika, and good olive oil.
Takes 1 hour
Serves 8
4 cups peeled and chopped sweet potato
2 cups peeled and chopped parsnips
2 cups chopped carrots
1 pound Brussels sprouts, ends trimmed and halved
1 head broccoli or romanesco, cut into bite-size florets
6 tablespoons olive oil
2 teaspoons Kosher salt
1 teaspoon dried thyme
1/2 teaspoon freshly ground black pepper
1/4 teaspoon cayenne powder
1 watermelon radish, thinly sliced
Turmeric Tahini Sauce
1 cup tahini
1/4 cup rice wine vinegar
1/4 cup soy sauce (or tamari)
2 tablespoons peeled and freshly grated ginger
2 teaspoons dried turmeric (unless you can get your hands on some fresh stuff– then use 2 tablespoons freshly grated)
1 tablespoon maple syrup
3/4 cup water, plus more if needed
- Preheat oven to 400 degrees.
- In a huge bowl, combine sweet potatoes, parsnips, carrots, brussels sprouts, and broccoli or romanesco with oil, salt, thyme, pepper and cayenne. Stir until everything is evenly coated with oil and spices. Pour out onto three baking sheets or roasting pans. (If you don’t have a huge bowl, just combine all ingredients on baking sheets as evenly as you can.)
- Roast for 40-45 minutes or until veggies are tender and beginning to brown in places. Halfway through roasting, make sure to turn veggies and rotate pans for more even cooking.
- While the veggies roast, prepare your sauce by combining all ingredients in a food processor and pulsing to combine. If you don’t have a food processor, you can absolutely just whisk all ingredients together in a medium bowl (it’s just easier to break up the tahini with a food processor). If the mixture looks too thick, add more water. If it’s too thin, add a bit more tahini. Taste and adjust seasonings as desired. More syrup for sweetness. More vinegar to brighten it up. More soy sauce if you think it needs more salt.
- Serve veggies warm with a generous amount of sauce drizzled over them. Garnish with radish slices.
.
CURRIED BUTTERNUT SQUASH SOUP
Adapted from Minimalist Baker
This soup just feels like fall. I love it on a cold night buried in blankets on the couch. Soup is always warming, but the creamy coconut milk and soothing curry and cinnamon spices really boost the coziness factor. Add the garnishes if you’re feeling fancy but don’t worry if you’d rather skip them. The soup very much stands up well on its own. Lauren
Serves 4-6
Takes 40 minutes
2 tablespoons butter (or coconut oil if vegan)
1 yellow onion, peeled and diced
1 leek, white and pale green parts only, peeled and diced
1 jalapeno, seeded and diced
6 cups butternut squash, peeled and diced
2 tablespoons favorite curry powder
1/2 teaspoon Kosher salt
1/4 teaspoon freshly ground black pepper
1/4 teaspoon ground cinnamon
2 cups water.
2 cups chicken or vegetable broth
1 can coconut milk (I always use full-fat but you can also use low-fat)
2 tablespoons maple syrup
Greek yogurt, optional
Sriracha, optional
Toasted pepitas, optional
- In a large stock pot, melt butter over medium heat. Add onion, leek and jalapeno. Saute for about 10 minutes until veggies are very tender and fragrant.
- Add squash and spices. Stir to combine well. Cover and cook for 5 minutes, stirring occasionally. If spices begin to stick to the bottom of the pot, just add a cup of water early.
- Add remaining water, broth, coconut milk and maple syrup. Bring mixture to a boil, reduce to a simmer and cook for 15 minutes until squash is tender.
- Let soup cool for a few minutes then puree with an immersion blender. Taste and adjust seasonings as desired. If it’s too thick, add a bit of water.
- Serve warm with optional garnishes of yogurt, sriracha and pepitas.
.
Good bye!; Oct 26 2017
- On: October 25, 2017
- 0
This is the last delivery for our May-October CSA shares. Thank you, thank you, thank you for being members of our farm. We truly appreciate your commitment to our CSA. We could not farm without you. We hope you enjoyed the adventure.
Many of you registered for continued deliveries with our Extension and Storage shares. We will be in touch with more information as those deliveries approach.
We will open registration for our 2018 season by early December. Watch for emails from us. In the meantime, you can continue eating our produce through the winter. Our stored cabbage, carrots and other roots will be on the shelves at these stores: Willy Street Coop (Madison, Middleton), Outpost Natural Foods (Mequon and Milwaukee area), Basics Coop (Janesville), Whole Foods (Madison only, with deliveries beginning soon), Good Harvest Market (Pewaukee), and Health Hut (Brookfield).
Love,
Beth and Steve
Best year ever (maybe). Highs and lows
This is a good moment to evaluate the season. I think the title above says it all. 2017 was a terrific season for us. With a few exceptions, the crops were abundant. Even the weather wasn’t too bad. The ‘maybe’ in the title simply indicates that our work is not finished yet. Our big storage harvests stretch over the next few weeks. We have a lot of good-looking crops in the field and hope to have our coolers stuffed full by Thanksgiving. Keep your fingers crossed for dry weather.
We sat down with the crew to brainstorm the highs and lows of this season.
HIGH – Best crew ever. Most of our 22 farmhands and managers were returning employees, and our three new hires brought a combined 50+ years experience in growing vegetables. Wow. Together, this crew has deep, deep knowledge of vegetables. Having so much experience on the farm took the pressure off Steve and me, allowing us to relax a bit and enjoy our work in a new way.
HIGH – Steve was healthy, pain-free and energetic this year. He spent the 2016 season in pain from a bicycle mishap, and limited in the energy he could muster for farming. He began working with a new physical therapist this past winter with amazing results. She showed him new techniques like “nerve flossing” that sped his recovery. He feels like a new man.
HIGH – I love our new experimental prairie planting. It was a fascinating new hobby and I did not even realize how much I need a hobby. Nevermind that it involves plants and field prep and transplanting, it still counts as a hobby.
HIGH – As mentioned above, most of our crops grew very well this year. The moderate weather helped. Even during the mid-summer rainy spell, most of the rain came at night, making work easier and more pleasant for all of us. A dry start to the summer plus dry fall weather kept crop diseases in check. Usually a whole bunch of different crop diseases explode in fall. Not this year. As a result, our fall brassica crops have been amazing! We’ve never had this much broccoli and cauliflower to share in the CSA boxes.
LOW – Unfortunately, a troubling new disease appeared during that mid-summer rainy spell. For years I’ve told Steve “If we can get through our farming careers without Phytophthora capsici (Pcap) showing up, I’ll be happy.” Well, Pcap showed up this year, wiping out entire melon fields and eliminating all the late melons we planted for you. That was painful. I have photographs of those fields but I am not going to share them with you. This is a family-friendly newsletter and the photos are like a snuff film.
LOW – Pcap also damaged about a third of our peppers. Our pepper crew wore uncomfortable plastic booties over their shoes for months to confine Pcap to the infected fields. That was a low for all involved.
HIGH/LOW – Daily use of the word “bootie” inspired one crew member to endless baudy jokes.
HIGH – There was a shining moment when six of our farm pickup trucks were working. That’s extraordinary. Of course, it only lasted one day before one of them broke. We use a combination of tractors and wagons plus pickup trucks for our harvests, giving each field team something for transport. The number of operating pickups directly affects our collective quality of life. Life is good when the pickups are running.
LOW – There was a dispiriting day when only one pickup was operating.
LOW – One day, a door suddenly fell off one of the pickups! The crew managed to realign it and lock it in place. We haven’t opened that door again. Fixing it is a winter project.
HIGH – The 2nd staked tomato field and the 3rd kale plantings were genuine high points. Those two fields just kept on giving.
HIGH – A garter snake took up permanent residence in one of the zucchini fields, appearing reliably during each zucchini harvest.
LOW – The garter snake always showed up in the row worked by the crew member who is terrified of snakes.
HIGH/LOW – One time, the crew found a garter snake with a toad in its mouth. The toad was still alive, feebly gasping and waving its arms. That’s the stuff of legends or nightmares or at least persistent farm memories.
HIGH – Poblano chiles. Wow, they were abundant this year. That’s why we could pack them in the boxes two times.
HIGH – Best farm lunches ever! A woman in Madison cooks lunch for our crew two days per week. She has cooked for us for years but was on a roll this year, with creative, abundant dishes. Thank you Gen!
HIGH – Finger weeders! Steve set up finger weeders, a new type of cultivating tool that does an amazing job. We weeded quite a few fields just by tractor, with no follow-up hand weeding, saving so much effort.
HIGH – Due to the finger weeders, we had beautiful, weed-free cabbage fields situated near the buildings where we could look at them every day. Ah, so nice.
LOW – Lake Tipi. Somehow, we ended up with an enormous, truck-devouring pothole. We have got to fix that.
That’s all I’m going to share. The crew had many more ideas but their highs and lows were getting pretty obscure (“Remember the time Billy caught a corndog in his mouth when you threw it from the porch?”, etc., etc.) You don’t need to hear these things! Thank you again for being Tipi-people this year. Beth.
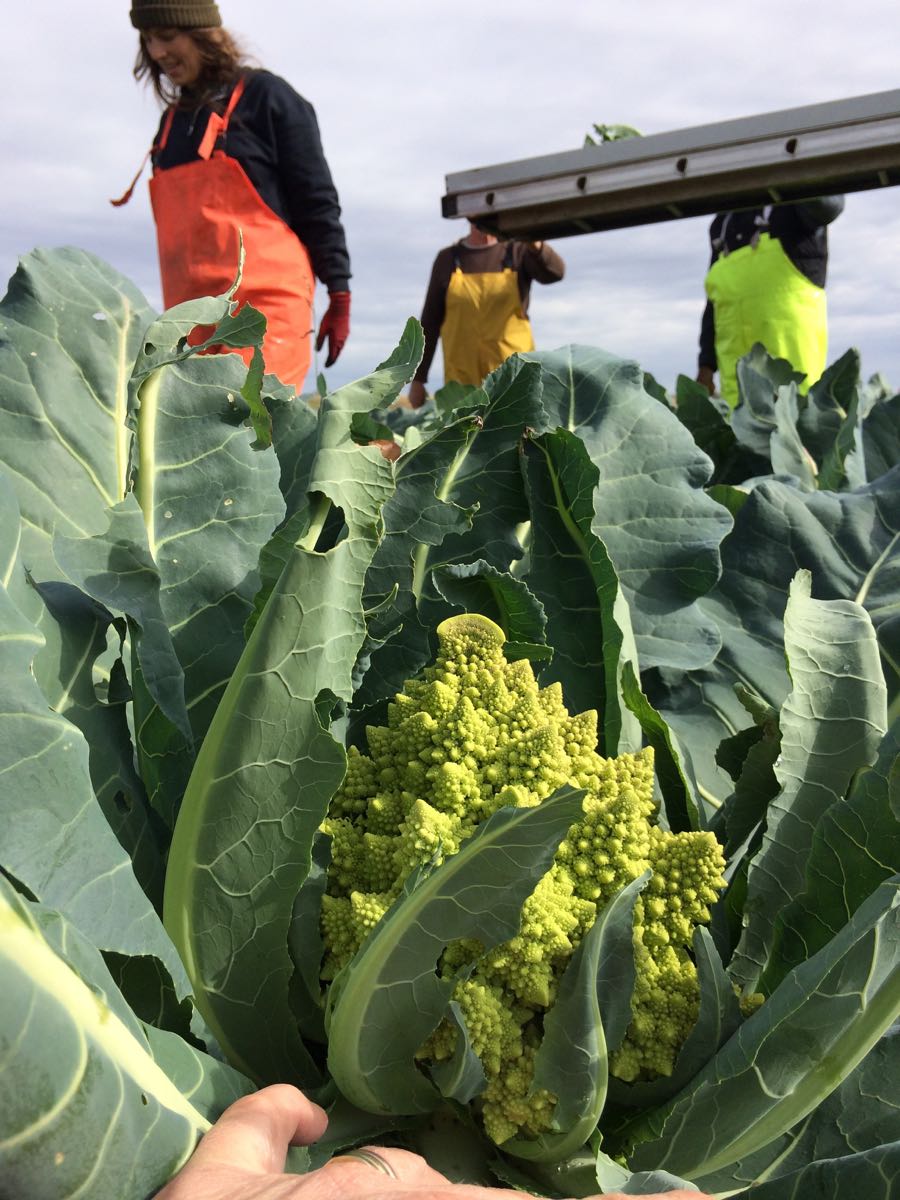
Fractally beautiful Romanesco at harvest. That’s Charlotte in the background.

It’s likely to frost tonight, so we stripped the pepper field of the last peppers. Above, Raul and Jory bring in the harvest. Look at Jory’s feet – you can just see his boot covers behind the basket. The valiant pepper crew wore boot covers for months to avoid spreading a new disease beyond the infected fields. A big thanks to Simone, Jim, Raul and Jory for making the effort. We know it was uncomfortable.

We’re preparing for our big, big carrot harvests. The wooden bins are repaired and ready to go. Steve’s worked over the carrot harvester. We have someone coming tomorrow to do preventative maintenance on our storage coolers. Carrot and root harvests start this week and extend into mid-November. We can’t afford any downtime during these critical weeks. Wish us luck! We should have enough cabbage, carrots and other roots to supply our store customers through the winter.

The cover crops are so vibrant right now. They protect against erosion during the winter, then revive and grow again in spring to nourish the soil. If you review the four photos above, the color green pops out. The farm glows on sunny days. It’s not too shabby on cloudy days either.
VEGGIE LIST and VEGGIE NOTES
(Oct. 26/27, 2017; week #24, purple EOW)
Sweet potatoes, 2 – 2.5 lb
Butternut squash
Red cabbage
Brussels sprouts, 1 lb
Romanesco
Celeriac
Purple daikon radish
Green bell peppers, ~2
Yellow onion
Shallots, 1 – 3
Baby ginger, 1 knob
This is the final box of our regular CSA season.
Romanesco (pale green conical head, possible tinged with purple) – This is the prettiest vegetable we grow. Look at it closely to appreciate its branched beauty and repeating spiral pattern. It is closely related to cauliflower which it resembles in flavor and texture.
Preparation: Like broccoli and cauliflower, it is fine eaten raw or cooked. It requires cooking times intermediate between the two. Don’t overcook it. I usually steam it, then dress it simply with a butter-lemon-garlic-mustard sauce.
Celeriac (knobby, round, bizarre-looking vegetable which smells like celery) – Flavorful celeriac is good raw or cooked. It is excellent in mixed roasted veggies or in soup. It’s especially good in cream soups, alone or mixed with potatoes. Grated raw celeriac is a great starting point for winter salads. Celeriac will store in your refrigerator for months. Cut off chunks as you need them. Peel before using.
Shallots – These look like small red onions. They can be round or oblong. Store at room temperature. This is the first time we’ve grown these! They seemed like a fun thing to try and have turned out nicely. Honestly, I am a novice with shallots but from what I’ve read (and eaten at restaurants) they are good in salad dressing, and caramelized and used to top dishes or sandwiches. Have fun!
Baby ginger – This is baby ginger, bright white and pink because it hasn’t grown a brown epidermis yet. The ginger in stores is grown for a long season in warm places like Hawaii. Baby ginger is special because it has the full ginger flavor and spiciness but almost no fibers. That’s why it’s used to make the pickled ginger served with sushi. I asked the crew to wash it lightly to avoid bruising. Expect to do a final wash before using it.
Storage: Eat soon; baby ginger is perishable. Wrap in a damp cloth or paper towel, and keep in the refrigerator in a plastic bag. You can also freeze your ginger, then grate as much as you need from the frozen knob.
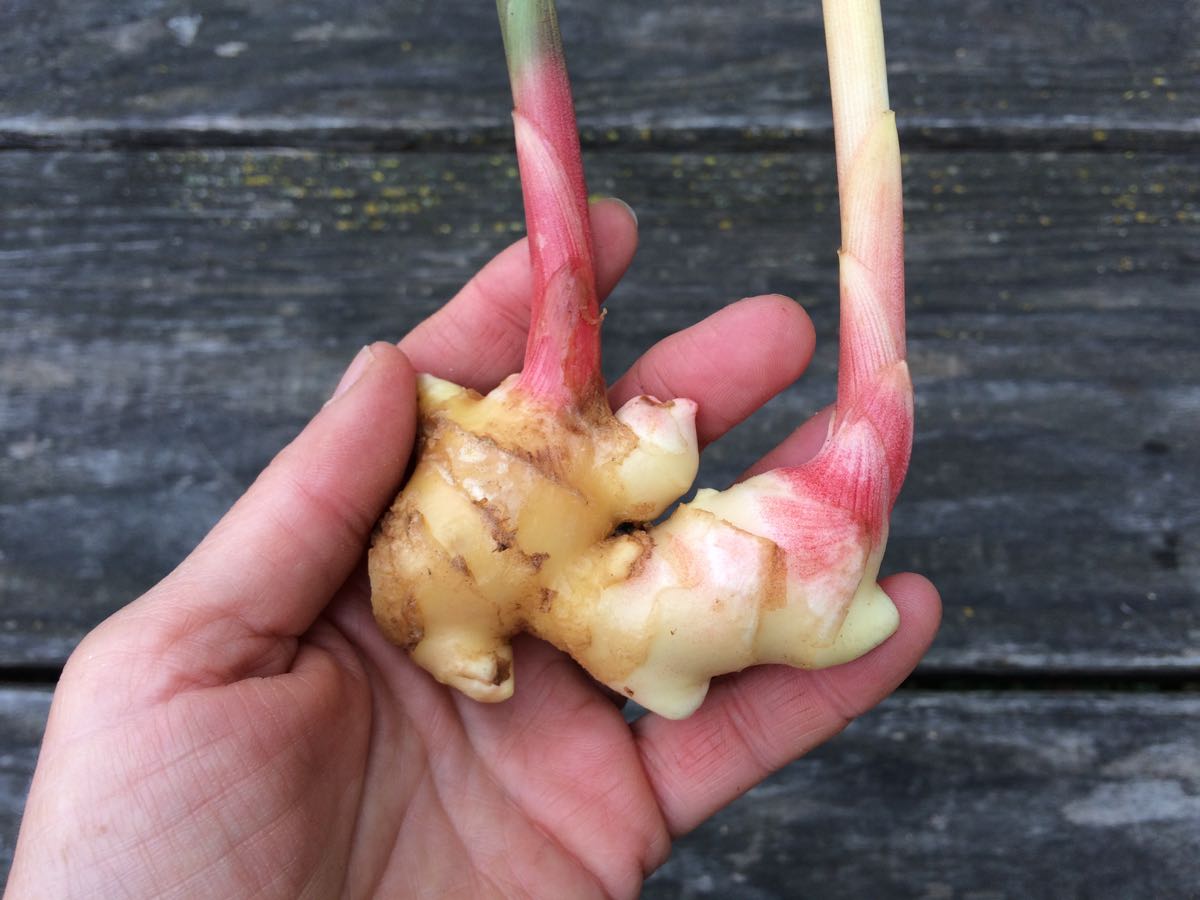
Baby ginger
RECIPE LOG
Visit our Recipe Log, a list of all our 2017 recipes.
LOCAL THYME RECIPES
Comforting Classics
Romanesco Gratin
Chicken or Tofu and Brussels Sprout Stir Fry with Ginger
Rice Bowl with Romanesco, Bell Pepper, Cabbage and Fried Egg
Celeriac Ribbon Remoulade
Outside the Box Recipes
Romanesco Polonaise
Brussels Sprouts Braised in Nutmeg Cream
Red Cabbage and Apple Soup
Celeriac, Smoked Mozzarella and Prosciutto Salad
Quick and Easy Meal
Roasted Sweet Potatoes and Brussels Sprouts with Miso Vinaigrette
RECIPES FROM LAUREN
DEEP DISH HARVEST PIZZA
If there is anything I love more than taking every vegetable I have and throwing it into one mess of a beautiful deep-dish pizza, I don’t know what it would be. This recipe is simple, insanely versatile and (as usual) fit for a crowd. It only makes one pizza so you won’t think it’s a lot of food, but trust me, this baby is dense. If you aren’t vegetarian, I totally recommend throwing some bacon on there. Enjoy! Lauren.
Serves 6-8
Takes 1 hour, 15 minutes
4 cups peeled and chopped butternut squash
2 cups water
2 teaspoons Kosher salt, divided
2 tablespoons olive oil plus more for drizzling
2 cups halved and quartered brussels sprouts
1 head romenesco, cut into bite-size florets
1 green pepper, diced (about 1/2 cup)
1/4 teaspoon freshly ground black pepper
1 tablespoon butter
2 shallots, peeled and thinly sliced
1 tablespoon maple syrup
1/2 teaspoon red pepper flakes
2 cups favorite pizza cheese (I used a blend of havarti, munster and Parmesan but mozzarella is also great on its own)
- Preheat the oven to 450 degrees.
- If making pizza dough from scratch, begin the dough now (see below). If not, skip to the next step.
- In a medium sauce pan, combine winter squash, water and 1/2 teaspoon Kosher salt. Bring to a boil, reduce to a simmer and cook for 25 minutes until squash is very soft. Drain and return to pan.
- Drizzle two tablespoons olive oil on a baking sheet. Add brussels sprouts, romanesco, green pepper, pepper and 1 teaspoon Kosher salt. Roast for 25 minutes, turning once for even cooking.
- While the winter squash simmers and veggies roast, melt a tablespoon of butter in a large cast-iron skillet. Add shallots along with remaining 1/2 teaspoon Kosher salt. Cook for 5-10 minutes until beginning to char in places. Add to drained winter squash along with maple syrup and red pepper flakes. Mash with a potato masher (or fork) until mostly smooth.
- Remove veggies from oven and bump temperature up 500 degrees.
- Drizzle cast-iron skillet with a bit of oil and then press pizza dough into pan and up the sides. It will stretch and sink but just keep pushing it up the sides until it stays about 2/3 of the way up. Let rest for a couple minutes while you shred the cheese.
- Add half the cheese to your pizza crust. Top with mashed winter squash and spread into an even layer. Add roasted veggies followed by remaining cheese.
- Bake for 25 minutes until crust is golden and cheese is bubbling. Serve warm.
.
Pizza dough:
1 cup warm (but not hot) water
1 packet instant yeast (or 2-1/2 teaspoons)
Pinch sugar
1 teaspoon Kosher salt
4 tablespoons olive oil
3 cups all-purpose flour
- Combine water, yeast and sugar together in a small bowl or measuring cup. Let sit for 5 minutes so the yeast proofs and becomes all yeasty.
- Add salt and olive oil to the yeast mixture.
- Pour flour into a large bowl (preferably your mixing bowl if you have one). Slowly stir in yeast liquid and stir until clumpy dough forms.
- Turn out dough onto counter and knead until smooth, and shape into a ball.
- Grease bowl you used to make dough and place dough ball in it. Cover with plastic and set in a warm place (like the warm oven that’s roasting your veggies) until ready to use. For me, this was 40 minutes and it was perfectly doubled in size.
.
.
SWEET POTATO CABBAGE BOWL WITH CASHEW LIME DRESSING
Takes 45 minutes
Serves 4-6
2 pounds sweet potatoes, cut into bite-size pieces
1 yellow onion, cut in chunks
2 tablespoons olive oil
2 teaspoons Kosher salt, divided
1/4 teaspoon freshly ground black pepper
1/2 cup quinoa
1/2 cup lentils
1-1/2 cup water
1/2 red cabbage, shredded
1 purple daikon, quartered and very thinly sliced
2 avocados, sliced
Sesame seeds, optional
Cashew Lime Dressing:
1/3 cup cashew (or almond or peanut) butter
1/3 cup olive oil
1/3 cup lime juice (about 3 limes)
2 tablespoons maple syrup
2 tablespoons water
1 tablespoon soy sauce (or tamari)
1 tablespoon minced ginger
1 teaspoon Kosher salt
1/2 teaspoon cayenne pepper
- Preheat oven to 450 degrees.
- Drizzle baking sheet with olive oil and add sweet potatoes, onion, black pepper and 1 teaspoon Kosher salt. Roast for 25 minutes, turning once for even cooking.
- Rinse quinoa and add to a medium saucepan along with lentils and remaining 1 teaspoon Kosher salt. Toast over medium heat about 5 minutes, until little to no moisture remains. Add water and bring to a boil. Reduce to a simmer, cover and cook for 20 minutes. Turn off heat, but leave lid on and continue steaming for 5 minutes.
- Prepare dressing by combining all ingredients in a small bowl and whisk until smooth. Taste and adjust seasonings as desired. Add water if it’s too thick.
- Build bowls by placing about 1/2 cup of quinoa and lentil mixture in each bowl. Top with a quarter of the sweet potatoes and onions, a generous amount of cabbage and daikon, and half an avocado. Drizzle with sauce and sprinkle sesame seeds on top (if using).
.
Week #23, final purple EOW box
- On: October 19, 2017
- 0
Box Countdown
October 19/20 (this week) = final box for purple EOW members
October 26/27 (next week) = final box for weekly members & for green EOW
Extension & Storage Shares in November – Just for members registered for these extra shares.
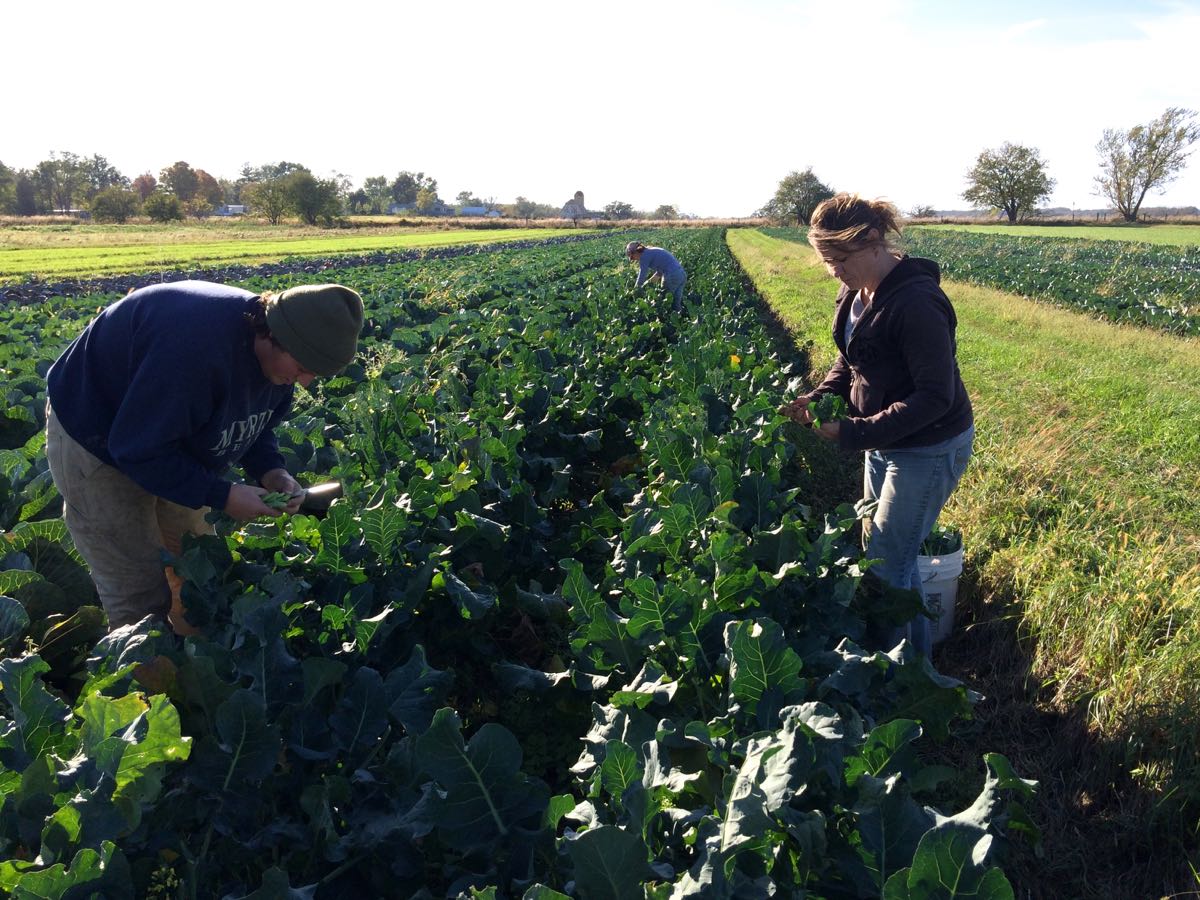
Jory, Kerry, and Karen in the broccoli field. The warm weather is OK for vegetables and wonderful for people.
Veggie List and Veggie Notes
(Oct. 19/20, 2017, week #23, purple EOW)
Beth’s box logic:
– Cauliflower. This has been an incredible year for broccoli and cauliflower. Some seasons, cauliflower is so rare that we only have enough for one CSA delivery. Not this year. We realize we have delivered cauliflower in your boxes at least three of the last four weeks. Let’s enjoy this bounty while it’s here. If you are feeling overwhelmed, you can freeze your cauliflower to use in winter soups. Here are Pat from Local Thyme’s instructions to freeze cauliflower: To freeze, wash and separate cauliflower florets, blanch for 3 minutes and submerge in ice bath. Drain well. Flash freeze by spreading the cauliflower out on a baking pan and putting them in the freezer to harden up. Once hard, pack the cauliflower in a plastic freezer bag and return to the freezer to store.
– Garnishes. We’ve sent multiple items to enliven your cooking this week (poblanos, scallions, parsley and garlic). Both Pat and Lauren have folded these ingredients into their recipes this week. If you’re not sure what to do with the poblano chiles, roast them, slice into ribbons and use to top anything you cook this week. These are the last scallions (sob) so I’ve hidden away a few bunches for our favorite ways to use scallions; use to garnish any soup but especially chicken soup; scallion-kimchi pancakes like this recipe (a favorite) or this recipe (which I want to try). I plan to try Lauren’s Smoky Butternut & Poblano Chile (see below) this weekend, and I know it will be great with scallions.
Butternut squash
Brussels sprouts, ~1 lb
Satina potatoes, ~3.5 lb
Leeks, 1 or 2
Cauliflower
Broccoli
Carrots, 2 lb
Bell pepper, 1
Poblano chiles, 3 – 4
Scallions, 1 bunch
Parsley, 1 bunch
Garlic
Next week’s box will probably contain butternut squash, Brussels sprouts, sweet potatoes, red cabbage, purple daikon radish, ginger, celeriac and more.
Butternut winter squash – Everyone gets one medium or two small butternuts. These early-maturing varieties are all on the small side.
Brussels sprouts – If you are a new CSA member, please approach Brussels sprouts with an open mind. Many of us grew up eating awful, overcooked Brussels sprouts. These Brussels sprouts are completely different. We usually delay B-sprout harvest until after they are sweetened by the first frost. We can’t wait any longer!
Here is our method to cook Brussels sprouts: Wash the sprouts and trim the cut ends. Cut an X in the stem end of large sprouts. Cut a single slit in small or medium sprouts. This does two things. It helps the Brussels sprouts cook evenly, plus it allows them to soak up any marinade or dressing. Place sprouts in a pot with one inch of water in the bottom and steam until tender, 7 to 10 minutes. If the sprouts are uneven in size, then set aside the smallest ones and add to the pot after the larger ones have cooked for a few minutes. Don’t overcook them! You can also oven-roast Brussels sprouts. Here are a few dressing ideas for cooked sprouts:
– Sherry vinegar/olive oil/Dijon mustard/garlic/white wine/salt and pepper. This is our favorite, especially when you combine the Brussels sprouts with slivered peppers and thinly sliced onions. Delicious warm, cold, or at room temperature.
– Balsamic vinegar/olive oil/garlic/salt and pepper
– Lemon juice and zest/melted brown butter/poppy seeds/white wine/garlic/salt
Satina potatoes – These pale yellow potatoes are from Igl Farms. Satinas are an all-purpose potato with thin skin and smooth flesh. We oven-roasted a batch and they browned perfectly.
Cauliflower – See Beth’s notes above.
RECIPE LOG
Visit our Recipe Log, a list of all our 2017 recipes.
LOCAL THYME RECIPES
Comforting Classics
Aloo Gobi
Cock-A-Leekie Soup
Maple Balsamic Roasted Brussels Sprouts
Butternut and Poblano Quesadillas
Outside the Box Recipes
Sweet and Savory Cauliflower Toast Melts
Mexican Pinto Bean Green Rice Skillet Supper
Whole Grain Spaghetti with Brussels Sprouts
Winter Squash Hummus
Quick and Easy Meal
Quick Broccoli and Cheddar Stuffed Potatoes
RECIPES FROM LAUREN
A recipe from last year: MASHED POTATO & LEEK FRITTERS
SMOKY BUTTERNUT SQUASH & POBLANO CHILI
Adapted ever so slightly from the lovely Love & Lemons.
Takes 1 hour
Serves 6-8
1 tablespoon extra-virgin olive oil
1/2 bunch scallions, sliced
1 teaspoon Kosher salt
1/4 teaspoon freshly ground black pepper
3 carrots, diced
3 cups cubed butternut squash
1 bell pepper (any color), stem and seeds removed, and diced
2 poblano peppers, stem and seeds removed, and diced
1 tablespoon brown sugar
1 tablespoon chili powder
2 teaspoons cumin
1 teaspoons smoked paprika
1/8 teaspoon cayenne pepper
28-ounce can diced tomatoes with their juices
15-ounce can black beans, drained and rinsed
15-ounce can canellini or Navy beans, drained and rinsed
Juice of 1 lime
4 cups water or vegetable broth (or enough to cover)
Garnishes:
1/2 bunch scallions, sliced
Shredded cheddar
Sour cream
Sliced avocado
Extra limes
- Heat the oil in a large pot over medium heat. Add the scallion, salt and pepper and cook until soft, 5 to 8 minutes. Stir in the carrots, butternut squash, bell pepper, and poblano. Cook until the vegetables just start to become tender and the scallions are lightly browned, about 15 minutes. Reduce the heat if necessary.
- Add the sugar, chili powder, cumin, smoked paprika, cayenne, and tomatoes and cook for 1 minute. Stir in the beans, lime juice and then add 4 cups of water or vegetable broth (or enough to cover everything). Simmer until the butternut squash and carrots are tender, 20 to 30 minutes, adding more broth, as needed.
- Season to taste with more salt, pepper, and spices to your liking. If your chili is too spicy, stir in a small splash of apple cider vinegar. If it’s too thick, add another cup of water or broth.
- Serve with scallions, cheddar, sour cream, avocado and extra limes.
.
CREAMY GOUDA VEGGIES WITH BREADCRUMBS
Adapted from Joy the Baker.
Serves 8-10 as a side
Takes 1 hour
1 pound brussels sprouts
1 head broccoli, chopped
1 head cauliflower, chopped
4 tablespoons butter, divided
1/2 cup breadcrumbs (I made my own by cutting into crouton-sized pieces and baking for 30 minutes at 350 degrees, then pulsing in a food processor)
2-3 leeks, white and light green parts only, cut in half lengthwise and sliced
1 teaspoon Kosher salt, plus more for seasoning
1/4 teaspoon freshly ground black pepper
1/2 teaspoon ground mustard
1/2 teaspoon thyme
1/4 teaspoon cayenne pepper
3 tablespoons flour
2 cups whole milk
2 cups shredded Gouda, divided
- Bring a large pot of salted water to a boil over high heat and preheat oven to 375 degrees.
- While waiting for the water to come to a boil, prepare the Brussels Sprouts. You’ll want to leave the smallest ones whole (but still trim the ends), halve the medium ones and quarter the largest ones.
- Toss the prepped brussels sprouts into the water once its boiling and cook for two minutes. After two minutes, add the broccoli and cauliflower and blanch for two minutes longer. Strain in a colander, rinse with cold water and then place ice cubes on top to stop the cooking process.
- In a large cast-iron skillet or other oven-proof skillet, melt one tablespoon of butter over medium heat. Add breadcrumbs and cook until golden brown throughout (about 5 minutes). Remove to a paper towel to drain extra grease. Scrape the pan with a spatula to make sure you get all the crumbs.
- Add remaining butter to skillet and cook over medium heat until melted. Add leeks, salt and pepper. Saute for 5 minutes until softened. Add ground mustard, thyme and cayenne pepper. Continue cooking for 5 minutes and then add flour. Reduce heat to low and cook for 3 minutes until flour is very lightly browned.
- Add milk to roux (mixture of butter, leeks and flour) and turn up heat to medium high. When milk just begins to simmer, remove from heat and stir in 1 cup cheese until melted. Remove ice cubes from blanched veggies and add vegetables into cheese mixture.
- Sprinkle remaining cup of cheese over the veggies and bake for 30 minutes until top is golden and bubbly. Sprinkle breadcrumbs on top when ready to serve.
.

