Blog
Week #20, Beth’s dad, purple + moon
- On: September 30, 2020
 0
0
Beth’s dad
My father passed away last week. He was very frail and his time had come. Steve and I left the farm to visit my parents for a few days, the first time I’ve seen them since the pandemic began. I am so grateful that we had those days with my dad. I got him to laugh a few times. He passed the night after we left. The funeral was this week, but we could only attend virtually – this pandemic has wrecked many things.
Thank you for the sweet messages that many of you sent. I feel very supported by all of you, as well as our wonderful farm crew who took on extra work to allow me the space I needed. They kept the farm running. Thank you all. Beth
Veggie List & Veggie Notes
Week #20, October 1/2, 2020
– Weekly shares
– EOW/ purple
– Sampler/ moon
Green beans, 1 lb
‘Molli’ yellow potatoes, ~ 3 1/3 lb
Leeks, 1 or 2
Kale or collards
Broccoli
Romaine lettuce
Peppers, green or red or yellow, 2 – 4
Poblano chiles, 3
(Poblanos are in the bag of beans.)
Parsley, 1 bunch
Garlic
Next week’s box will probably contain sweet potatoes, winter squash, some kind of green, and more.
Yellow potatoes – These are from our friends at Driftless Organics. ‘Molli’ is a good all-purpose potato. Some potatoes have flaws that will need a little trimming.
Peppers (sweet) – We’ve begun stripping pepper fields, so you’ll get a medley this week. It’s time. Frost is coming.
Poblano chiles (triangular, shiny, MILDLY HOT) – We’ve packed your poblano chiles in your bag of beans, so they are easy to identify. Poblanos have lots of great flavor in combination with manageable heat. Roast and add to soup or casseroles. To reduce heat, remove the seeds and midveins.
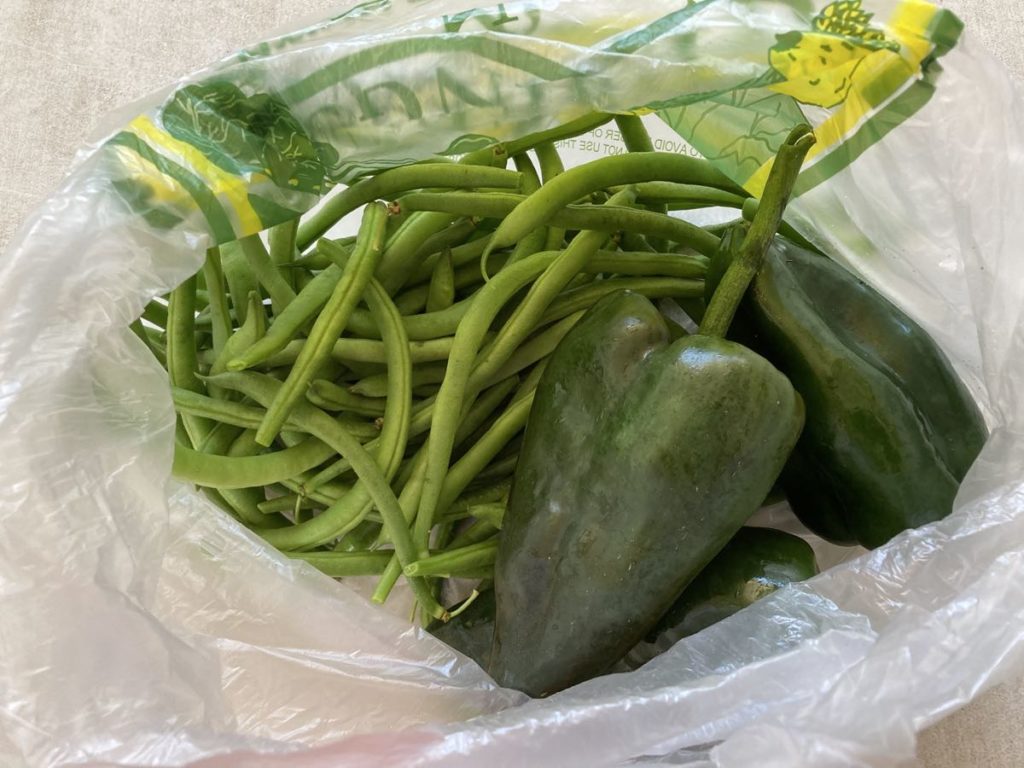
Your poblano chiles are in your bag of beans. These are mildly hot. All the other peppers (outside the bean bag) are sweet.
RECIPES
Visit our 2020 Recipe Log or our 2019 Recipe Log or join our Facebook discussion group.
LOCAL THYME/ Cooking 101
Broccoli and Braising Greens Soup
Wilted Braising Greens with Bacon and Vinegar (also a vegetarian version in the recipe)
Green Beans Braised with Bay Leaves
LOCAL THYME/ Cooking 202
Broccoli Hummus
Greens and Cheese Stuffed Chicken Breasts with Garlicky White Wine Reduction Sauce with Tomatoes
Niçoise Salade Chickpea Bowl
LOCAL THYME/ Quick & Easy Meal
Taco Salad with Skirt Steak & Roasted Poblano Buttermilk Dressing
RECIPES FROM LAUREN
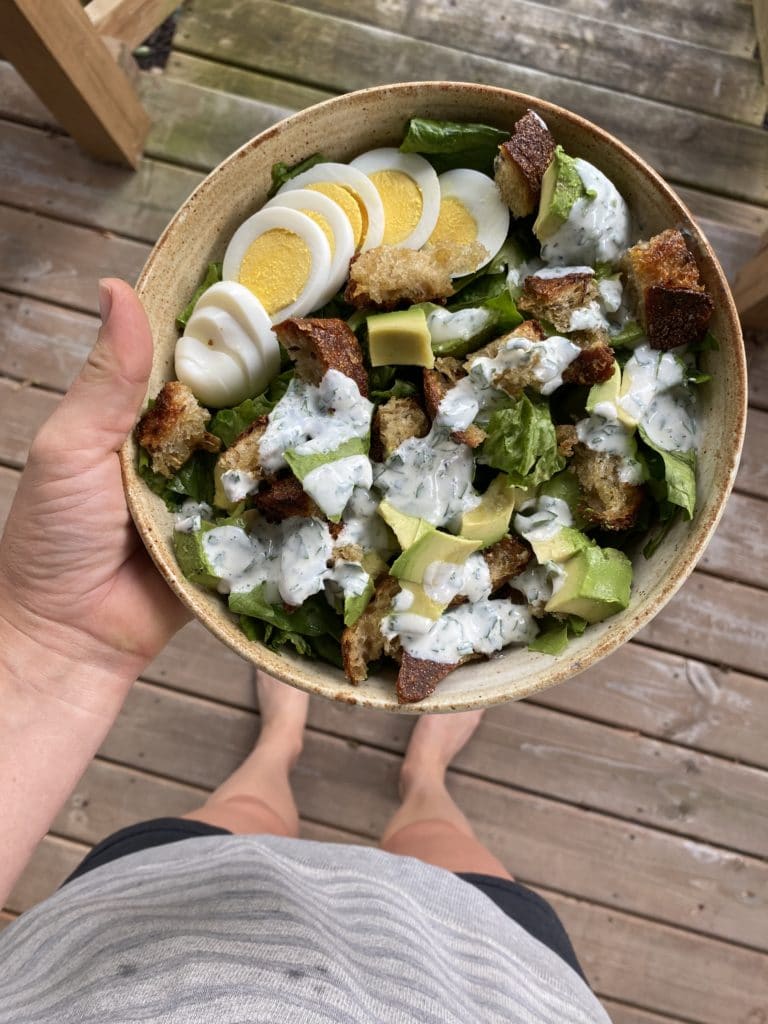
ROMAINE CHOP SALAD WITH ROASTED POBLANO DRESSING
This recipe is intended as a lovely side salad to accompany any fall meal, but if you want to make it a full meal, feel free to add some grilled chicken or crispy tempeh.
Serves 2-4
Takes 30 minutes
3 tablespoons olive oil
4 garlic cloves, smashed
3 cups torn sourdough or ciabatta bread
Kosher salt
1 head romaine
2-3 avocados, cubed
4 hard-boiled eggs
Roasted Poblano Dressing
2 poblanos, broiled for 5-8 minutes; put into a bowl and covered with a plate for 5 minutes
1/4 cup finely chopped parsley
1/2 cup full-fat Greek yogurt
1/4 cup buttermilk
1 teaspoon Kosher salt
1/2 teaspoon garlic powder
1/2 teaspoon onion powder
- Preheat broiler to high.
- Roast poblanos under broiler, flipping every couple of minutes so they are well charred on all sides. This should take 5-8 minutes. Place poblanos in a bowl and top with a plate to let the peppers steam and allow the skins to come off more easily. After 5 minutes, remove the poblano skins.
- Combine poblanos and remaining dressing ingredients in a blender or food processor and process until smooth. Add more buttermilk if the mixture is too thick.
- In a large skillet, heat olive oil. Once it shimmers (but before it smokes), add garlic and bread. Saute for 5-6 minutes until bread is toasty. Discard garlic.
- Serve salad by diving washed and torn romaine leaves among 2-4 salad bowls. Top with avocado, hard-boiled eggs, and fresh croutons. Drizzle with dressing.
.
????
.

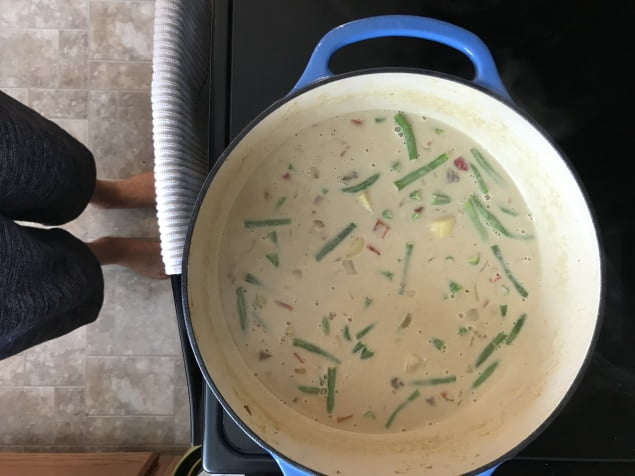
ONE POT GREEN CURRY
If green curry paste isn’t currently a staple in your household, it really should be. I love its bright, mellow, herbaceous flavor. I have made my own but honestly generally just keep a jar of the Thai Kitchen green curry paste (available at pretty much any grocery store in the ethnic/international aisle) on hand. It’s super tasty and also happens to taste good with pretty much any vegetable. 101 cookbooks has a Simple Asparagus Soup recipe made with green curry paste (and a handful of other ingredients) and it was the meal that converted me from a red curry to a green curry fanatic.
Serves 6-8
Takes 55 minutes
3-1/2 cups water, divided
1-1/2 teaspoons salt, divided
1 cup white rice
2 tablespoons butter (or coconut oil if vegan)
1 large yellow onion (or 2 medium shallots), diced
1 bell pepper (green or colored– whatever you have on hand), seeded and diced
2 tablespoons green curry paste
1 tablespoon brown sugar
2 16-ounce cans full-fat coconut milk
2 cups potato, sweet potato or winter squash (I usually use potatoes or a combination of sweet potatoes and potatoes but whatever you have on hand will work great)
1 pound steak of your choice, cubed (skip if vegan or substitute a bit more potato/sweet potato)
2 cups green beans, ends trimmed and cut in half
1 tablespoon fish sauce, plus more to taste (skip if vegan)
Lime wedges, optional
- In a medium saucepan, bring 1-3/4 cups water and 1/2 teaspoon salt to a boil. Once boiling, add rice. Reduce to a simmer, cover and cook until all the water is absorbed (about 12 minutes). Remove the pot from the heat but leave the lid on for at least 5 minutes. Remove lid and fluff with a fork just before eating.
- In a large stock pot or Dutch oven, melt butter over medium heat. Add onion or shallots along with 1 teaspoon salt and cook until fragrant and softened (about 5 minutes). Add peppers and cook 5 minutes more. Add green curry paste and brown sugar, cooking until it just begins to brown and gets fragrant, about 1-2 minutes.
- Add coconut milk, remaining water and potatoes. Bring to a boil, reduce to a simmer and cook for 20 minutes. Add the steak and simmer 10 minutes longer. Add the beans and cook until softened, about 5 minutes.
- Remove from heat. Add fish sauce, taste and adjust seasonings as desired.
.
????
.
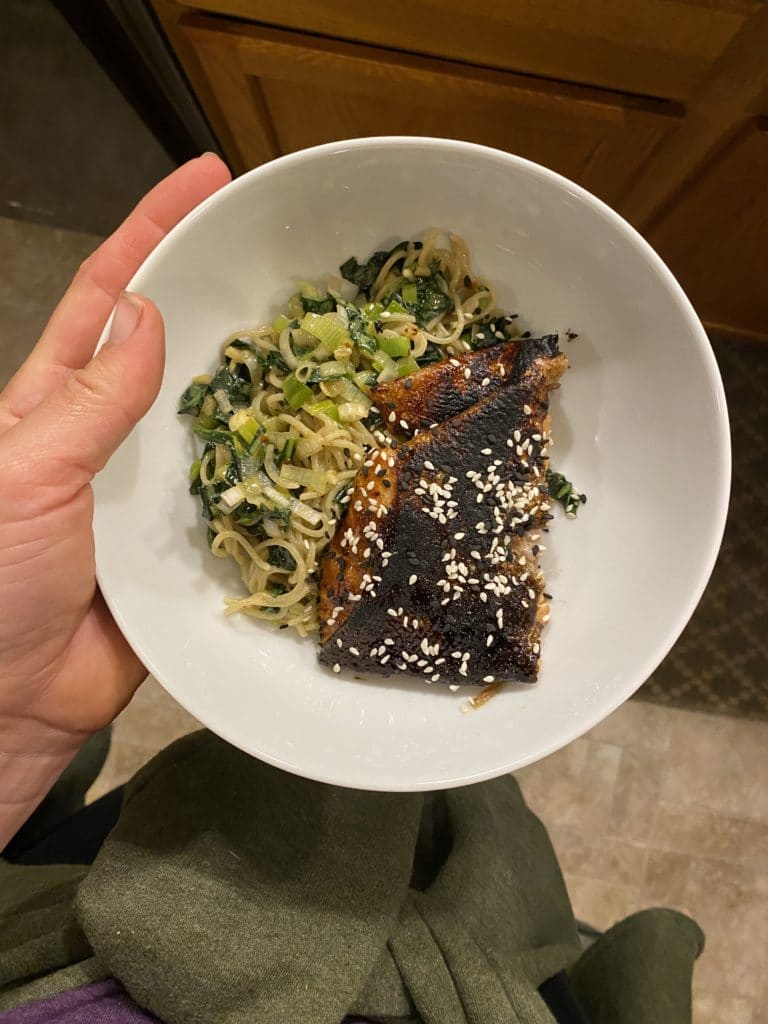
GLAZED SALMON WITH LEEK & KALE RAMEN NOODLES
Takes 1 hour
Serves 5
6 tablespoons soy sauce, divided
3 tablespoons rice wine vinegar, divided
2 tablespoons brown sugar
2 tablespoons toasted sesame oil
1 pound skin-on salmon filets
2 leeks, thinly sliced
4 garlic cloves, minced
1/3 cup canola oil
2 teaspoons sugar
20 twists black pepper
1/2 teaspoon red pepper flakes
1/2 teaspoon Kosher salt
5 ounces ramen rice noodles (I love anything from Lotus Foods)
1 bunch kale, stems removed and roughly chopped
1/4 cup toasted sesame seeds
- Mix together 4 tablespoons soy sauce, 2 tablespoons rice wine vinegar, brown sugar and toasted sesame oil in a large bowl. Add salmon and place in the fridge for 20 minutes to marinate. If the salmon isn’t full covered by the liquid, flip once during the marinating process.
- Preheat oven to 400 degrees and line a baking sheet with parchment paper.
- In a medium bowl combine leeks and garlic.
- In a small saucepan, heat canola oil over high heat until very hot but not smoking (about 400 degrees). Pour over leeks and garlic. Stir once and then let sit for 5 minutes. Add remaining 2 tablespoons soy sauce, 1 tablespoon rice wine vinegar, sugar, black pepper, red pepper flakes and salt. Toss to combine.
- Once oven is preheated, place salmon skin side down on prepared baking sheet. Pour half the marinade over the top. Discard the rest. Bake for 10 minutes.
- Bring large kettle of salted water to a boil on the stove. Add ramen noodles and cook according to package directions. Drain and add to a large bowl. Add kale while the ramen is still hot and toss to combine so that the kale wilts a bit. Add leek mixture and toss again to combine.
- Remove salmon from oven, flip so it is skin side up, and preheat the broiler. Finish salmon under the broiler so the skin crisps. It will take 1-2 minutes depending how hot your broiler gets. Check it frequently so that it doesn’t burn.
- Serve noodles with salmon and top with sesame seeds.
.
Week #19
- On: September 24, 2020
 0
0
Veggie List & Veggie Notes
Week #19, September 24/25, 2020
– Weekly shares
– EOW/ green
Everyone gets most items from this list:
Green cabbage
Beans, ~1.3 lb, mostly green + a few wax
Winter squash (by site, Carnival acorn OR ‘Nutterbutter’ butternut)
Tatsoi
Small bell/frying peppers, ~4, mostly green, maybe 1 red
Jalapeno chile (HOT), 1 or 2
Yellow onion
Garlic
Dill
– Some sites get broccoli.
– Some sites get cauliflower.
Next week’s box will probably contain potatoes, leeks, poblano chiles, peppers, beans, broccoli OR cauliflower and more.
Tatsoi (bundle or head with dark green leaves) – This bok choy relative has darker leaves and thinner stems. Easily substituted for bok choy in recipes.
Dill (bundle with fine leaves and flowers) – Cover and refrigerate. We are sending the dill to pair with the beans.
Winter squash – See last week’s newsletter for lots of information on storing and using winter squash. Expect to wash your squash before cooking, just a rinse and a gentle wipe. This year, we are wiping the squash instead of running them through our brusher washer. The change allows greater social distancing and doesn’t compromise the squash at all. In fact, this system is probably better because we avoid wetting the squash.
RECIPES
Visit our 2020 Recipe Log or our 2019 Recipe Log or join our Facebook discussion group.
LOCAL THYME/ Cooking 101
Swedish Cabbage Rolls
Dilled Green Beans with Walnuts
Cauliflower Latkes
LOCAL THYME/ Cooking 202
Risotto with Braised Green Cabbage and Bacon
Green Beans with Olives
Cauliflower with a Briny Dressing
LOCAL THYME/ Quick & Easy Meal
Cabbage and Green Bean Salad
RECIPES FROM LAUREN
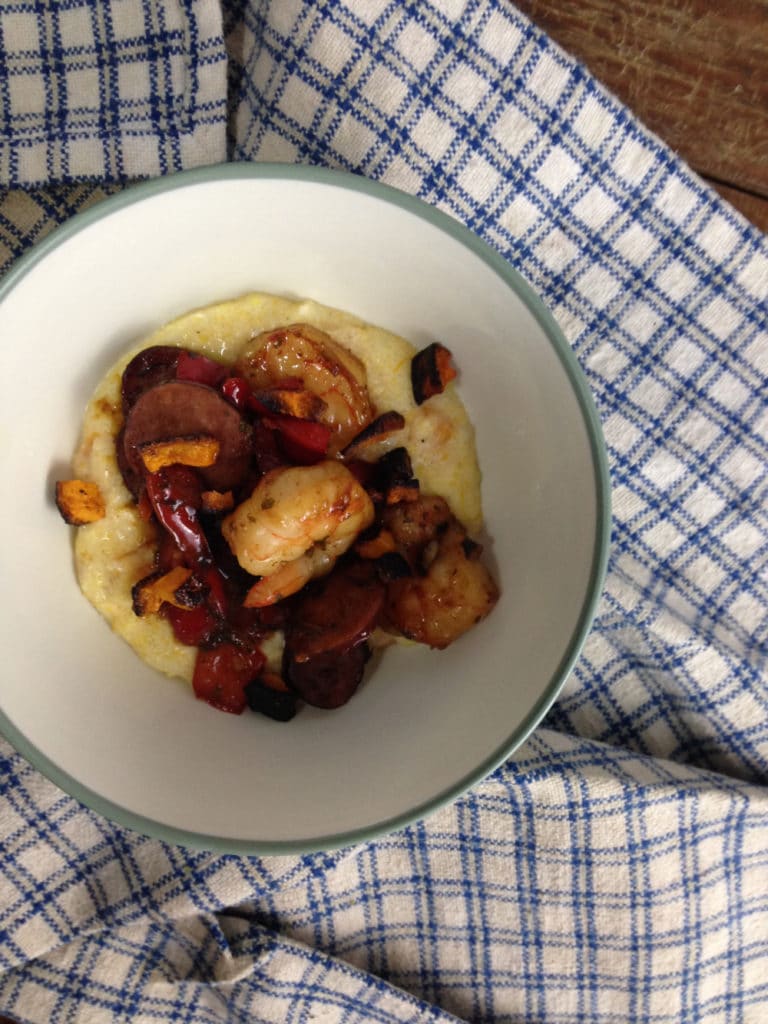
SHRIMP & SAUSAGE OVER BUTTERNUT GRITS
Serves 6-8
Takes 55 minutes
3 cups peeled and diced carnival or butternut squash
2 tablespoons butter, divided
1 small yellow onion, diced
1 teaspoon Kosher salt, divided
1/2 teaspoon freshly ground black pepper, divided
4 garlic cloves, minced, divided
4 cups milk
1 cup grits or cornmeal
1/2 cup parmesan
4 andouille sausages, thinly sliced
1-1/2 cups diced red peppers
3/4 cup scotch ale (or any mild lager-style beer)
1 pound medium shrimp, peeled and deveined
1 tablespoon dried parsley
1. Bring a pot of salted water to a boil. Pour in butternut squash and cook for 10 minutes until soft. Drain and set aside until ready to use.
2. In a large stock pot or deep skillet, melt one tablespoon of butter over medium low heat. Add onion along with 1/2 teaspoon of salt and pepper. Cook for 5 minutes until soft and fragrant. Add half of the garlic and an additional 1/4 teaspoon of salt. Saute an additional 5 minutes until the garlic is fragrant but before it begins to brown.
3. Add milk to pan and bring to a simmer over medium heat. Remove grits from heat and pour in grits slowly. Whisk vigorously until smooth. Return to medium heat and continue cooking and whisking until grits begin to thicken (about 2-3 minutes). Stir in squash and remaining salt and pepper. If you prefer looser grits, add a bit more water or milk. Cook for 10 minutes, stirring occasionally. Add Parmesan and season to taste.
4. In a separate skillet (cast-iron works great if you have it), melt remaining tablespoon of butter over medium heat. Add the garlic and cook until fragrant, about 5 minutes. Add sausage and turn heat to medium high. Stir infrequently so sausage and garlic blackens in spots. After two minutes, reduce the heat to medium, and add red peppers and beer. Simmer gently for 5 minutes until reduced by half. Add shrimp and parsley. Cook until shrimp curl and become opaque (2-3 minutes). Serve over warm grits.
.
????
.

CABBAGE PATCH SOUP
Adapted from Taste of Home
Serves 8-10
Takes 50 minutes
1 pound ground beef (or venison)
2 teaspoons Kosher salt, divided
1/2 teaspoon freshly ground black pepper, divided
2-3 colored pepper, seeded and diced (about 1 cup)
1/2 yellow onion, diced
1 jalapeno, seeded and diced
1/2 large head cabbage (red or green or a mixture of both), chopped (about 6 cups)
32 ounces canned or boxed tomato soup (I love Pacific Organic Creamy Tomato Soup)
28 ounces canned diced tomatoes (or 4 cups diced fresh tomatoes)
4 cups water
1/4 cup brown sugar
2 teaspoons chili powder
In a stock pot, combine ground meat with 1 teaspoon salt and 1/4 teaspoon pepper. Cook ground meat over medium heat until well browned. Add peppers and onion to the pot and cook until gently softened, about 5 minutes. Somethings might stick or brown a little. Don’t worry about that one bit.
Add the remaining ingredients to the pot and stir to combine. Bring a boil, reduce to a simmer and cook uncovered for about 25 minutes over medium low heat until cabbage is well softened.
Taste and adjust flavors to your liking.
.
????
.
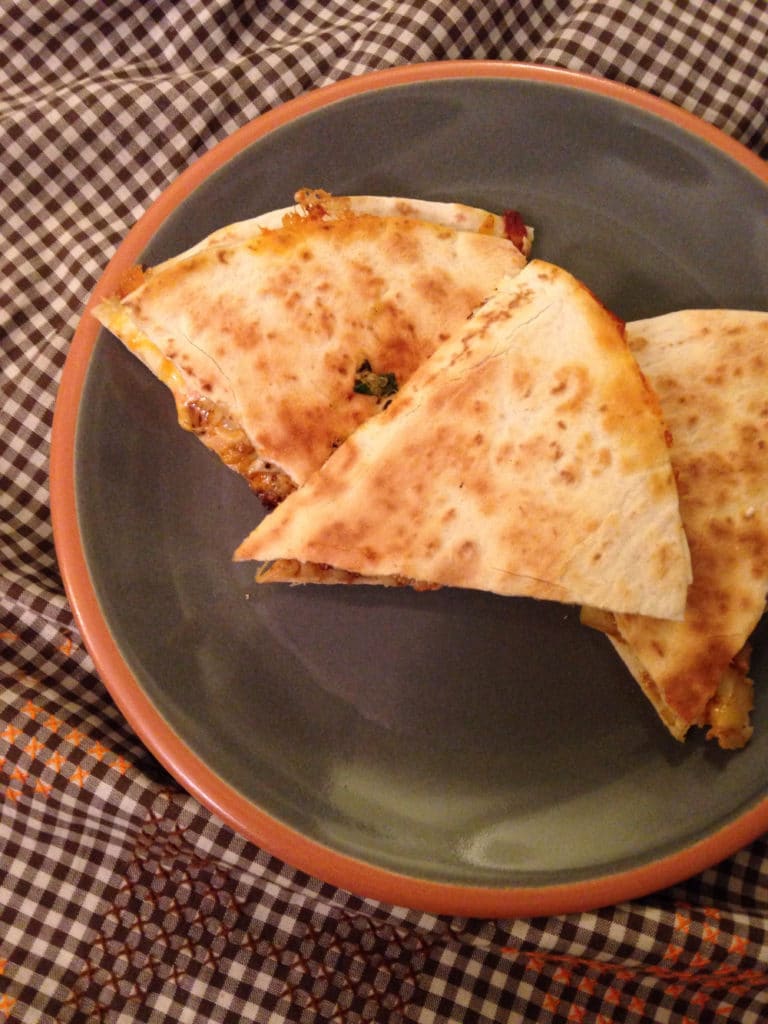
CAULIFLOWER QUESADILLA
Inspired by a Smitten Kitchen recipe
Takes 40 minutes
Makes 2 beautiful quesadillas that will serve 2-4 people, depending on hunger levels
Around 5 cups roughly chopped cauliflower, you want small pieces, nothing bigger than an inch
2 tablespoons olive oil
Kosher salt and freshly ground black pepper
1/2 yellow onaion, diced
1 jalapeno, seeded and minced
½ teaspoon cumin
½ teaspoon chili powder
1 tablespoon lime juice
1 cup shredded Colby jack cheese
1 cup shredded spicy jack cheese (we used habanero)
4 10-inch tortillas
Preheat the oven to 450 degrees while you chop your cauliflower and shred the cheese.
Toss chopped cauliflower with olive oil and a generous amount of Kosher salt and freshly ground black pepper in a medium bowl until well coated. Add to a baking sheet and place in preheated oven. Roast for 15 minutes, without touching it. You want it to brown and char in spots. Shake pan after 15 minutes and roast 10 minutes longer so new spots can take on color.
Remove cauliflower from oven and put back in medium bowl. Toss with onion, jalapeno, cumin, chili powder and lime juice.
Warm a large skillet or griddle over medium low heat. Place one quesadilla down on the skillet surface. Add half the cauliflower mixture as uniformly as possible, followed by half of the cheese. Top with another tortilla and press down slightly. Cook for 3 minutes and flip using a large spatula. Cook for another 3 minutes.
Serve warm with sour cream, salsa, hot sauce, etc. Yummmm!
Week #18; Purple + sun
- On: September 16, 2020
 0
0
Beth’s dad
Folks, my father is very ill. It is age-related, not COVID-19. Steve and I plan to visit him in a few days, our first visit since the pandemic began. Our crew will keep everything running well. They know what to do. However, I ask for a little more patience than usual this week and next. Expect less precise box lists. I take care of getting all the details right but I don’t want to burden our crew with that work. They will prep nice boxes for you. Also, I can’t handle any special requests. Thank you.
Beth.
After the rain
You too shivered through last week’s unusually cold weather. We farmers prefer average conditions. We held our breath during last week’s cold, rainy days. About half our winter squash crop was still in the field, and weather like that can be deadly for winter squash. We waited a few days to let everything dry, then brought in the crop. They looked very good at harvest, and we are hopeful that they escaped lasting damage. We’ll know in a week or so.
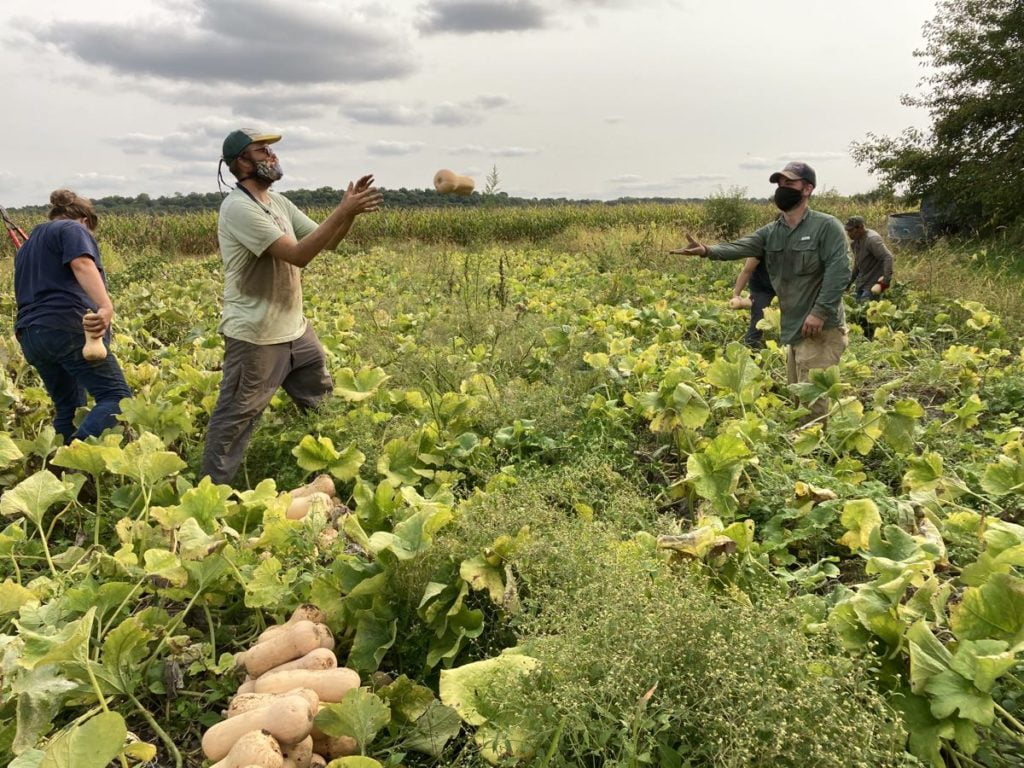
From left, Kristin, John, Karen (in back), Chris, and Raul.
Like most farm jobs, this is a team effort. Karen, Kristin, Raul and I have judged and cut squash together for years. Chris and John tossed and piled the squash to make it easy to collect. John was the receiver for almost every squash. He was mortified and apologetic after dropping one squash. One. That’s an amazing record.
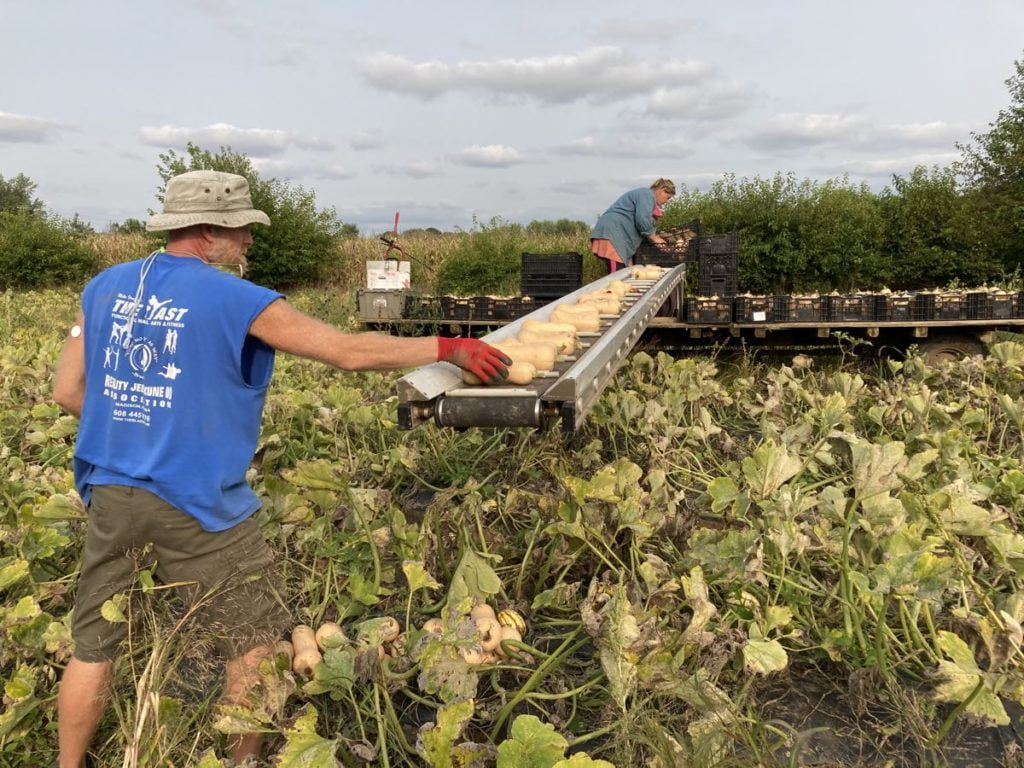
From left, Ben and Maggie.
Squash is heavy. Let’s use the harvest belt.
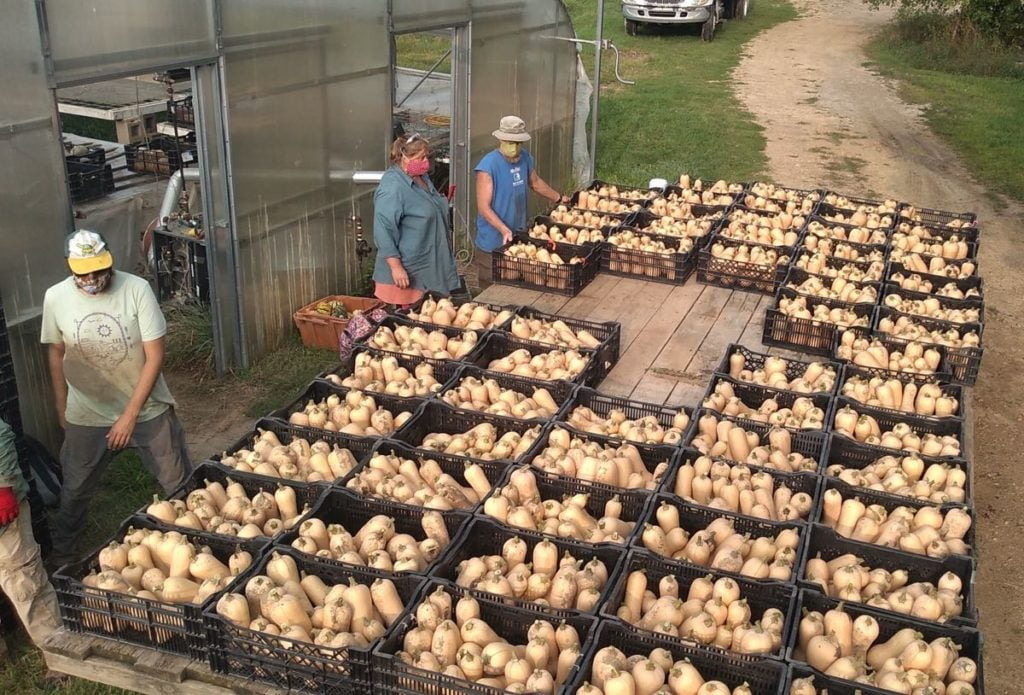
Our wagonload of squash. That’s a nice butternut harvest. Now you understand why dropping only one squash was remarkable. Photo credit Billy Frain.
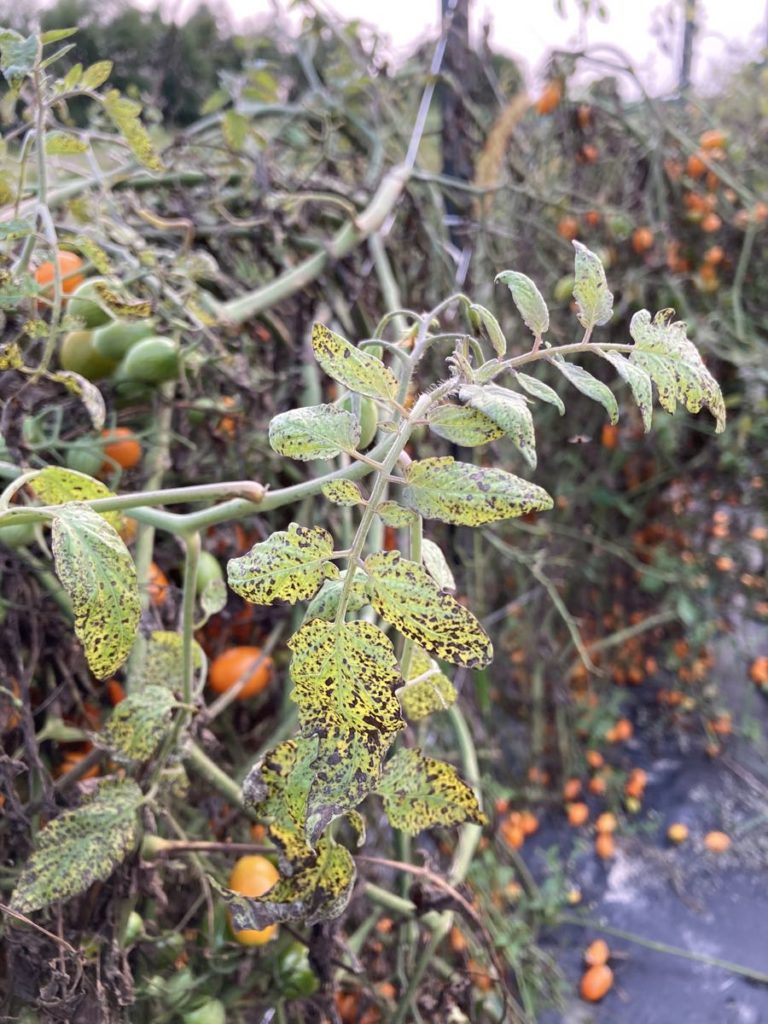
The cold, wet weather ended our tomato crop. Leaves this diseased cannot support ripening fruit.
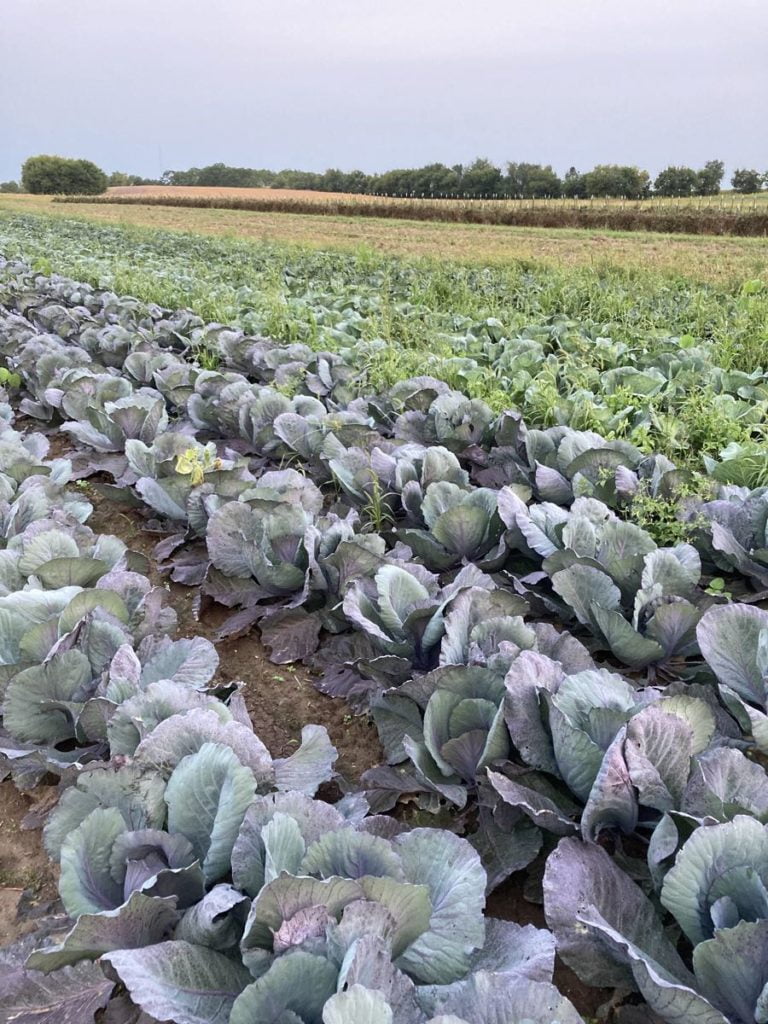
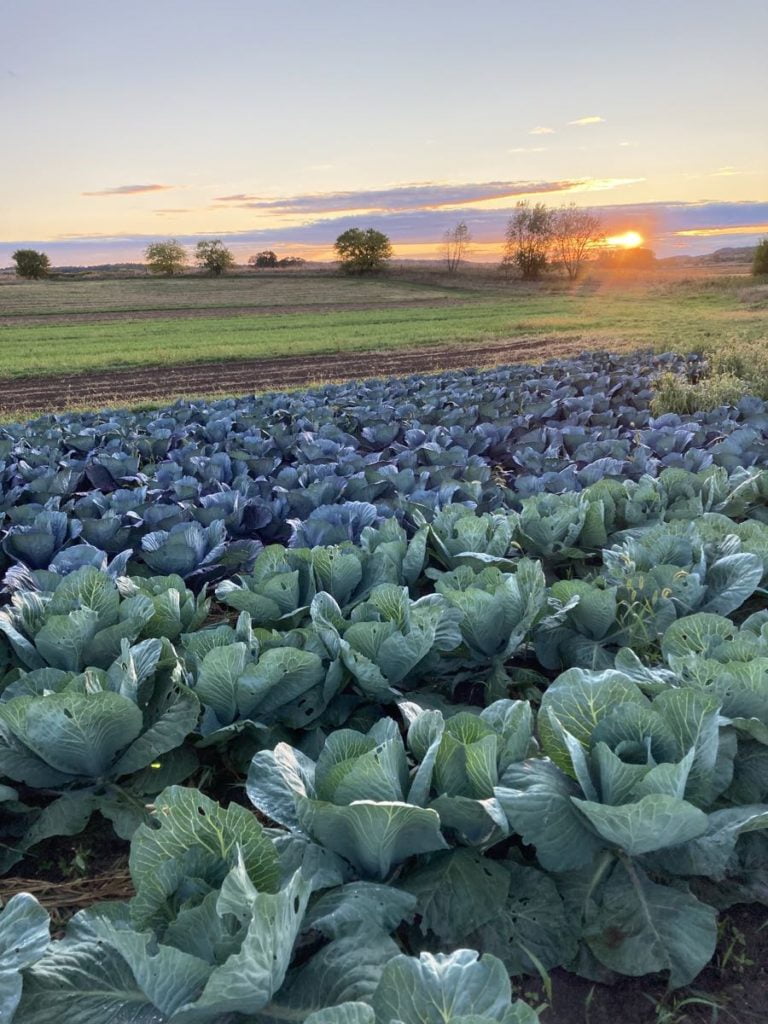
On the other hand, all our brassica (cabbage family) crops loved the cool nights. Above, the cabbage is growing well. In contrast, you can see the dying line of trellised tomato plants in the distance.
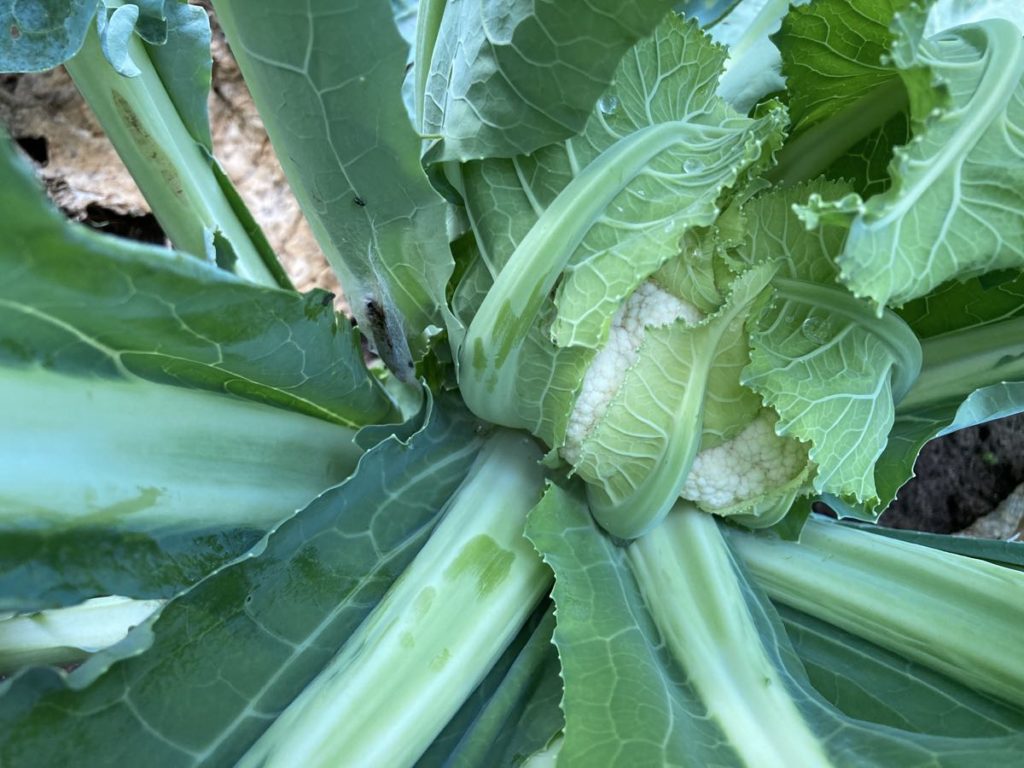
The first cauliflower is forming, and should be ready in a few weeks.
Veggie List & Veggie Notes
Week #18, September 17/18, 2020
– Weekly shares
– EOW/ purple
– Sampler/ sun
Everyone gets most items from this list:
Winter squash, 1
Bok choy
Kale
Romano beans, 0.6 lb
Roulette chile (NOT HOT, in bag with Romano beans)
Jalapeno chile (HOT, loose in the box)
Red peppers, 1 or 2, bell or frying
A small bag of tomatoes (grape OR plum)
Yellow onion
Red onion
Basil
Next week’s box will probably contain cabbage, butternut squash and more.
Acorn squash – See below for cultivar photo. All types are cured and ready to eat. Plan to eat within two weeks.
Bok choy (large rosette with thick white stems and green leaves) – This Asian green is good for stir-frying or sautéing or in soup. You can think of the stems and leaves as two separate vegetables. The stems require longer cooking. The leaves will cook almost as quickly as spinach. Bok choy stores well, so feel free to pull off leaves as you need them, or use the whole head at once. Refrigerate in a plastic bag or other container.
‘Roulette’ chiles – This chile has been bred to have the aromatic taste of habanero chiles, with almost no heat. Snack on them to enjoy their flavor, or add them to any dish. To reduce all chances of spiciness, remove the seeds and midveins. We’ve packed your Roulette(s) in the bag with the beans, so you can recognize it.
Tomatoes – These are the last tomatoes of the season. Eat these soon; they will not store well.
Yellow and red onions – Both are pungent onions, good for frying.
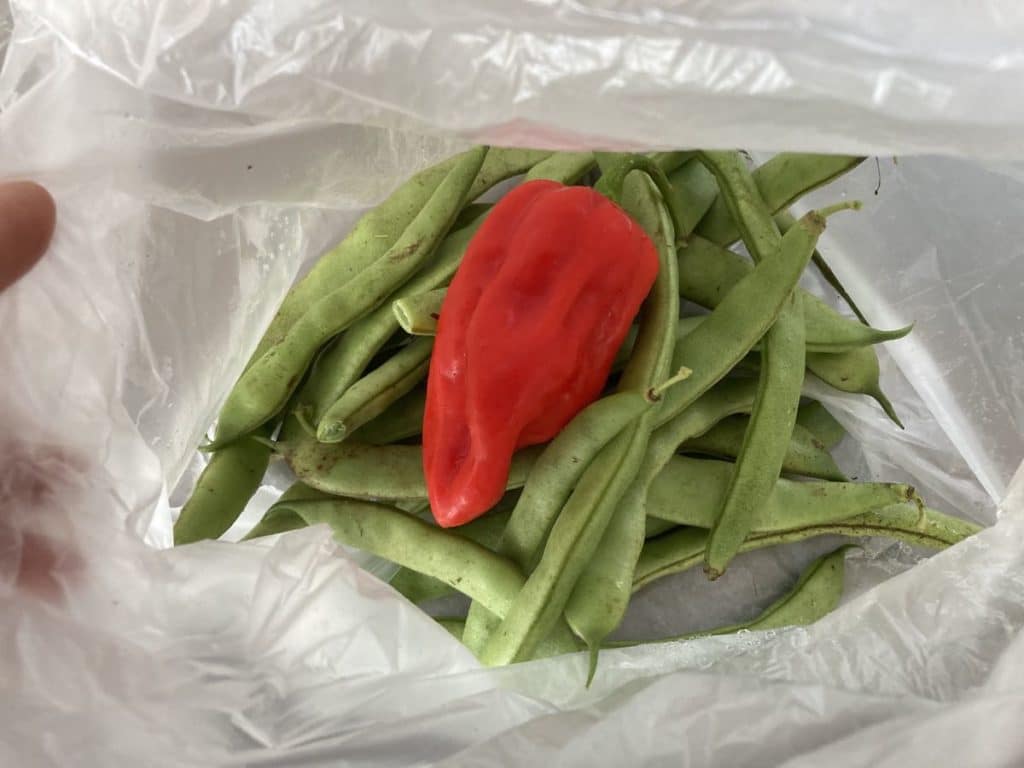
Look for your Roulette chile(s) in your bag of beans.
Winter Squash Primer
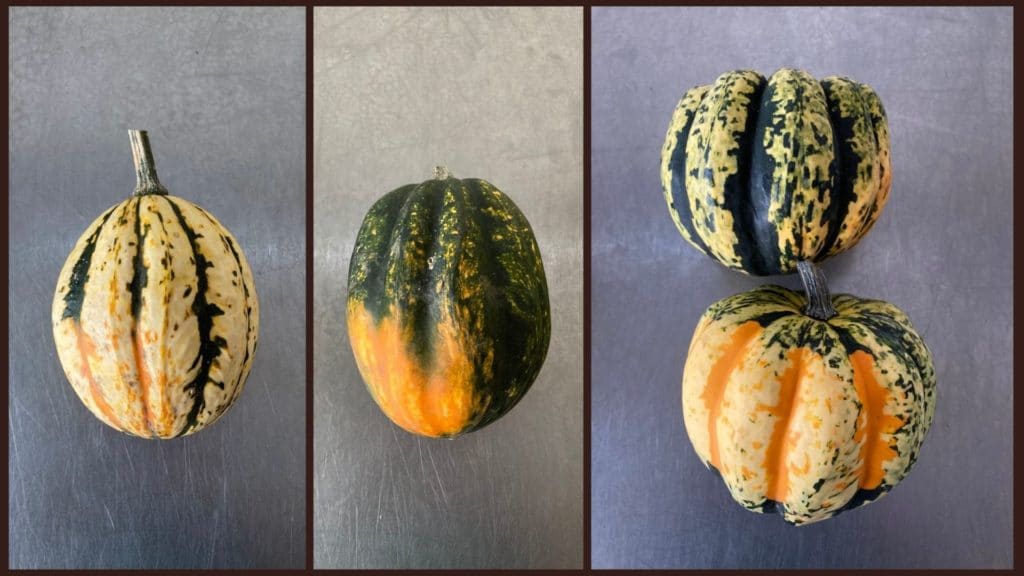
THIS WEEK’S ACORN SQUASH, from left: ‘Jester’ OR ‘Starry Night’ OR ‘Carnival’
Everyone gets one squash this week, of one of the varieties above. We used to grow dark green acorn squash but switched to the newer striped varieties because they taste better, the plants are more vigorous, and the squash are so pretty. Most of the Carnival squash are darker green than usual this year, less colorful than the bottom sample in the Carnival photo. That’s what happens when the plants pollinate during hot weather.
We expect to have a steady supply of squash or sweet potatoes over the coming weeks. Let’s review some basics about winter squash.
Expected life: Some winter squash varieties are ready to eat soon after harvest, others store deep into winter. This week’s acorns are cured and ready to eat. Plan to eat these early varieties within two weeks of delivery. Check the newsletter each week for storage information about that week’s delivery.
Storage: Winter squash store best at room temperature with good air circulation. No cooler than 50 degrees. On your kitchen counter works. Do not cover.
To make squash easier to cut: Microwave on high for 30 to 60 seconds, depending on size of the squash. This will soften the rind and flesh, making it much easier to cut.
Beth’s favorite simple preparation (acorn or butternut): Winter squash are easily roasted in a 400F oven. The goal is to get brown, caramelized edges.
– Split in half with a sharp knife.
– Scoop out and discard seeds.
– Run the squash briefly under running water, then shake off the excess water. Place cavity-side-down on an oiled baking sheet. The little bit of moisture seals the squash to your roasting pan. The water soon evaporates, allowing the squash to brown and caramelize. Caramelization really boosts the flavor.
– Roast at 400F until easily pierced with a fork, 30 – 45 minutes depending on size. Flip over while hot. Add a little butter to melt and some seasoned salt. Cut into wedges and eat.
Stuffed squash
Acorn squash have a central cavity perfect for stuffing. Prepare your favorite fully-cooked stuffing, e.g. a rice or quinoa mixture. Roast your squash as described below. Preheat the stuffing. Fill the cooked squash with stuffing, top with grated cheese and return to the oven until everything is hot.
Can you eat the rind? In my opinion, rinds on these acorn squash are too tough to eat. Steve eats the Jester rind. I don’t.
RECIPES
Visit our 2020 Recipe Log or our 2019 Recipe Log or join our Facebook discussion group.
LOCAL THYME/ Cooking 101
Maple Squash Puree
Chicken and Bok Choy Fried Rice with Sesame Oil
Bok Choy and Pepper Salad with Ramen Noodles
LOCAL THYME/ Cooking 202
Acorn Squash and Beef Chili
Bok Choy Cashew Stir Fry
Quinoa Salad with Beans, Tomato, Sweet Pepper and Feta
LOCAL THYME/ Quick & Easy Meal
Chili-Glazed Salmon with Bok Choy
RECIPES FROM LAUREN
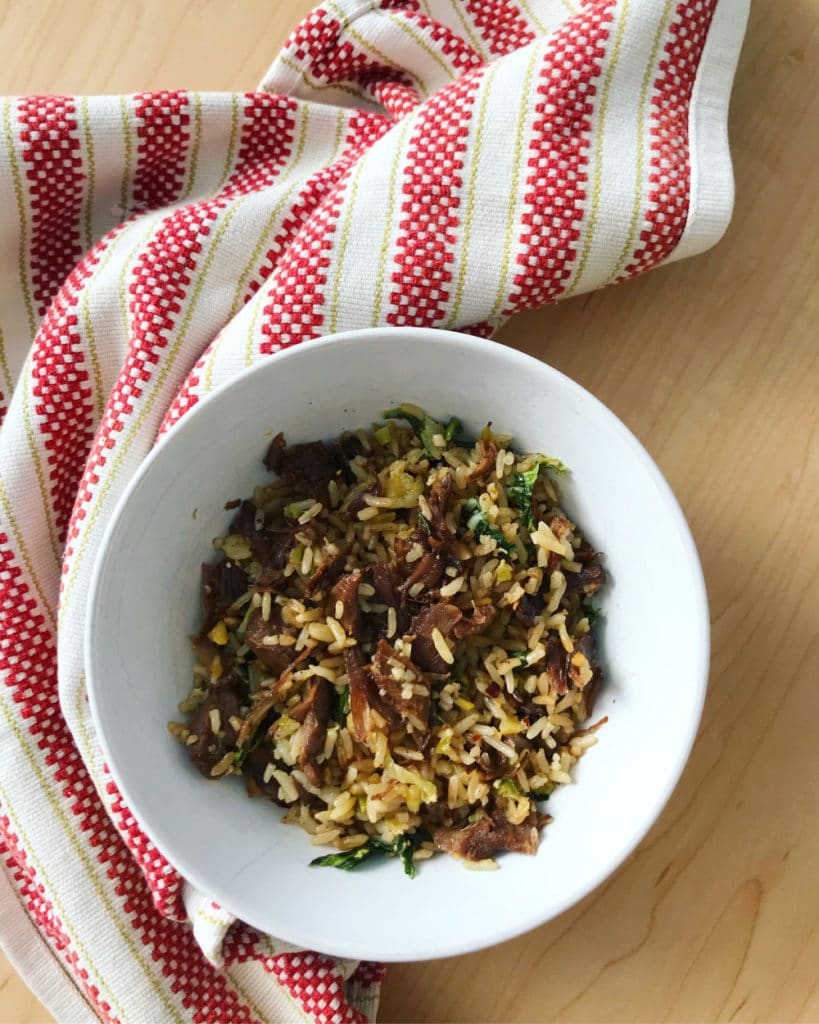
SLOW COOKER BEEF & BOK CHOY FRIED RICE
Serves 4-6
Takes 30 minutes of active cooking time + time for slow cooker to do it’s thing (7-8 hours on low heat; 3-4 hours on high heat)
3-5 pounds beef short ribs or beef neck bones
1/2 cup soy sauce
1/2 cup beef broth
1/4 cup brown sugar
2 tablespoons toasted sesame oil, divided
1 tablespoon freshly grated ginger
2 teaspoons crushed red pepper flakes, divided
1 tablespoon sesame oil
1 large bok choy
5 garlic cloves, minced
1-2 routette chilis, minced
1-1/2 teaspoon Kosher salt, divided
3 cups cooked white rice
3-4 tablespoons vegetable oil
3 eggs
1 red onion, diced
1. Place beef short ribs or neck bones in a crock pot.
2. In a small bowl, whisk together soy sauce, beef broth, brown sugar, 1 tablespoon toasted sesame oil, grated ginger, and 1 teaspoon red pepper flakes until combined. Pour over beef short ribs or neck bones. Let cook for 3-4 hours on high heat or 7-8 hours on low heat. Once cooked through and very tender, shred meet from bone and place in large bowl. Reserve 1/2 cup of the delicious juices for later use.
3. When you are ready to start your meal, use a knife to separate the bok choy leaves from your stems. Roughly chop the greens and set them to the side. Thinly slice the stems.
4. In a large skillet (preferably cast-iron or other non-stick surface), warm remaining tablespoon sesame oil over medium heat. Add bok choy stems, garlic, roulette pepper, and 1/2 teaspoon salt to pan and saute gently for 5-10 minutes until garlic is fragrant and stems are well-softened. Place in bowl with shredded beef.
5. Add two tablespoons and 1/2 teaspoon red pepper flakes to same pan. No need to wipe it out. Let it heat for a couple minutes then add about half of the rice followed by 1/2 teaspoon salt. It should sputter and splatter a little bit. Let it cook for a couple minutes. You want the bottom of the rice to crisp. Saute generally (scraping rice so it doesn’t stick to the bottom as necessary) for an additional 5 minutes until all the rice is coated in oil and a little golden. Add to bowl with beef and cooked bok choy stems.
6. Add another tablespoon of oil and remaining 1/2 teaspoon red pepper flakes followed by remaining rice and salt. Cook this second batch of rice just like you did with the first one. Add to bowl when crisped.
7. Reduce skillet to medium low heat and add last tablespoon vegetable oil if the pan is dry (it likely won’t be).
8. In a small bowl, whisk eggs together and then add bok choy greens. Add to skillet and cook for 5-10 minutes turning occasionally with a spatula until softly scrambled.
9. Add eggs to bowl of rice along with the diced red onion. Stir to combine all ingredients. Taste and add beef juices as desired for more flavor. Serve warm.
.
????
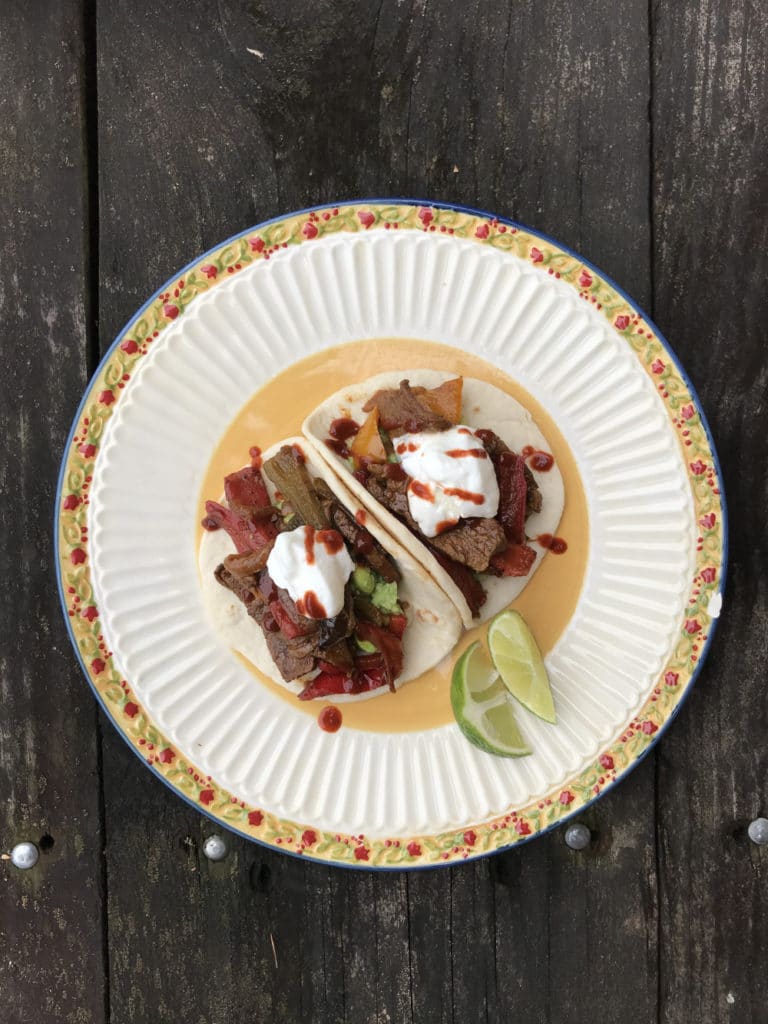
FALL FAJITAS WITH AVOCADO MASH
Takes 30 minutes
Serves 4-6
1/4 cup olive oil, divided
2 colored peppers, seeded and cut into thin strips
1 yellow onion, cut in half and thinly sliced
3 garlic cloves, minced
1 teaspoon Kosher salt, divided
1/2 teaspoon freshly ground black pepper
1 pound flank steak, cut into thin strips
2 teaspoons cumin
2 teaspoon chili powder
1 pinch cayenne powder
2 avocados
1 lime, juiced
Tortillas
Halved cherry tomatoes, optional
Sour cream or Greek yogurt, optional
Hot sauce, optional
1. In a large heavy skillet, heat 2 tablespoons olive oil over medium heat. Add peppers, onions, and garlic with 1/2 teaspoon each salt and pepper. Cook for 15 minutes, stirring occasionally. You want the veggies to be softened and just beginning to char in places. Add steak along with cumin, chili powder, and cayenne. Saute 5 minutes longer, just until steak is cooked through.
2. Put avocado into a small bowl. Mash gently then add the juice from half a lime and remaining 1/2 teaspoon salt. Taste and adjust flavors as desired. I used the juice from a whole lime but you may not want to.
3. Warm tortillas on a skillet or in microwave and serve with a generous portion of both avocado mash and fajita mixture. Top with sour cream or Greek yogurt, cherry tomatoes and hot sauce if desired. Enjoy!
.
Week #17; Summer into fall.
- On: September 09, 2020
 0
0
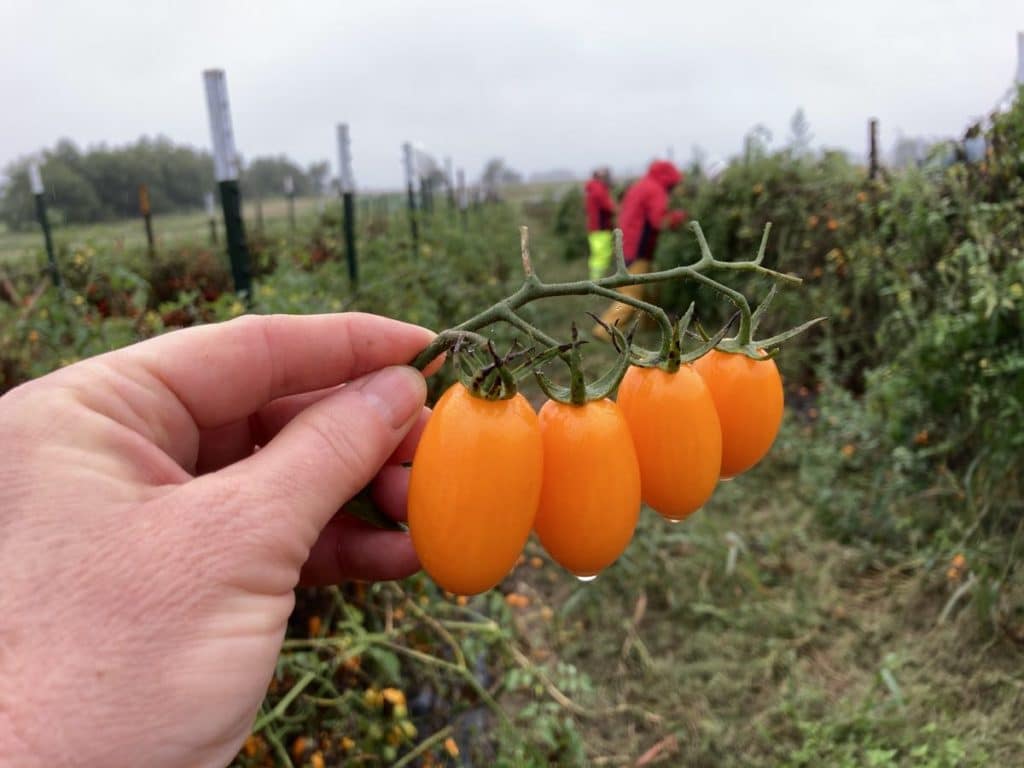
The recent cold, wet weather is hard on our tomatoes and other remaining summer crops. We think you will enjoy this week’s orange grape tomatoes. This ‘Nova’ variety is often one of our best-tasting tomatoes as the season winds down.

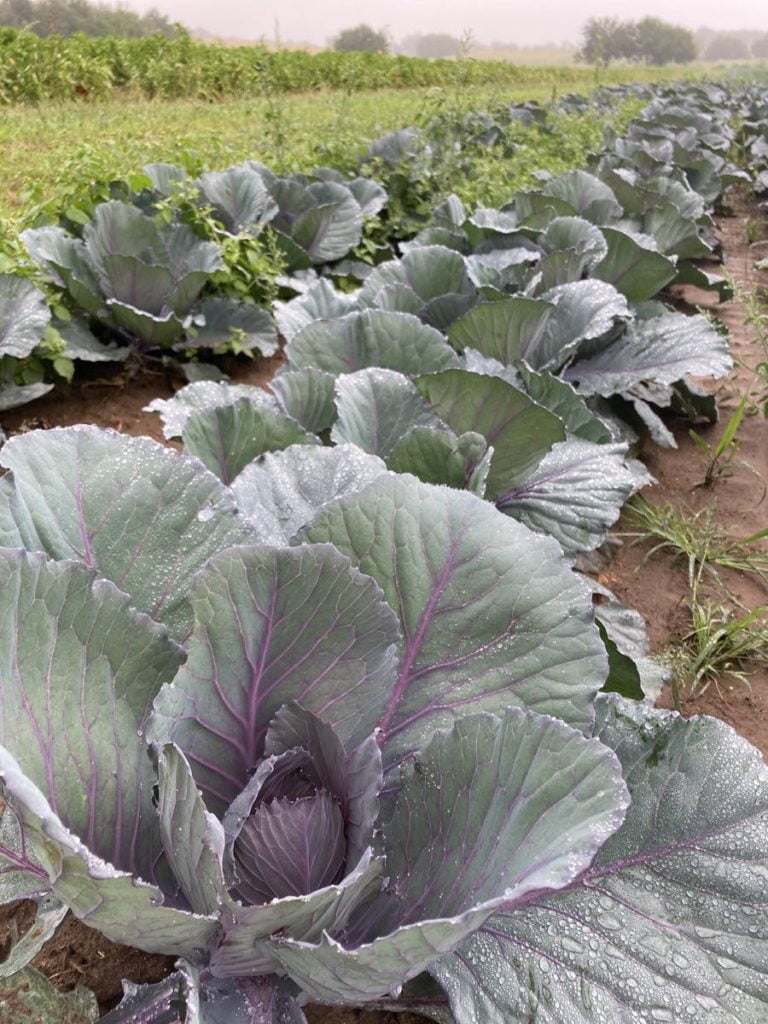
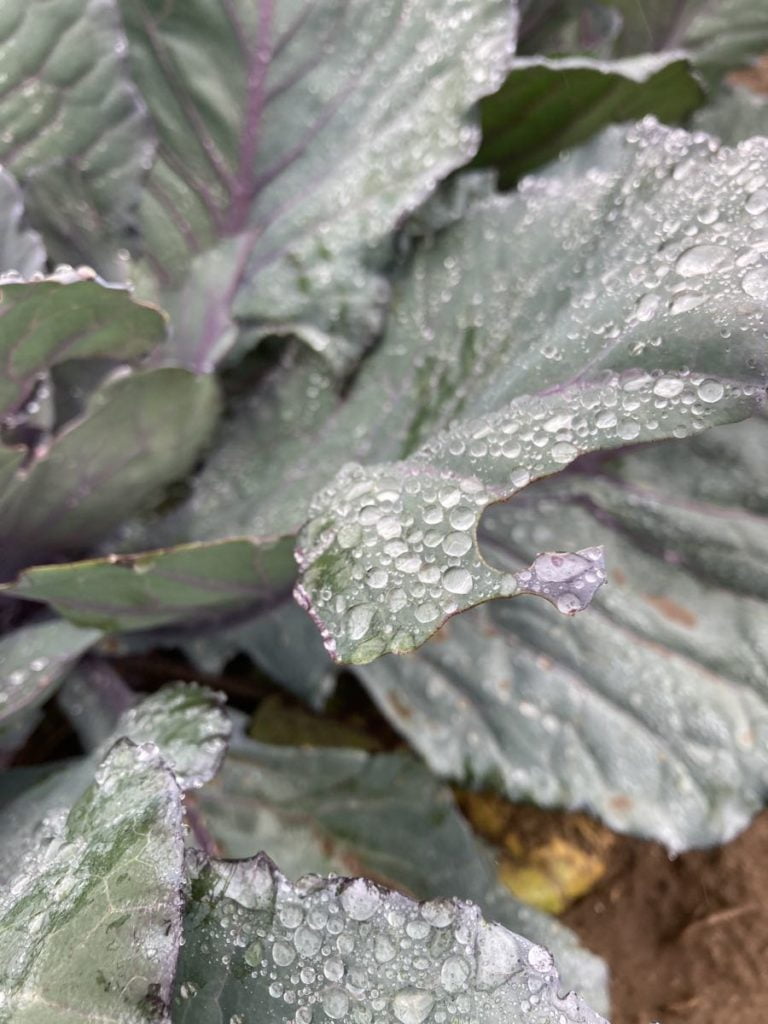
The fall crops love the cooler nights and are growing strongly. From top, cauliflower, napa cabbage and red cabbage.
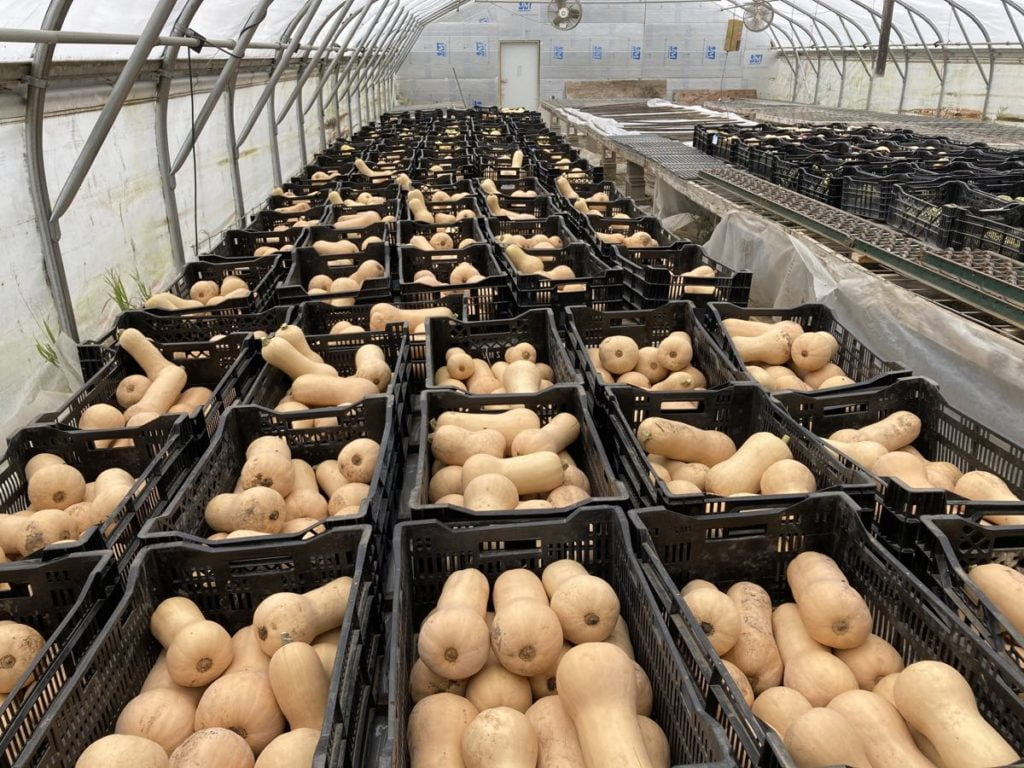
We hustled last week to bring in winter squash before the rain. It’s curing safely in our greenhouse, and should be ready to pack in the CSA boxes soon.
Veggie List & Veggie Notes
Week #17, September 10/11, 2020
– Weekly shares
– EOW/ green
Red potatoes, 3.5 lb
Beets, 2 lb
Plum tomatoes, 4 lb
Orange grape tomatoes, 1 heaping pint, in a paper bag
Red frying peppers (sweet), ~4
Poblano chiles (mildly hot), 2
Lettuce
Leek, 1 or 2
Yellow onion, 1
Basil, 1 sprig
One or two sites get a bell or snack pepper.
Next week’s box will probably contain winter squash and other vegetables.
Red potatoes – These beauties are from Josh and Noah Engel at Driftless Organics.
Poblano chiles (triangular, shiny; green or brown; MILDLY HOT) – Poblanos are the creme de la creme of chiles. They have lots of great flavor in combination with manageable heat. Roast and add to soup or casseroles. To reduce heat, remove the seeds and midveins. These will go nicely in a stir-fry with the bok choy and red peppers.
Beets – Storage: Cover and refrigerate. Beet roots will store for months. Wash well to remove leaf fragments. For all the cooking methods below, wash and scrub the beets but do not peel. The skins slip off easily once the beets are cooked and cooled.
Cooking beet roots on the stovetop: Slice or quarter, cover with water in a pot, and simmer until tender. This will take from 25 to 45 minutes depending on how large the beet pieces are. Drain.
Roasting beets in oven: Wash beets, but do not peel. On a sheet of aluminum foil, put beets (halved or quartered if large), salt, pepper and a few sprinklings of water. Seal the foil packet, and roast at 400 oF until tender, about 45 minutes to 1 hour. Slip off skins once cool.
Microwave: Slice beets in half and place in a large microwave-proof bowl. Add ¾ inch water and cover with a plate. Microwave on high until tender, about 9-20 minutes, depending on your microwave’s power. Drain and slip off skins.
Uses: Use cooked beets in cold salads, or dress simply with vinaigrette, onions, salt and pepper. Beets are also good tossed with sour cream, minced onion, fresh herbs and walnuts.
Leeks (look like big scallions) – These alliums have a milder flavor than onions. Nonetheless, they can be used in recipes that call for onions. To wash, split the leek lengthwise, from the green tops about halfway to the base, leaving the base intact. Rinse well under running water, separating the layers to flush. If necessary, split the leek further if soil has penetrated more than halfway down the leek. Shake dry. Leeks are generally eaten cooked. They can be sauteed, steamed or roasted. Intact leeks will store 2 to 3 weeks if covered loosely and refrigerated. The outer leaves will yellow. Just peel them off and discard. The inner leek layers will be fine.
Yellow onion – These onions are much more pungent, and will fry better, than the sweet Walla Wallas we’ve sent this summer.
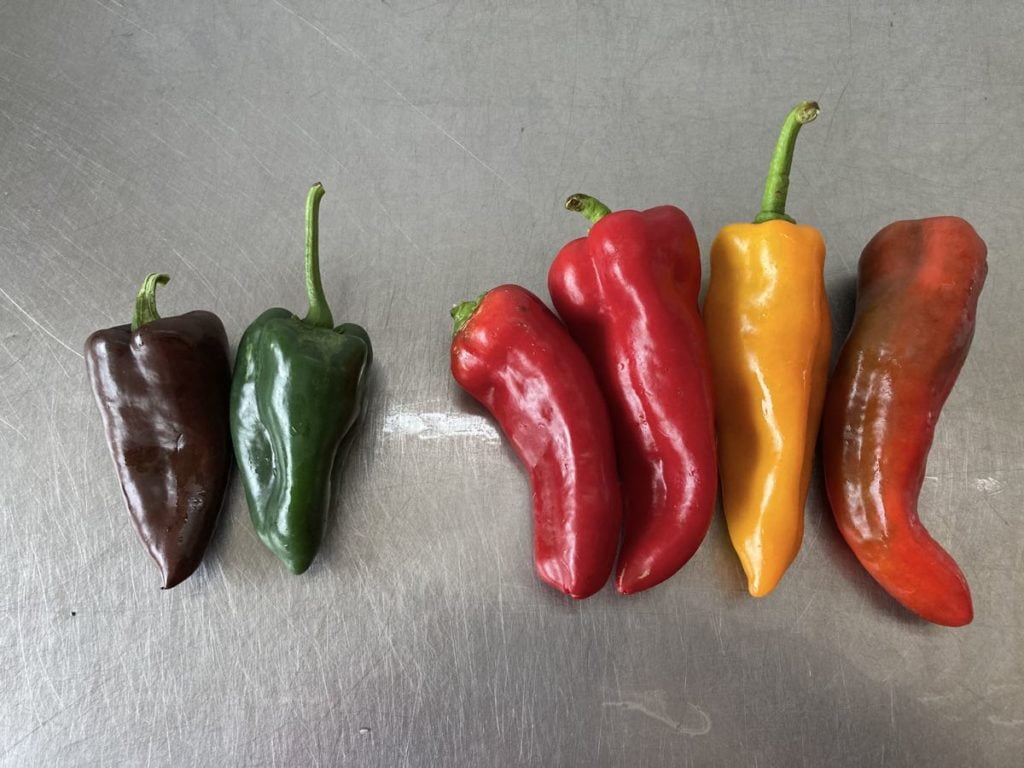
Left; poblano chiles (mildly hot) are triangular and can be either green or chocolate brown.
Right; Frying peppers (sweet) this week are mostly red but could be yellow or tinged with green. We will not send any fully green fryers this week, to make the poblanos easy to identify.

A few sites get an orange snack pepper.
RECIPES
Visit our 2020 Recipe Log or our 2019 Recipe Log or join our Facebook discussion group.
LOCAL THYME/ Cooking 101
Salad of Beets and Pistachios with Lemon Vinaigrette
Red Potato and Sweet Pepper “Shmash”
Fresh New England Clam Chowder
LOCAL THYME/ Cooking 202
Roasted Root Vegetables with Mustard Seed Vinaigrette
Beet and Leek Risotto with Blue Cheese Sauce
Beef or Bean Enchiladas with Roasted Pepper Sauce
LOCAL THYME/ Quick & Easy Meal
Taco Salad with Pinto Beans & Roasted Poblano Buttermilk Dressing
RECIPES FROM LAUREN
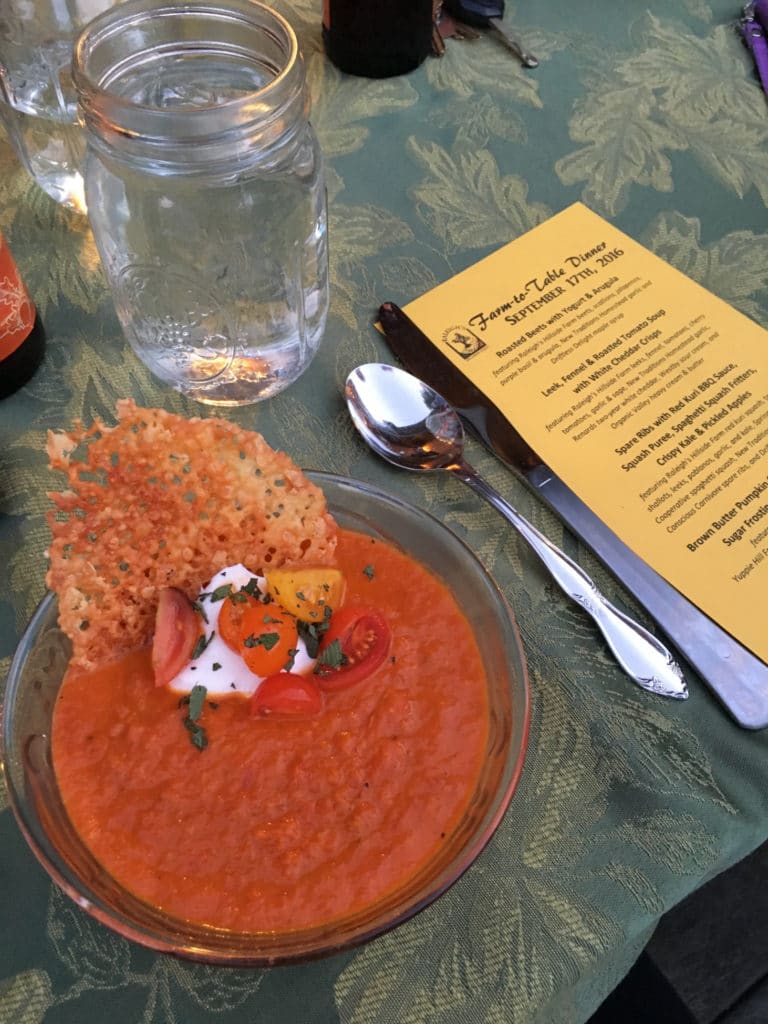
TOMATO BASIL SOUP WITH WHITE CHEDDAR CRISP
*This is the one recipe where it doesn’t really matter if the tomatoes you use are rock hard and not as perfectly ripe as summer tomatoes or not. However, if you happened to have the forethought to freeze or can whole tomatoes this summer, feel free to use those. In that case, pour the tomatoes with their juices in a 9 x 11 baking pan instead of a baking sheet.
Serves 8
Takes 1 hour, 20 minutes
2 tablespoons butter
2 large leeks, white and light green parts only, sliced
1/2 yellow onion, diced
1/2 teaspoon Kosher salt, plus more for seasoning
1/4 teaspoon freshly ground black pepper, plus more for seasoning
1 tablespoon olive oil
4 pounds plum tomatoes, cored and halved* (see note)
3 cups chicken stock
1 cup shredded white cheddar cheese
2 tablespoons minced fresh basil (or 2 teaspoons dried sage), plus more to taste
1/2 cup heavy cream
Sour cream, optional
1 pint cherry tomatoes, halved, optional
Preheat oven to 450 degrees.
Melt butter in a large stockpot over medium heat. Add leeks, onion, salt and pepper. Cook for 20 minutes, stirring occasionally to prevent sticking until soft. Reduce to low and continue cooking slowly for additional 20 minutes while the tomatoes roast.
Drizzle oil over baking sheet. Add tomatoes, cut side down. (If you are using frozen or canned tomatoes, see directions above). It’s fine if they are crowded but make sure they are in a single layer. If they don’t all fit on one pan, then leave the rest for another use. Sprinkle with a generous amount of salt and pepper. Roast for 40 minutes.
Add tomatoes (with juices) to stock pot along with chicken broth. Bring to a boil, reduce to a simmer and cook for 20 minutes on medium low.
Meanwhile, line a clean, dry baking sheet with parchment paper. Place 8 mounds of cheese on parchment. Reduce heat to 350 degrees and bake for 18 minutes until browned and lacy-looking. Remove from heat and allow to cool before moving.
Remove soup from heat. Puree with an immersion blender (or in a food process or blender). Add basil and cream. Taste and adjust seasonings.
Serve warm with cheese crisp, a dollop of sour cream, halved cherry tomatoes and a sprinkle of basil.
.
????
.
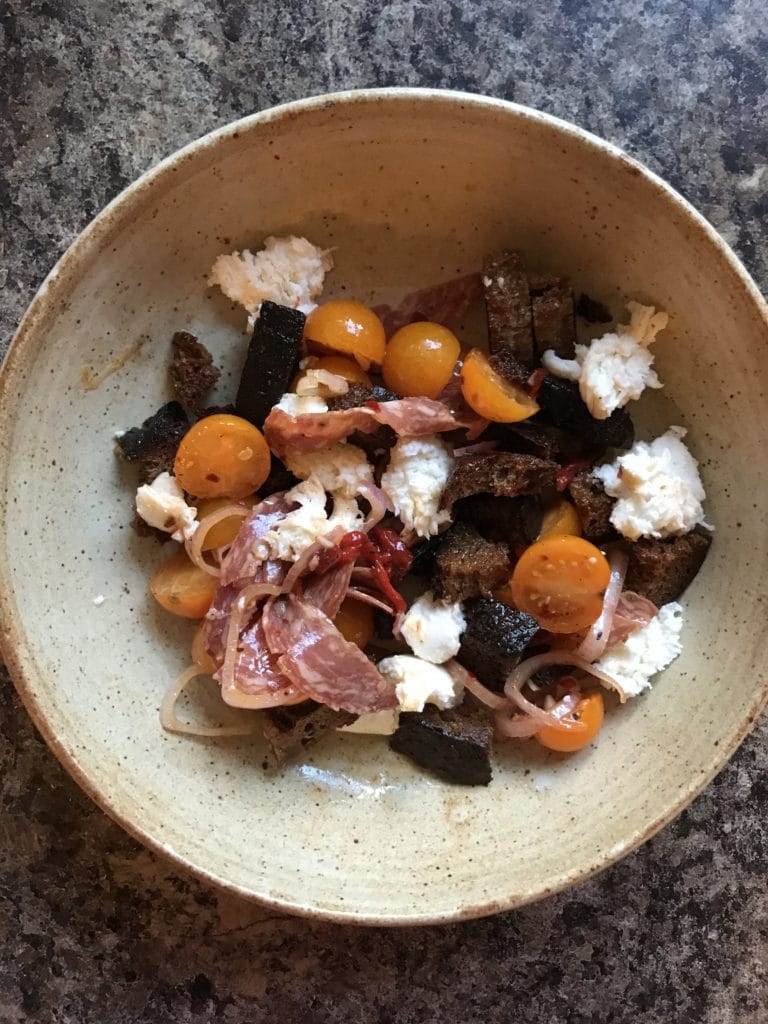
ROASTED PEPPER & CHERRY TOMATO PANZANELLA
Adapted from Six Seasons
Takes 45 minutes
Serves 2-4
2 pounds red, orange or yellow sweet peppers
2 large, thick slices sourdough bread (about 4 ounces)
6 tablespoons olive oil, divided
Kosher salt and freshly ground black pepper, divided
1 leek
4 garlic cloves, minced
2 tablespoons champagne vinegar
1/2 teaspoon red pepper flakes
1 pint cherry tomatoes, halved
4 ounces salami, preferably a fancy artisan one with a lot of fennel seasoning
4 ounces fresh mozzarella, torn into bite-size pieces
Preheat your broilers.
Place peppers on a baking sheet and broil them, turning occasionally, until the skins are blackened and blistered. It will take 10-12 minutes. Transfer the peppers to a large bowl and cover with a towel or plate.
Turn the oven temperature to 400 degrees. Tear bread into rough bite-size pieces and toss with 2 tablespoons olive oil and a light sprinkling of salt and pepper on a baking sheet. Place in the oven and bake until golden brown, 10-20 minutes. Check every 5 minutes or so since every type of bread will take a different amount of time. When you check the croutons, also shake the pan to redistribute and get even browning on all sides. You want the croutons to have a crunchy exterior and soft middle.
Once the croutons are done, peel the skins off the peppers, remove the seeds, and cut into thick 1-inch slices. Place in a large bowl with leek, garlic, vinegar, red pepper flakes, cherry tomatoes, 1 teaspoon Kosher salt and 1/4 teaspoon freshly ground black pepper. Toss to combine. Add salami and remaining 4 tablespoons olive oil, and toss again.
Right before serving, add the croutons and mozzarella. Toss mixture once more before serving and enjoy!
.
????
.
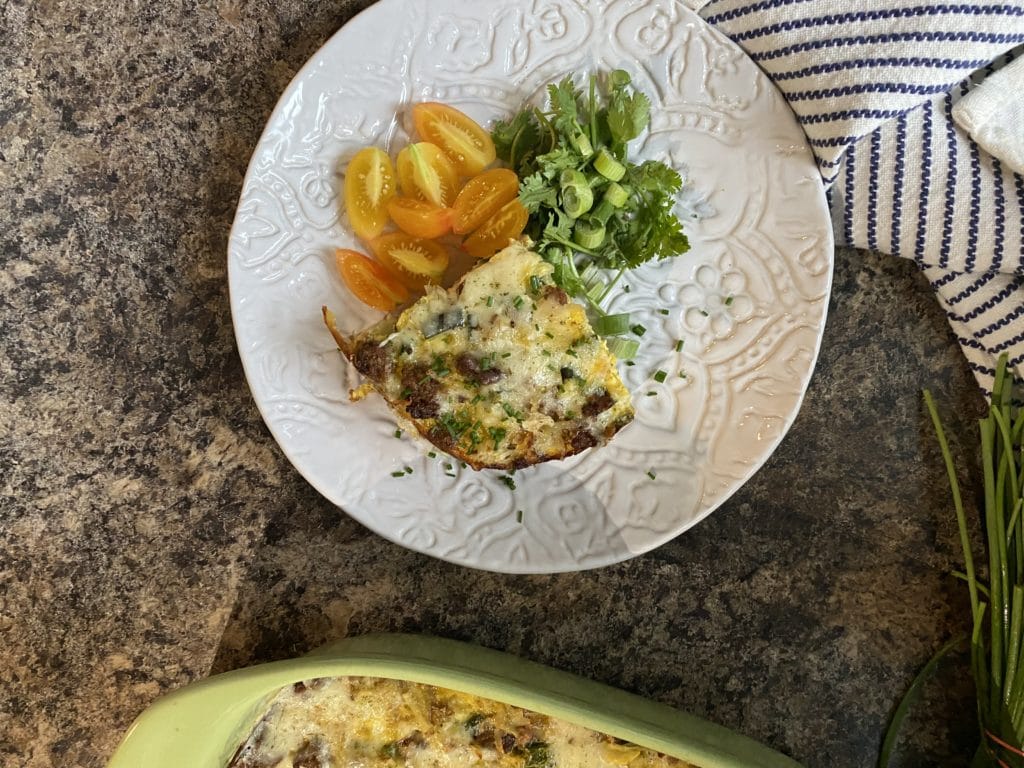
POBLANO & POTATO BREAKFAST CASSEROLE
Serves 6-8
Takes 1 hour (most of it inactive)
1 tablespoon olive oil
3-4 cups shredded potatoes
2 poblanos, diced
1/2 yellow onion, diced
1 pound breakfast sausage, browned
8 eggs
1/2 cup whole milk
1 teaspoon hot sauce
1 teaspoon mustard powder
1 teaspoon Kosher salt
1/2 cup favorite cheese (I used a lovely dill havarti)
- Preheat oven to 350 degrees.
- Grease a 9×13 casserole dish with olive oil.
- Combine potatoes, peppers, onion and pork sausage in prepared casserole dish. Toss to combine.
- In a medium bowl, whisk together eggs and milk. Add hot sauce, mustard powder, and salt. Pour evenly over potato mixture.
- Place in pre-heated oven and bake for 35-40 minutes until the eggs are set. Add cheese and cook 5 minutes longer just to melt (or lightly brown).
- Enjoy!
Week #16, Tomato peak
- On: September 02, 2020
 0
0
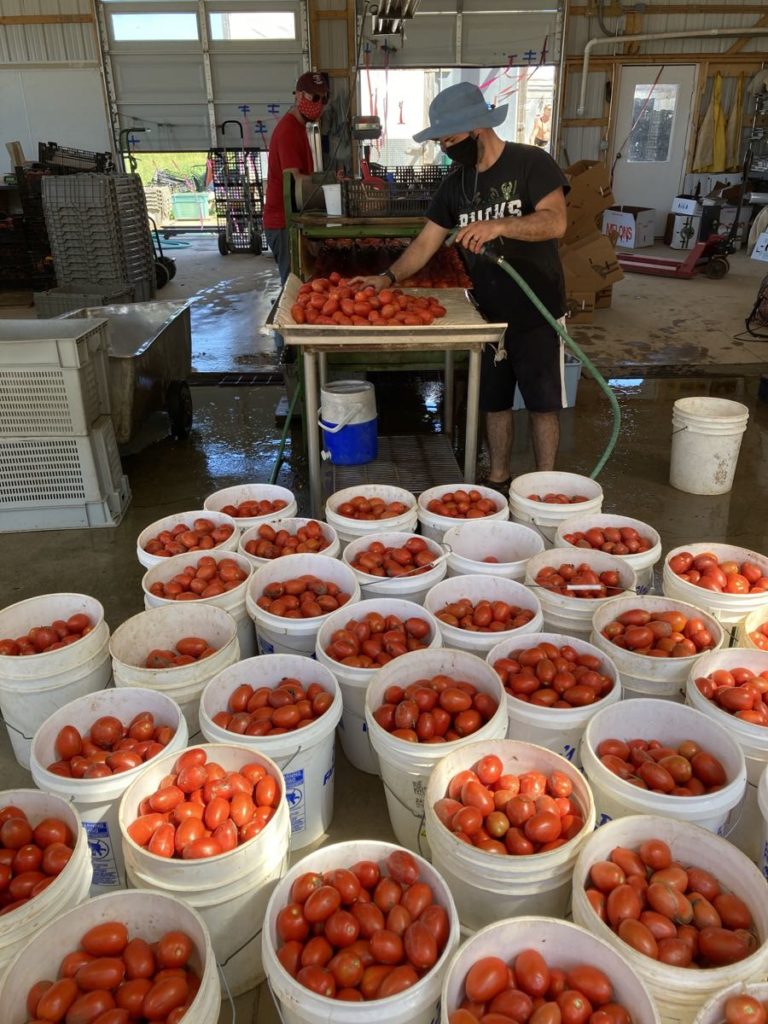
We are at peak tomato harvests this week. That’s why we can offer plum tomatoes for sale. If we have enough next week, we’ll offer sales again. Watch for emails from us.
Veggie List & Veggie Notes
Week #16, September 3/4, 2020
– Weekly shares
– EOW/ purple
– Sampler/ moon
Sweet corn, ~10 ears
Slicing tomatoes, ~3 lb
Romano beans, 1/2 lb
Collards or kale (red or green), 1 bunch
Watermelon (by site; red or yellow)
Bell peppers, 1 or 2, red or green
Anaheim chile, 1
Walla Walla onion
Garlic, 1 bulb
Next week’s box will probably contain tomatoes, peppers, leeks, beets and more.
Sweet corn – This is another batch of very pretty corn and the last corn of the season. I am soooo relieved that this delivery falls on our EOW/green week. I know our green members have been waiting for another batch of sweet corn. Our sweet corn deliveries end in a 3:2 ratio, purple:green. That’s the best we can do.
Anaheim chile (long, slender, green or red) – These flavorful chiles have medium heat. They look deceptively like frying peppers. Some sites get a yellow frying pepper this week, but no one gets red or green frying peppers this delivery. If you have frying peppers left over from last week, keep segregated from the Anaheim so you can recognize them.
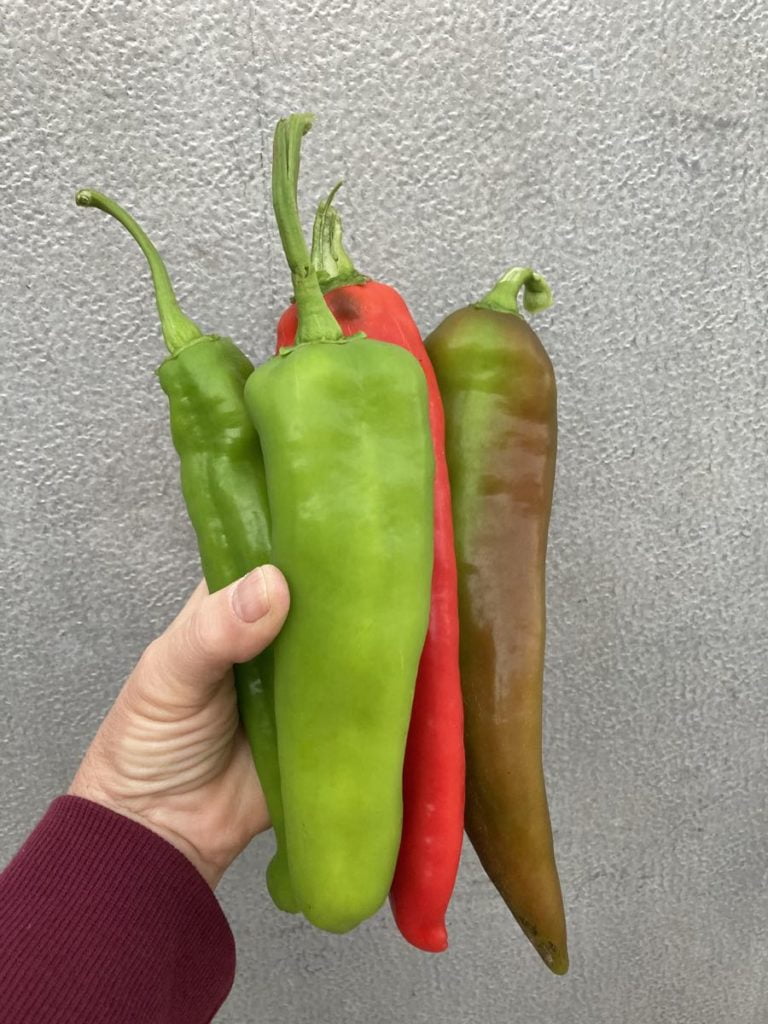
Everyone gets one Anaheim. Could be any of these colors (but not yellow).
RECIPES
Visit our 2020 Recipe Log or our 2019 Recipe Log or join our Facebook discussion group.
LOCAL THYME/ Cooking 101
Chicken, Kale, and Anaheim Pepper Burrito
Tomato Watermelon Goat Cheese Salad
Vegetarian Tortilla Soup
LOCAL THYME/ Cooking 202
Watermelon Granita
Romesco Sauce
Kale, Lentil and Kielbasa Soup
LOCAL THYME/ Quick & Easy Meal
Fish Tacos with Tomato, Pepper and Hot Sauce Salsa
RECIPES FROM LAUREN
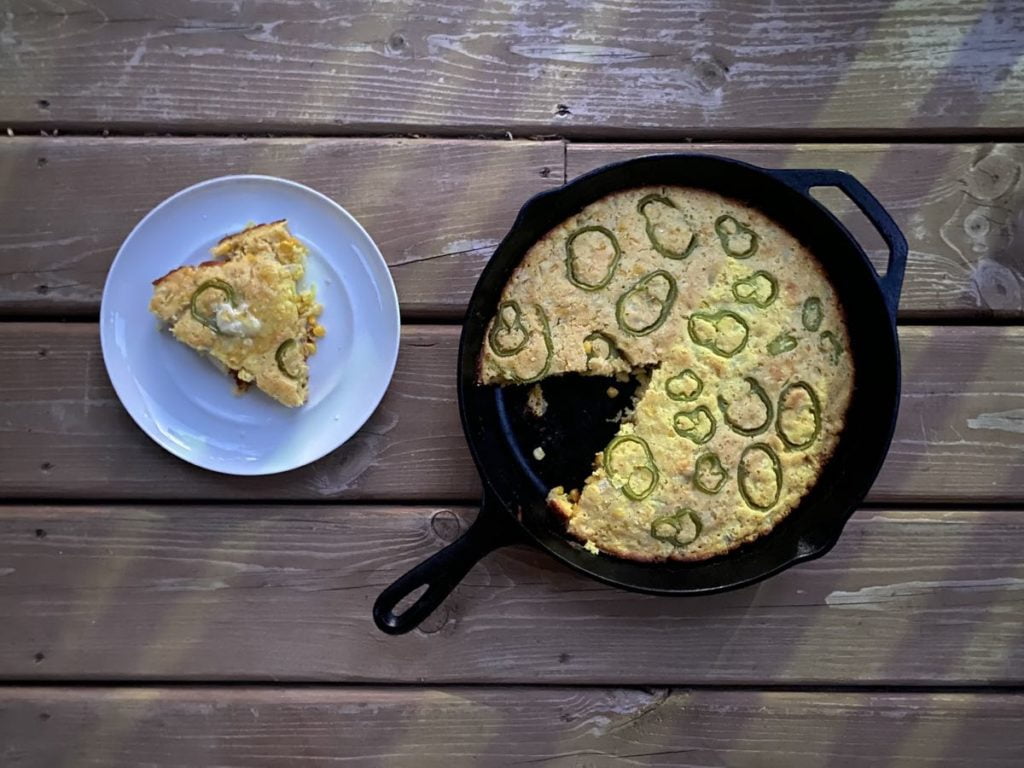
LOADED SUMMER CORNBREAD
Serves 6-8.
Takes 45 minutes.
1 cup all-purpose flour
1 cup cornmeal
3 tablespoons sugar
1-1/2 teaspoons baking powder
1/2 teaspoon baking soda
1 teaspoon Kosher salt
4 tablespoons melted butter, divided
1 cup buttermilk
2 eggs
2 cups fresh (or frozen) cooked corn
1/2 large Walla Walla onion, diced
1 large anaheim pepper, thinly sliced into rounds
Preheat oven to 400 degrees.
In a large bowl combine flour, cornmeal, baking powder, baking soda and salt. Make a well in the flour mixture and add in 3 tablespoons melted butter, buttermilk, eggs, corn and onion. Stir until smooth.
Pour remaining butter into a large oven-proof skillet. Add batter and shake the pan so it’s even. Place anaheim pepper slices on top and gently press into the cornbread.
Bake for 25-30 minutes, until a toothpick inserted into the center comes out clean.
.
????
.
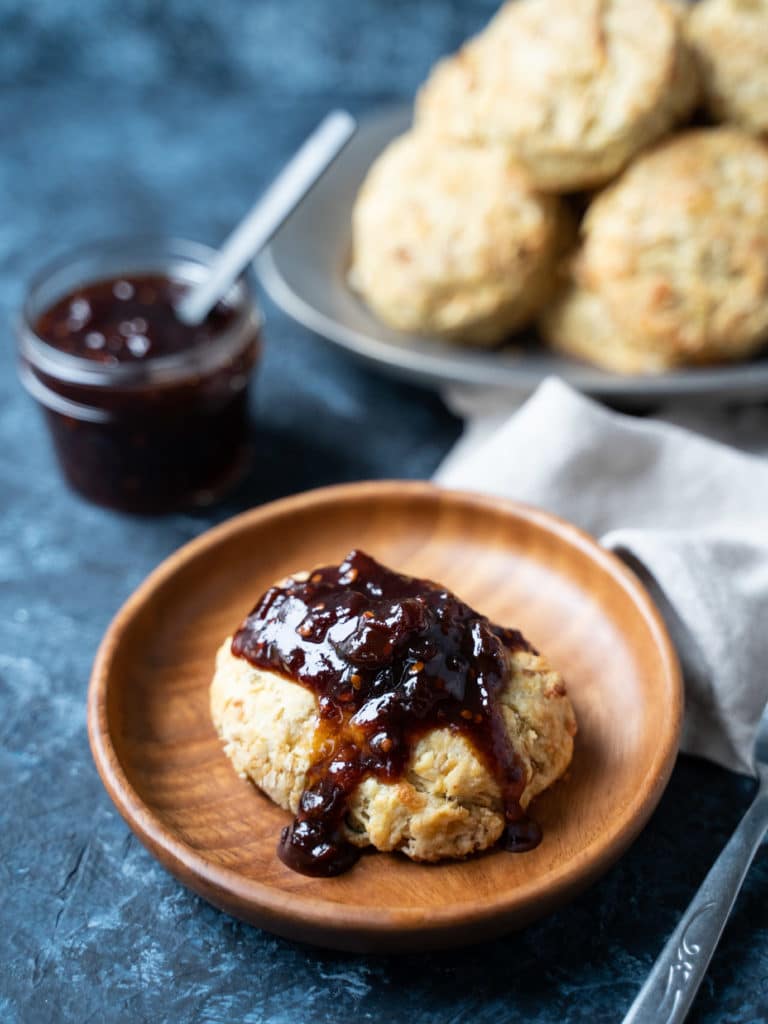
TOMATO BALSAMIC JAM
Serves 6-8.
Takes 2 hours for jam (much of it inactive).
3 cups diced, cored tomatoes
1 cup brown sugar
1/2 cup sugar
2 tablespoons honey
1 tablespoon balsamic vinegar
Pinch red pepper flakes
Pinch ground cinnamon
Pinch ground allspice
1. Combine all ingredients in a medium saucepan. Bring to a boil, then reduce to a simmer and cook until reduced to a thick jam (about two hours). Stir often to keep the jam from sticking to the bottom of the pan.
2. Use on warm biscuits with butter or your loaded cornbread!
.
????
.
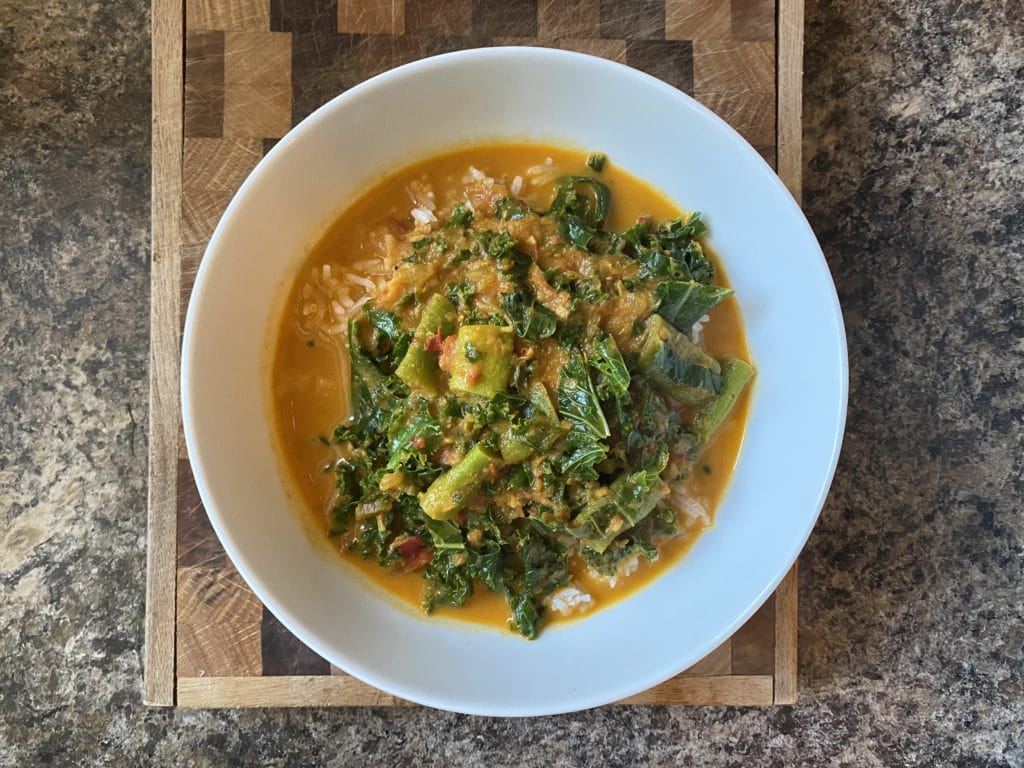
INDIAN CURRY WITH ROMANO BEANS & KALE
Takes 45 minutes.
Serves 4.
2 tablespoons olive oil
1/2 Walla Walla onion, diced
4 garlic cloves, minced
1-2 “suntan” bell peppers, seeded and diced
1-1/2 teaspoons dried coriander
1 teaspoon dried ginger
1/2 teaspoon ground turmeric
1/2 teaspoon cinnamon
1/2 teaspoon mustard powder
1/2 teaspoon fennel seeds
1/4 teaspoon ground cloves
10 twists black pepper
2 cups chicken stock
2 large slicers, cored and diced
1/2 pound Romano beans
1 teaspoon Kosher salt
5-6 leaves of kale, stems removes and roughly chopped
1 15-ounce can coconut milk
Cooked white or brown rice
– In a large stock pot or Dutch oven, heat the oil. Add onion, garlic and peppers. Saute for 5 minutes over medium heat until softened.
– Add spices and cook for 30 seconds to toast.
– Add chicken stock and tomatoes. Bring to a boil, reduce to a simmer and cook for 5 minutes until tomatoes are broken down.
– Blend in a blender, food processor or with an immersion blender until smooth.
– Return mixture to stove and add romano beans and salt. Cook over medium heat until the beans are tender.
– Add kale and cook 2-3 minutes more until kale is fully wilted.
– Remove from heat and stir in coconut milk. Serve over rice.
Week #15; Lows and highs of the week.
- On: August 26, 2020
 0
0
“I’m waterboarding in my own sweat.”
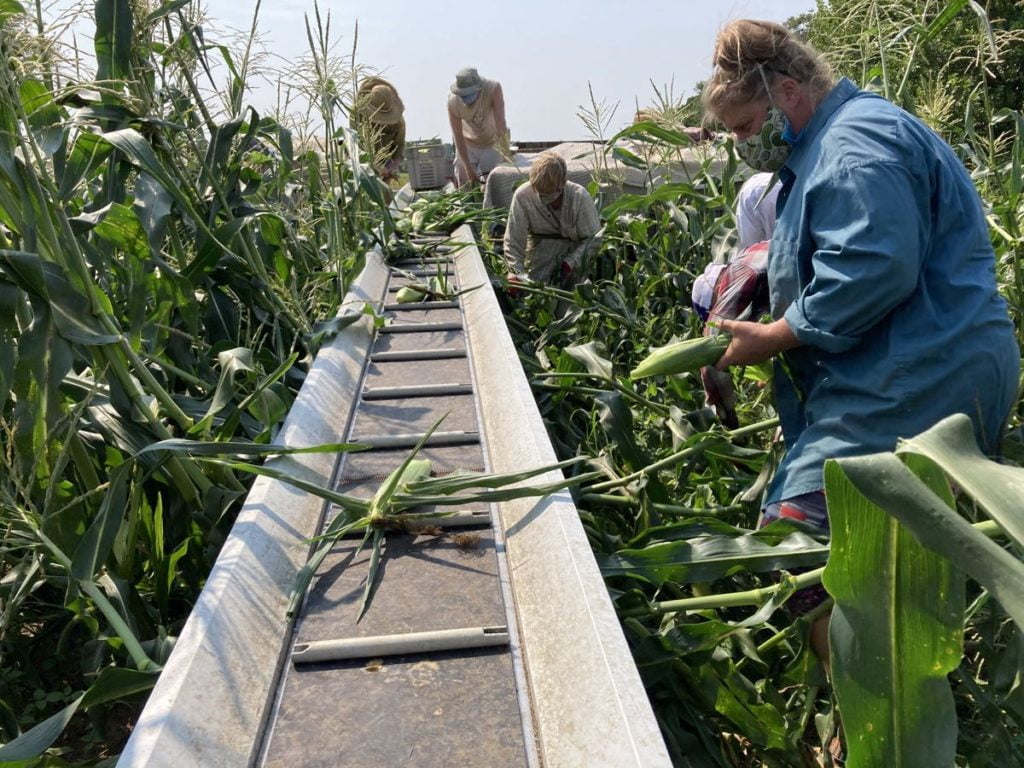
Yup, it’s been that kind of week. The quote above was overheard during a sweaty sweet corn harvest. The derecho two weeks ago blew down parts of this week’s sweet corn field. That was the same storm that damaged so much field corn in Iowa. Sweet corn still ripens when blown down but is much harder to pick because the stalks are a tangled mess. Even though outside, we wear our masks when working this close together. The harvest was worth the sweat. This is an unusually nice batch of corn.
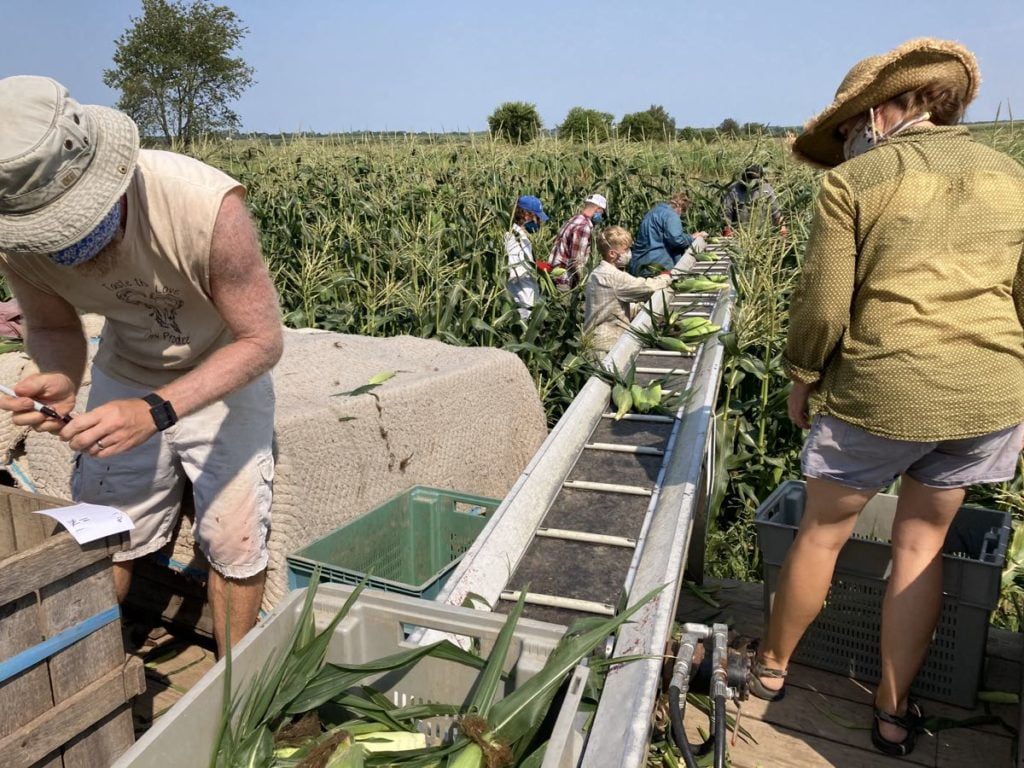
Everyone claims a row (if you can find it), picks the ripe ears and puts them on a conveyor attached to our harvest wagon. Ben and Karen count every ear, an essential step for dividing up the corn.
And now the highs

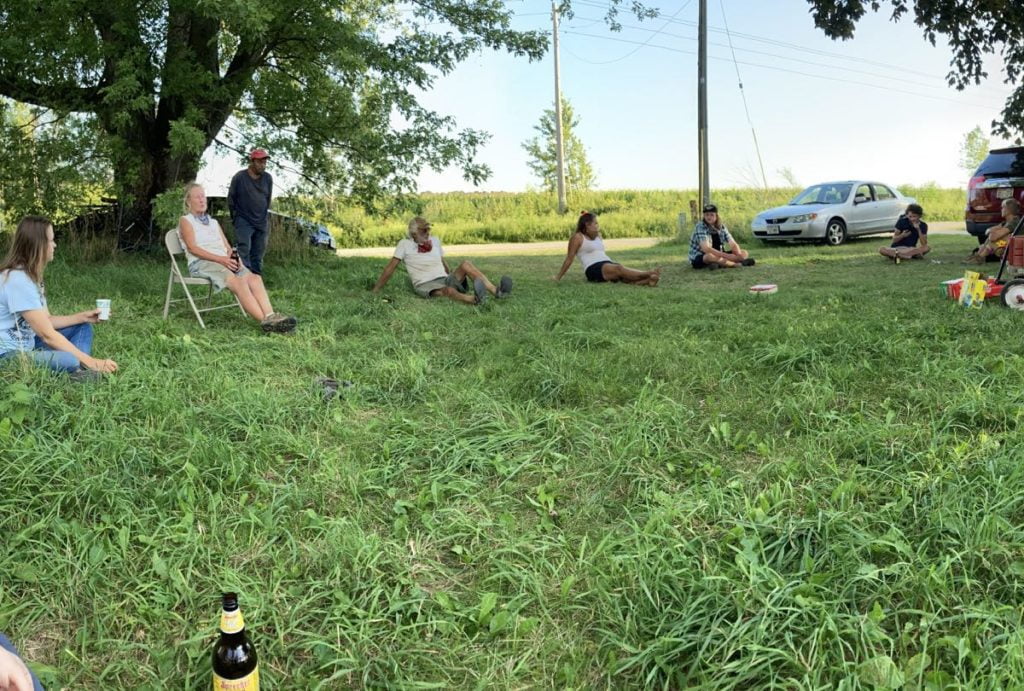
We are grateful that farming allows us some semblance of normalcy. Our small community can work together and socialize every day, unlike many people working in isolation. Above, we had a socially-distant happy hour to mark two crew members returning to school or other work. It takes two photos to show everyone! People sitting close together share a household. It was a treat to sit around and share a few cold drinks.
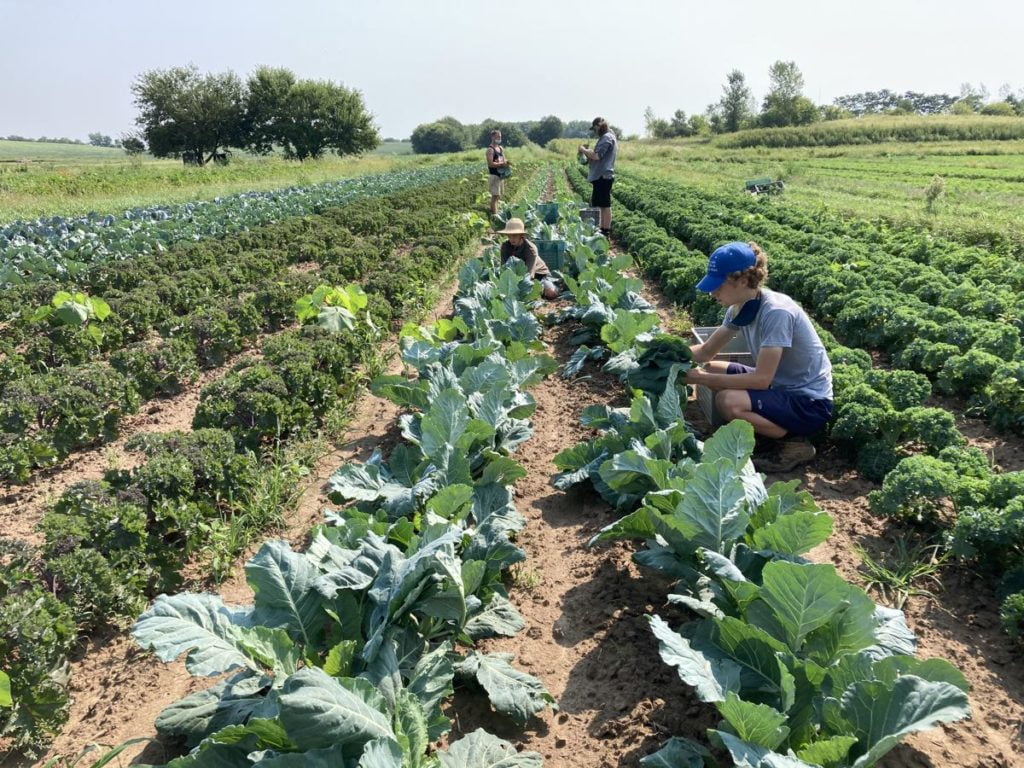
Our second planting of kale and collards is ready for its first harvest. Leaves from these young plants are very tender, a difficult thing to achieve during hot summer weather. It was an easy harvest. The field is weed-free and open to cooling winds. In a planting this large, we can spread out and take off our masks. You may have noticed that we stopped sending greens earlier this summer. The first planting gets tough and fibrous. It’s a pleasure to move into our second planting.

On a 90 degree day, this is everyone’s favorite path back to the buildings, cooled by irrigation spray.
Veggie List & Veggie Notes
Week #15, August 27/28, 2020
– Weekly shares
– EOW/ green
Sweet corn, ~10 ears
Collards or kale, 1 bunch
Watermelon (by site, yellow or red)
Plum & slicing tomatoes, 3 lb total
Peppers (bell/ frying), ~2
Carrots, ~2 lb
Walla Walla onion, 1 0r 2
Garlic, 1 bulb
Curly parsley, 1 bunch
By site; Silver Slicer cucumber or a few snack peppers or an extra frying pepper.
Next week’s box will probably contain tomatoes, sweet corn, melon, peppers, greens and other summer veggies.
Sweet corn – This batch of ‘Incredible’ variety is the prettiest batch yet. We expect to have sweet corn again next week.
Garlic – These large-cloved bulbs are the German Extra Hardy strain.
Curly parsley – We are finally sending an herb other than basil! Enjoy it!
Mixed plum & slicing tomatoes – Wow, the tomatoes ripened quickly during this hot spell.
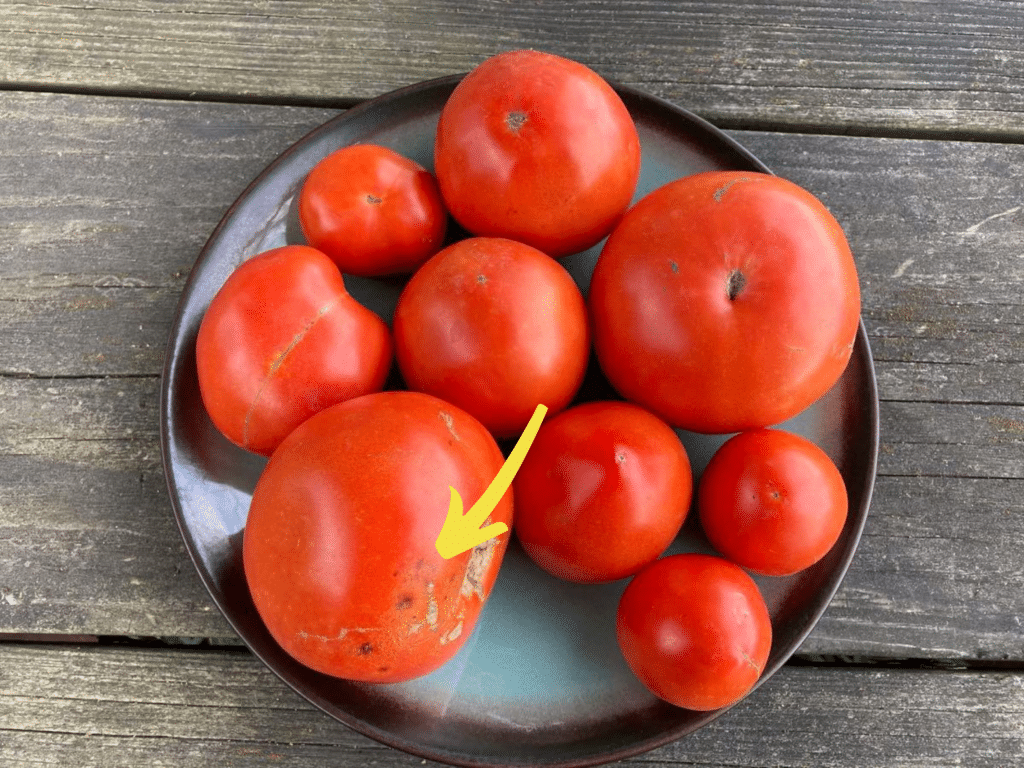
As I mentioned a few weeks ago, I encourage you to spread your tomatoes on plates so you can keep an eye on them. Eat first the ripest ones or any showing flaws. The yellow arrow shows small inconsequential flaws that will grow with time. Eat now.
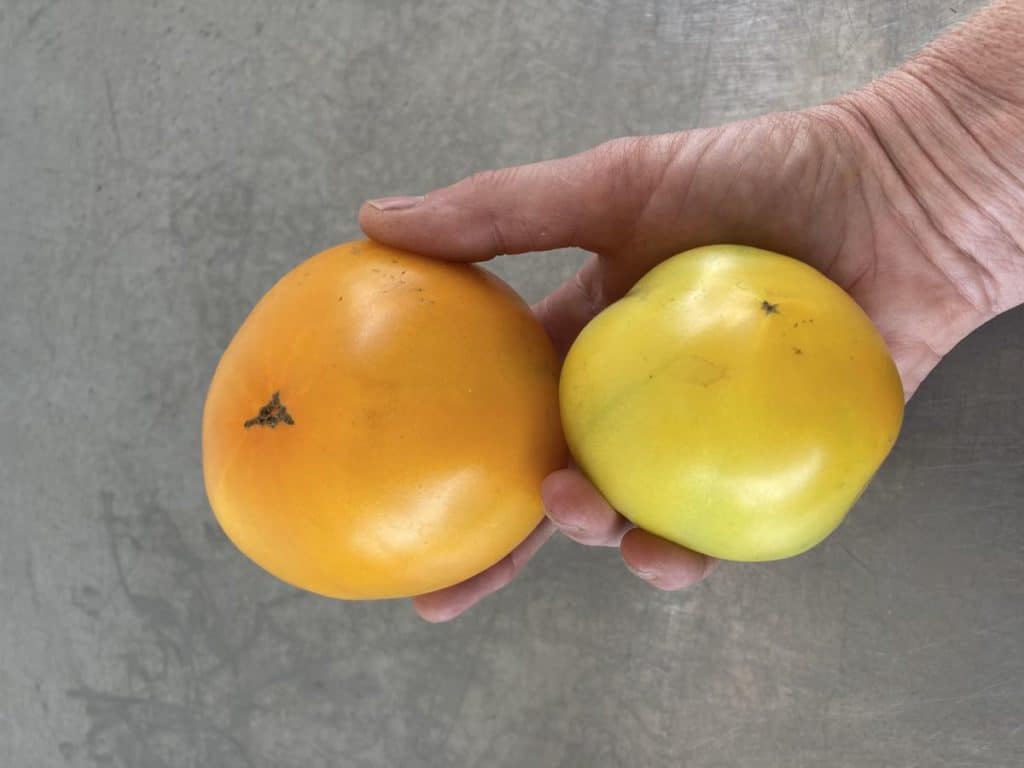
Left, fully ripe yellow tomato. Right, less ripe yellow tomato, showing some greenish coloring.
Yellow tomatoes get very soft when they are ripe. We’re experimenting with harvesting yellow tomatoes less ripe, so you have a chance to eat them before they are overripe. You might get a tomato that’s ready to eat (above, left) or you might get one that needs a day or two on your kitchen counter (above, right).
RECIPES
Visit our 2020 Recipe Log or our 2019 Recipe Log or join our Facebook discussion group.
LOCAL THYME/ Cooking 101
Corn, Pepper and Pinto Bean Burritos
Corn, Kale and Goat Cheese Fritters
Pizza with Tomatoes and Peppers
LOCAL THYME/ Cooking 202
Zesty Corn Relish
Parmesan and Kale Frittata topped with Fresh Tomatoes
Spicy Tomato Juice
LOCAL THYME/ Quick & Easy Meal
Chickpea and Collards Curry with Tomato and Coconut Milk
RECIPES FROM LAUREN
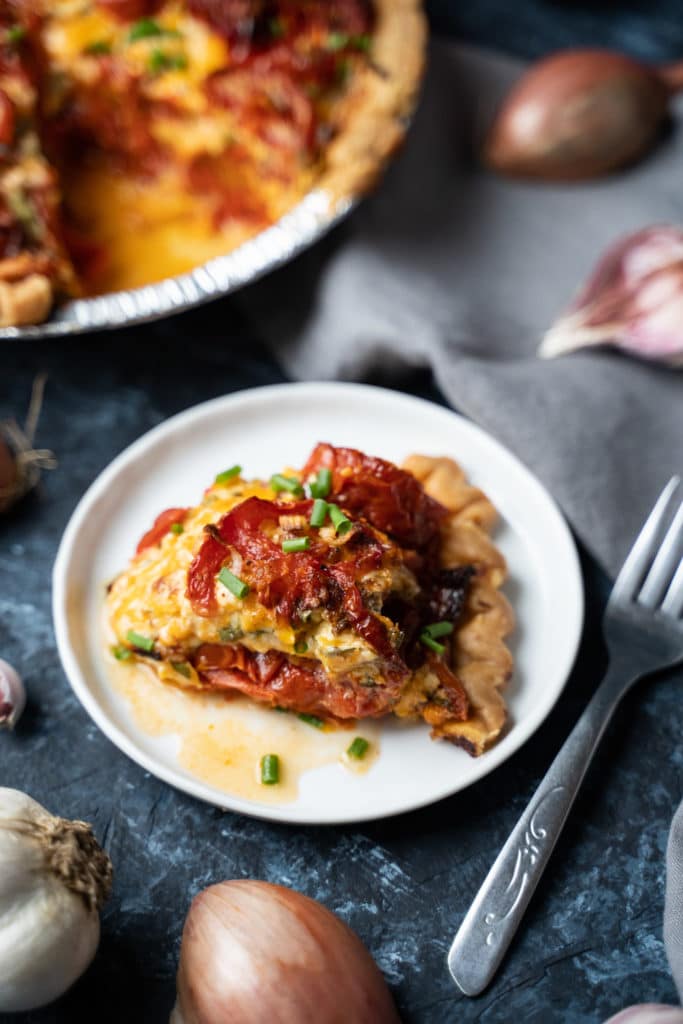
TOMATO PIE WITH BROWN BUTTERED GARLIC
Adapted from Bon Appetit
Takes 2 hours (a little more if making the crust from scratch)
Serves 4-6
1 batch favorite store-bough pie crust (or make your own; my favorite tomato pie crust is here)
4-5 pounds tomatoes
2 tablespoons olive oil
1/2 teaspoon kosher salt
1/4 teaspoon freshly ground black pepper
8 tablespoons butter (1 stick)
6 garlic cloves, sliced
1/2 cup mayonnaise
1-1/2 cups shredded havarti*
1/4 cup finely grated Parmesan
1/4 cup roughly chopped fresh parsley (or 1 tablespoon dried)
1/2 Walla Walla onion, thinly sliced
- Preheat oven to 475 degrees.
- If making your crust from scratch, get this going first so it has plenty of time to chill in the freezer. If not, hop to step 3.
- Core tomatoes and then cut into 1/4-inch slices. Lay tomato slices out on two large baking sheets so that they are mostly in a single layer. This may take four pounds of tomatoes or it may take five depending on how thick your slices are. Drizzle with olive oil and sprinkle with salt and pepper. Roast in preheated oven for 45 minutes until the tomatoes look dehydrated and most of the liquid has evaporated. Rotate your pans a couple times to ensure even cooking.
- While the tomatoes bake, melt butter in a small sauce pan over medium low heat. Add garlic and cook until the butter smells browned. It will foam and then turn clear and then begin to brown, about 5-8 minutes. Stir and check the pan often during this process to ensure it does not burn. Place a fine mesh sieve over a small bowl and strain out garlic while saving the butter.
- Transfer garlic to a cutting board and finely chop.
- Combine garlic, mayonnaise, cheddar, parmesan, and parsley in a small bowl. Stir until smooth.
- By now your tomatoes should be done cooking. Remove them from the oven and reduce the temperature to 375 degrees.
- Roll out your pie crust and place in a 10-inch pie pan. If using a pre-made frozen pie crust, I recommend using two crusts. This is a lot of tomatoes and it will overflow if you just use one. Place aluminum foil and pie weights (or rice or dried beans) inside and bake for 15 minutes. If you purchased a pre-made crust you can skip this step.
- Remove crust from oven. Place all but the 10 (of the most perfect) roast tomato slices into the pie crust in even layers. Spread mayo mixture over the top and then arrange 10-12 cooked tomatoes over the top followed by thinly sliced onion. Glaze the whole thing with your prepared garlic butter by slowly drizzling evenly over the top.
- Bake for 45- 55 minutes until the crust is golden. Let cool at least 5 minutes before slicing or devouring.
*Any favorite cheese would work here. I love havarti and tomato together, but a mild cheddar, Gruyere or Swiss would all also work great!
.
????
.
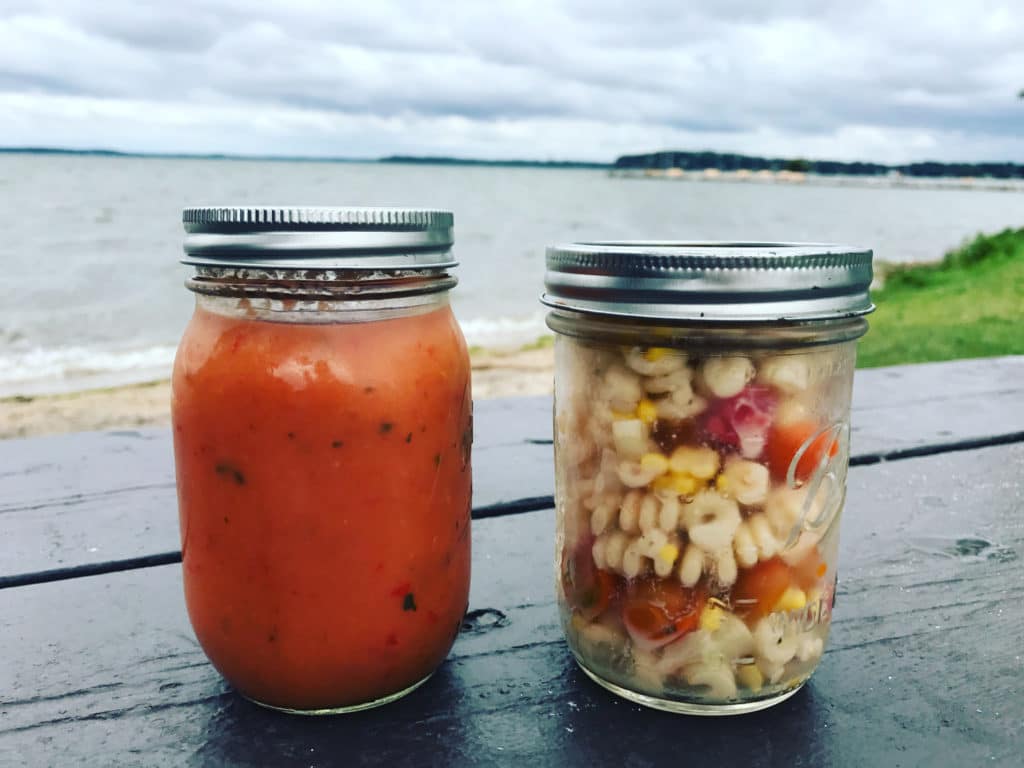
SWEET CORN PASTA SALAD
Serves 8-12 as a side
Takes 40 minutes
1 pound pasta, the type is your choice
1 silver slicer, seeded and diced
1/2 Walla Walla (or other sweet) onion
3 colored peppers, diced
4 ears corn, husks removed
Dressing:
1/4 cup mayo
1/4 cup Greek yogurt
1 tablespoon white wine or white vinegar
1 tablespoon kosher salt
1/2 tablespoon sugar
1/2 teaspoon freshly ground black pepper
- Bring a large pot of well-salted water to a boil on the stove over high heat. Once boiling, add pasta and cook to al dente according to package directions.
- While pasta cooks, prepare your dressing by whisking together all ingredients.
- Drain pasta in a colander and let sit for a minute to lose some of the water, then add to a large bowl. Add dressing to noodles while they’re still warm and toss to combine. Set aside.
- Refill stock pot with salted water and bring to a boil. Once boiling, add sweet corn and cook for 7 minutes. Meanwhile, chop your other veggies. Rinse corn under cold water to cool and then cut off kernels with a knife. Add cucumber, onion, peppers, and corn to bowl. Toss to combine.
- Taste and adjust salt and pepper as desired.
.
????
.
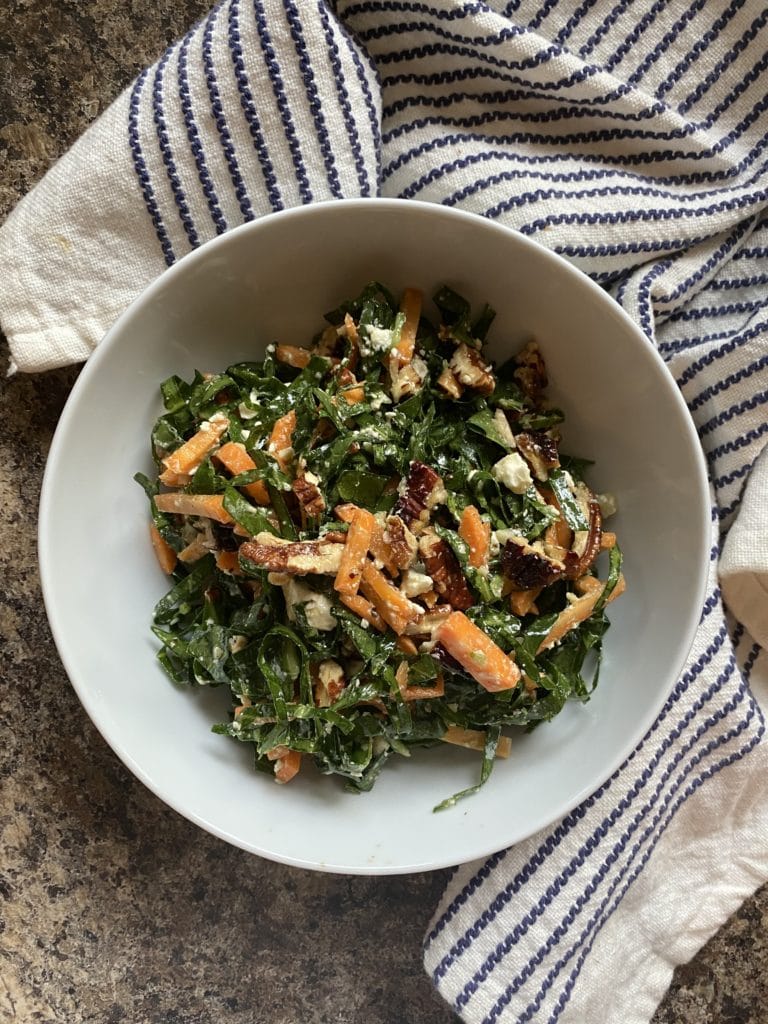
COLLARD & CARROT SALAD WITH PECANS AND FETA
20 minutes
Serves 4-6
1 bunch collards or kale, stems removed, thinly sliced
1 pounds carrot, peeled and shredded (or cut into matchsticks
4 ounce feta, crumbled
2 cups toasted pecans, toasted for 5 minutes in a 400 degree oven and roughly chopped
Maple Dijon Dressing
2 garlic cloves, minced
1/4 cup olive oil
1 tablespoon maple syrup
1 tablespoon Dijon mustard
2 tablespoons fresh lime juice
3 hefty pinches salt (about 1/2 teaspoon)
- In a large bowl, combine collards (or kale) and carrots.
- In a small bowl, whisk together all dressing ingredients until smooth. Add to greens and carrots, and toss until well-coated.
- Add feta and pecans. Toss to combine. Taste and adjust seasonings as desired.
.
Week #14, Our planting is almost finished.
- On: August 19, 2020
 0
0
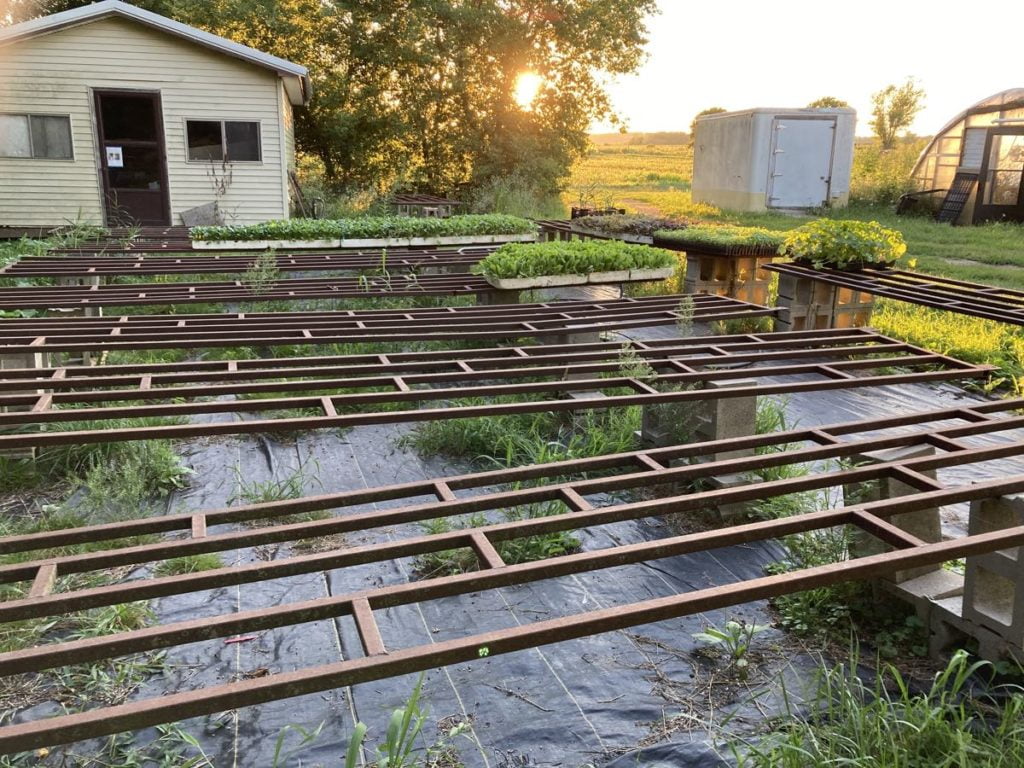
Look at those empty seedling benches! We have just a few flats of seedlings still to transplant this year, mostly bok choy and other fall greens.
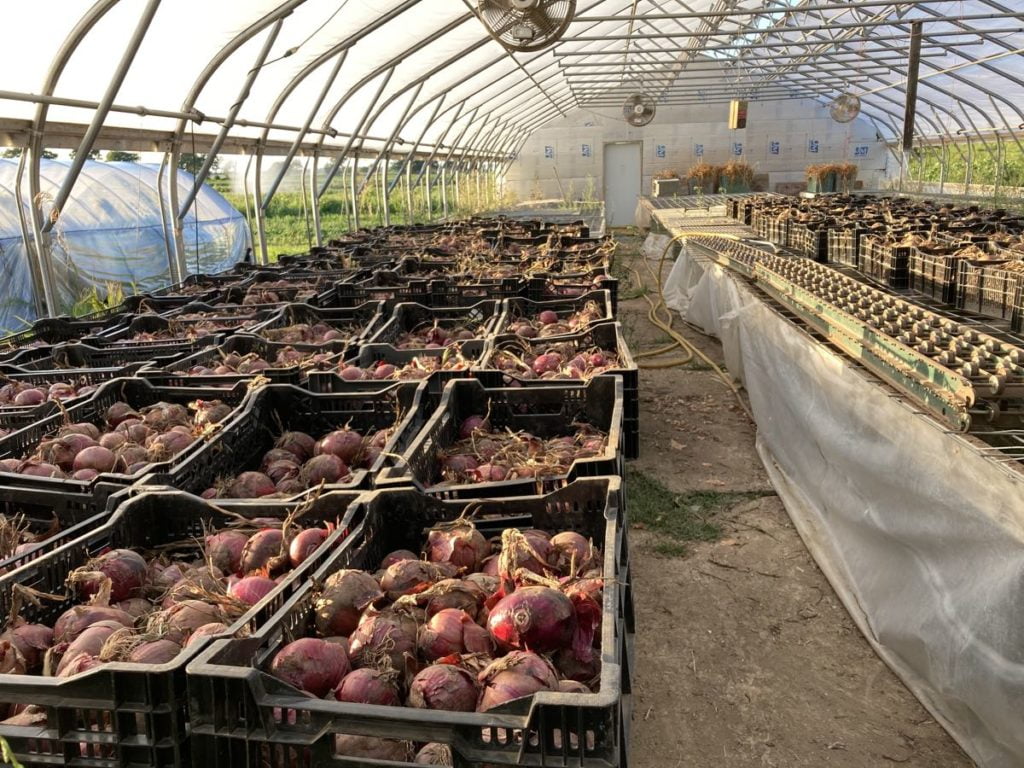
The greenhouses are long empty of plants. Now, we’re curing onions in the largest greenhouse. It’s a good place for the onions to dry down and mature before we move them into the barn loft.
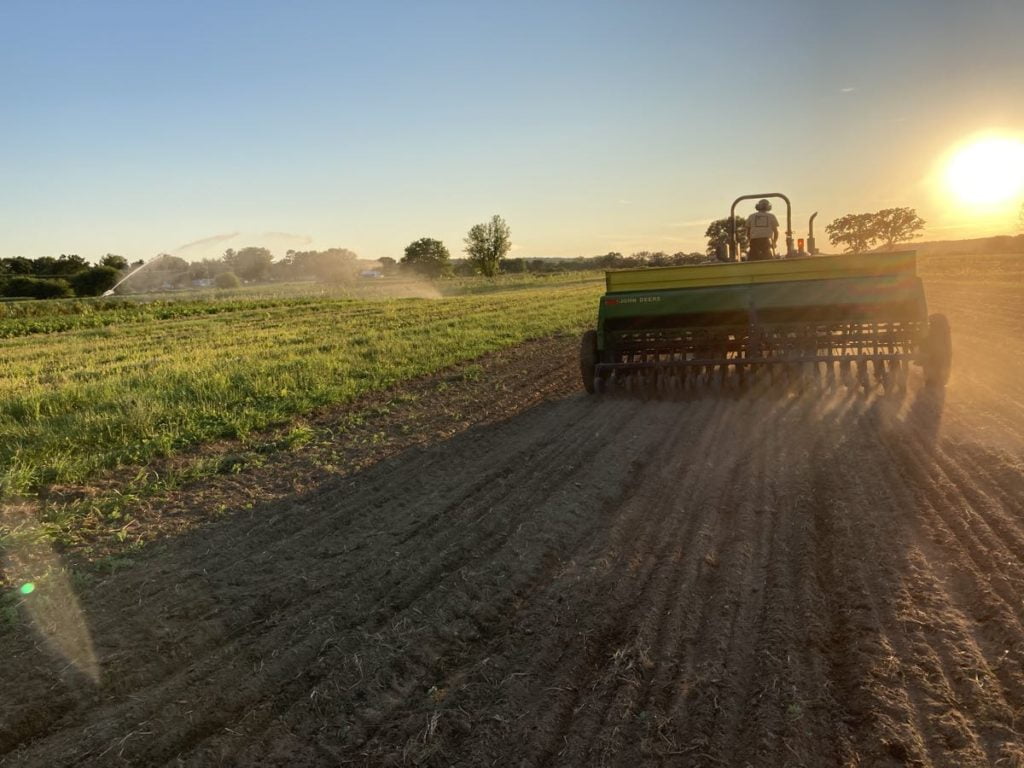
Steve seeded one of our final summer cover crops tonight. This is a good moment to seed quick-growing annual cover crops, especially as vegetable crop finish and fields open up. Soon we’ll begin seeding overwintering fall cover crops that protect the soil in winter, then fix nitrogen in spring.
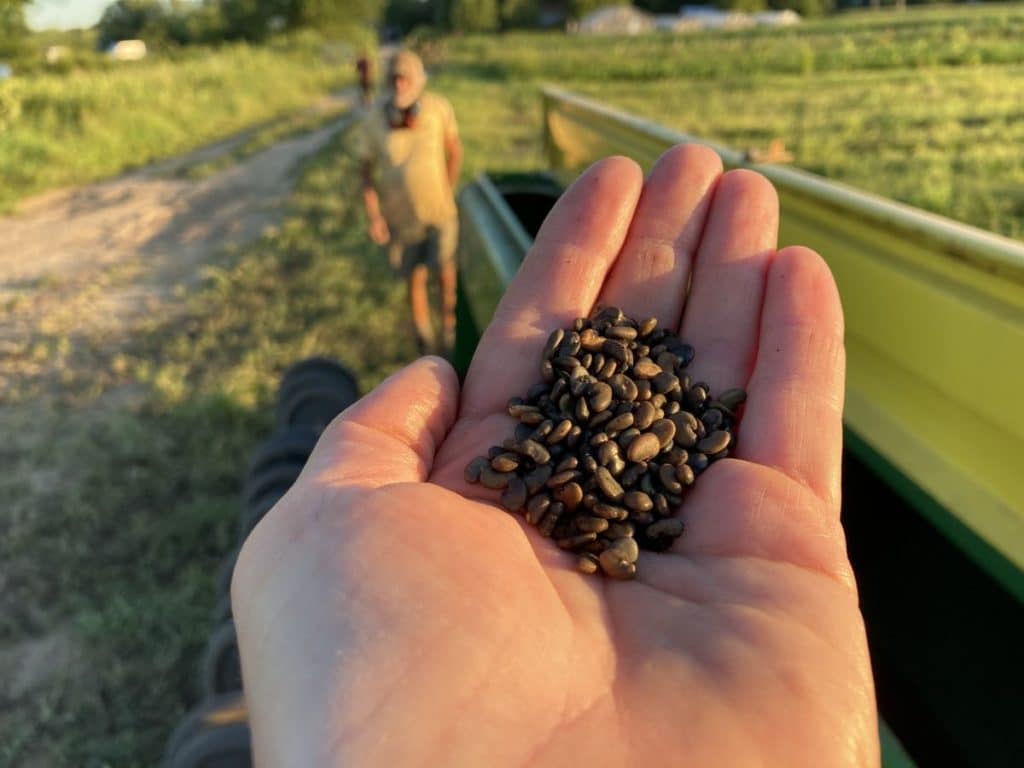
This seeding is sunn hemp, an interesting, fast-growing legume. This is our second sunn hemp planting this season. It is a new cover crop for us, and we are impressed with the quick, lush growth in our fields planted in July. As a legume, we can hope for nitrogen fixation. I’ll take some photos soon so you can see how beautiful the fields are.

We are back to irrigating and would really appreciate some rain. These young carrots need the water but we’re also irrigating this field so it will be easier to weed in the next two days. It’s the next field on our weeding schedule.
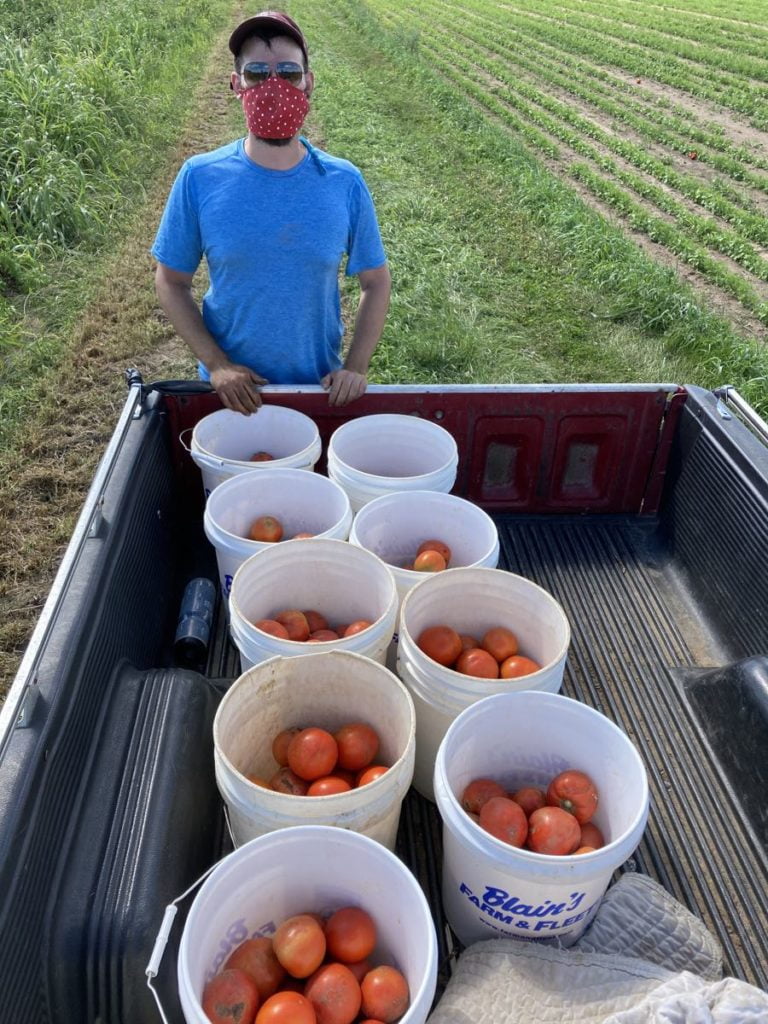
Three new employees started work in the last week or so. Their arrival was cheered by the other crew members. We have felt quite short-handed the last few weeks as several crew members left us to return to school or their pre-pandemic careers. Above, new guy Janson loads tomatoes into the truck.
Veggie List & Veggie Notes
Week #14, August 20/21, 2020
– Weekly shares
– EOW/ purple
– Sampler/ sun
Slicing tomatoes, 2.5 – 3 lb
Watermelon (red OR orange OR yellow, by site)
Carrots, 2 lb
Cherry tomatoes, 1 pint
Peppers, ~2
Jalapeno chile (hot), 1
Cucumber, 1 or 2 large + 1 small
Walla Walla onion, 1 or 2
White onion, 1 or 2
Basil, ~2 sprigs
By site; red cabbage OR globe eggplant OR Swiss chard
If your red cabbage is small, you’ll get a bag of pickling cucumbers too.
Next week’s box will probably contain tomatoes, peppers and other summer crops.
Slicing tomatoes – This batch are in good shape. I still encourage you to spread your tomatoes on plates on your counter so you can keep an eye on them. If small flaws develop, eat those tomatoes first.
Cucumbers – This is the final delivery of cucumbers!
Onions – You’ll receive both white and Walla Walla onions this week. They are easy to tell apart. See photo. Walla Wallas are the sweet onions we’ve sent so far this year. White onions are more pungent and less watery. Neither type fries particularly well, although you have a better chance with a white onion.
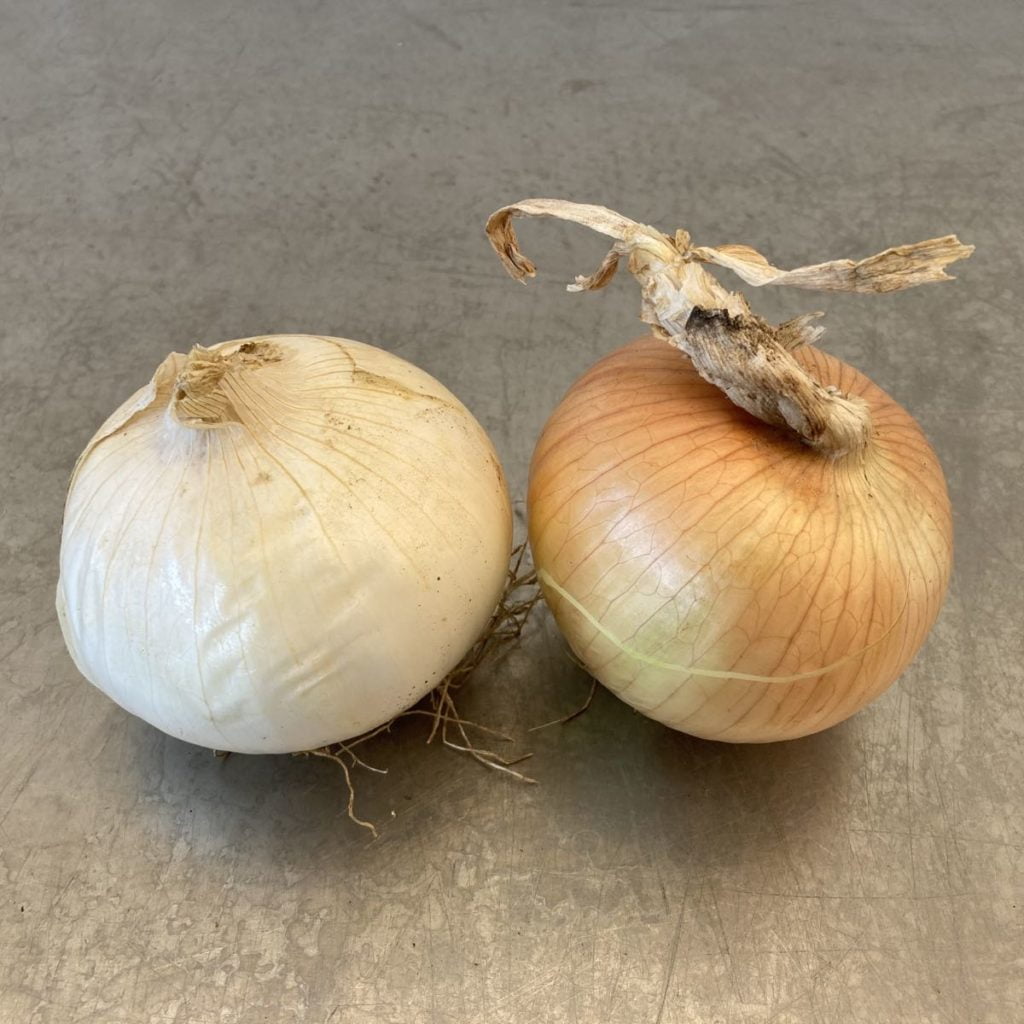
From left, white onion and Walla Walla onion.
RECIPES
Visit our 2020 Recipe Log or our 2019 Recipe Log or join our Facebook discussion group.
LOCAL THYME/ Cooking 101
Salad with Tomato, Cucumber, Fresh Mozzarella and Basil Vinaigrette
Grilled Red Cabbage with Creamy Blue Cheese Dressing
Shredded Carrot Cabbage and Chicken Salad with Honey Poppy Seed Dressing
LOCAL THYME/ Cooking 202
Pork Tenderloin with Apple Cider Braised Red Cabbage and Horseradish Sauce
Spicy Tomtato Basil Salsa
Cucumber and Carrot Kimchi Style Salad
LOCAL THYME/ Quick & Easy Meal
Watermelon Gazpacho
RECIPES FROM LAUREN
Takes 10 minutes
Makes 1 quart caprese
Serves 1 hungry person for lunch or 2 less hungry non-farming people
1-2 pounds slicer tomatoes (if they’re out of season, don’t even bother), cored and cut into thick slices
1 pint cherry tomatoes, halved
4 ounces fresh mozzarella ball, halved and cut into thick slices
1/4 cup minced basil
2 tablespoons olive oil
1 tablespoon balsamic vinegar
Kosher salt
Freshly ground black pepper
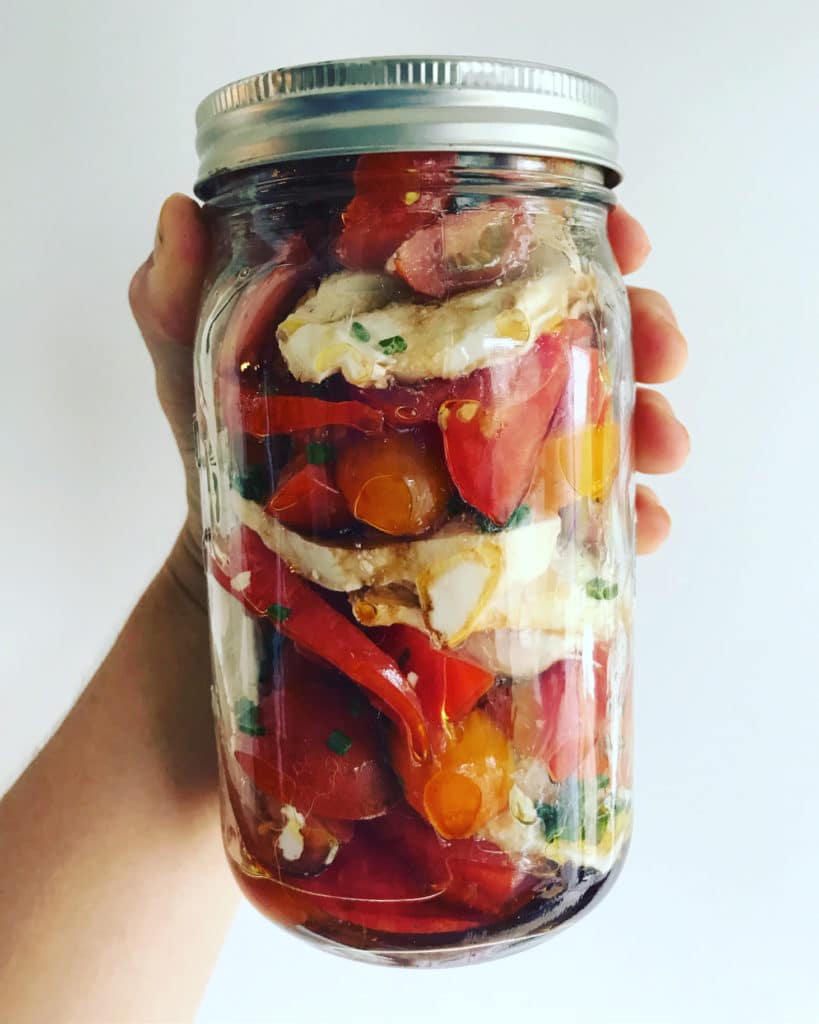
- Grab a quart mason jar (or a 4-cup pyrex or other container). Place 1-2 sliced tomatoes in bottom of container. Layer a handful of cherry tomatoes on top followed by a few slices of mozzarella. Sprinkle with a quarter of the basil. Repeat until you’ve used all ingredients or filled your container (whichever comes first).
- Drizzle with olive oil and balsamic. Cover and shake gently so that olive oil and balsamic coat tomatoes throughout.
- Sprinkle with salt and pepper just before serving. (I have my own Kosher salt jar and pepper grinder at work for exactly this kind of purpose. I suggest you do the same.
.
????
.

LIME WATERMELON FLOAT
Makes 2 large or 4 small floats
Takes 5 minutes
1 small watermelon or 1/2 large watermelon (any color!), preferably chilled
1/4 cup water
1/4 cup sugar
1/4 cup fresh lime juice
Pinch Kosher salt
1 (12-ounce) can lime seltzer, preferably chilled
2 cups frozen yogurt or custard scoops
- Scoop watermelon out with a spoon or cut into cubes and place in food processor or blender. You want about 4 cups. Add water, sugar, lime juice and salt. Process until smooth, about 30 seconds.
- Using a fine mesh sieve or cheesecloth, strain watermelon into a measuring cup or mason jar. It should be about 2 cups. Add seltzer.
- Divide frozen yogurt or custard into two or four glasses (depending on how many you are serving) and pour watermelon soda over. ENJOY!
.
????
.
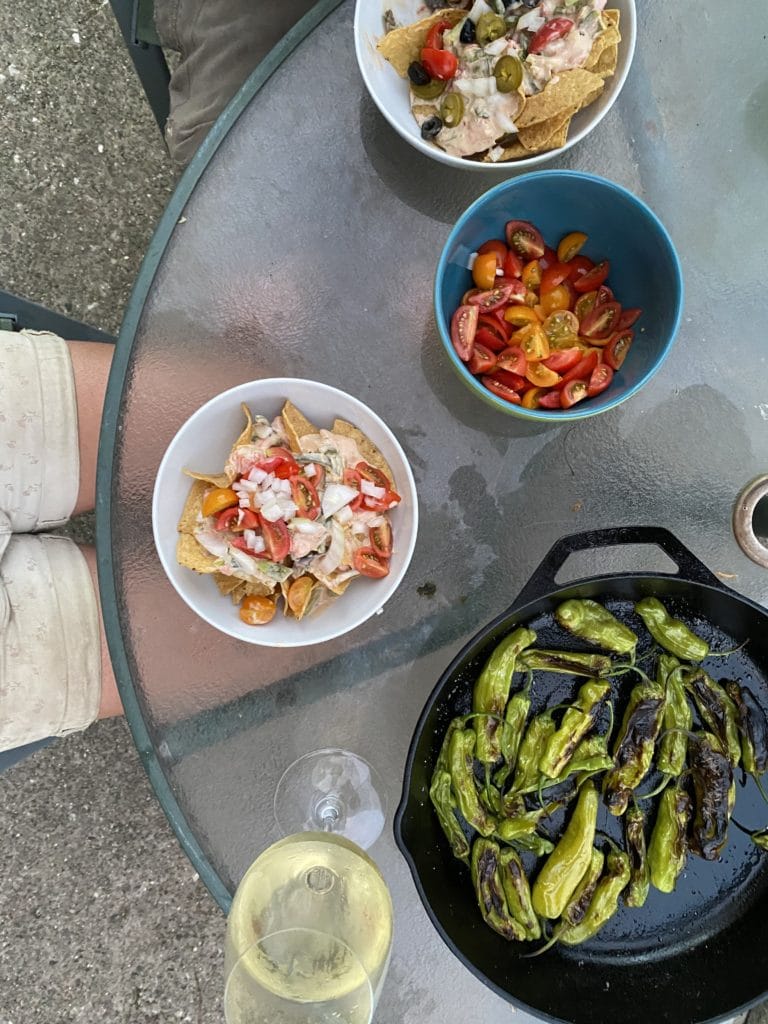
EASY QUESO CHEESE DIP
Takes 30 minutes
Makes 4 cups
Serves 6-8
2 tablespoons unsalted butter
1/2 yellow onion, finely chopped
1 green pepper, seeded and finely chopped
1 red or yellow pepper, seeded and finely chopped
1-2 hot peppers of your choice, seeded and finely chopped
1 teaspoon Kosher salt
1-1/2 cups milk, divided
1 8-ounce block cream cheese, cut into cubes
3 cups shredded cheese (Monterey Jack, Cheddar, and Brick would all work—or use a blend)
2 tomatoes, cored and diced
- Melt butter in a large saute pan or deep skillet over medium low heat. Add onion, peppers, and salt. Saute for 10 minutes until vegetables soften and become very fragrant.
- Add ½ cup of the milk along with the cream cheese. Stir consistently until the cheese has melted and is mostly smooth. Reduce heat to low.
- Add remaining milk followed by shredded cheese. Stir until incorporated, about 5 minutes, and remove from heat.
- Add diced tomatoes and gently stir until combined. At this point it is ready to go! You can puree it with an immersion blender or food processor for a smoother texture.
- Serve with chips, guacamole and salsa or use it for a big old plate of dinner nachos.
.
Week #13, The derecho missed us.
- On: August 12, 2020
 2
2

We are very fortunate that Monday’s derecho skipped our farm on its path of destruction across the Midwest. We were close to the edge of the storm, which left us 2.2 inches of rain and this beautiful rainbow. The day before, the weather forecast predicted 0.15 inches rain, so this was quite a change. We welcome the rain but worry for the Iowa’s farmers who had 10 million acres of crops damaged or destroyed. What a loss.
Tossed Melons
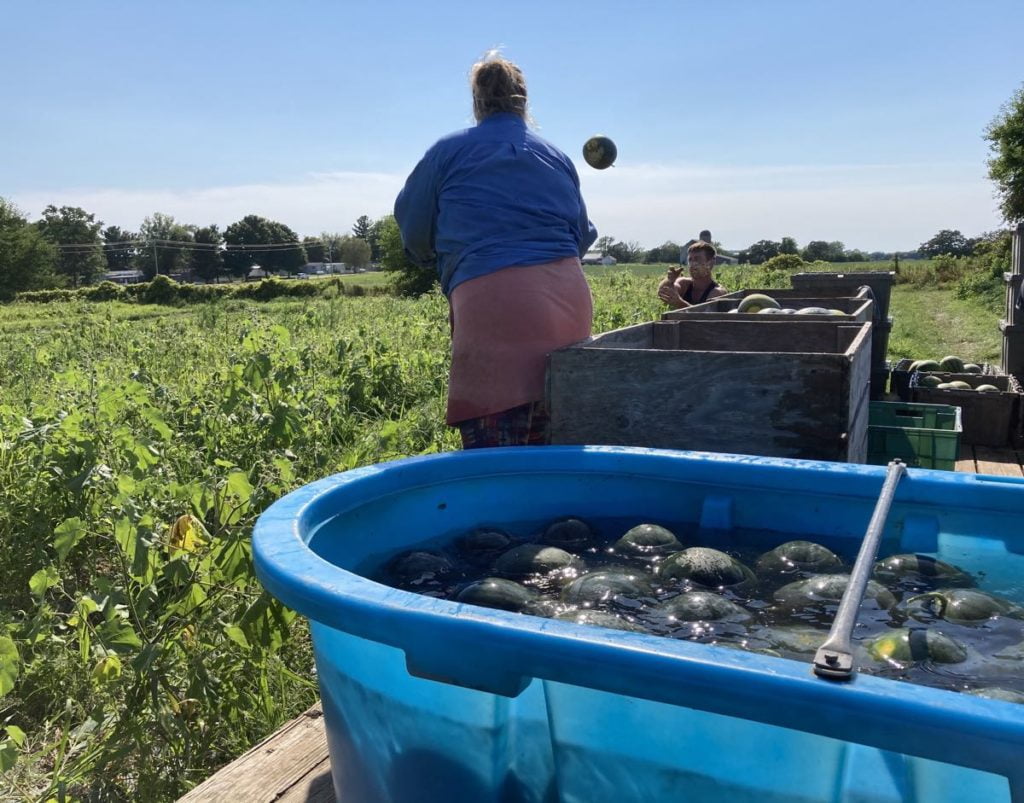
You cannot choose to join our melon harvest crew; you have to audition. Auditions are held at lunch. Billy tosses a melon to random people to check their reflexes. Once the melon is dropped and cracked, auditions are over and they eat the melon.
Above, Steve (out of view) chooses ripe melons, then tosses to Billy (in back), who tosses to Maggie on the wagon.
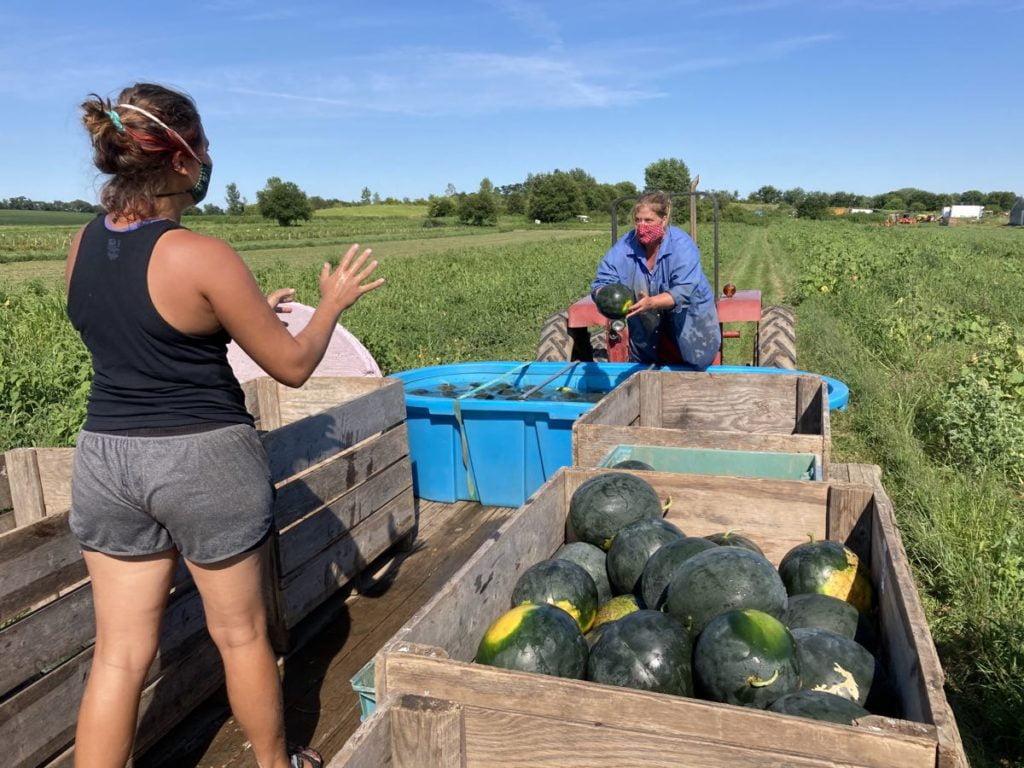
… tosses to Anna who puts it in a bin.
Once we’re done, Steve goes in the house to lie down on the floor a bit and stretch his back. It’s a big job. Beth
Veggie List & Veggie Notes
Week #13, August 13/14, 2020
– Weekly shares
– EOW/ green
Sweet corn, ~10 to 11 ears
Green beans, 1.3 lb
Slicing & plum tomatoes, ~3 lb
Red Summercrisp lettuce
Red frying pepper, 1
Cucumbers or pickles
Walla Walla onion
Basil, a few sprigs
By site, orange watermelon OR muskmelon.
Next week’s box will probably contain tomatoes and other summer vegetables.
Sweet corn – This planting is the ‘Vision’ variety, the same as last week. We hope you enjoy it. We think it is a terrific variety.
Pickles – Some people get normal slicing cucumbers, some get Silver Slicer cukes, some get pickles. Of course, pickles can be used for refrigerator pickles but are really great as a crisp salad cucumber too.
RECIPES
Visit our 2020 Recipe Log or our 2019 Recipe Log or join our Facebook discussion group.
LOCAL THYME/ Cooking 101
Parmesan Corn on the Cob
Pepper and Watermelon Salsa
Composed Salad with Tunafish and Boiled Eggs
LOCAL THYME/ Cooking 202
Corn and Wild Rice Fritter
Garlic Basil Marinated Veggie and Fruit Kebabs
Tofu, Green Bean, Bell Pepper Stir Fry with Rice
LOCAL THYME/ Quick & Easy Meal
Summertime Paella
RECIPES FROM LAUREN

SWEET CORN, WALLA WALLA, & BASIL PIZZA
Makes 1 pizza
Serves 3-4
Takes 45 minutes
1/2 cup basil leaves, finely chopped
4 garlic cloves, minced
1 tablespoon lemon juice
1/4 teaspoon Kosher salt
1/4 cup olive oil
3 ears sweet corn
1/2 Walla Walla, finely chopped
1/2 batch favorite pizza dough (or 1 store-bought pizza crusts)
1-1/2 cups shredded mozzarella
1/2 teaspoon red pepper flakes
- Preheat oven to 500 degrees.
- While you wait for the oven to preheat, prepare you basil sauce. Combine basil, garlic, lemon and salt in a small bowl. Stir to combine then add olive oil and slowly incorporate.
- Bring a large kettle of water to a boil. Once boiling, cook corn for 3 minutes.* Rinse under cold water.
- Use a knife to remove kernels from ears. Place in a medium bowl along with onion.
- When oven is pre-heated, roll out crust and bake for 10 minutes.
- Spread basil sauce on pre-baked crust. Top with sweet corn mixture and shredded cheese. Finish with red pepper flakes. Bake for 10-15 minutes longer until crust and cheese are golden brown.
- Let sit for 5 minutes before serving.
.
????
.
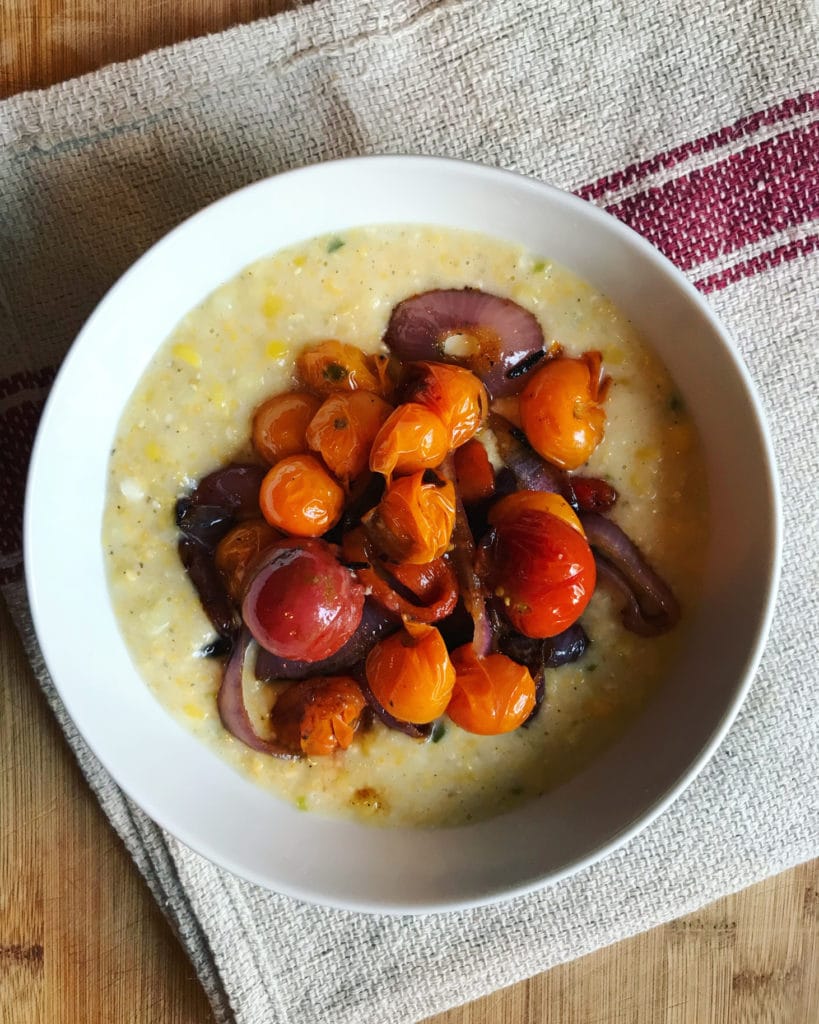
SWEET CORN POLENTA WITH GRILLED TOMATOES
Takes 30 minutes
Serves 4-6
2 pounds tomatoes, sliced
1 tablespoon olive oil
1-1/2 teaspoon Kosher salt, divided plus more to taste
1/2 teaspoon freshly ground black pepper, divided
2 tablespoons butter
2 ears sweet corn, kernels cut off cob (no need to cook first!)
1 red pepper, seeded and finely chopped
1 cup whole milk
1 cup water
1/2 cup polenta (also known as corn grits, cornmeal or polenta; I’m obsessed with this polenta from my friends at Meadowlark Organics)
- Preheat your grill to medium high heat. Alternatively, if you don’t have a grill, preheat the broiler of your oven.
- In a medium bowl combine tomato slices with olive oil, 1/2 teaspoon kosher salt and 1/4 teaspoon pepper. Toss gently to combine. Place on preheated grill. Grill for 10-15 minutes until blackened on both sides. Remove to a bowl.
- Meanwhile, get your polenta going. You can easily walk away from your grilling veggies for 5 minute intervals to do this inside, but if you have a burner on your grill, by all means use that to make the polenta!
- In a large stock pot or sauce pan, melt butter. Add corn, pepper, remaining salt and pepper and cook over medium heat until beginning to soften (about 5 minutes). Add in water and milk. Increase heat to medium high and wait for mixture to just begin bubbling. Stir once or twice with a whisk while waiting for it to bubble to make sure nothing sticks to the bottom of the pan.
- Pour in polenta slowly, whisking while you pour them in to create a smooth texture. Reduce heat to a low simmer and continue whisking every couple minutes to keep the mixture from clumping or sticking. When polenta looks creamy and consistent, it’s ready! It can cook very quickly, about 10 minutes. If they cease up while you prepare other parts of your meal, just cook them over low heat and add more milk until they have the desired consistency.
- Add about a half cup of polenta to a large bowl, top with tomatoes.
.
????
.
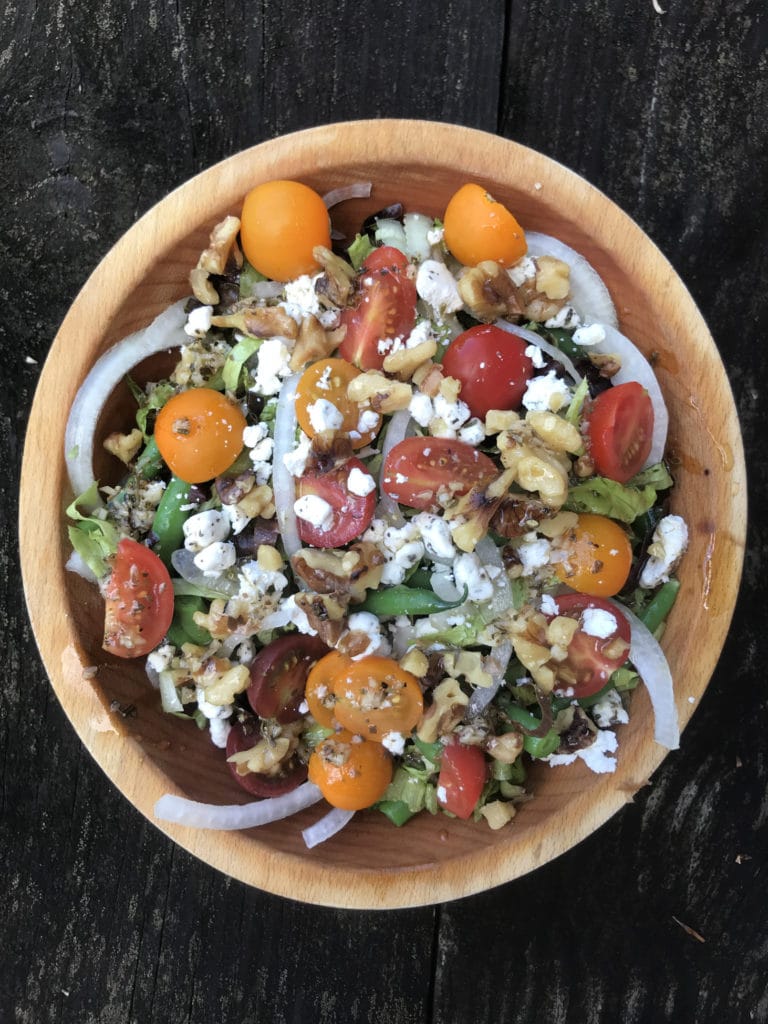
LATE SUMMER GREEN BEAN SALAD
Adapted from Vegetarian Times
Serves 4
Takes 20 minutes.
1 pound green beans, ends trimmed and cut in half if large (about 4-5 cups)
1 head washed lettuce, thinly sliced
1/2 Walla Walla onion, halved and thinly sliced
1 cup crumbled feta cheese
2-3 large tomatoes, diced
1 cup chopped toasted walnuts
1/2 teaspoon dried oregano
2 minced garlic cloves
1 tablespoon sherry or red wine vinegar
1/2 teaspoon dried oregano
1/2 teaspoon Kosher salt
1/4 teaspoon freshly ground black pepper
2 minced garlic cloves
3 tablespoons olive oil
Flaky sea salt, for serving
- Bring a large pot of water to a boil. Add green beans and cook for 4 minutes then rinse under cold water. Pat dry with a towel.
- Toss together lettuce, beans, onion, and tomatoes in a large bowl (or four small bowls). Top with feta and walnuts.
- Whisk sherry vinegar with dried oregano, salt, pepper, and garlic. Once combined, whisk in olive oil. Taste and adjust flavors as desired. Drizzle over salad. Sprinkle with a little extra flaky sea salt right before serving.
.
Week #12, Tomato care
- On: August 05, 2020
 0
0

Another spectacular sunset. What a joy.
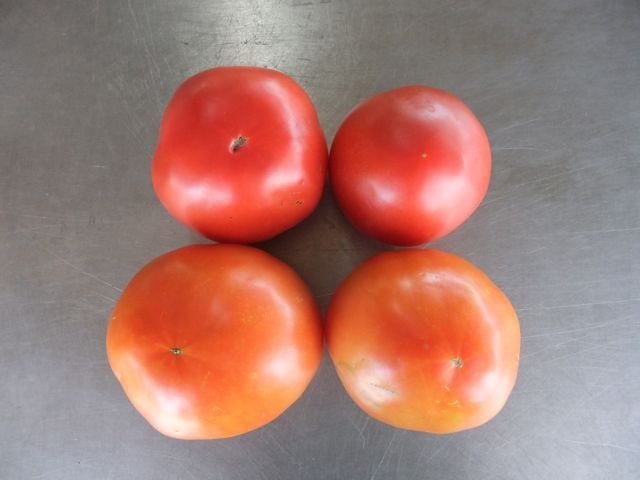
Ripe (top) and less ripe tomatoes (bottom).
Tomato care, Basil care
This week’s tomatoes will hold better than last week’s. We were late to recognize problems in our earliest planting. We have stopped harvesting the problematic varieties, and have minimized washing to avoid bruising. You might need to wash some of your tomatoes but we think it’s worth the effort to help keep them in better condition. The cooler temperatures this week help a lot too.
Steve and I were trying to figure out how we missed these issues at harvest last week. Then we realized “Oh, we were in a food safety inspection that day.”
Tomatoes retain their best flavor and texture when stored at room temperature, no lower than 55oF. However, you should refrigerate your tomatoes if they are fully ripe and you don’t expect to eat them right away. It is better to sacrifice a little flavor and texture than to lose your tomatoes to rot. Also, fully ripe tomatoes are less sensitive to chilling injury.
As usual, we pack a mix of ripe and less-ripe tomatoes so you can stretch them through the week. The top tomatoes in the photo above are ready to eat. The bottom tomatoes can ripen at room temperature for a few days.
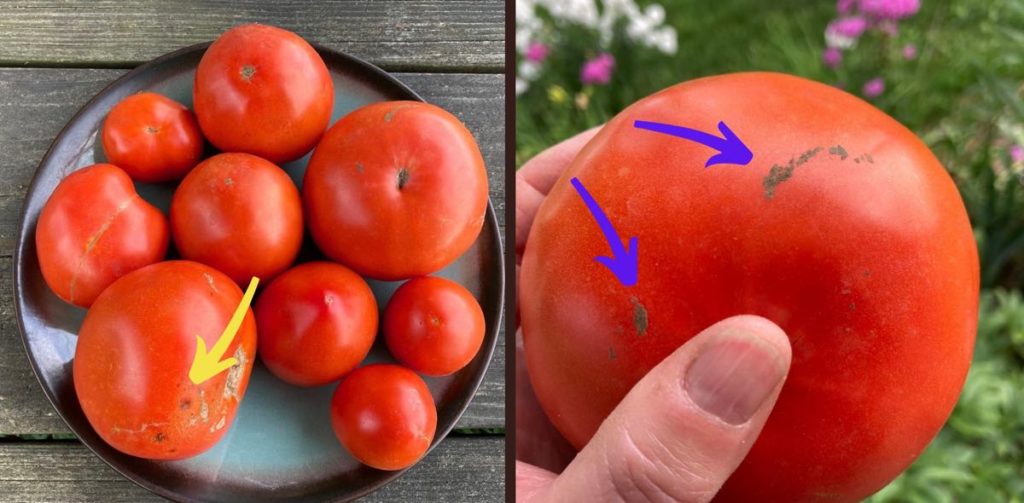
(Left) I encourage you to spread your tomatoes on plates so you can watch them. Eat first the ripest ones or any showing flaws. The yellow arrow shows small inconsequential flaws that will grow with time. Eat now.
(Right) Expect to wash your tomatoes. We handle the ripe tomatoes as little as possible to avoid bruising. The purple arrows show leaf residue bits stuck to the tomato. Wet the tomato and the residue will come right off.
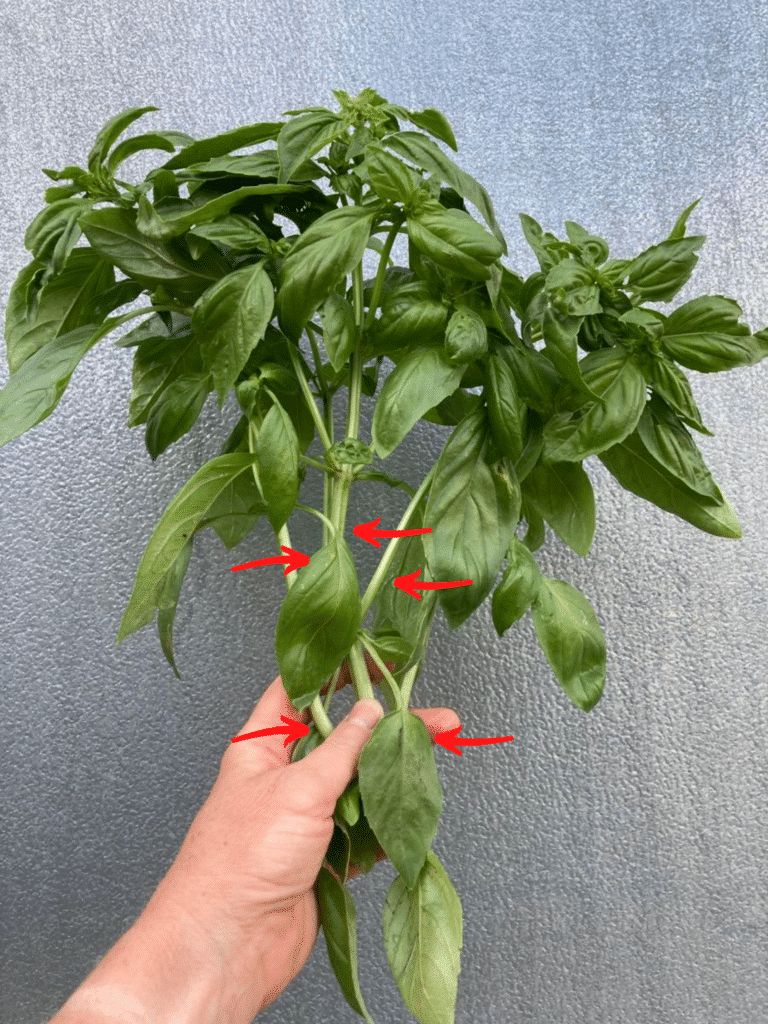
This week’s basil is a branched stalk that needs to be cut into smaller stalks (at the arrows) before putting into a jar of water and storing at room temperature.
Veggie List & Veggie Notes
Week #12
– Weekly shares
– EOW/ purple
– Sampler/ sun
Green beans, 1.5 lb
Carrots, ~2 lb
Slicing tomatoes, ~3 lb
Lettuce, Summercrisp
Zucchini, probably 1
Red peppers (bell or frying), probably 2
Walla Walla onion
Basil, 1 medium bunch
By site, cucumber OR pickles OR broccoli OR eggplant
By site, muskmelon OR watermelon.
Next week’s box will probably contain tomatoes, sweet corn, peppers, melon and more.
Basil – I realize that we have sent a lot of basil this summer but it is lush and beautiful so we’re happy to share it. Please freeze any extra. You’ll be glad to have it in winter, or even later this season.
Muskmelon (for some sites) – Some melons are ripe and ready to eat. Some need to ripen a day or two on your kitchen counter. Keep at room temperature but refrigerate if not eaten within 2 – 3 days.
Watermelon (for some sites) – These are red, seeded melons. If uncut, watermelon can be stored at room temperature for a week. Refrigerate once it’s cut.
Korean melon (for some sites; yellow, oblong) – These unusual melons are sweet and crisp, reminiscent of a good honeydew. This new variety ‘Torpedo’ is an improvement over previous varieties. The melon is ready to eat if the color is rich yellow and the melon is pleasantly fragrant. If there’s a tinge of green, ripen the melon at room temperature for no more than three days. Refrigerate once ripe.
Cucumbers (for some sites) – We now have both normal and Silver Slicer cucumbers to share. We’ll scatter the Silver Slicers among the boxes as they are ready. They are medium-sized white cucumbers with thin skins. They can be used interchangeably with slicing cucumbers in recipes, or mixed together. However, their best use is as a snack. Hand these to the kids on the ride home from picking up your CSA box. There’s no need to peel them. As usual, store all types of cucumbers in the warmest part of your fridge.
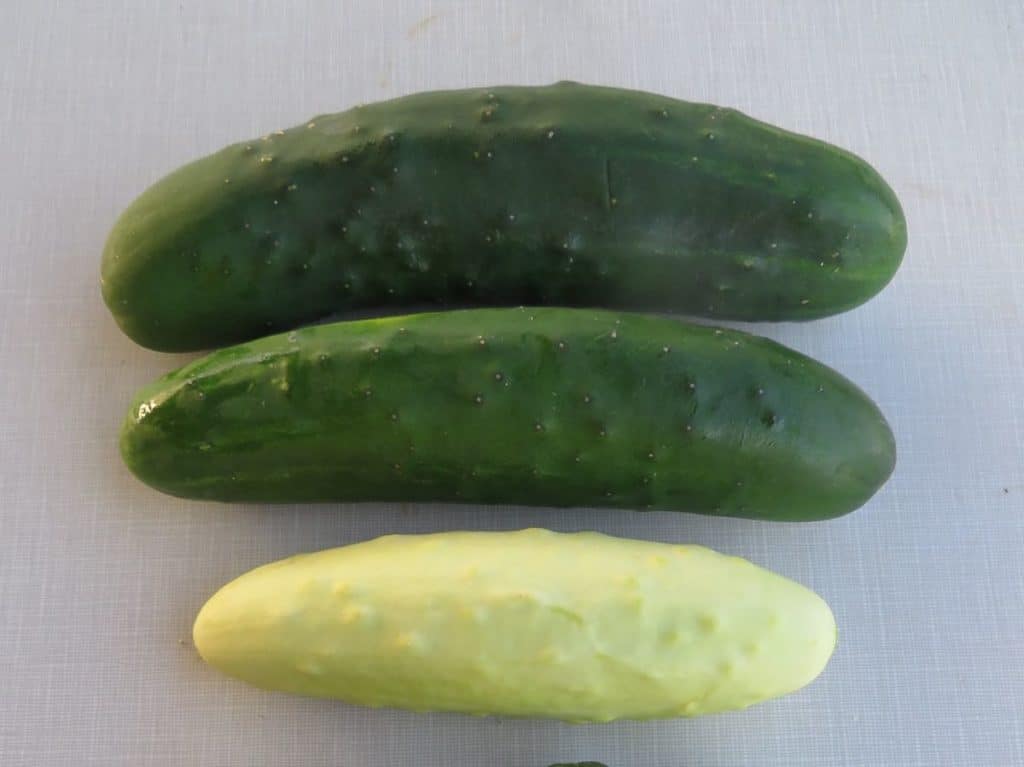
Typical slicing cucumbers (top) and smaller ‘Silver Slicer’ cukes (bottom).
RECIPES
Visit our 2020 Recipe Log or our 2019 Recipe Log or join our Facebook discussion group.
LOCAL THYME/ Cooking 101
Carrot Apple Muffin
Grilled Green Beans
Black Beans with Vegetables and Yellow Rice
LOCAL THYME/ Cooking 202
Grilled Zucchini and Tomato Lettuce Wraps
Soba Noodles with Shrimp, Carrots, Pepper and Green Beans in Lime Peanut Sauce
Roasted Carrot White Bean Dip with Basil
LOCAL THYME/ Quick & Easy Meal
Penne with Green Beans and Tomatoes
RECIPES FROM LAUREN
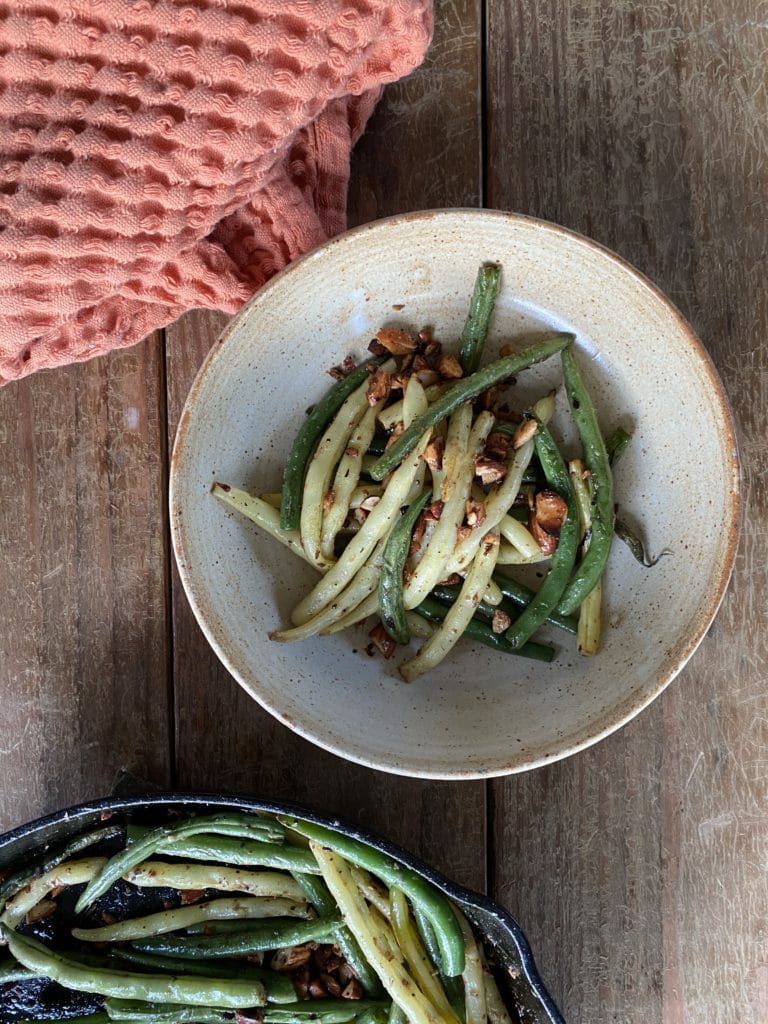
GREEN BEANS WITH BUTTER & ALMONDS
Takes 20 minutes
Serves 1-4
1 teaspoon neutral cooking oil (I love hazelnut oil if you happen to have it, otherwise plain old Canola will do just fine)
1 pound green beans, ends trimmed
1/2 teaspoon Kosher salt
1/3 cup almonds, roughly chopped
2 tablespoons butter
Flaky sea salt, optional
- Heat oil over medium heat in a large heavy skillet. As usual, cast-iron is best. Add green beans, turn the heat up to medium high and cook for 5 minutes, until the beans start to blacken in place.
- Add 1/2 cup water, turn the burner down to medium, and cook until no water remains, about 3 minutes. Continue cooking 2 minutes longer than add your almonds. Cook until mixture smells nutty and almonds are toasted, about 2 minutes more.
- Remove the pan from heat. Add butter and swirl the pan until it melts. Serve immediately. Season with flaky sea salt.
.
????
.
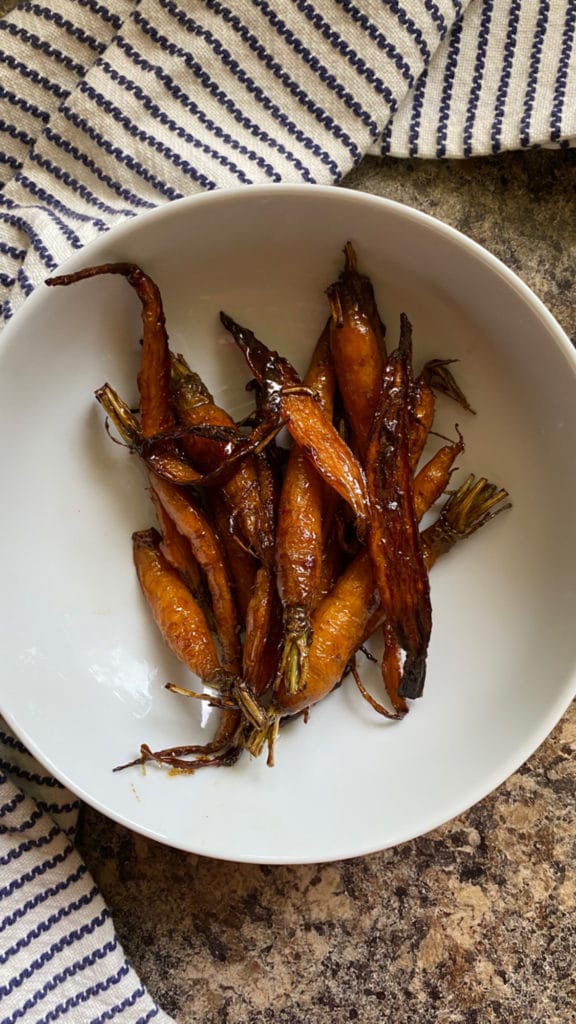
BUTTER BALSAMIC ROASTED CARROTS
Takes 30 minutes
Serves 2 as a side or 1 as a meal
2 bunches very small (almost baby) carrots or 1 large bunch carrots (ideally with greens)
3 tablespoons butter
1/2 teaspoon Kosher salt
1 tablespoon maple syrup
1 tablespoon balsamic vinegar
- Remove carrot tops and set to the side for Carrot Top Chimichurri. If using very small carrots, you can leave them whole and halve the ones that are more “small” then “very small” lengthwise. If using a larger bunch, halve small carrots lengthwise and/or quarter the largest ones. The smaller the better. We want these beauties to get very tender.
- Preheat oven to 450 degrees.
- Melt butter over medium heat in a large heavy skillet (cast-iron is preferable). Add carrots and season with salt. Cook over medium heat for 10 minutes, until carrots are just beginning to char in places.
- Place in oven and roast for another 10 minutes, until carrots are very tender and charred in more places.
- Add maple syrup and balsamic. Toss to combine, making sure any juices that are collecting at the bottom of the pan are coating the carrots as best they can. Roast additional two minutes until sauce caramelizes.
- Serve carrots warm with chimichurri sauce.
.
????
.
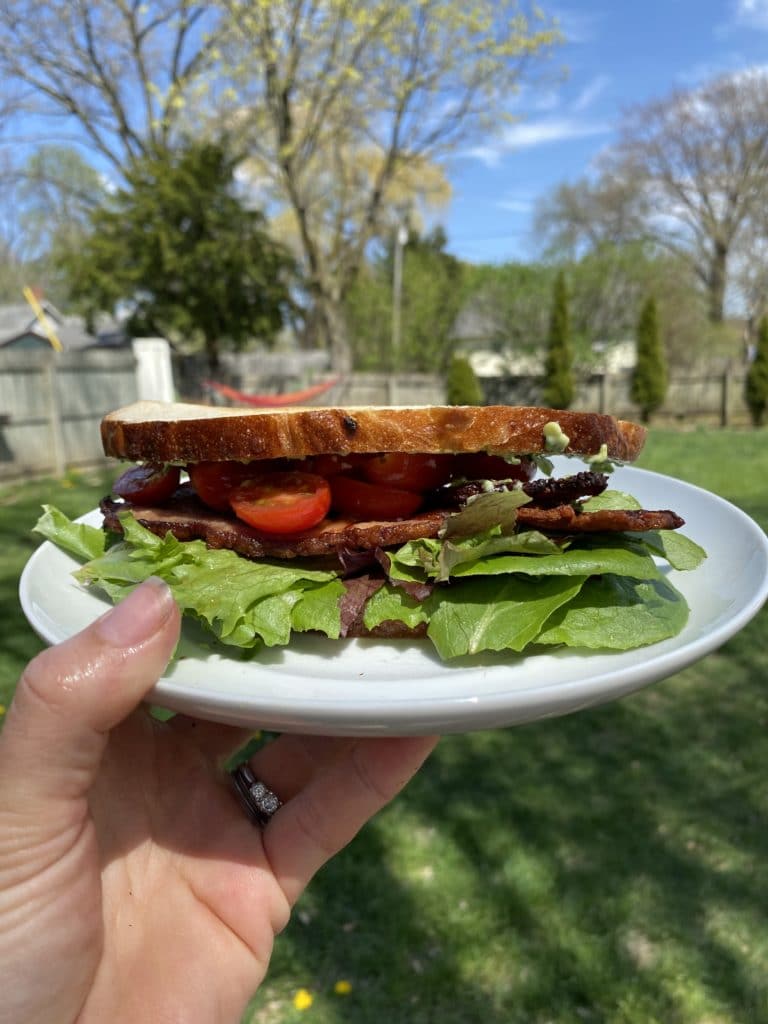
BASIL BALSAMIC BLT
Takes 30 minutes
Serves 4
8- 12 pieces of bacon (less if thick-cut, more if thin)
1/2 cup mayonnaise
2 garlic cloves, minced
2 tablespoons minced fresh basil
Handful of additional basil leaves
1/2 head lettuce
8 slices toasted bread, preferably sourdough
1 pound tomatoes, sliced
1 tablespoon balsamic vinegar
Flaky sea salt
- Lay bacon flat on a baking sheet (in a single layer) and place in a cold oven. Turn oven to 400 degrees and set the timer for 20 minutes. Depending on the thickness of your bacon, it should be perfectly cooked after 20 minutes. It will take a bit longer if thick-cut. Drain on paper towels and allow to cool.
- In a small bowl, mix together mayo, garlic and basil.
- Spread mayo mixture on all slices of toasted bread. Top half of the slices with 3 or 4 lettuce leaves followed by a few basil leaves, press it down slightly and then add bacon (2-3 slices per piece of bread). Add 1-2 thick slices of tomato followed by a drizzle of balsamic and pinch of sea salt. Top with remaining pieces of toast. Enjoy!
Week #11, Food Safety Inspection!
- On: July 29, 2020
 2
2

DATCP inspector Michael Barta reviews our hand and tool-washing arrangements, and a pile of paperwork and record-keeping.
We passed our first official inspection under the Federal Food Safety Act (FSMA), following a preliminary ‘walk through’ last year. The inspection went well! We passed!
FSMA is a big deal for us and for other vegetable growers. It’s a federal law intended to prevent outbreaks of food borne illness like E. coli and salmonella on lettuce, melons, etc. The final law was years in the making. Some of the early versions were awful, eg telling us to eliminate (ie kill) all wildlife.
We started the process in a secure position, the result of two decisions Steve and I made when setting up our farm.
1. We do not use any surface water for irrigation, for example from a pond or creek. Our deep irrigation well is much less vulnerable to contamination than surface water.
2. We don’t have any livestock on the farm, not even a flock of chickens. Dealing with raw animal manure on a vegetable farm is tricky. It can be done but brings a lot of risk.
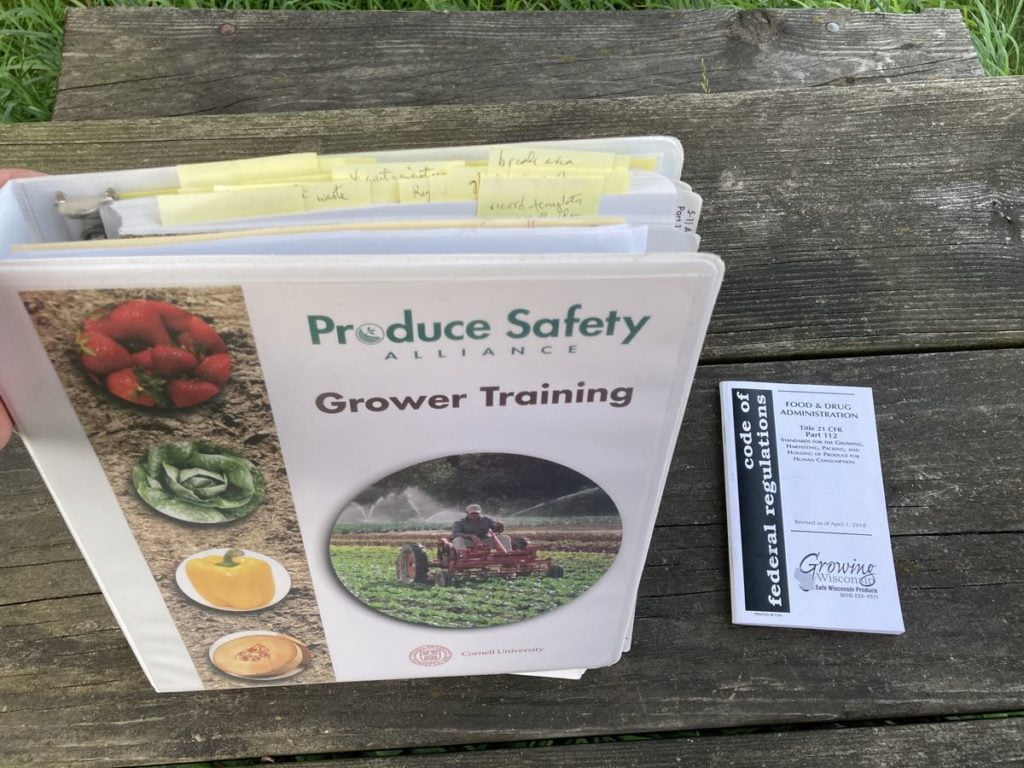
Complying with this federal law has been intimidating at times. I was given the training manual at left when taking a grower training two winters ago. Compare that with the condensed version at right that we work from now.
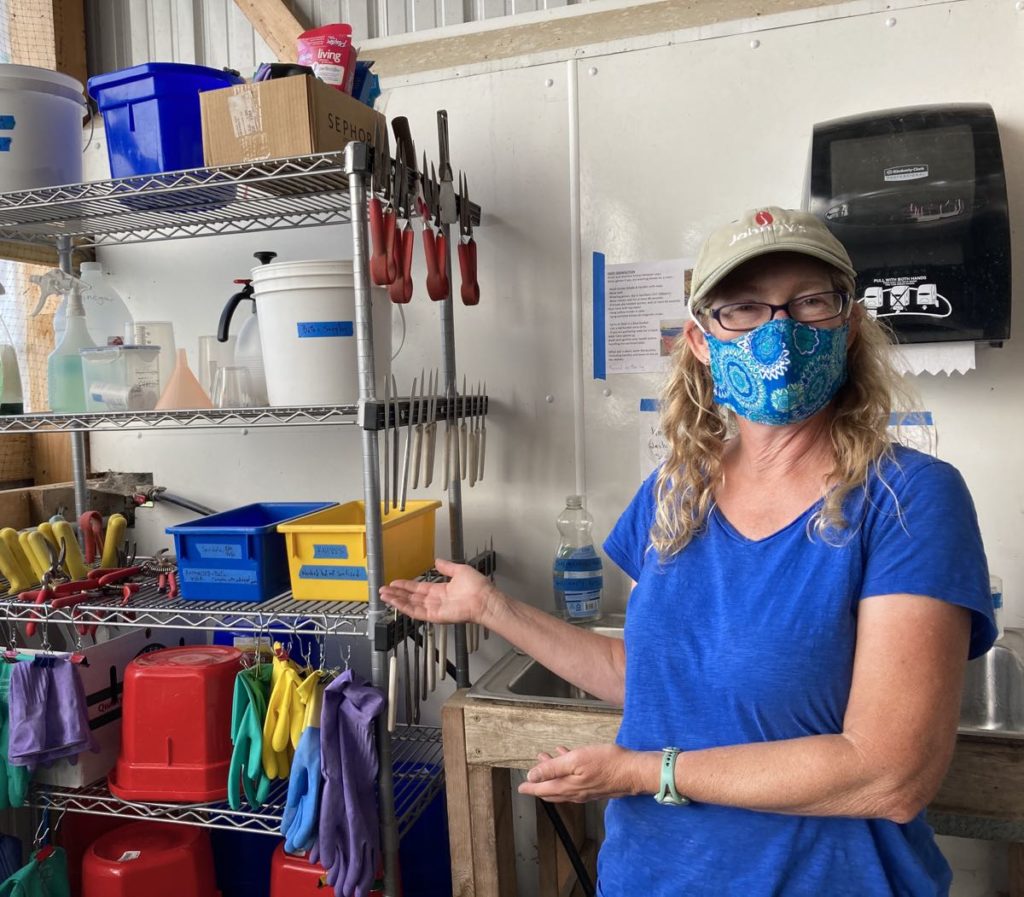
COVID-19 has forced changes for our farm, all of which benefit our food safety program. Some of the changes were simply better organization. I set up this tool washing station in our outdoor washroom and everyone immediately adopted it. Defined storage for each tool, central storage for cleaning and sanitizing supplies, rubber gloves for everyone, color-coded pails (blue = sanitized, red = dirty). I should have done this years ago. Beth
We are hiring.
We have several openings for farmhands to replace crew members who are returning to school or pre-pandemic careers. We offer valuable work, outdoors in a safe, friendly environment. Plus you get to take home lots of healthy produce. Please spread the word. Learn more at http://bit.ly/TipiJobs .
Keeping basil fresh
As usual, I encourage you to store your basil at room temperature in a glass of water, just like a bouquet of flowers. Cold temperatures damage basil, and it will blacken in the fridge. However, I neglected to tell you that big, branched stems should be cut into small stems, to avoid wilting. A big stem like in the photo could wilt.
Look at the photo and you’ll see that we can get five stems from this plant. Wet the plant, then cut free the bottom two stems (below my thumb), then the next two stems up the stalk (above my thumb, one is hidden). Cut the main stem just above that. Put all the stems in water. You’ll have a few loose leaves to deal with but most leaves will still be attached. Use a sharp knife or shears!
If your basil (or any greens) are already wilted, try submerging in a basil of water. For basil, submerge just a few minutes in room temperature water. For kale, lettuce or spinach, submerge for 15 minutes in cold water. I hope this helps.
This week’s basil stems are less heavily branched but we’ll send big stems again in the future. Beth
Veggie List & Veggie Notes
Week #11, July 30/31, 2020
– Weekly shares
– EOW/ green
Sweet corn, ~10 ears
Green beans, ~1/2 lb
Tomatoes, plum or slicing, 2 lb
Pepper, 1 small red bell or frying pepper
Zucchini/squash, maybe 1
Broccoli, 1 or 2 heads
Cucumbers, 1 or 2
Walla Walla onion
Basil, 1 bunch
Some sites get red watermelon. Some sites get muskmelon. Some sites get a Korean melon.
Next week’s box will probably contain tomatoes, lettuce, peppers, melon, and other summer crops.
Sweet corn – There are far fewer bugs than last week. Yeah! This is a really nice batch of corn this week.
Watermelon – These are red, seeded melons. If uncut, watermelon can be stored at room temperature for a week. Refrigerate once it’s cut.
Muskmelon – Some are ripe and ready to eat. Some need to ripen a day or two on your kitchen counter. Keep at room temperature but refrigerate if not eaten within 2 – 3 days.
Korean melon (yellow, oblong) – These unusual melons are sweet and crisp, reminiscent of a good honeydew. This new variety ‘Torpedo’ is an improvement over previous varieties. They are ready to eat. Refrigerate.
RECIPES
Visit our 2020 Recipe Log or our 2019 Recipe Log or join our Facebook discussion group.
LOCAL THYME/ Cooking 101
Broccoli Tomato Basil Salad
Tomato Cucumber Corn Panzanella
Tomato and Melon Salad with Basil Oil
LOCAL THYME/ Cooking 202
Quinoa Veggie Bowl with Broccoli, Tomato, Sweet Pepper and Feta
Black Bean and Veggie Enchiladas
Summer Squash and Tomato Sandwiches with Basil Mayo
LOCAL THYME/ Quick & Easy Meal
Roasted Fish with Tomato with Basil
RECIPES FROM LAUREN
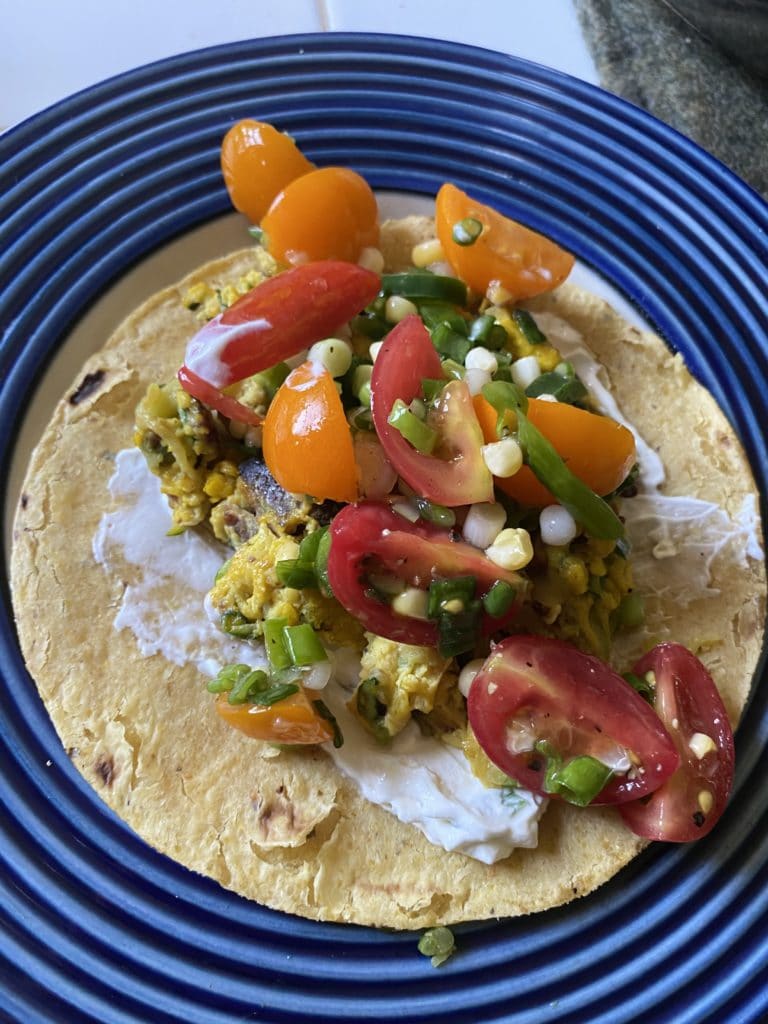
ZUCCHINI BREAKFAST TACOS WITH SWEET CORN SALSA
Serves 2 generously.
Takes 25 minutes.
3 pieces bacon
1 tablespoon butter
2 garlic cloves
1 medium zucchini, shredded
1/2 teaspoon Kosher salt
10 twists black pepper
4 eggs
1/4 cup milk
4-6 corn tortillas (we’re obsessed with the new Bandit Tortilleria in Madison!)
Sour cream, optional
Hot sauce, optional
- Prepare your bacon however you like. We always lay it out on a baking sheet and place it in a cold oven. Set the temperature to 400 degrees and the timer for 15 minutes for regular or 20 minutes for thick cut. Generally, this gets us perfect crispy (but not burnt) bacon every time. Drain on a paper towel and reserve for later.
- Melt butter in a large skillet. Add garlic, zucchini, salt and pepper. Saute over medium heat for 5-6 minutes, until the zucchini has dried out and begun to caramelize a bit, but is no where near close to burning or blackening. The garlic should also smell fragrant. Reduce heat to low.
- Roughly chop bacon and add to zucchini and garlic.
- In a small bowl, whisk eggs and milk until smooth.
- Add eggs to zucchini mixture and scramble gently with a spatula. We like to scramble our eggs over low heat. It will take about 10 minutes but they will be soft and tender every time. They won’t need constant attention. While you slowly scramble the eggs, feel free to prepare your sweet corn salsa (recipe below).
- To serve, warm tortillas however you like (dry skillet, microwave, toaster oven). Add eggs and top with salsa. Feel free to add sour cream or hot sauce if you desire. Devour immediately.
.
Sweet Corn Salsa
2 ear corn
1 pound diced tomatoes
1 colored pepper, finely chopped
1/2 Walla Walla onion, finely chopped
1/2 lime, juiced
1/2 teaspoon Kosher salt
5 twists black pepper
- Using a knife, remove the kernels from your ear of corn. You do not need to cook the sweet corn. It is milky and creamy when eaten raw.
- Combine corn and remaining ingredients in a small bowl. Toss gently to combine.
.
????
.
CUCUMBER BASIL AQUA FRESCA
Makes 1 quart
2 cucumbers, roughly chopped
1/2 cup packed basil leaves
1/3 cup lemon (or lime) juice
1/2 cup sugar
4 cups water (or fizzy water), divided
- Combine cucumbers, basil, lemon juice, sugar and 2 cups water in a food processor or blender until cucumbers are finely chopped.
- Strain into a pitcher or large mason jar. Add remaining water and shake or stir to combine.
- Drink immediately or chill before stirring.
.
????
.
BROCCOLI & GREEN BEAN SALAD WITH PEANUTS
Serves 2-4
Takes 20 minutes
1/4 cup olive oil, divided
1 head broccoli, cut into florets
1/2 teaspoon Kosher salt
1/2 pound green beans, ends trimmed and halved
1/4-1/2 Walla Walla onion, sliced (as much or as little as you want is great!)
1 teaspoon sugar
1 tablespoon rice wine vinegar
1/4 cup dry roasted peanuts, roughly chopped
2 tablespoons toasted sesame seeds
Flaky sea salt, to taste
- In a large skillet, warm 2 tablespoons of olive oil over medium heat. Add broccoli florets and cook about 10 minutes, until tender and charred in places. Season with salt.
- In a medium saucepan or kettle, bring water to a boil. Once boiling, add green beans and cook for 3 minutes. Drain and rinse under cold water.
- In a medium bowl, combine warm broccoli, cooled beans and onion. Toss with sugar, rice wine vinegar and remaining 2 tablespoons olive oil.
- Add roasted peanuts, sesame seeds and salt right before serving.
.


